Transcription
MONITORING TOOLSCactiNYANJAU KIMANIpkimani@kenet.or.keApril 2017Some Material BorrowedFrom: NSRC
IntroductionNetwork Monitoring Tools Availability Reliability PerformanceCacti monitors the performance andusage of devices.
Introduction A tool to monitor, store and presentnetwork and system/server statistics Designed around RRDTool with a specialemphasis on the graphical interface Almost all of Cacti's functionality can beconfigured via the Web. You can find Cacti here:http://www.cacti.net/
IntroductionCacti: Uses RRDtool, PHP and storesdata in MySQL. It supports the useof SNMP and graphics with RRDtool.“Cacti is a complete frontend to RRDTool, it stores all of the necessaryinformation to create graphs and populate them with data in a MySQLdatabase. The frontend is completely PHP driven. Along with being able tomaintain Graphs, Data Sources, and Round Robin Archives in a database,cacti handles the data gathering. There is also SNMP support for thoseused to creating traffic graphs with MRTG.”
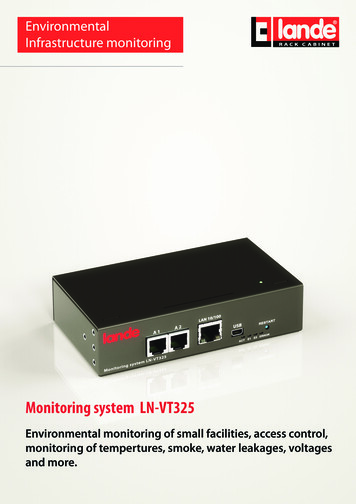
Getting RRDtool Round Robin Database for time series data storage Command line based From the author of MRTG Made to be faster and more flexible Includes CGI and Graphing tools, plus APIs Solves the Historical Trends and Simple Interface problems aswell as storage issuesFind RRDtool here: http://oss.oetiker.ch/rrdtool/
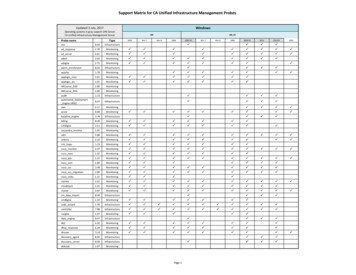
RRDtool Database Format
General Description1. Cacti is written as a group of PHP scripts.2. The key script is “poller.php”, which runs every 5 minutes(by default). It resides in /usr/share/cacti/site.3. To work poller.php needs to be in /etc/cron.d/cacti like this:MAILTO root*/5 * * * * www-data php /usr/share/cacti/site/poller.php /dev/null 2 /var/log/cacti/poller-error.log4. Cacti uses RRDtool to create graphs for each device anddata that is collected about that device. You can adjust allof this from within the Cacti web interface.5. The RRD files are located in /var/lib/cacti/rra when cacti isinstalled from packages.
AdvantagesYou can measure Availability, Load, Errors and more allwith history.– Cacti can display your router and switch interfaces and their traffic,including all error traffic as well.– Cacti can measure drive capacity, CPU load (network h/w and servers) andmuch more. It can react to conditions and send notifications based onspecified ranges.Graphics– Allows you to use all the functionality of rrdgraph to define graphics andautomate how they are displayed.– Allows you to organize information in hierarchical tree structures.Data Sources– Permits you to utilize all the functions of rrdcreate and rrdupdate includingdefining several sources of information for each RRD file.
Advantages (continued)Data Collection– Supports SNMP including the use of php-snmp or net-snmp– Data sources can be updated via SNMP or by defining scripts to capturerequired data.– An optional component, cactid, implements SNMP routines in C with multithreading. Critical for very large installations.Templates– You can create templates to reutilize graphics definitions, data and devicesourcesCacti Plugin Architecture– Extends Cacti functionality. Many, many plugins are available. Part of thedefault Cacti installation in Ubuntu version 12 and above.User Management– You can manage users locally or via LDAP and you can assign granularlevels of authorization by user or groups of users.
Disadvantages Configuration of Interfaces via the web interface istedious – use provided command-line scripts instead. Upgrading versions can be difficult if installed fromSource.Advice:For continuous use or large installations it is likely thatyou will be using scripts and tools to automate theconfiguration of Cacti.
Steps to Add and Monitor DevicesPART IIBefore we install Cacti we demonstrate how to use theinterface to add and monitor some devices
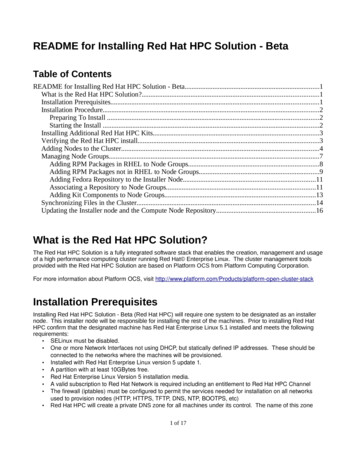
Adding a Device via the Web InterfaceManagement - Devices - AddSpecify device attributes– We’ll add an entry for our gateway router, gw.ws.nsrc.org**Actual device name may be different.
Add Devices (2)
Add Devices (3) Host Template: ucd/net SNMP Host is recommended forservers to include disk definitions. Choose SNMP version 2 for this workshop. For “Downed Device Detection” we recommend eitherusing Ping and SNMP, or just Ping. Use “NetManage” for the “SNMP Community” string.SNMP access is a security issue:- Version 2 is not encrypted- Watch out for globally readable “public” communities- Be careful about who can access r/w communities.- Replace “xxxxxxx” with your local public r/o string
Add Devices (4)For a router you may see a lot of potential networkinterfaces that are detected by SNMP.Your decision is to create graphs for all of theseare not. Generally the answer is, “Yes” – Why?
Create Graphics Chose the “Create graphs for this host” Under Graph Templates generally check thetop box that chooses all the available graphs tobe displayed. Press Create. You can change the default colors, but thepredefined definitions generally work well.
Create Graphics (2)
Create Graphics (3)
Create Graphics (4)You’ll see this screen later when you are creating graphics for hosts vs. routers
View the Graphics Place the new device in its proper location inyour tree hierarchy. Building your display hierarchy is your decision.It might make sense to try drawing this out onpaper first.– Under Management Graph Treesselect the Default Tree hierarchy (or, createone of your own).
Graphics TreeFirst, press “Add” if you want a new graphing tree:Second, name your tree, choose the sorting order (the author likesNatural Sorting and press “create”:
Graphics TreeThird, add devices to your new tree:Once you click “Add” you can add “Headers” (separators), graphs or hosts.Now we'll add Hosts to our newly created graph tree:
Graphics Tree with Two Devices Our graphics tree just after the first two devices were added. So far, graphics are empty – the first data cantake up to 5 minutes to display. Cacti graphs are stored on disk and updated using RRDToolvia the poller.php script, which, by default, is run every fiveminutes using cron.
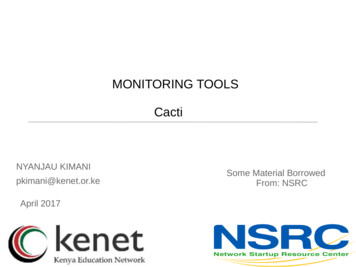
Initial Graphs
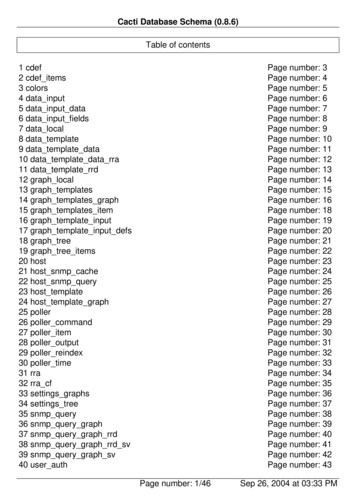
See Tendencies Over Time
Next Steps There are a number of popular Cacti plugins, such as:- Settings- thold- PHP Weathermap A good place to start is http://cactiusers.net/ and Google. To send email to RT from Cacti via rt-mailgate you canuse the Cacti “settings” plugin:http://docs.cacti.net/plugin:settings Automate device and graph creation using availablecommand-line scripts in /usr/share/cacti/cli, such as:-add devices.php-add graphs.php-add tree.php
Conclusions Cacti is very flexible due to its use of templates. Once you understand the concepts behind RRDTool,then how Cacti works should be (more or less) intuitive. The visualization hierarchy of devices helps to organizeand locate new devices quickly. It is not easy to do a rediscover of devices. To add lots of devices requires automation. Softwaresuch as Netdot, Netdisco, IPPlan, TIPP can help – aswell as local scripts that update the Cacti back-endMySQL database directly.
References Cacti Web Site:http://www.cacti.net/ Plugin Documentationhttp://docs.cacti.net/plugins Cacti Discussion Group:http://forums.cacti.net/ Cacti Users – Plugin Architecture Homehttp://cactiusers.org/
Cacti Installation and ConfigurationWorkshop Labs
Cacti Plugin Architecture - Extends Cacti functionality. Many, many plugins are available. Part of the default Cacti installation in Ubuntu version 12 and above. User Management - You can manage users locally or via LDAP and you can assign granular levels of authorization by user or groups of users. Advantages (continued)