Transcription
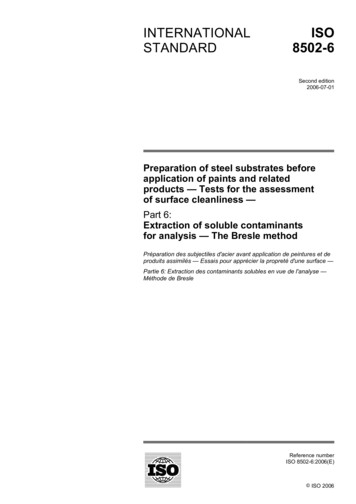
INTERNATIONALSTANDARDISO2553Fourth edition2013-12-15Welding and allied processes —Symbolic representation on drawings— Welded jointsSoudage et techniques connexes — Représentations symboliques surles dessins — Joints soudésReference numberISO 2553:2013(E) ISO 2013
ISO 2553:2013(E) COPYRIGHT PROTECTED DOCUMENT ISO 2013All rights reserved. Unless otherwise specified, no part of this publication may be reproduced or utilized otherwise in any formor by any means, electronic or mechanical, including photocopying, or posting on the internet or an intranet, without priorwritten permission. Permission can be requested from either ISO at the address below or ISO’s member body in the country ofthe requester.ISO copyright officeCase postale 56 CH-1211 Geneva 20Tel. 41 22 749 01 11Fax 41 22 749 09 47E-mail copyright@iso.orgWeb www.iso.orgPublished in Switzerlandii ISO 2013 – All rights reserved
ISO 2553:2013(E) Contents PageForeword. ivIntroduction.v1234567Scope. 1Normative references. 1Terms and definitions. 1Welding symbol. 44.1General. 44.2Basic welding symbol. 44.3Welding symbol systems. 54.4Elementary symbols. 5Supplementary symbols. 94.54.6Arrow line. 144.7Reference line and weld location. 164.8Tail. 19Dimensioning of welds.19General. 195.15.2Cross-sectional dimensions. 19Length dimensions. 195.35.4Butt welds. 20Fillet welds. 215.55.6Plug welds in circular holes. 215.7Plug welds in slots. 21Spot welds. 225.85.9Seam welds. 225.10 Edge welds. 225.11 Stud welds. 225.12 Overlay welds. 22Dimensioning of joint preparations.346.1General. 346.2Root gap. 346.3Included angle. 346.4Radii and root faces — U and J butt joints. 35Depth of joint preparation. 356.56.6Countersink angle for plug and slot welds. 37Alternative butt weld symbol with required weld quality.387.1General. 387.2Example. 38Annex A (informative) Examples of the use of welding symbols.39Annex B (informative) Tolerances and transition points for weld types[9].50Annex C (informative) Alternative methods for designating intermittent butt and fillet welds.51Bibliography. 54 ISO 2013 – All rights reserved iii
ISO 2553:2013(E) ForewordISO (the International Organization for Standardization) is a worldwide federation of national standardsbodies (ISO member bodies). The work of preparing International Standards is normally carried outthrough ISO technical committees. Each member body interested in a subject for which a technicalcommittee has been established has the right to be represented on that committee. Internationalorganizations, governmental and non-governmental, in liaison with ISO, also take part in the work.ISO collaborates closely with the International Electrotechnical Commission (IEC) on all matters ofelectrotechnical standardization.The procedures used to develop this document and those intended for its further maintenance aredescribed in the ISO/IEC Directives, Part 1. In particular the different approval criteria needed for thedifferent types of ISO documents should be noted. This document was drafted in accordance with theeditorial rules of the ISO/IEC Directives, Part 2. www.iso.org/directivesAttention is drawn to the possibility that some of the elements of this document may be the subject ofpatent rights. ISO shall not be held responsible for identifying any or all such patent rights. Details of anypatent rights identified during the development of the document will be in the Introduction and/or onthe ISO list of patent declarations received. www.iso.org/patentsAny trade name used in this document is information given for the convenience of users and does notconstitute an endorsement.For an explanation on the meaning of ISO specific terms and expressions related to conformityassessment, as well as information about ISO’s adherence to the WTO principles in the TechnicalBarriers to Trade (TBT) see the following URL: Foreword - Supplementary informationThe committee responsible for this document is ISO/TC Welding and allied processes, Subcommittee SC 7,Representation and terms.This fourth edition cancels and replaces the third edition (ISO 2553:1992), which has been technicallyrevised.Requests for official interpretations of any aspect of this standard should be directed to the Secretariat ofISO/TC 44/SC 7 via your national standards body, a complete listing of which can be found at ww.iso.org.iv ISO 2013 – All rights reserved
ISO 2553:2013(E) IntroductionThe symbols given in this standard can be used on technical drawings for welded components. Designrelated specifications, such as type, thickness, and length of weld, weld quality, surface treatment, fillermaterial and testing specifications, can be indicated directly at the weld by means of the symbols givenin this standard. The principals of this standard can be applied to brazed and soldered joints.Clarity may be improved by references to collective information in the drawings or references toadditional design-related documents.Preparation for production may require detailed welding-related planning. The type of representationdescribed in this standard can be used for this purpose and complemented by additional productionrelated information (e.g. welding position, welding process, WPS, weld preparation, preheating ).This information is often given in production-related documents, such as work schedules or weldingprocedure specifications (WPS).Technical drawings are intended to clearly and understandably illustrate design-related specifications.Welding-related drawings should be prepared and checked by specially trained personnel (see ISO 14731).This edition of ISO 2553 recognizes that there are two different approaches in the global market todesignate the arrow side and other side on drawings, and allows for either to be used in isolation, to suita particular market need. Application of either approach identifies a welding symbol in accordance withthis International Standard. The approach in accordance with system A is based on ISO 2553:1992. Theapproach in accordance with system B is based upon standards used by Pacific Rim countries. ISO 2013 – All rights reserved v
INTERNATIONAL STANDARD ISO 2553:2013(E)Welding and allied processes — Symbolic representationon drawings — Welded joints1 ScopeThis International Standard defines the rules to be applied for symbolic representation of welded jointson technical drawings. This may include information about the geometry, manufacture, quality andtesting of the welds. The principles of this standard may also be applied to soldered and brazed joints.It is recognized that there are two different approaches in the global market to designate the arrow sideand other side on drawings. In this Interational Standard:— clauses, tables and figures which carry the suffix letter “A” are applicable only to the symbolicrepresentation system based on a dual reference line;— clauses, tables and figures which carry the suffix letter “B” are applicable only to the symbolicrepresentation system based on a single reference
ISO 129-1, Technical drawings — Indication of dimensions and tolerances — Part 1: General principles ISO 1302, Geometrical Product Specifications (GPS) — Indication of surface texture in technical product documentation ISO 3098-2, Technical product documentation — Lettering — Part 2: Latin alphabet, numerals and marksFile Size: 1MBPage Count: 62
