Transcription
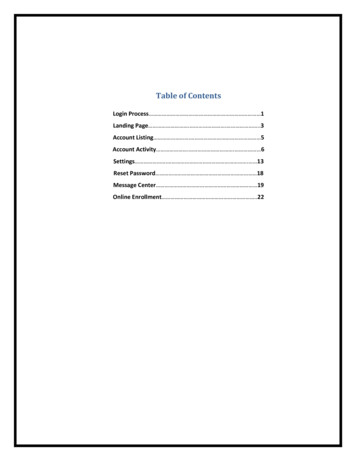
Table of ContentsLogin Process . 1Landing Page . . .3Account Listing . 5Account Activity . . 6Settings . . 13Reset Password 18Message Center 19Online Enrollment .22
*NetTeller logs out automatically after 10 minutes of inactivity. Warning message displays after 9 minutes. An optionTo Continue or Log Out is provided with one minute to take action.Login ProcessHome: Directs you back to WCB’s website.Test Browser: Tests browser for 128-bit encryption.Enroll: Allows submission of a NetTeller application to WCB.NetTeller ID: 12-digit NetTeller Id number or (if not a first time user) alias. Alias is not case sensitive.NetTeller Password: For the first time login, password is the 4-digit number provided by WCB.Reset Password: Create a new password if your NetTeller account is locked or you have forgotten your password. Inorder to use this feature, you must have already established your Password Reset Question in the Settings tab.Online AgreementAt first log in, you must agree to the Online Agreement.Step 1: Review the Online AgreementStep 2: Click I AgreeStep 3: Click Accept to proceed1
Password ChangeAt first login or if your password has been reset, you must create a new password. If desired, you can also changeyour NetTeller ID to create an alias or nickname.Watermark SelectionSelect a watermark image. Image appears at all future logins and all pages within NetTeller. When you enter your IDand see this image, you will know that you are logging into WCB’s genuine online banking website and not afraudulent one.Security Question SelectionFor security reason’s you will be asked to select three questions. These questions are to verify your identity in thefuture if needed.Step 1: Click Continue.Step 2: Select a question from each drop-down menu and input answer. Click Submit. Answers are not casesensitive.Step 3: Review selected questions and answers. Click Confirm.*If needed, edit answers before clicking confirm. Once confirm is selected, questions and answers cannot bemodified.2
Landing PageThe landing page is the initial screen that displays once you have successfully logged into NetTeller.My NetTellerProvides a customizable dashboard view of various NetTeller options divided by widgets. You may select whichwidgets display in each column and in which order.3
Configure this Page: Upon clicking this link, a lightbox window appears allowing control over which widgets to display.Any widgets not currently displayed are listed in the right column of the lightbox window and can be added.To configure the page:Step 1: Choose a column to work with from the Select Column To Configure drop-down field. The names of widgets(items) assigned to the column appear below. My NetTeller has a Left, Center, and Right column. The default selection is Left Column. Widgets arepre-assigned into specific columns on the My NetTeller page and cannot be in different columns.Step 2: Add or remove widget and change the order of display, if desired.Step 3: Return to Step 1 until all columns have been set up.Step 4: Click Save to retain changes made to all columns. The Configure This Page lightbox closes and the MyNetTeller page reloads to reflect the changes.4
Account ListingDisplays list of accounts linked to your NetTeller ID and balance of those accounts. Account Listing: Displays account pseudo name, balance, and status (Closed, Dormant, etc.).Select Option: Jumps to Transactions, Download, Statements, Transfers, and Account Info for the account.Customer Summary Information: Displays the quantity of accounts tied to the NetTeller ID and a loginsummary.5
Account ActivityViewing TransactionsThere are three ways to view transactions in NetTeller. You can click a specific account name from the AccountsWidget from the My NetTeller page, you can select an account from the Accounts page, or you can select an accountby hovering over the Accounts menu option. Transactions are kept for 6 months on NetTeller. Current Transactions: Appear in date order and include item number (if applicable), transaction description,amount of the transaction, and the running balance. Clicking the item number displays the front and backimage of a check.View Transactions for: Navigate between the transactions listing of other accounts.Current Balance: Displays the current balance of the account.Available Funds: Displays the available balance of the account. The link displays the makeup of the availablefunds.View Range: View transactions since last statement, last 7 days, last 15 days, last 30 days, or All.Search: Looks for specific transactions.Print: Creates PDF print file of the page.6
Download Transaction HistoryTransaction history may be downloaded in various formats. Download Transactions for Account: Use the drop-down box to navigate between accounts.Select Download Range: Options include transactions since last download, since last statement, or betweentwo dates.Select Download Format: Determines the file type downloaded. Options Include:o Microsoft Money (OFX)o Spreadsheet (CSV)o Word Processing (TXT)Click Download to display instructions for downloading or viewing the results.7
TransfersAllows you to move money between internal accounts linked to your ID, view existing/future transfers, and view history.Quick TransfersQuickly create an immediate transfer from the Transfer widget from the My NetTeller widget page. The location of the transfer widget on the My NetTeller page varies based on configuration settings.8
Add TransferFuture-dated or recurring transfers can be created in the Transfers menu. Step 1: Select New, enter transfer information, and click Submit.ooo Transfer funds from: Select account to debit.Transfer funds to: Select account to credit.Payment options: If a transfer is being made to a loan, payment options such as Regular, PrincipalOnly, or Interest Only payment may occur. Principal Only and Interest Only payments do not advance payment due date.o Amount to transfer: Enter the dollar amount of the transfer.o Frequency: options include One Time, Weekly, Bi-Weekly, Semi-Monthly, and Monthly. Selectinganything other than One Time adds additional fields to specify week or day of the month. Stop Dateappears if frequency is anything other than One Time.o Memo: Used to remind you of the purpose of the transfer.Step 2: Click Confirm to finalize transfer and receive confirmation or Cancel to discard the transfer.9
Pending TransfersView pending or recurring transfers already established. Use the drop-down menu to view, edit, or delete transfers.Transfer HistoryView detailed information on transfers completed.10
StatementsDisplays basic account statements. These do not replace statements sent electronically. These statements do notinclude check images.11
Account infoSnapshot of account information; includes balance, amount of last deposit, interest rate, etc.12
SettingsModify various fields of information like email address, password, and account names.PersonalMake changes to login information, email address and password reset settings, and click Submit to save the changesModify Personal Settings: Change email address. Password Reset Questions: Self-established questions. Password Reset Answer: Self-established answer. Answer is case sensitive. Click Watermark image to select new Picutre.Modify Login Information: Change NetTeller ID and NetTeller Password.13
AccountFor security reasons, account numbers are not displayed within online banking. Each account is assigned a pseudoname. Select Account to change account names and the order in which accounts appear. Account names must bealpha/numeric and cannot contain special characters.14
DisplayEstablish default settings for various pages within NetTeller. Accounts: Number of accounts displaying on Account listing page.Transactions: Amount of initial history displayed when viewing transactions. This option also controls theamount of transaction history available in mobile banking.BillPay History: Amount of initial history displayed when viewing bill pay history.Transfer History: Amount of initial history shown when viewing transfer history.Download Lines: Amount of transactional information included when issuing the download feature.Transfer Confirmation: Determines whether a transfer review screen appears before a transfer is completed.15
AlertsAlerts are an excellent way to stay aware of activity on your account. Four types of alerts exist: Event, Balance, Item,and Personal. You can either have alerts displayed after you log into NetTeller or you can have them emailed to you.16
Event AlertsWatch for account activities. Examples include incoming ACH credits and debits, transfers failed, receiving incomingwires. Event Alerts remain active until deleted.Balance AlertsWatch for when an account goes above or below a specified balance. Select the Account Name from the drop-downbox. Item Alerts delete once the alert has been generated and viewed.Item AlertsWatch for a specific item number to clear your account. Enter the Item Number and select the Account Name fromthe drop-down box. Item Alerts delete once the alert has been generated and viewed.Personal AlertsTo be reminded of a self-defined message on a specific date. Enter the Date the alert is to be active and the Text toinclude in an alert. Item Alerts delete once the alert has been generated and viewed.17
Reset PasswordIf you have locked yourself out of NetTeller, or simply do not remember your password, you have the ability to reset thepassword yourself.Before the Reset Password can be utilized, Current Email Address, Password Reset Question, and PasswordReset Answer fields must be completed. These fields are modified in Settings Personal after the initial login. ThePassword Reset Answer field is case sensitive.Step 1: Click Forgot your password? On the login screen.Step 2: Enter your NetTeller ID/alias, email address, and email subject. Click Continue.Step 3: Email displaying E-mail subject verbiage is sent. Click the link located in the body of the email.Step 4: Enter your NetTeller ID/alias and answer displayed questions (answer is case sensitive). Click Continue.Step 5: Create a new password, Click Submit.18
Message CenterSend and receive secure messages to West Central Bank.Sending New MessageStep 1: Select Contact.Step 2: Click New. Fill out message information. Click Submit19
From: Your NetTeller ID.Your E-Mail: E-Mail address as entered in Settings. E-mail address is used to send an automated messagenotifying you when WCB responds to your message.Your Name: Full Name.Subject: Enter a subject for the message.Urgency: The level selected flags the message accordingly.Message: Enter the message.Attachment: Browse for a file and attach to the message. Possible types are PDF, Text, HTML, Word, andExcel.20
Sending New MessageAn automatic email is sent informing you of a new message from WCB.After a successful login, a message alert will be visible on both the My NetTeller Messages widget and theAccount Listing page.Once the message is viewed you may View, Reply, or Delete the message. Messages stay in the inbox untildeleted.21
Online EnrollmentOnline enrollment allows you to submit an application to WCB requesting access to NetTeller. WCB will email you yourcredentials in two separate emails. Complete the application and submit for processing.Step 1: Click Online Banking Enrollment.Step 2: Review Online Enrollment Agreement. Click I Agree to continue.Step 3: Enter requested information. Click Continue to move forward with application or Cancel to discontinue.22
Step 4: Enter requested personal information. Click Submit to complete process or Cancel to discontinue.Step 5: A confirmation message displays. Click Return To button to be redirected to bank’s website.23
NetTeller Password: For the first time login, password is the 4-digit number provided by WCB. Reset Password: Create a new password if your NetTeller account is locked or you have forgotten your password. In order to use this feature, you must have already established your Password Reset Question in the Settings tab.