Transcription
TRACKSPACER2.5.9Wavesfactory TrackspacerPage 1
INTRODUCTION .3WHAT’S NEW IN VERSION 2.5 .3GETTING STARTED .3SPECIFICATIONS .3SYSTEM REQUIREMENTS .3INSTALLATION .4TROUBLESHOOTHING .4DEMO EVALUATION .4AUTHORIZATION .5ABOUT SIDECHAINING .5LOGIC PRO .6PRO TOOLS .6CUBASE .6LIVE .6REAPER .6BITWIG.6DIGITAL PERFORMER .6STUDIO ONE .6FL STUDIO.6MASCHINE .6USER INTERFACE .7ADVANCED PANEL .8HIDDEN MENU .8AUTO-UPDATER .9USE CASES .11SUPPORT .11FUTURE UPDATES .11FINAL WORDS.11CREDITS .11EULA .12CHANGELOG .13Wavesfactory TrackspacerPage 2
INTRODUCTIONTrackspacer is a mix tool that creates space in the mix for an instrument, voice, or other audio byperforming automatic, multi-band equalisation on a channel based on the spectrum of anotherchannel. In real-time it analyses the audio frequency content via side-chain, and applies anintelligent 32-band EQ to subtract those frequencies from the track where Trackspacer is inserted.This may sound a little bit confusing, but in reality it’s a very useful mixing tool that can be managedwith a single knob. Its utility is simple: blend two tracks together giving priority to one over the other.In order to do that, we insert the plug-in in the track that we want to apply the effect, and set up theside chain so Trackspacer listens to the track that we give priority. At that moment, you’ll be able tosee the spectrum analyser moving. It’s analysing the incoming side-chain signal and reducing theneeded frequencies to the track we inserted Trackspacer in. Then, you just need to increase the“Amount” knob to the desired value and you’re done.WHAT’S NEW IN VERSION 2.5Trackspacer has been ported to a new framework, coded from the ground-up in order to keep itsimple for making regular updates and improvements. Then number 1 request we’ve got since itsoriginal release has been lowering the CPU consumption, and that’s what we’ve done in this update.We also re-created the whole UI from scratch, making it bigger (650 x 650 instead of 400 x 400)making is suitable for modern displays.There is only one installer now instead of a different binary for demo and full versions. Wheninstalling the demo you’ll be able to enter the serial number at anytime and turn it to the full versionwithout having to install anything else.Support for RTAS has been dropped as well as support for MacOS 10.5 and 10.6, and Windows XPand Vista. In version 2.5.5 support for 32 bit systems has also been dropped.GETTING �Carve specific frequencies that a track needs in real time.32 band EQ that reacts to side-chain.Apply the reduction to L/R or M/S.Attack and release controls.Pristine audio quality.Low-cut and high-cut filters for adjusting the range of the effect.Simple authorisation using a serial number, no iLok required.New graphics with bigger screen size.Formats: VST, VST3, AU, AAX (64 bit only).Platforms: OSX, Windows.SYSTEM REQUIREMENTSMac OSX 10.9 or superior.Windows 7 or superior.Wavesfactory TrackspacerPage 3
INSTALLATIONMacDouble-click on the PKG file downloaded from Wavesfactory.Follow the steps to install the plugin.The installer will place the different plugin formats in the right folders for you:‣ AU: onent‣ VST: Library/Audio/Plug-Ins/VST/Trackspacer.vst‣ VST3: Library/Audio/Plug-Ins/VST3/Trackspacer.vst3‣ AAX: Library/Application he installer will also create a folder in Library/Application Support/Wavesfactory namedTrackspacer that will contain all the necessary files like user manual and license.WindowsDouble-click on the EXE file downloaded from Wavesfactory.Follow the steps to install the plugin.The installer will place the different plugin formats in the right folders for you:‣ VST: C:\Program Files\Steinberg\Vstplugins\‣ VST3: C:\Program Files\Common Files\VST3\‣ AAX: C:\Program Files\Common Files\Avid\Audio\Plug-InsThe install will also create a folder at C:\Users\’username’\AppData\Wavesfactory namedTrackspacer that will contain all the necessary files like user manual and license.TROUBLESHOOTHINGIf Trackspacer doesn’t appear in your DAW plug-in list you can try following these steps:‣ Re-scan all plug-ins.‣ If you’re on Windows make sure that the plug-in is in the correct folder as the installer will place itin the default VST location but your DAW may be using a custom one.‣ Make sure that your OS version is 10.9 minimum on Mac and Windows 7 minimum on Windows.If Trackspacer crashes your DAW on start-up or while using it please delete it from the folder andreinstall it.Make sure that you have the latest version by downloading a new installer from your user oadsIf the crashes continue, contact support with any available crash reports, specifying your OS version,DAW version and any other valuable information that you may have.https://www.wavesfactory.com/contactDEMO EVALUATIONTrackspacer will run in demo mode by default. It will output a short burst of noise every 45 seconds,parameters won’t be recalled when saving the session. All other features will be available for fullevaluation with no specific time expiration.While in demo mode the plugin will show the authorisation panel every time you open the UI, if youstill want to evaluate it you have to click on “Continue evaluation” at the bottom of the pop-up.Wavesfactory TrackspacerPage 4
AUTHORIZATIONWhen purchasing Trackspacer from Wavesfactory you’ll receive an e-mail immediately containingthe serial number. This will be formatted like this:Serial: XXXX-XXXX-XXXX-XXXX-XXXXYou have to copy this to the clipboard by selecting it and either‣ Right-click and select “copy”.‣ Press ctrl C on Windows or cmd C on Mac.Make sure that you copy them without empty spaces as it will result in a not valid authorisation.Then open the plug-in and the authorisation panel will appear. Insert your username (e-mail address)and serial. Press “paste” and the contents of the clipboard will be copied accordingly. Finally, pressthe Activate button. If the information is correct he plug-in will save your serial number inWavesfactory/Trackspacer/License/. If the information is not correct the panel won’t disappear andthe version will still be in demo mode.In order to de-authorise you can simply delete the file inside Wavesfactory/Trackspacer/License.ABOUT SIDECHAININGSide-chaining is a production technique used in a wide variety of music genres where an effect isactivated by an audio track different to the one that the effect is inserted in. In other words, an audioeffect uses an alternative audio source to trigger a processor.It’s very commonly used in EDM to create a pumping effect on a bass or pad by putting acompressor in side-chain mode listening to the kick and lowering the volume of the pad every timethe kick hits.There seems to be a little bit on confusion on how to effectively set up Trackspacer in your DAW, sohere you have a selection of online tutorials (mainly from YouTube) on how to do side-chaining in allmajor DAWs. If a link is down please report it here: https://www.wavesfactory.com/contactWavesfactory TrackspacerPage 5
LOGIC PRO‣ https://www.youtube.com/watch?v QR0NSr4vn6IPRO TOOLS‣ https://www.youtube.com/watch?v fXDjtj6xC1YCUBASE‣ https://www.youtube.com/watch?v 5-hlD45Yv30LIVE‣ https://www.youtube.com/watch?v DCXuqKTd590‣ https://www.youtube.com/watch?v oeJ7hPhhBAQREAPER‣ https://www.youtube.com/watch?v rDa-ydf1P3UBITWIG‣ https://www.youtube.com/watch?v IUMTXxt pi0DIGITAL PERFORMER‣ https://www.youtube.com/watch?v IvaX eBN8DkSTUDIO ONE‣ https://www.youtube.com/watch?v faqls72NvjM&t 3sFL STUDIO‣ https://www.youtube.com/watch?v frpTvh98ynA (Russian)MASCHINE‣ https://www.youtube.com/watch?v GKcSmX03U2cWavesfactory TrackspacerPage 6
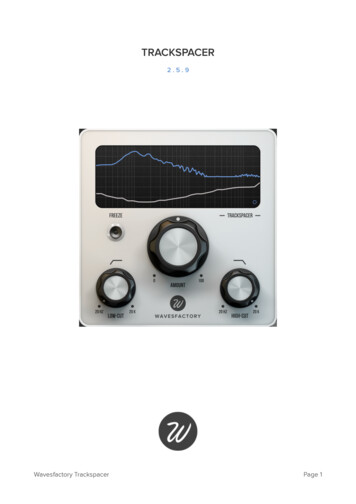
USER INTERFACEThis is the main view of the plug-in. On the top you have a spectrum analyser that will show you theanalysis of the incoming signal. When you set up the side chain the blue line will show the analysisof the side chain signal and the white analysis the reduction amount based on the amount knob.On mouse-hover the display will show the frequency and dB values that the mouse points to.The Amount knob sets the amount of reduction that is being applied to the signal (the negative gainof the filters). Use the Low-Cut and High-Cut filters in order to reduce the range to which the effect isapplied. For example, if you are using a kick drum to duck the frequencies of a bass you don’t needthe top information from the kick, you just need the lower part of the spectrum. Turn the High-Cutknob down so the higher information is not taken into account.The Freeze button can be activated with a single click and will pause the reduction to the currentstate of the filters. This is useful for having a static EQ that’s set up automatically based on the sidechain spectrum.Click on the Wavesfactory logo in order to show the info panel.If you look closely in the spectrum analyser you’ll see a little blue dot. When you activate this buttonthe Advanced Panel will be shown.Wavesfactory TrackspacerPage 7
ADVANCED PANELIn the advanced panel you can find a set of parameters for a better audio control.‣ Pan: controls the panorama of the effect. In L/R mode you can set the effect to the left or to theright or anything in between. In M/S mode you can set the effect to the mid channel or the sideschannel or anything in between.‣ L/R - M/S: Selects the processing mode to regular stereo (L/R) or to mid / sides (M/S).‣ Attack: Sets how quickly the gain reduction reacts to changes in the input signal level.‣ Release: Sets how fast the gain reduction.‣ Side-chain: When activating this button you’ll hear the side chain signal with the Low-Cut andHigh-Cut filter applied for a better fine-tuning.HIDDEN MENUWhen you click on the Wavesfactory logo it appears a menu with a set of options:- About: shows you info about the version of the plug-in and credits.- Visit w
INTRODUCTION Trackspacer is a mix tool that creates space in the mix for an instrument, voice, or other audio by performing automatic, multi-band equalisation on a channel based on the spectrum of another channel. In real-time it analyses the audio frequency content via side-chain, and applies an