Transcription
Dino-LiteUser ManualENUser ManualDKBrugervejledningFRManuel d’utilisationTRKullanım KılavuzuDEBedienungsanleitungPTManual do UtilizadorESManual de usuarioRUITManuale utenteРуководство ndarhandbokFelhasználóiÚtmutatóPLInstrukcja obsługiISR עברית www.dino-lite.eu
tuguês146Pусский161Magyar178 תירבע 193
Dino-Lite User manualENGLISHThank you for purchasing a Dino-Lite microscope. The DinoCapturesoftware is designed to give you the best possible digital microscopyexperience by the inventors of the handheld digital microscope.The DinoCapture software runs on computers with a WindowsXP, Windows Vista or Windows 7/8/10 operating system. TheDinoXcope software is designed to work with Apple Macintosh OS.Important safety information Avoid touching the lens with finger to protect theproduct from electrostatic damage Do not drop Keep dryIndexSoftware installationSoftware interface DinoCapture / Windows24Software interface DinoXcope / Mac11Cleaning and maintenance, Warranty, Support13English 1
Dino-Lite User manualSoftware installationThe DinoCapture and DinoXcope software is licensed from AnmoElectronics Corporation and is subject to an End User LicenseAgreement (EULA) that users will have to accept during theinstallation process.Important notice: DO NOT connect the USB cable of theDino-Lite to the PC before installing the software.1.2.3.4.5.6.7.Use the CD delivered with your Dino-Lite to install theDinoCapture and DinoXcope software and drivers. Alternatively,download and run the latest version of the software from thesupport section of the website: www.dino-lite.eu.Click ‘Next’ and the Installshield wizard will start. (An ‘OpenFile-security warning’ may appear on some systems.Select ‘Run’ or ‘YES’). Choose the language you want for theDinoCapture 2.0 interface.Read the User License Agreement. If you agree, press ‘Yes’ tocontinue or press ‘no’ to stop the installation.Select a destination folder for the DinoCapture software. Whendone, press ‘Next’. Click ‘Install’ to start installing the software.If the Windows security warning message appears, click ‘Installthis driver software anyway’.When the installation is complete, selecting ‘Finish’ completesthe software installation.The DinoCapture software has an auto-update feature that willcheck for software updates when you start DinoCapture.A full manual can be found in the help function of DinoCapture,as a pdf on the CD or on the website.Hardware installation1.After full installation of the DinoCapture software and driverpackage, connect the Dino-Lite to one of the USB ports of yourcomputer.2 English
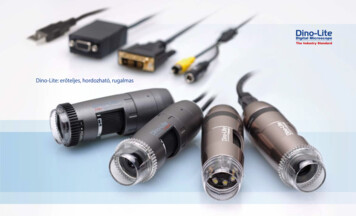
Dino-Lite User manual2.3.4.5.Please use a USB 2.0 port that is fully powered. Some USB portson portable computers do not supply sufficient power.The driver will be automatically installed. Please WAIT untilthe notification appears: ‘Device driver software installedsuccessfully’.Now start DinoCapture 2.0 by double clicking on the desktop icon.The LED lights should go on and an image should appear inDinoCapture. If this is not the case, refer to the frequentlyasked-questions (FAQ) on www.dino-lite.eu.Hardware features1.2.3.4.5.6.At the center of the device, the adjustable dial is used toset the focus. The focus of the image depends on the distanceto the object. Once you have focused on the object, you canread the magnification rate achieved from the number next tothe Δ symbol.The models in the AM/AD 411X series feature a magnificationlock. The magnification lock is particularly useful for repetitiveinspection at a given level of magnification.Dino-Lite models with the letter T in their product name havea Microtouch function at the cable end of the device. Touchingthis sensor will capture the current image or start/stop videorecording (for usb-devices). On the Dino-Lite high speed realtime models the Microtouch sensor can be used to switch theLEDs on/off (all models) or freeze the image (AM5116 modelsonly).Models with the letter Z in their product name have apolarization function, that can be controlled by turning theadjustable cap.Models with the letter L operate at a longer working distance.These models only achieve focus at some distance from theobject.The AD and Edge models have exchangeable front covers/caps. Align the red lines on cap and frontend of the Dino-Lite toremove or place the cap, then turn the cap 180 degrees. Somecaps are designed to be clicked onto the microscope. In thiscase, there is no red line on the cap.English 3
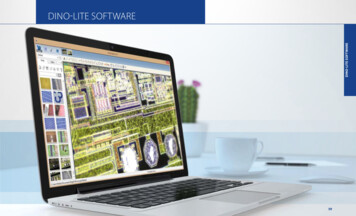
Dino-Lite User manual7.8.The DinoEye models are designed as a replacement of theexisting ocular of a traditional microscope. The U model isintended to be placed over an existing ocular and the C modelis intended to be connected to a C-mount adapter on a suitablemicroscope or optical device.Models with the letters TW have the macro zoom function.Software interface DinoCapture / WindowsThere are five key sections in the DinoCapture software:1.2.3.4.5.Menu barImage list toolsPreview window management barTool barPreview window toolsMenu barFolder – create folders or access existing folders.Files – manage files, such as open, copy, save, print ordelete as well as send as e-mail or create slide show.Settings – customize the way the software operatessuch as: Showing or hiding elements on the screen The properties for measurements The way the Microtouch or foot pedal(if attached) work Accessing the Motorized focus accessorysettings Connecting over IP Bar code recognition function External GPS Auto update functionHelp – access the full user guide on screen, or readDinoCapture 2.0 information or the license agreement.4 English
Dino-Lite User manualImage list toolsOpen – open a picture selected from the imagethumbnail gallery below the image list tool bar.Copy – copy a selected picture to the windowsclipboard.Save as – save selected picture(s) to the desired fileformat or folder.E-mail – attach the selected picture(s) to a newmessage opened in your default e-mail client.Print – print the selected picture.Slideshow – run a slideshow of the selected pictures.Delete – clean up the image thumbnail gallery bydeleting the selected picture(s).Preview window management barThis window enables you to switch between windows if two or moreDino-Lite’s are connected at the same time or multiple pictures areopened.Tool barThe tool bar is divided into four parts:Draw tools – The draw tool set allows you to write text and drawon the images. The bar is located below the preview windowmanagement bar.English 5
Dino-Lite User manualMeasurement tools – Many different measurement types can bedone with the measurement tools. The double flash icon gives youaccess to the grid and ruler settings.Notice: The measurement and calibration feature is onlyavailable for certain models. For the DinoEye models, it isrecommended to make calibrated measurements only. Pleasecontact a local sales representative for further information.LineContinuouslinePoint to linePolygonRadius circleDiameter6 EnglishLeft click and drag to the desired length, and clickagain to finish.Click and drag to form one section of distance, clickagain to start another section. Continue until thetotal desired distance is measured. Double click tofinish.Create a line to represent the base by clickingonce to start, drag, and then click again to set theendpoint. Branch off from the base line to startmeasuring the line that is 90 degrees from the baseline and a final click to finish the measurement.Click and drag to form the desired length, and clickagain to start the next section. When finished,double click to finish the polygon measurement.Click and extend out to the desired radius.Click and extend out to the desired diameter.
Dino-Lite User manualThree pointcircleThree pointarcThree pointangleFour pointsangleCenterdistanceGridlinesCircle gridCrosshair oncameraScalecrosshairFixed lengthFixed angleLassoClick on any three points on the circle you wish tomeasure.Click on three consecutive points on an arc tomeasure.Start at the pivot point and extend out to startmeasuring an angle.Select two points from one line segment andanother two points from another line segment tocomplete the angle measurement.After drawing at least two circles, select the iconand the mouse pointer will change to a pointingfinger for selectable circles. Click on each circle andthe software will measure the distance.The pitch will match the magnification inputted.The pitch will match the magnification inputted.The crosshair XY position can be moved whenyou select it. The cursor position is the location ofthe mouse pointer and location 0,0 is the centercoordinates of the crosshair.The scale crosshair increments can be compared tothe scale on the bottom left corner. The centre ofthe crosshair can be moved. (Magnification valueneeds to be entered for this feature to work).Type in the desired length. The line can berotated and moved without changing the lengthof the measurement. By double clicking on themeasurement results a new length can be inserted.The required angle can be fixed with this tool. Nomatter the direction or location of the angle, theangle will stick to the input data.Measurement tool for freehand tracing and outlineselection around an image. As you trace, the lenght(mm) and area (mm²) of the selection outline willupdate.English 7
Dino-Lite User manualColor average A tool to measure the average RGB color valueswithin the selected image region. Colors aredisplayed in hex triplet format.Text and line toolsLine formatFontSelect line color, style and widthSelect font, font style, size and colorMeasurement ize and show the status of all themeasurements as well as the ability to adjusthow the results are shown on the image. Exportto excel.Digitally enlarge the area around yourmouse pointer for more details and accuratemeasurements.When making a new measurement, snap mode isused for quickly locating the endpoints of a line,midpoints of a line, and the center of a circle of aprevious measurement.MagnificationInput the magnification in the blue box. Themagnification can be read from the dial onthe microscope. Models with AMR display themagnification rate here.UnitsSelect the unit of measurement, inch, mil, mm orum.CalibrationSelect calibration, create new calibration profilemenuor open the calibration folder.Barcode Reader Click on the icon to enable and disable barcodedetection.8 English
Dino-Lite User manualPreview window toolsMicrotouch - Activated when you touch theMicrotouch sensor. Activate or deactivate theMicrotouch. Some Dino-Lite models do not havethis feature.White Balance - Select the required White BalanceMode (available on certain models only)Auto Exposure – This allows you to change theexposure or turn off auto exposure. Sliding the barto the right increases the exposure time and viceversa.LED control - Lets you turn ON/OFF or switch LED’son the Dino-Lite (most models).DF - DarkfieldBF - Brightfield illuminationFLC - The LED’s on the Dino-Lite models with theFLC function are divided in 4 different quadrantswhich can be adjusted separately. 6 levels ofillumination can be chosen.Setting - The setting window allows you to controlthe camera settings.Maximize - Lets you see the live video or picture infull screen. To exit full screen mode, click anywhereon the screen or press “ESC”.Close window - Allows you to close the currentwindow.Snapshot - Take a picture.English 9
Dino-Lite User manualVideo recorder - Start/stop recording of a video.Time-Lapsed Video - Create a series of images orvideos taken at a regular time intervalEDR - Save a picture using Extended Dynamic Range(EDR)EDOF - Save a picture using EDOF (Extended Depthof Field). Place the mouse pointer over the EDOFicon and scroll the mouse wheel to the desiredfocal depth for the automatic mode. Or scroll withthe mouse wheel until the word "Manual" appearsand follow EDOF-manual wizard.Automatic Refocus. Hold the Ctrl key, then clickon an area of interest in the live preview and thecamera will attempt to focus at the selected depth.Release the Ctrl key to revert back to the originalfocused depth.Manual Refocus. Hold the Ctrl key, then scroll themouse wheel in the live preview window to focusat depths above or below the initial focus. Releasethe Ctrl key to revert back to the original focuseddepth.Edge Detection. Set your detection criteriaand measurement tool (line or circle) to detectthe edges. Use the Validaction Rule to set theparameters for pass/fail warnings.Choose the resolution for the image. Please notethat an additional Codec may be required to display5 megapixel resolution. See the support section onwww.dino-lite.eu for further information.Choose the folder where images/videos will bestored10 English
Dino-Lite User manualClick on the grey bar on the bottom of the previewwindow and the annotation box will expand. Writetext within this box and press ENTER to start anew line. When done, left click anywhere in thepreview window to save the annotation and exitthe annotation box.Focus strength indicator - Indicates the level offocus achieved (available on certain models only)Software interface DinoXcope / MacThere are four main sections in the DinoXcope program window:1.Action bar Make picture. If you want to make measurements on thepicture later, open the picture by double clicking and addthe input magnification that you read from the focus dial.Make video. Choose frame rate, recording time, quality andcompression. To stop recording manually, use the ESC keyMake time lapse video. Choose capture interval, numberof frames and playback frame rate, as well as quality andcompression.Switch LED’s on/offGo to full screen mode, to end full screen mode use theESC keyEnglish 11
Dino-Lite User manual2.Image list Choose between pictures or video’sLook at an image with mouse-over, or double-click to openin new windowSelect AlbumCreate new album3.Live image Use the action bar for the action that you want to perform Use the Controls menu (the menu bar is on top of thescreen) to change settings, use (digital) zoom, freeze theimage, change the resolution or change the functioning ofthe Microtouch button. Use the Live measurement function (in the Tools menu)to open a special selection window for drawing andmeasurement tools. After selection, click okay and use thetool on the live image.4.Open image 12 EnglishIf you open a stored image, you will see a menu barabove it, that allows you to choose saving, drawing andmeasurement tools.
Dino-Lite User manualCleaning and maintenanceAvoid touching the lens with any substance. Clean the lensperiodically with compressed air. Clean the body of the microscoperegularly with a soft cloth dampened with disinfectant. Clean thedetachable caps with a 50%-70% alcohol solution, do not usediethyl ether, 100% alcohol or alcohol gel.WarrantyThe DinoCapture software is provided for use with a Dino-Litedigital microscope supplied by AnMo Electronics or one of itsdistributors or resellers. The use of the DinoCapture software isguided by the End User License Agreement.The Dino-Lite product is delivered with a two year warrantyfrom the date of purchase by the end customer. Please note thataccessories (i.e. detachable caps/extensions) are not covered underwarranty. For warranty issues please contact the reseller or storewhere you bought the product.SupportIf you have any problem or issue with your Dino-Lite or theDinoCapture software, please contact your reseller or check theDino-Lite Europe support pages at www.dino-lite.eu. An extensiveuser manual for DinoCapture can be found within the software andon the website.English 13
Dino-Lite User manualIDCP BV / Dino-Lite EuropeManuscriptstraat 12-14, 1321 NN AlmereThe NetherlandsTel: 31 (0)20 6186322Fax: 31 (0)20 6189692E-mail: info@dino-lite.euWeb: www.dino-lite.eu2017Q2 AnMo/IDCP/Dino-Lite Europe.No part of this publication may be reproduced or distributed unlessfor personal use in conjunction with usage of Dino-Lite digitalmicroscopes.Patent info:US Pat. No. 7.102.817.B1Germany Pat. No. 20 2006 001 409.8Japan Pat. No. 3123176Taiwan Pat. No. M302031AnMo Electronics Corporation and its authorized representativein the EU, IDCP BV, declare that the apparatus Dino-Lite andDinoEye comply with the essential requirements and other relevantprovisions of Directive 1999/5/EC. The original Declaration ofConformity can be found at www.dino-lite.eu/doc/dino-lite.pdfVersion 2017Q2 Copyright14 English
Dino-Lite User manualFRANÇAISMerci pour l'achat d'un microscope numérique Dino-Lite. Le logicielDinoCapture est conçu pour vous donner la meilleure expériencepossible de la microscopie digitale par les inventeurs du microscopenumérique de poche. Le logiciel DinoCapture fonctionne sur desordinateurs avec un système d'exploitation Windows XP, WindowsVista ou Windows 7/8/10. Le logiciel DinoXcope est conçu pourfonctionner avec Apple Macintosh OS.Information importante de sécurité Évitez de toucher l'objectif avec le doigt pour protéger leproduit contre les dommages électrostatiques Ne le faites pas tomber Conservez au secContenuInstallation du logiciel16Interface du logiciel DinoCapture / Windows18Interface du logiciel DinoXcope / Mac26Nettoyage et entretien, Garantie et Support28Français 15
Dino-Lite User manualInstallation du logicielLe logiciel DinoCapture ou DinoXcope est sous licence de AnmoElectronics Corporation et est soumis à un Contrat de LicenceUtilisateur Final (CLUF) que les utilisateurs devront accepterpendant le processus d'installation.Avis important: NE PAS brancher le câble USB de la Dino-Lite ouDinoEye à l'ordinateur avant d'installer le logiciel.1. Utilisez le CD livré avec votre Dino-Lite pour installer le logicielet les pilotes DinoCapture et DinoXcope. Sinon, téléchargez etexécutez la dernière version du logiciel dans la section supportdu site web: www.dino-lite.eu.2.Cliquez sur 'Suivant' et l'assistant d'installation va démarrer.(Un avertissement de sécurité peut apparaître sur certainssystèmes. Sélectionnez 'Exécuter' ou 'OUI'). Choisissez la langueque vous voulez pour l'interface DinoCapture 2.0.3.Lisez le contrat de licence d’utilisation. Si vous êtes d'accord,appuyez sur 'Oui' pour continuer, sinon appuyez sur 'non' pourarrêter l'installation.4.Sélectionnez un dossier de destination pour le logicielDinoCapture. Lorsque vous avez terminé, pressez 'Suivant'.Cliquez 'Installer' pour lancer l'installation du logiciel. Si lemessage d'avertissement de sécurité de Windows apparaît,cliquez sur 'Installer ce pilote quand même'.5.Lorsque l'installation est terminée, en sélectionnant 'Terminer'termine l'installation du logiciel.6.Le logiciel DinoCapture dispose d'une fonction automatique quiva vérifier les mises à jour du logiciel lorsque vous le démarrez.7.Un manuel complet peut être trouvé dans la fonction d'aide deDinoCapture, dans un fichier PDF sur le CD et sur le site web.Installation du matériel1.Après l’installation complète du logiciel et du pilote DinoCapture,connectez le Dino-Lite à l'un des ports USB de votre ordinateur.16 Français
Dino-Lite User manual2.Veuillez utiliser un port USB 2.0 qui est entièrement alimenté.Certains ports USB sur les ordinateurs portables ne fournissentpas suffisamment de puissance.3.Le pilote sera installé automatiquement. Veuillez ATTENDREque la notification : 'logiciel pilote de périphérique installé avecsuccès' apparaisse.4.Maintenant démarrez DinoCapture 2.0 en double cliquant surl'icône du bureau.5.Les voyants lumineux devraient s'allumer et une image devraitapparaître dans DinoCapture. Si ce n'est pas le cas, reportezvous à la foire aux questions sur www.dino-lite.eu.Caractéristiques du matériel1.2.3.4.5Au centre de l'appareil, la molette réglable est utilisée pourdéfinir la mise au point. La netteté de l'image dépend de ladistance de l'objet. Une fois que vous avez fait la mise au pointsur l'objet, vous pouvez lire le taux de grossissement obtenuà partir du numéro à côté du symbole Δ.Les modèles de la série AM/AD 411X sont équiper d'uneserrure d'agrandissement. Le serrure d’ agrandissement estparticulièrement utile pour les inspections répétitives à unniveau d’ agrandissement fixé.Les modèles Dino-Lite avec la lettre T dans leur nom de produitont une fonction Microtouch à l'extrémité de l'appareil. Unsimple toucher de ce capteur lancera une capture de l’imageactuelle ou démarrer / arrêter l'enregistrement vidéo (pour lespériphériques USB). Sur les modèles Dino-Lite en temps réelà grande vitesse le capteur Microtouch peut être utilisé pourchanger les LED on / off (tous les modèles) ou de geler l'image(AM5116 modèles uniquement).Les modèles avec la lettre Z dans leur nom de produit ont unefonction de polarisation, qui peut être contrôlée en tournant lering réglable.Les modèles avec la lettre L fonctionnent à une distance detravail plus longue. Ces modèles atteignent la mise au pointseulement à une certaine distance de l'objet.Français 17
Dino-Lite User manual6.7.8.Les modèles AD et Edge ont des couvercles / capuchonséchangeables. Quelques couvercles sont conçu pour être cliquésur le microscope, Pour des autres, il faut aligner les lignesrouges sur le capuchon avec la face avant du Dino-Lite pour leretirer ou le placer, puis tourner le couvercle à 180 degrés.Les modèles DinoEye sont conçus pour remplacer l'oculaire d'unmicroscope traditionnel existant. Le modèle U est prévu pourêtre placé sur un oculaire existant et le modèle C est prévu pourêtre connecté à un adaptateur à montage-C sur un microscopeou appareil optique adapté.Les modèles désignés par le lettre W on le fonction MacroZoom.Interface du logiciel DinoCapture / WindowsIl y a cinq sections principales dans le logiciel DinoCapture:1.2.3.4.5.Barre de menuOutils de la liste d'imageBarre de gestion de la fenêtre de prévisualisationBarre d'outilsOutils de fenêtre de prévisualisationBarre de menuDossier – créer dossier ou accéder à un dossier existant.Fichiers – gérer les fichiers tel que ouvrir, copier,sauvegarder, imprimer ou supprimer ainsi que envoyerun mél ou créer un diaporama.18 Français
Dino-Lite User manualRéglages – personnaliser la façon dont le logicielfonctionne comme: Montrer ou cacher des éléments sur l'écran Les propriétés de mesures La manière dont le Microtouch ou la pédaleà pied (si elle est jointe) fonctionne Moteur pas à pas La connexion sur IP La fonction du reconnaissance de code à barres GPS externe La fonction de mise à jour automatiqueAide – accéder au manuel d'utilisation complet surl'écran, ou lire des informations sur le DinoCapture2.0 ou le contrat de licence.Outils de la liste d'imageOuvrir – ouvrir une image sélectionnée dans la galeriedes vignettes d'image en dessous de la barre d'outil dela liste d'image.Copier – copier une image sélectionnée dans le pressepapier de Windows.Enregistrer sous – sauvegarder les photos sélectionnéesau format de fichier ou dossier désiré.Mél – attacher les photos sélectionnées à un nouveaumessage ouvert par le client de messagerie par défaut.Imprimer – imprimer la photo sélectionnée.Diaporama – lancer un diaporama des photossélectionnées.Supprimer – nettoyer la galerie vignette de l'image ensupprimant les images sélectionnées.Français 19
Dino-Lite User manualBarre de gestion de la fenêtre de prévisualisationCette fenêtre nous permet de basculer entre les fenêtres, si deux ouplusieurs Dino-Lite sont connectés en même temps ou si plusieursimages sont ouvertes.Barre d’outilsLa barre d’outils est divisée en quatre parties :Des outils de dessin – Le jeu d’outils de dessin vous permet d'écriredu texte et dessiner sur les images. La barre est située en dessous dela barre de gestion de la fenêtre de prévisualisation.Outils de mesure – De nombreux types de mesures différentespeuvent être faits avec les outils de mesure. L'icône de double flashvous donne accès aux réglages de la grille et de la règle.Remarque : La fonction de mesure et d'étalonnage estuniquement disponible pour certains modèles. Pour les modèlesDinoEye il faut calibrer avant de pouvoir mesurer. Veuillezcontacter un représentant commercial local pour de plus amplesinformations.Ligne20 FrançaisFaire un clic gauche et glisser à la longueur désirée,et cliquer à nouveau pour terminer.
Dino-Lite User manualLignecontinueCliquer et faire glisser pour former une section de ladistance. Cliquer à nouveau pour commencer uneautre section. Continuer jusqu'à ce que la distancetotale désirée soit mesurée. Double-cliquer pourterminer.Point à ligne Créer une ligne pour représenter la base en cliquantune fois pour commencer, faire glisser, puis cliquerà nouveau pour mettre le point final. Dériver de laligne de base pour commencer à mesurer la lignequi est à 90 degrés de la ligne de base et faire undernier clic pour terminer la mesure.PolygoneCliquer et faire glisser pour former la longueurdésirée, et cliquer à nouveau pour lancer la sectionsuivante. Quand c’est terminé, double-cliquer pourterminer la mesure polygone.RayonCliquer et tirer au rayon désiré.DiamètreCliquer et tirer au diamètre désiré.Cercle à trois Cliquer sur trois points sur le cercle à mesurer.pointsArc à troisCliquer sur trois points consécutifs sur un arc àpointsmesurer.Angle à trois Commencer par le point de pivot et tirer pourpointscommencer la mesure d’un angle.Angle à quatre Sélectionner deux points d'un segment de lignepointset deux autres points d'un autre segment de lignepour compléter la mesure d'angle.Distance du Après avoir dessiné au moins deux cercles,centresélectionner l'icône. Le pointeur de la souris setransformera en un doigt pointé pour les cerclessélection nable. Cliquer sur chacun et le logicielmesurera la distance.QuadrillageLa hauteur sera fonction de l'agrandissement choisi.Cercle de grille La hauteur correspondra à l'agrandissement choisi.Français 21
Dino-Lite User manualPointeur encroixLa position XY du pointeur en croix peut êtredéplacée lorsqu’elle est sélectionnée. La position ducurseur est l'emplacement du pointeur de la souriset l'emplacement 0,0 correspond aux coordonnéesdu centre du pointeur en croix.Echelle duLe incréments du réticule d'échelle peuvent êtreréticulecomparée à l'échelle afficher dans le coin inférieurgauche. Le centre de la croix peut être déplacée.(Valeur de grossissement doit être saisi pour quecette option fonctionne).Longueur fixe Tapez la longueur désirée. La ligne peut êtrepivotée ou déplacée sans changer la longueur dela mesure. En double-cliquant sur les résultats desmesures, une nouvelle longueur peut être insérée.Angle fixeL'angle requis peut être fixé avec cet outil. Quelque soit le sens ou l'emplacement de l'angle, l'anglerestera aux données d'entrée.LassoL'outil de mesure pour un traçage à main levée etune sélection d'aperçu autour d'une image. Lorsquevous tracez, la longueur (mm) et la zone (mm²) del’aperçu de la sélection seront mises à jour.Moyenne de Un outil pour mesurer les valeurs moyennescouleurde couleur RVB dans la région d’image choisie.Les couleurs sont affichées en format triplethexadécimal.Outils de texte et de ligneFormat de ligne Sélectionner la couleur de ligne, son style et sa largeurPoliceSélectionner la police, son style, sa taille et sa couleurOptions de mesure22 Français
Dino-Lite User manualPropriétés demesureOrganiser et montrer l'état de l'ensemble desmesures ainsi que la capacité d'ajuster la manièredont les résultats sont affichés sur l'image.Exporter vers excel.Agrandir numériquement la zone autour de votrepointeur de souris pour plus de détails et unemesure précise.LoupeAperçu / Arrêtsur imageLors d’une nouvelle prise de mesure, la fonctionAperçu/Arrêt sur image vous permet de repérerfacilement les points clefs d’une mesureprécédente : les extrémités et le centre d’uneligne , ainsi que le centre d’un cercle.Agrandissement Entrer l'agrandissement dans la zone bleue.Le grossissement peut être lu sur le cadran quiest sur le microscope. Les modèles avec AMRaffichent le taux de grossissement ici.UnitésSélectionner les unités de mesure, pouce, mil,mm ou um.MenuSélectionner l'étalonnage, créer un nouveaud'étalonnageprofile d'étalonnage ou ouvrir le dossierd'étalonnage.Lecteur de code Cliquez sur l'icône pour activer et désactiver labarresdétection de code à barres.Outils de la fenêtre de prévisualisationMicrotouch – cette fonction est activée lorsque voustouchez le capteur Microtouch. Activer ou désactiverle Microtouch. Certains modèles Dino-Lite nedisposent pas de cette fonctionnalité.Balance des blancs - Sélectionnez le mode de balancedes blancs requis (disponible sur certains modèlesuniquement)Français 23
Dino-Lite User manualExposition automatique - Ce paramètre vous permetde modifier l'exposition ou désactiver l'expositionautomatique. Glisser la barre vers la droite augmentele temps d'exposition et vice versa.Voyant lumineux de contrôle – vous permet demettre en MARCHE/ARRET ou changer de voyantslumineux sur le Dino-Lite (la plupart des modèles)DF- éclairage fond sombreBF - éclairage fond ClairFLC - Les LEDs sur les modèles de Dino-Lite avec lafonction FLC sont divisés en 4 quadrants différentsqui peuvent être réglés séparément. 6 niveauxd’illumination peuvent être choisis.Réglage – La fenêtre de réglage vous permet decontrôler les réglages de l'appareil.Maximaliser - Permet de voir la vidéo en temps réelou une image en plein écran. Pour quitter le modeplein écran, cliquer n'importe où sur l'écran ou taper« ESC »Fermer fenêtre – Permet de fermer la fenêtre encoursInstantané - Prendre une photoEnregistreur vidéo - Démarrer / arrêterl'enregistrement d'une vidéoImagerie vidéo intermittente - Créer une séried'images ou de vidéos prises à un intervalle de tempsrégulierEDR - Enregistrer une image en utilisant ExtendedDynamic Range (EDR)24 Français
Dino-Lite User ma
Dino-Lite to the PC before installing the software. 1. Use the CD delivered with your Dino-Lite to install the DinoCapture and DinoXcope software and drivers. Alternatively, download and run the latest version of the software from the support section of the website: www.dino-lite.eu. 2. Click 'Next' and the Installshield wizard will start.
