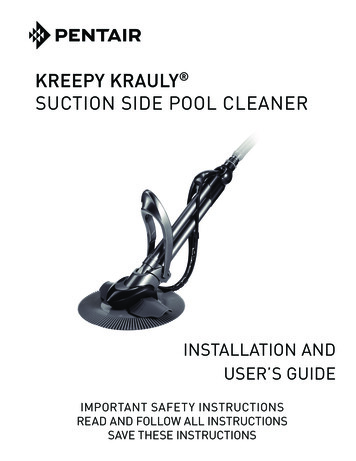
Transcription
D L Y AU STRA PROUL IAN GNED ESIEDAND MADVTX-7OWNER’S MANUALSOC33548 VTX-7 instructions Art4.indd 129/09/2015 2:56 pm
CongratulationsYour new Kreepy Krauly VTX-7 is designed to give you years of reliableperformance. As soon as you complete the final assembly steps,it’s ready to use. Don’t worry, it doesn’t take long and this guidewill walk you through assembly and installation step-by-step.This booklet should answer all your questions. However if youneed a little extra help, feel free to call our Customer ServiceDepartment, Mon-Fri 9am-5pm in your local area, or go tothe website for up-to-date information.1800 777 255www.kreepykrauly.com.auSOC33548 VTX-7 instructions Art4.indd 229/09/2015 2:56 pm
Contents2Components checklist4Assembling your VTX-76Installing the VTX-7 in your pool11Fine-tuning your VTX-713Authorised Kreepy Krauly Accessories14Troubleshooting18Looking after your VTX-720What should I expect from my VTX-7?21Warranty information1SOC33548 VTX-7 instructions Art4.indd 129/09/2015 2:56 pm
Components checklistYou will find all the pictured components inside this box.Male-male hose x1Male-female hose x11Hose weights x3Hose protector sleeveRetaining collarSmart-SkimSmart-Skim adaptorsused with most vacuum platesused with Polyplastics 190 & 210 standardused with Polyplastics SK10 (rectangular)Auto Skim Upgrade (to replace Smart-Skim)Anti-vortex washerAuto Skim valvesVent valveVacuum plate2SOC33548 VTX-7 instructions Art4.indd 229/09/2015 2:56 pm
Steering adjuster float barSwivel head assemblyDive float assemblyVTX-7 cleaner unitPilot weight assemblyMain bodySerial numberBumper strapScoopSilicon sealSole3SOC33548 VTX-7 instructions Art4.indd 329/09/2015 2:56 pm
Assembling your VTX-7STEP1SAttach the ScoopGently run the straps of the scoop around the groove in themain body. When the tabs are secured correctly at the back ofthe main body, the straps should overlap.12STEP2SAttach the Silicon SealSlide the seal onto the groove at the bottom of the mainassembly body so it’s able to rotate freely.4SOC33548 VTX-7 instructions Art4.indd 429/09/2015 2:56 pm
STEP3Attach the SoleFit the sole to the base of the main body. Ensure it is fitted allthe way around.STEP4Install the Steering Adjuster Float BarFit the steering adjuster float bar into the top bridge of the divefloat assembly. For adjustment hints, see page 12.5SOC33548 VTX-7 instructions Art4.indd 529/09/2015 2:56 pm
STEP5Attach the Bumper StrapSSlide one end of the bumperstrap into the back of themain body (near the scoopattachment), and the other endinto the swivel head assembly.bent section downInstalling the VTX-7 in your poolSTEP1Prepare your poolIf your pool is clean, balanced and algae-free, you’re ready toget started.a.First, clean the skimmer and pump basket.b.Check the water level.c.Brush down the sides of your pool.d.Next, make sure the return jets are facing downwards.e.Then, backwash or clean your cartridge filter.f.Now turn off the pump.6SOC33548 VTX-7 instructions Art4.indd 629/09/2015 2:56 pm
STEP2a.Fit the Vacuum Control Valve (2 options)Smart-Skim (comes standard)Insert the Smart-Skim into an adaptor fitting,then attach to your vacuum plate. Depending onthe vacuum plate your pool uses, you may haveto use a different skim adaptor – we’veincluded 3 options (see page 2). You’ll know it’sthe right one when there’s a tight fit.TIP:Depending on the Vacuum Plate your pooluses, you may have to use a different skim adaptor– we’ve included three for you to choose from.You know you’re using the right one when there is atight fit. See our website if you need help.used with mostvacuum platesused with Polyplastics190 & 210 standardused with PolyplasticsSK10 (rectangular)NOTE: To remove, ensure the pump is off and grasp from the bottomof the Smart-Skim, pulling up. (Note: Not from the hose or spring).ORb.Combined Vacuum Plate and Auto Skim valve (optional upgrade)Your pool shop would have already assisted youin selecting the correct replacement for yourpool’s existing vacuum plate.To assemble, place the Auto Skim Valve intothe opening in the new Vacuum Plate. Attachthe Anti-Vortex Washer over the valve inlet.Place the entire unit in the skimmer box.NOTE: A Vacuum Plate Clamp can stop your vacuum plate moving.TIP: The Anti-Vortex Washer stops the slurping sound.7SOC33548 VTX-7 instructions Art4.indd 729/09/2015 2:56 pm
STEP3Build the Ultra Flex HoseSStart with the male-male hose and twist on a female length.Keep going until the hose is long enough to reach fromyour skimmer box to the far corner of your pool plus around1.5 metres extra – this will optimise the coverage of your VTX-7.malemalefemaleTIP:Wetting the hose ends in your pool willmake them easier to connect to each other.STEP4SAttach the 3 Hose WeightsStarting at the end that connects to the VTX-7, slide the firstweight 2.2m along the hose. Now slide the second weight1.2m along. Finally, slide the third weight no more than 10cmfrom where the hose will connect to the cleaner.2.2m1.2m10cm or lessTIP:When using less than 8m of hose,only use 2 hose weights.8SOC33548 VTX-7 instructions Art4.indd 829/09/2015 2:56 pm
STEP5Submerge the HoseSubmerge the assembled hose in your pool to expel all the airby pushing downwards and feeding the hose into the pool.STEP6Connect the Hose to the VTX-7Submerge the VTX-7 in your pool to expel all air(rotate to help remove trapped air). Now connectthe weighted end of the submerged hose tothe swivel head assembly of the VTX-7.NOTE: Do not use any otherbrand of pool cleaner hose withyour VTX-7 or performanceand coverage will be impaired.9SOC33548 VTX-7 instructions Art4.indd 929/09/2015 2:56 pm
STEP7Connect Hose to the Skim ValveSlide the retaining collar and then the protector sleeve onto theend of the hose. Connect the hose to the Smart-Skim valve(or Auto Skim valve if using the upgrade.) There are two optionsfor the path of the hose:Option 1:Hose through theskimmer box door.Option 2 (improvessurface skimming):Hose through thetop of the skimmerbox, cover removed.Position the retaining collar so that it holds the protector sleevein place to protect the hose from wear where it is in contactwith the pool edge or skimmer box door.Turn on the pump. Your VTX-7 should now be up and running.You should hear a gentle ticking – that’s your cue to relax whilethe VTX-7 gets to work cleaning your pool.10SOC33548 VTX-7 instructions Art4.indd 1029/09/2015 2:56 pm
Fine-tuning your VTX-7Depending on your pool’s shape and surface, you may need to make somesmall tweaks to optimise the performance of your VTX-7.How to achieve the right inclineVTX-7 works best when the main body sits at a 45 incline to the pool surface.If your cleaner is lifting (greater than 45 ), move the second hose weighttowards the swivel head assembly. To test if it is sitting correctly turn offthe pump, tow the VTX-7 into 1.2 metres of water and observe how it sitswhen it settles to the bottom. Adjust the second weight further if needed.more than 45 If your cleaner is sitting lower than 45 , move the second hose weight awayfrom the swivel head assembly. If it still won’t sit correctly, remove the firsthose weight or call your pool shop or our Customer Service Centre for advice.less than 45 11SOC33548 VTX-7 instructions Art4.indd 1129/09/2015 2:56 pm
Adjust the turning actionIf your pool sits above ground, has box sections or unusual features,you may need optional extras to customise the turning action. Steering Adjuster Float Bar (comes as standard) – clips intothe bridge in 4 different positions to adjust the angle andbalance of your VTX-7.option 1(standard)option 3option 2 rotateoption 4Extended Float Bar (optional) – fits to either the top or bottombridge to adjust the VTX-7’s turning circle.option 1option 212SOC33548 VTX-7 instructions Art4.indd 1229/09/2015 2:56 pm
Authorised Kreepy Krauly AccessoriesRoller Bumper StrapFor pools with rough surfaces that place excessive wearon a standard bumper strap.Main Drain CoverPlace over main drain grille to ensure the VTX-7 can movesmoothly. (No screws required.)Vacuum Plate ClampHolds down the vacuum plate when the pool pump is off.Expanding PlugUsed to block off selected skimmer box pool drain inlets.Step DeflectorPrevents VTX-7 from becoming trapped in tight cornersor on steps.Extended Float BarAssists in steering the VTX-7 away from obstacles suchas steps or lights.13SOC33548 VTX-7 instructions Art4.indd 1329/09/2015 2:56 pm
TroubleshootingVTX-7 pulsates rapidlybut doesn’t move, or travelsvery slowly: Check that the sole is fitted correctly. If the sole tread is worn away,replace it with a new sole. Check that the combinedvacuum plate and Auto Skimor Smart-Skim valves are fittedcorrectly (see page 7).VTX-7 travels too slowly,or doesn’t pulsate: If the filter is blocked, backwashor clean it thoroughly. If the flow valve at the bottom ofyour VTX-7 is blocked, clean outthe valve (see page 19). If the pump or skimmer boxstrainer basket is full or blocked,clean them out. Check the markings on the siliconseal to make sure it hasn’t beeninstalled upside down. If the main drain valve is open,shut it off, or fit an optionalexpanding plug. Check the Smart-Skim orAuto Skim valve isn’t jammed.If it is, remove the valve from thevacuum plate, submerge the valvein water – opening and closinguntil it moves freely. Check for damage to the main body. Check Smart-Skim spring iscorrectly attached.Low vacuum or slow,faltering hammering sound: Check large debris isn’t blockingyour VTX-7 or hose (see page 19). Check the combined Auto Skimvalve or Smart-Skim valve andvacuum plate is sitting correctly inthe skimmer box. You may need adifferent size plate. Backwash filter.Check for a blockage in the mainbody of your VTX-7 (see page 19).14SOC33548 VTX-7 instructions Art4.indd 1429/09/2015 2:56 pm
- If the weather is cooler, lay thehose out straight and fill it withwarm (50-60ºC) not boilingIf you have more than oneskimmer box, you’ll need to blockoff water flow from the box notconnected to the VTX-7. If the inlet from the main drain isleaking, install an expanding plug. Your pool pump and filter systemmay be too small to effectivelyrun your VTX-7. Ask your pool proto advise. Check for leaks or small holes inthe main body. Check flow valve for damage.water. Roll the water backwardsand forwards until the hosewarms up and uncoils. Empty thewarm water and then pour coldwater through the hose – eithermanually or by attaching one endto the pump. Check that the pool outlets aren’tpushing the VTX-7 off course.Adjust downwards if necessary oruse an eyeball diverter. Do you have enough pool weightson the hose? Additional weightsmay improve directional stability.VTX-7 stays at one end ofthe pool: Check that the hose is long enoughto reach the far corner of the pool.If it isn’t, add extra sections. Check that the hose isn’t kinked orcoiled. If it is, follow these steps:- If the storage box has caused thehose to coil, you will need to relaxit. The easiest method is to lay itflat by the pool for a few hours ona hot day (above 28ºC).VTX-7 only travels aroundthe water line: Your pool tiles may not sit flushwith the plastered walls. Fit yoursteering adjuster float bar inposition option 3 or 4 (see page 12)or consult your pool pro. Check the hose is not coiled. If it iscoiled, try to straighten the hose out.15SOC33548 VTX-7 instructions Art4.indd 1529/09/2015 2:56 pm
VTX-7 travels around the waterline in only one direction:VTX-7 keeps wedging itselfon the steps: Check that the main body andswivel head are not out ofalignment. Adjust accordingly.Attach a Step Deflector (bumper) –available from your pool shop. Or,shorten the pool hose slightly sothe VTX-7 can’t reach the steps andclean the missed area manually.VTX-7 sticks on theunderwater light: The seal could be getting trappedon the light fitting. Try fittingyour steering adjuster float bar inposition option 3 or 4 (see page 12).The VTX-7 only climbs partway up the wall: Check the sole isn’t worn andneeds replacing.VTX-7 becomes stuck on themain drain: Check silicon seal and sole fordamage.VTX-7 doesn’t sit at 45 andhas difficulties attaching tothe pool floor: Adjust hose weights closer to orfurther away from the machine untilthe seal is flat on the pool floor. Make sure the bumper strapis fitted. Check for damage to the machineand missing floats.Fit a main drain cover over the grille.16SOC33548 VTX-7 instructions Art4.indd 1629/09/2015 2:56 pm
You notice bubbles at returnto pool outlets: Check if the hose is damagedby lifting it near the surface andlistening for a hissing sound.Replace damaged section with anew section.VTX-7 is always comingto the surface of the pool,possibly drawing in air: Check that the Auto Skim valveor Smart-Skim valve is installedcorrectly (see page 7). Check that there are no largeleaves blocking the skim valveand creating excess vacuum. Reprime the pump. Check the Auto Skim valve orSmart-Skim valve isn’t jammed. Make sure the pool water level ishigh enough.Check the hose weights are fittedcorrectly and readjust if necessary. Check that the steering system isclean and can move freely. Fit your steering adjuster floatbar in position option 3 or 4 (seepage 12) or use extended float bar. Check the Auto Skim valve isn’tsitting above the waterline.If it is, fit an anti-vortex washeron the valve.NOTE:For more detailed troubleshooting advice please don’thesitate to contact your helpful local dealer, or check our onlineresources for tips and other information: www.kreepykrauly.com.au17SOC33548 VTX-7 instructions Art4.indd 1729/09/2015 2:56 pm
Looking after your VTX-7 IMPORTANT If you are giving the water a shock treatment with chlorine orother chemicals, remove your VTX-7 from the pool for at least 24 hours. If thechemicals are too strong for people to swim in, they’re too strong for the VTX-7. Do not use petrol or solvents to clean your VTX-7 as they will damage it.If needed, use detergent and water. Periodically check the suction seal, scrubbing sole and bumper for wearand tear. If they need replacing, see your pool shop.TIPS TO PROTECT YOUR HOSE: Never stretch or lift the hose while it is full of water Never hang your hose from hooks Always store your hose loosely coiled (minimum 1m diameter)on a flat surface or, ideally, disassemble and store straight– particularly if storing long term. This will prevent the hosefrom kinking and ensure your VTX-7 can move freelywhen you return it to the pool.18SOC33548 VTX-7 instructions Art4.indd 1829/09/2015 2:56 pm
Check the flow valve periodically, or when there is a blockage:a.Remove the sole and then silicon sealb.Remove the baffle plate by firmly pressing the plastic side tabs inwardsc.Remove and clear and debris from the flow valved.Replace flow valve, baffle plate, silicon seal and then sole.b.c.flow valveBeware of the pool blanket effectPool blankets prevent chlorine evaporating. If you’re usingone, carefully monitor your chlorine or salt water setting toavoid over chlorinating your pool, which can harm your VTX-7and void your warranty. If you have any questions pleasecall our Customer Service department on 1800 777 255 or talkto your pool shop pro.19SOC33548 VTX-7 instructions Art4.indd 1929/09/2015 2:56 pm
What should I expect from my VTX-7?How it movesHow it CleansYour Kreepy Krauly VTX-7 will movebackwards in direction, with thewater flowing through the base ofthe cleaner and alternately divertedbetween the two drive tubes. Thekinetic energy generated by thewater being trapped in each drive tubeprovides the lifting and propellingmotion of the cleaner, which may resultin a faintly audible ‘ticking’ sound.Your VTX-7 will clean your pool dailywith your normal filter cycle by gentlySkimming, Scrubbing and VortexVacuuming your pool surface. Itsoversized scoop in combination withSmart-Skim, will ensure leaves anddebris on the floor and at water levelare efficiently removed direct to yourskimmer basket and filter. Don’t beshocked if at first you see a whitecloud appear around your cleaner,this is calcium build up being gentlyremoved from your pool surface. Theentire system efficiently delivers ourpromised Triple Clean with Vortex.How it SteersYour cleaner steers utilising its divefloat assembly to create a UniqueCrisscross Pattern. This allows yourcleaner to climb up the walls andefficiently cross the pool floor. Incombination with the Ultra Flex hose,which ensures your cleaner is notrestricted or directed by the hose.The Ultra Flex HoseThe unique Ultra Flex hose rests justbelow the water surface, due to itsbuoyancy and hose weights. The ultraflex design means when the cleanercrosses paths with the hose sectionclosest to the cleaner, it is able tomove freely. This gives your cleanerthe freedom and mobility to coverevery inch of your pool.20SOC33548 VTX-7 instructions Art4.indd 2029/09/2015 2:56 pm
Your WarrantyYour VTX-7 is engineered to last. This is reflected in the 2-year Full SystemWarranty and 10-year Flow Turbine Warranty.Protecting Your WarrantyAll Kreepy Krauly pool cleaning systems are made in Australia to withstand harshAustralian conditions. They are manufactured from top quality materials thatare UV, salt and chemical resistant. Being an Australian company, we offer localafter sales service, maintenance and parts. For any troubleshooting with yourVTX-7, simply contact your local pool shop for assistance. You will extend the lifeof your VTX-7 by using genuine VTX-7 parts and chlorinating your pool correctly.The use of non-genuine parts and over-chlorinating your pool may void yourwarranty, impair your VTX-7’s performance or result in colour fade.Activating Your VTX-7 WarrantyTo activate your 2-year Full System Warranty and 10-year Flow Turbine Warranty,please fill in your VTX-7’s serial number and return the self-addressed warrantyregistration card to us as soon as possible. Alternatively, you can activateyour 2-year Full System Warranty and 10-year Flow Turbine Warranty online atwww.kreepykrauly.com.au/warranty.Record Serial Number Here:TIP:Your Serial Number can be found on the packaging orstamped on the underside of your float assembly.NOTE: For full warranty conditions, please refer to your warrantycard or go online to www.kreepykrauly.com.au/warranty21SOC33548 VTX-7 instructions Art4.indd 2129/09/2015 2:56 pm
Further InformationThis booklet should have answered all your questions.However if you need a little extra help or up-to-dateinformation, go to www.kreepykrauly.com.au, or call ourCustomer Service Department on 1800 777 255, Mondayto Friday 9am-5pm in your local area. Alternatively,contact your local pool shop professional.www.kreepykrauly.com.auWe reserve the right to revise, change, or modify VTX-7 without incurringany obligations to make like changes on VTX-7 models previously sold.This publication remains the sole copyright of Sherwood Overseas Co Pty. LtdSOC33548 VTX-7 instructions Art4.indd 2229/09/2015 2:56 pm
21 Warranty information SOC33548 VTX-7 instructions_Art4.indd 1 29/09/2015 2:56 pm. Components checklist . Smart-Skim adaptors Anti-vortex washer Auto Skim valves Vacuum plate Vent valve Auto Skim Upgrade (to replace Smart-Skim) used with most vacuum plates used with Polyplastics 190 & 210 standard used with Polyplastics SK10 (rectangular)
