Transcription
Owner s manualDPA-1RoomPerfect DIGITALMUTEANALOGMENUENTERDPA-1 Digital Pre-Amplifier
2
Table of ContentsOperating Voltage4Input Name26Unpacking the DPA-14Input Sensitivity26Serial Number Registration4Introduction5Accessories6Front Panel7Display Indicators8Rear te Control10Connecting the DPA-1- Connecting to sources and amplifiers- Using Main and Line outputs121213Menu System- Navigating the Menu System1414Advanced Setup- Communication- Comm Address- Comm Speed- Master/Slave- Digital Out- Main Out- Main Out Control- Main Out Level- Line Out- Line Out Control- Line Out Level- Routing- Crossover Frequency- Filter Type- Delay- Trigger Setup- Remote Control- Firmware Versions- Factory ResetMenu Tree15RoomPerfect Troubleshooting32Introduction to RoomPerfect - Global Listening- Focus Listening- Voicing16161616Firmware Upgrading33RoomPerfect - Guided Setup- Setting the Measurement Volume Level- Focus Measurement- Room Measurements- Adding more Room Measurements- Calculation of Focus 1 and Global Filters- Advanced Options- Measure Focus Pos.- Measure Room Pos.- RoomKnowledge- RoomCorrection171718191920212222222323Connectors- Mains Connector- Trigger Connector- Optional AD Converter Board- Balanced Inputs- Unbalanced Inputs343434343434Cleaning and Maintenance34Technical Specifications- Audio- Protection- Mains- Trigger- Mechanical353536363636Display- Display Timeout- Disp. Brightness- Volume Disp. Timeo.24242424Technical Assistance37Appendix- Voicing Curves3838Volume- Def. Vol.- Max. Vol.252525Manual version 23-10-20123
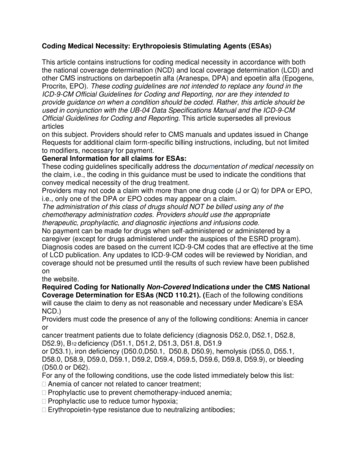
Operating VoltageThe DPA-1 can be switched between 115V and 230V mains voltage.In 115V mode the DPA-1 requires a mains voltage of 100V-120V at 50-60Hz.In 230V mode the DPA-1 requires a mains voltage of 220V-240V at 50-60Hz.The mains voltage setting for your DPA-1 can be changed on the rear selector.Make sure the rear selector is in the correct setting and connect the power inputonly to the appropiate AC source. The warranty will not cover any damage causedby connecting to the wrong type of AC mains.The DPA-1 has three power modes:1. OFFNo circuitry is powered. Please note that some parts of the mains entry section still carry live mains.2. STANDBYThe microprocessor is active.3. ONAll circuits are active.Unpacking the DPA-1Carefully remove the unit and accessory kit from the carton, visually check for shipping damage.Contact both the shipper and your Lyngdorf Audio representative immediately if the unit bears any signof damage from mishandeling. All Lyngdorf Audio equipment is carefully inspected before leaving ourfactory.Keep shipping carton and packing material for future use or in the unlikely event thatthe unit needs servicing. If this unit is shipped without the original packing, damagecould occur and void the warranty.Serial Number RegistrationPlease record the serial number of your DPA-1 here for future reference. The serial number is printedon the label on the rear panel. You will need this serial number, should you ever require service for yourDPA-1.DPA-1 serial number:4
IntroductionCongratulations on the purchase of your Lyngdorf Audio DPA-1 with RoomPerfect .Besides being a state-of-the-art pre-amplifier, it also enables you to take advantage of the most advancedroom correction system on the market. It is implemented in such a way that you will always achieve theperfect result. No computer needed, no acoustic knowledge needed, no user input needed. We leavenothing to chance in the fully automated calibration process.However, for the advanced user there are plenty of challenges since the DPA is also a complete ‘ControlCentre’ that allows you to build advanced multi-way passive or active speaker systems. This is possibledue to the very powerful built-in DSP ‘engine’ which facilitates signal routing, creation of active crossovers, delay settings etc.In fact we believe it to be the most versatile pre-amplifier on the market today, a true state-of-the-artdevice that sets new standards for what’s sonically possible to achieve in a real life environment.5
AccessoriesYou should find the following accessories included:Mains cord8 m (26.25 feet)XLR – XLR cableMicrophoneProgramming lTUNERvolumeENTERA/BrandomrepeatRemote control6Microphone stand with Mic clamp(delivered in a separate carton)
Front PanelDIGITALMUTEANALOGMENUENTERDPA-1 Digital Pre-Amplifier12345678ControlsThe buttons/controls on the front panel of the DPA-1 can all be operated either with direct presses or byoperating the corresponding keys on the supplied remote control. All the keys on the front panel (exceptthe Mains Switch) are duplicated onto the remote control as well.1. Mains SwitchPowers the DPA-1 on/off.2. MuteToggles Mute mode on/off.Pressing the Mute button for 3 seconds will set the DPA-1 in stand-by mode.3. Analog Input SelectorChanges to Analog input, or if already selected, cycles to the next Analog input.In standby mode, press to turn On the DPA-1 with the last selected analog input.4. Digital Input SelectorChanges to Digital input, or if already selected, cycles to the next Digital input.In standby mode, press to turn On the DPA-1 with the last selected digital input.5. DisplayDisplay with all information on the menu system, status, active input selection and volume control.6. Volume WheelOptical encoded volume control wheel.7. Navigation KeysIn stand by mode, press Enter to turn On the DPA-1 with the last selected input.In normal operation mode the Up/Down toggles between bypass and the available Focus and Globalfilters. The Left/Right keys toggles between neutral and the available voicings.In menu mode the keys are used for navigation in the menu system: Up/Down, Left/Right & Enter. Pressing and holding down the Up/Down, Right/Left keys, changes selected values fast.8. Menu ButtonToggles Menu mode on/off7
Display IndicatorsDA11232453451. A-DIlluminates to indicate whether the active input is Analog or Digital.2. MenuAlphanumeric Display (2*20 Characters).3. 1-5Illuminates the active input.4. RoomPerfect LogoIs illuminated when a filter is active.5. Volume Display3 digits indicating Volume control setting from 00.0 to 99.9 – in dB’s.Mute is indicated by the Volume control setting ‘---’.Standby mode is indicated with the decimal dot from the volume indicator being lit only.Rear Panel12345100-120V / 220-240V 50-60Hz 35W67891011121. Analog Input 1-3Unbalanced/RCA Left/Right Analog input pairs2. Analog Input 4Balanced/XLR Left/Right Analog input3. Analog OutputDouble pair of balanced/XLR Left/Right analog outputs (Main and Line out).4. Analog OutputDouble pairs of unbalanced/RCA Left/Right analog outputs (Main and Line out).813
5. 115V and 230V Mains Voltage Switch.Switches between 115V and 230V mains input voltage.Make sure the rear selector is in the correct setting and connect the power inputonly to the appropiate AC source. The warranty will not cover any damage causedby connecting to the wrong type of AC mains.6. Digital Input 1-3RCA connectors for SPDIF input7. Digital OutputThe digital output can be selected as the main or the line channel. In both cases the output can be selected as Full Scale or Regulated.The sample rate is fixed at 96 kHz. This output is also active when Analog input is selected.8. Digital Input 4XLR Connector for AES input9. Optical Digital Input 5Connector for Toslink input10. Mic. InMic. in for connection of RoomPerfect microphone.11. Trigger OutDC Trigger out for remote start of SDA 2175, power amplifiers or other suitable equipment with a remotestart.The output voltage is 12V and a maximum current of 50mA can be drawn from the output.12. RS232 Input/AuxRS232 communication connectors for communication with a PC, remote control from other Lyngdorfequipment with broadcast commands or linked control between several other amplifiers or other suitableequipment with a remote start. The ‘INPUT’ is used for connection to a PC, or as a control input from a Lyngdorf master amplifier. The ‘AUX’ connection is output in Master mode for controlling slave amplifiers, or bypasses inputfrom other master amplifiers to the next amplifier.13. Mains Input9
Remote ControlThe remote control is used to access the menu system as well as the buttons directly accessible on thefront panel. To control the DPA-1 the AMP key must be pressed (please note the DPA-1’s volume andmute buttons still work when in other modes).The functionality of the buttons when AMP is pressed are as follows:1. StandbyThe standby button puts the DPA-1 in stand-by mode.2. Numerical Buttons 1-8Selects Focus listening mode (up to 8 different listening positions canbe stored in RoomPerfect ).121234567894digital0info73563. Numerical Button 9Selects global listening mode.89menuanalog101311AMPRCSCDTUNER14124. DigitalTurns On the DPA-1 from stand-by mode in the last selected digitalinput.Selects Digital input, or if already selected, cycles to the next Digitalinput. To select a specific Digital input, press the ‘Digital’ button followed by numerical button 1-5 within 2 seconds.5. Numerical Button 0Selects bypass listening mode (no room correction filter selected).6. InfoHold down for 2 seconds to show the current samplerate.To select a specific Voicing filter, press the ‘Info’ followed by numericalbutton 0-6 within 2 seconds.7. AnalogTurns On the DPA-1 from stand-by mode with the last selected analoginput.Selects Analog input, or if already selected, cycles to the next Analoginput. To select a specific Analog input, press the ‘Analog’ button followed by numerical button 1-4 within 2 seconds.8. MuteToggles Mute function on/off.9. MenuActivates or de-activates the Menu system on the Main display.10. AMPSelects the remote for operation with a Lyngdorf Amplifier/Pre-amp.11. RCSSelects the remote for operation with a Lyngdorf Room Processor.12. CDSelects the remote for operation with a Lyngdorf CD 16
13. TunerNo function.14. Channel -/ Toggles down/up between inputs.15. Volume Up/downIncreases or decreases the volume in the chosen direction.16. Up / Down / Left / RightIn normal operation mode the Up/Down toggles between bypass and the available Focus and Globalfilters and the Left/Right toggles between neutral and the available voicings.In menu mode they are used for navigation in the menu system. Pressing and holding down a keychanges selected values fast.17. EnterTurns the DPA-1 On from stand-by mode with the last selected input and works as Enter in menu system.18. No Function.11
Connecting the DPA-1Connecting to sources and amplifiersThe DPA-1 is very simple to hook up.1. Connect all sources to the DPA-1.Then connect the DPA-1 output signal to a poweramplifier.Source(s)DPA-1 Digital Pre-AmplifierDPA-1Poweramp12
Using Main and Line outputsAs described in “Routing” and “Crossover Frequency” there are many ways to utilize the Main and Line outputs. Here we have described the three most common set-up s. Please note the products, outputs and crossover frequencies are chosen randomly in these descriptions. Combine them at your own will and needs.1.Single-amp set-up with no subwoofer.A poweramp is connected to each Main Output Left and Right. No crossover is selected.Main Output LeftNo filterSpeaker2.Main Output RightNo filterPowerampSpeakerPoweramplifier and subwoofer set-up.A poweramp is connected to the Main Out Left and Right and highpass crossover is set at 80Hz.The Subwoofer is connected to the Line Output and lowpass crossover is set at 80Hz. Remember to setthe subwoofer cut-off frequency to maximum.Main Output Left RightHighpass filter set at 80HzSpeakers3.DPA-1DPA-1Line Output RightMono lowpass filter set at 80HzActive subwooferPowerampLyngdorf 2 2 setup.A poweramp is connected to Line Output Left and Right and highpass crossover is set at 400Hz.Two Lyngdorf boundary woofers are connected to Main Output Left and Right, through a poweramp, andlowpass crossover set at 400Hz.Main Output Left RightHighpass filter set at 400HzSpeakersPowerampDPA-1Line Output Left RightLowpass filter set at 400HzPowerampBoundary woofers13
Menu SystemThe Main Display on the front panel of the DPA-1 shows all functionality and current status of the DPA-1.An overview of the menu tree can be seen in the ‘Menu Tree’ chapter.Navigating the Menu SystemPressing the Menu button on the front panel or the remote enters the menu or steps back one level inthe menu system.Using the left/right arrows keys the Menu system settings can now be scrolled through. To access a submenu setting scroll to it and press the Enter button. To change a setting, use the Up/Down and/or Left/Right arrows and press Enter to accept the change, or Menu to exit without applying any changes.14
Menu TreeThis is an overview of the entire DPA-1 menu structure.DPA -1 Main MenuRoomPerfectAdvanced setupGuided setupAdvanced optionsMeasure Focus PosCommunicationFirmware versionsComm SpeedFactory ResetTheater SetupRoomKnowledgeMaster /SlaveDisplayDigital OutMain OutDisplay TimeoutMain Out ControlDisp . BrightnessMain Out LevelVolume Disp. Timeo.VolumeDef. VolumeMax. VolumeInput NameInput SensitivityRemote ControlComm AddressMeasure Room PosRoomCorrectionAdvanced setupLine OutLine Out ControlLine Out LevelRoutingCrossover freqFilter TypeDelay15
Introduction to RoomPerfect Once the guided set-up has been successfully completed you have the option to listen to music throughtwo listening settings; Focus 1 and Global room correction filters. The RoomPerfect filters are storedon the numerical buttons from 1 to 9 on the remote control. To change from one filter to the other yousimply press the numerical button corresponding to the desired filter, or toggle between them by pressing the Up/Down buttons on the remote or front panel.Global is stored on numerical button 9 and the Focus 1 is stored on numerical button 1. Furthermore youcan add 7 more Focus/listening position (8 in all). The additional focus/listening positions can be stored onnumerical buttons from 2 to 8. To bypass the room correction filters, press numerical button 0.Global ListeningThe Global filter improves the sound quality across the whole room. When you are listening to music ina room but are not sat in any particular listening position, the global filter gives the best result.Focus ListeningThe Focus filter improves the sound quality at a listening position by exploiting the 3-dimensional acoustic properties gained through the room measurements. This makes the Focus filter the best solution foroptimal sound quality at a specific listening position.VoicingWhen using RoomPerfect you will experience a much more precise and detailed sound reproduction– which could also be described as more analytical.The Voicing setting is an EQ filter that can be used to gently amplify or attenuate certain frequencies according to your personal preferences and/or to compensate if a given recording sounds too ‘bright’ or too‘dark’. The standard voicing settings, and their numerical value on the remote control, are: Neutral (0), Music 1 (1), Music 2 (2), Relaxed (3), Open (4), Open Air (5), Soft (6).The frequency curves of the different voicing settings can be viewed in the appendix. Neutral is a bypasssetting.You can toggle between neutral and the available voicings by pressing the Left/Right buttons on the remote or front panel. The voicings can also be chosen directly on the remote by pressing the ‘Info’ buttonfollowed by 0-6.16
RoomPerfect The sub menus accessible in the RoomPerfect menu are:RoomPerfectGuided setupAdvanced optionsAdvanced options is only available when Guided set-up has been performed.Guided SetupWhen you enter the RoomPerfect Main Menu for the first time, only the Guided setup is available.Press Enter to initiate the guided set-up.The main steps in the guided set-up procedure are: Setting the measurement volume level Taking one Focus (listening position) measurement Taking at least three room position measurements Adding more room measurements in the guided set-up (optional) Finally, automatic calculation of Focus and Global filtersIf you wish to leave the guided set-up at any time during the set-up, simply press the ‘Menu ’ button andthe following message appears, ‘Exit without saving? No/Yes’. Choose Yes to exit the guided set-up without saving any data or, Choose No to cancel and continue with the guided set-up.17
Setting the Measurement Volume LevelThe calibration volume is a recommended maximum volume. It is important that you always judgewhether the calibration volume is too loud. The calibration volume should not be so loud that it causes: uncomfortably loud sounds that are inconvenient to you or your environment, or damage to your loudspeakers.When the message ‘Connect and place mic. in focus pos.’ appears, connect the microphone to the microphone input found on the back panel. Thereafter, place the microphone, using the microphone stand,in an appropriate focus/listening position. This location should be at your main listening position, typicallymore or less centered between the loudspeakers.Make sure that the height and the orientation of the microphone corresponds to your typical listeningheight and direction as illustrated and do not block the line of sight between the microphone and theloudspeakers.When the microphone has been correctly connected and placed in the focus position, you are ready toset the calibration volume. The calibration signal is a combination of the high and low frequency measuring signals and is only presented in your left loudspeaker. The measuring signals sound very artificial anddisharmonic due to the fact that they are composed of pure tones at different frequencies.Press Enter to confirm and to commence the calibration process.The test signal will start and shortly thereafter the DPA-1 will suggest an initial estimate of the desiredmaximum calibration volume (in dB), displayed as ‘Desired vol. max XXdB – Retry/Save Current’Please raise or lower the volume towards the desired maximum volume shown on the display but ensureyou avoid clipping, uncomfortably loud levels and damage to the loudspeakers. Continue choosing Retryfor a re-estimation of the desired maximum calibration volume, until an appropriate calibration volumeis reached. If you find the suggested calibration volume too loud simply turn down the volume to an appropriate level and choose Save current.When the message ‘Calibration ok. Press Enter to continue’ is displayed, the calibration volume has successfully been set and saved.18
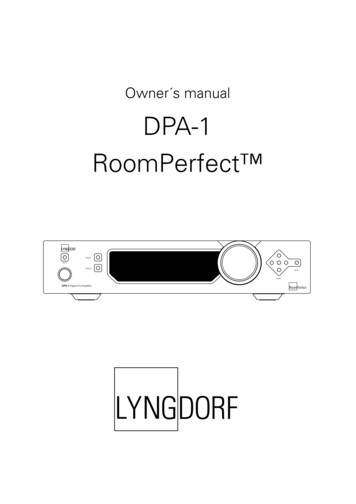
Focus MeasurementWhen the calibration is OK, press Enter to start the measuring process and ‘Measuring Focus position ’ will be displayed. Each measurement comprises four steps: A low and a high frequency measuring signal first in the left and then in the right channel.The length of each measurement depends on a combination of the measurement volume, set in thecalibration process, and the background noise in your local environment. Typical measuring times for thelow and high frequency measuring signals are 25 and 5 seconds, respectively.Do not sit in the listening position during focus measurements.The measurement will stop prematurely if an error occurs during the measuring process. In this case,an error message is displayed. Press Enter to continue and ‘Retry focus measurement – press Enter’ isdisplayed.If the error needs correcting this should be done at this point (see RoomPerfect troubleshooting),thereafter press Enter to retry the measurement. The measurement procedure will start again.A measurement has ended successfully when the last measuring signal stops and the display shows aRoomKnowledge rating, as ‘RoomKnowledge XX% - Measurement ok’. Press Enter to continue.Room MeasurementsThe number of room positions needed depends on the value of RoomKnowledge, if it is below 90% afterthe third measurement the guide automatically includes extra room measurements until a RoomKnowledge of 90% or more has been achieved.The remaining measurements are to be placed in random positions in the room with random orientations of the microphone. Choosing these random or arbitrary positions and orientations is easy. All youhave to do is place the microphone at different positions in the room and with different orientations. It isimportant to perform well spaced measurements to get a covering image of the acoustical properties inthe room, i.e. varying positions, heights and orientations of the microphone.For an optimal room correction it is very important that the measurements are:1. performed more than 1 meter (approx. 3 feet) away from the loudspeakers,2. not performed behind the loudspeaker, and3. that there is at least 50 cm/1.5 ft between each measurement.2.Not behindloudspeaker3.50cm1.1m19
When a random measuring position and microphone orientation has been chosen press Enter. The measuring process will start and the display will show ‘Measuring room position 1’.The measurement will stop prematurely if an error occurs during the measuring process. In this case, theerror message ‘Retry room measurement – press Enter’ is displayed. Press Enter to continue.If it is an error that needs correcting, then correct the error (see ‘RoomPerfect trouble-shooting’ chapter)and proceed with the room position measurement by pressing Enter. The measurement has ended successfully when the last measuring signal stops and the display shows ‘RoomKnowledge XX% - Measurementok’.This process is repeated at least three times and until the RoomKnowledge reaches 90%.Adding more Room MeasurementsIf you have performed successful measurements and RoomKnowledge has reached 90%, the message‘Add more room meas.? Yes/No’ is displayed.At this point, or any time later, you can decide whether the acquired room measurements are sufficient oryou wish to add further room measurements to learn more about the room’s acoustical information. Addingmore room measurements results in a higher RoomKnowledge, this in turn improves the room correctionfilters. Choose Yes to add more room measurements. The room measuring process is now continued asdescribed in the previous section. Choose No when no additional measurements are required. The volume will now return to defaultvolume or lower, depending on the volume you have entered the guided set-up with.The message ‘Save guided measurement - Yes/No’ will be displayed when exiting a successfully completedguided set-up. Choose Yes to save the results of the guided set-up and calculate the focus and the global roomcorrection filters. Choose No if you wish to exit the guided set-up without calculating any room correction filters, withoutsaving the performed measurements and without setting the calibration volume.20
Calculation of Focus 1 and Global FiltersWhen RoomPerfect calculates the filters the display shows the following, ‘Calculating filters - Pleasewait’.The filter calculation process can be expected to take anywhere between 5 seconds and a minute depending on the specific task.When RoomPerfect has calculated the room correction filters, they are automatically saved. The Focusfilter is saved as setting 1 and Global is saved as setting 9 out of the possible 9 filter settings.You have now successfully completed a guided set-up and the RoomPerfect Advanced Menu is nowavailable.21
Advanced OptionsThis section describes the options in the advanced menu, which is available after Guided Setup has beencompleted. Here you can add new listening positions and room measurements, check the RoomKnowledge of your current set-up, and check the RoomCorrection for the different filters.Advanced optionsMeasure Focus PosMeasure Room PosRoomKnowledgeRoomCorrectionMeasure Focus Pos.As mentioned, it is possible to add 7 different listening/focus positions.Place the microphone correctly in the new listening position and the measurement process can commence.The saved calibration volume from the guided set-up is used as a default when adding extra focus/listening and room positions though, as mentioned, the volume can be changed at any time between measurements to suit a particular situation.After a successful measurement the message ‘RoomKnowledge XX% - Measurement ok’ is displayed.Press Enter to continue.The message ‘Save Focus measurement(s) – Yes/No’ will appear. choose Yes to save the measurement or, choose No to exit without saving the current measurement.Choose between focus/listening position 2 - 8 and press Enter. If you wish to overwrite an existing Focusfilter (2 to 8 can be overwritten) or you are trying to save a new filter on an existing preset then ‘Focusno.X exists! Overwrite? Yes/No’ will be displayed.When the Focus number has been chosen, the volume turns down to default or lower and the newFocus filter is calculated and saved.Measure Room Pos.It is always possible to add more room measurements, which can increase RoomKnowledge and thereby fine tune all the room correction filters.Press Enter to start a new room measurement.Place the microphone in a random room position and the measurement can commence.The saved calibration volume from the guided set-up is used as default when adding extra focus/listeningand room positions, though as mentioned, the volume can be changed at any time between measurements to suit a particular measurement situation.After a successful room measurement the RoomKnowledge is re-calculated and displayed as ‘RoomKnowledge XX% - Measurement X ok’. Press Enter to continue.22
‘Add more room meas.? Yes/No’ will show in the display: choose Yes to add another room measurement or, choose No to stop adding more room measurements. If No is chosen the volume is returned tothe default or lower.‘Save room measurement(s)? Yes/No’ will hereafter be shown. choose Yes to save the performed room measurement, and No to exit without saving any of the performed measurements.Adding one or more room measurements leads to a re-calculation of all filters (i.e. Global and all Focusfilters) due to the fact that more of room’s acoustic properties have been learned, something that affectsall filters.RoomKnowledgeThe RoomKnowledge index is a parameter that tells how much of the room’s acoustical properties havebeen learned. A high RoomKnowledge ( 90%) means that most of the room’s acoustical properties havebeen learned. The more room measurements you add, the higher the RoomKnowledge will become.The more that the acoustical properties of the room are learned, the greater the accuracy of the roomcorrection.RoomCorrectionThe RoomCorrection index is a measure of how much processing is being employed in the room correction filters. To some extent the RoomCorrection index reflects how audible the correction is. However, the same amount of processing can sound very different due to placement in frequency of theprocessing. For low values (below 10%) of the room correction index, only subtle correction is neededto the original sound in the room. With high room correction index values more extensive processing isemployed.The RoomCorrection index for a specific RoomPerfect filter can be viewed by pressing the numericalbutton of the corresponding filter. This can only be done while in the RoomCorrection menu.To see a short video presentation of RoomPerfect , please go to www.lyngdorf.com.23
DisplayThe sub menus accessible in the Display menu are:DisplayDisplay TimeoutDisp. BrightnessVolume Disp.Timeo.Display TimeoutDisplay Timeout set-up is used for enabling/disabling the 10 sec. display ’switch’off’ feature. If enabledthe Main Display reading will switch off after 10 sec of inactivity from the remote control or front panelbuttons.Disp. BrightnessDisplay Brightness is used to control the brightness of the display. The brightness can be set to 25%,50%, 75% or 100%.Volume Disp. Timeo.If Volume Display Timeout is enabled the Volume Display reading will switch off after 10 sec of inactivityfrom the remote control or front panel buttons.24
VolumeThe sub menus accessible in the Volume menu are:VolumeDef. VolumeMax. VolumeDef. Vol.The Default Volume setting controls the default volume at start-up and can be set from 0 to 99 dB.However, a setting over 88 is not recommended as this corresponds to max output with full scale digitalinput.Max. Vol.The Maximum Volume setting is a safety precaution used for limiting the maximum volume which can beachieved by spinning the wheel or increasing volume via the remote. This can be set to avoid excessivelyloud sound pressure levels and/or to protect your loudspeakers against overload.25
Input NameAs default, digital inputs are called Digital 1-5 and Analog inputs are called Analog 1-4. To change thename, choose an input and then between the following preset names: ADC, Analog 1-4, AUX, CD, CD-1, CD-2, DAB, DAT, DBS, DCC, Digital 1-5, DVD, DVD-1, DVD-2, FM, LD,MD, PC, PHONO, RADIO, RIAA, SACD, SAT, TAPE, TUNER, TV, VCR, VDP, VIDEO, VIDEO-1,VIDEO-2.Input SensitivityThe Input Sensitivity adjustment enables you to match levels from different sources as well as obtainingfull scale output on your amplifier. The Sensitivity can be adjusted /-12dB in 0.1 dB steps.Setting the Input Sensitivity too high will result in clipping/distortion. Therefore,always use your ears when setting the Input Sensitivity26
Advanced SetupThe sub menus accessible in the Advanced menu are:Advanced setupCommunicationMain OutCrossover freqRemote ControlTheater SetupLine OutFilter TypeFirmware versionsMaster /SlaveRoutingDelayFactory ResetDigital OutCommunicationThe sub menus accessible in the Communication menu are:CommunicationComm AddressComm SpeedComm AddressThe Communication Address setting identifies the DPA-1’s to the PC interface or other Lyngdorf products. In master mode the DPA-1 setting is normally 1, and the addresses 2-99 can be used for individualslav
Keep shipping carton and packing material for future use or in the unlikely event that the unit needs servicing. If this unit is shipped without the original packing, damage could occur and void the warranty. Serial Number Registration Please record the serial number of your DPA-1 here for future reference. The serial number is printed