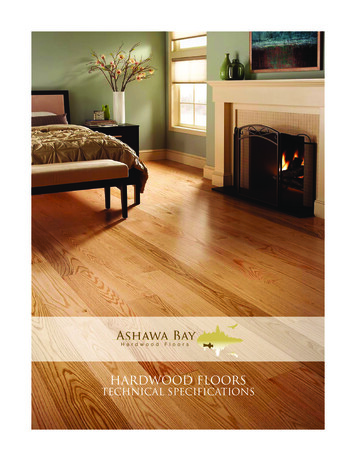
Transcription
Engineered Hardwood FlooringInstallation Instructions,Care/Maintenance Guide& WarrantyWe make every effort to ensure that the finest hardwoods are used to create our wood planks, that the natural characteristics of thewood are preserved, and that our finish provides the protection needed to help preserve the look of your hardwood flooring for years.IMPORTANTIn order to preserve the natural beauty of your new wood flooring, it is important to read all the following installation andmaintenance instructions, prior to installation. Please note: Complying with the following installation and maintenance instructions willensure the full benefit of your hardwood flooring warranty. With wood’s natural beauty you can expect variations in color, tone, andgrain. Therefore, we cannot warrant against color variation within a floor, or variation between samples and the installed floor. Installers: Please review with your customers the information under the section: “Installers–Advise Your Customers of theFollowing.” Prior to installation, it is the responsibility of the installer to determine that the job-site environment and subfloors meet orexceed all applicable standards and recommendations of the construction and materials industries. These instructionsrecommend that the construction and subfloor be dry, clean, secure, and flat. The manufacturer declines anyresponsibility for job failure resulting from, or associated with, sub-surface or job-site environmental deficiencies. Install out of several cartons simultaneously to achieve proper color and shade mix.Installer/Owner ResponsibilityYour hardwood floors are manufactured in accordance with accepted industry standards, which permit a natural ormanufacturing defect tolerance, not to exceed 5%. Please ensure that a 5% overage in material is ordered to allow for cutting and grading waste factors. Floors installed in apattern or on a diagonal may require additional material. Prior to installation, the installer must inspect all flooring material and assumes all responsibility for final inspection ofproduct quality. Carefully examine flooring for color, manufacturing, finish, and quality before installing. The installermust use reasonable selectivity and separate out or cut off pieces with defects, whatever the cause. If material is notacceptable, do not install it, and contact the seller immediately.INSTALLATION INSTRUCTIONSTools Needed for Installation Electric Power Saw, Circular or JigsawChalk lineHammerHandsawTape measurePull bar Wooden or plastic spacer wedgesBroomAdhesive and Adhesive RemoverTrowelTapping BlockMoisture Testing EquipmentFor glue down installations, Mapei ECO 975, 980, 985, 995; Sika T15, T21, T35, T55; or equivalent flooring adhesive. (See your distributorfor adhesive recommendations.) Follow manufacturer’s guidelines and trowel recommendations when using adhesive. For nail-downor staple-down installations, use the proper nailer. (see Nail-down or Staple-Down Installation). For floating installations use a qualitywhite wood glue (PVAC).CAUTION: By not using the proper tools, “puckering” may result on the face of the plank. Manufacturer is not responsible for problemscaused using improper products or installation tools. See your distributor for tool recommendations and use.Note: Never strike the plank edges directly with a hammer – always use a tapping block to protect the edges of the boards.WARNING:Do not use tape to secure flooring planks when installing your prefinished hardwood floor. Use of tape mayleave adhesive residue or may harm the finish of your new hardwood floor. Damage resulting from use of tape during orafter installation may void your finish warranty.
INSTALLERS - ADVISE YOUR CUSTOMER OF THE FOLLOWINGSEASONS: HEATING AND NON-HEATINGHardwood flooring product dimensions are affected by varying levels of humidity within your installation area. Use care to controlhumidity levels within the 35-55% range (humidity may vary with regional conditions). In addition, we recommend the following: Heating Season (Dry) - A humidifier is recommended to prevent excessive shrinkage in wood floors due to low humiditylevels. Wood stoves and electric heat tend to create very dry conditions. Non-Heating Season (Humid, Wet) - Proper humidity levels can be maintained by use of an air conditioner, dehumidifier, or byturning on your heating system periodically during the summer months. Avoid excessive exposure to moisture during periodsof inclement weather. Do not obstruct in any way the expansion joint around the perimeter of your floor.FLOOR REPAIRMinor damage can be repaired with a touch-up kit or filler. Major damage may require board replacement, which should beperformed by a professional wood flooring installer.PRE-INSTALLATION PROCEDURESACCLIMATING THE HARDWOOD FLOORINGHVAC systems should be fully operational at least 14 days prior to flooring installation, maintaining a consistent room temperaturebetween 60 –80 Fahrenheit, and relative humidity between 35-55%. This not only stabilizes the building’s interior environment, but also isessential when acclimating hardwood flooring to the job site. Hardwood flooring should be handled and unloaded with care andstored within the environmentally controlled site. Flooring stored upon “on-grade” concrete floors should be elevated at least fourinches to allow air circulation under cartons.ROOM PREPARATIONRemove existing baseboards, quarter rounds and thresholds. Undercut door jambs, using a piece of flooring material as a guide.Door frames and other wooden elements should be sawed off at the bottom to ensure proper fit and expansion tolerances of theinstalled wood flooring.PRE-INSTALLATION INSPECTIONIt is the responsibility of the installer to inspect each board for visible defects prior to installing the board. Any board with visibledefects will be replaced at no cost. If a defective board is installed, manufacturer will not assume cost of labor for repair orreplacement of defect.SUBFLOOR TYPEEngineered hardwood flooring can be installed over the following properly prepared subfloors: Concrete: On, above or below grade installations are acceptable. Must be clean, dry, and smooth to within 3/16” over 10’.Concrete slabs must be at least 30 days old prior to installation. Terrazzo: Should be lightly sanded and cleaned with mineral spirits prior to spreading the adhesive. Allow the mineral spirits todry prior to spreading the adhesive. Ceramic Tile: Tiles must be securely fastened to the subfloor. Surface should be roughened up with a sander or grinder andcleaned to remove all dust. If grout lines are too deep, they must be filled. Wood Subfloors: plywood, OSB and underlayment particleboard and tongue and groove boards. Must be smooth and dry.Squeaks and popping areas should be secured prior to spreading adhesive. Vinyl: sheet vinyl and vinyl tile. Vinyl must be securely fastened to the subfloor with full spread adhesive. Loose laid or perimeterglued sheet vinyl must be removed. De-gloss flooring as necessary to create a good adhesive bond using an abrasive pad. Donot sand sub-surfaces such as vinyl or synthetic tiles that may contain asbestos. Do not install over floors that exceed one layer, asthe thickness of the flooring materials will prevent an adequate mechanical bond.SUBFLOOR PREPARATIONSubfloor must be: Clean and free of wax, paint, oil, and debris. Scrape smooth and sweep thoroughly prior to installation. Flat to 3/16” per 10’ radius. If subfloor levelling is required, “hills” should be sanded down and “valleys” filled with an underlaymentpatch, developed by a reputable manufacturer for use with hardwood flooring. Structurally sound prior to installation. Secure loose areas to reduce squeaking, and replace water damaged or delaminated subflooring or underlayment.Testing for Moisture ContentAll concrete subfloors must be tested for moisture content. Several tests are outlined below. These tests do not guarantee a dryconcrete slab year-round. With that in mind, a moisture barrier using a minimum of 6-mil poly film should have been establishedbetween the ground and concrete. A minimum of at least three test locations for areas up to 1,000 sf are recommended; add oneadditional test for each 1000 sf or fraction thereof. Tramex Concrete Moisture Encounter Meter. Moisture readings obtained should not exceed 3.5 on the upper scale. Calcium Chloride. Moisture emission should not exceed 3 lbs./1,000 square feet during a 24-hour period with this test. Per industrystandards, 0-3 lbs. is dry, over 3lbs requires moisture barrier (see below), and over 7lbs is too wet. RH (relative humidity) probe: RH testing is determined by in-situ probes at a depth of 1.5” or 40% of the slab depth. Readingsshould not exceed 75% RH. Installations over a concrete floor with readings over 75% RH require use of a vapor retarder.
Moisture Barrier SystemIf the above tests reveal excessive moisture or relative humidity levels, install an impermeable vapor retarder or vapor-resistantmembrane with a permeance rating of one perm or less. Follow manufacturer’s instructions for use when applying any vaporretarder.SET UP In order to have sufficient material on hand, calculate area and add 5% more flooring material to allow for cutting waste and forminor natural or manufacturing defects. When installing on a diagonal or in a pattern increase your cutting waste accordingly. Work out of several cartons at the same time to insure color and shade mix.LAYOUT Layout should be designed to save labor and materials, as well as to enhance the appearance of the floor. Lay the floor so thatthe end joints are staggered at least 8 inches on adjacent rows to avoid a stair step or H pattern. Staggered or irregular jointsmean less material waste and a better overall appearance. Plan the layout so that the last row of flooring (which usually needs to be cut lengthwise) is not too narrow. In some cases, it maybe necessary to cut the first row as well as the last row. Allow expansion space equivalent to the thickness of the flooring to be installed along all walls and vertical obstructions. Flooringshould be laid at right angle to the floor joist and, if possible, parallel to the longest wall.SUBFLOOR PREPARATIONNAIL-DOWN OR STAPLE-DOWN INSTALLATIONRemove all dirt and rough areas by thoroughly cleaning, sanding, and leveling. Note: Particle board is not a suitable subfloor fornail-down or staple-down installation. The clean subfloor should be covered wall-to-wall with 15 lb. roofing felt, overlapping 4”along the edges, and securing with tape.INSTALLATIONTo determine a straight first starting row, snap a chalk line the width of a few boards plus 3/8” expansion space from the wall. Tokeep first rows straight and in place, nail a straight 1 x 2 or 1 x 4 holding board on the chalk line. For nailer or stapler, use correctshoe based on thickness of flooring. Use pneumatic staplers with correct shoe base for the thickness of the product. (Powernail Model 2000 Pneumatic Powernailer.) Set the compressor pressure to recommended PSI and adjust accordingly using a “practice”board. Check for surface and tongue damage before proceeding with installation. Manual Model 250 Powernailer can also beused. Begin installation with several rows at a time, tightening boards as necessary to reduce gaps before fastening. Nail/stapleeach board placing fasteners every 6”–8” and 3” from the ends. The last 1–2 rows will need to be face nailed where clearancedoes not allow blind nailing with stapler or brad nailer. Brad nail or face nail on tongue side. Rip the final row to fit and face nail. Ifthe final row is less than 1” width, it should be edge-glued to the previous row, before installation. The two joined rows can beface nailed as one board. Go back to the starting wall, remove the starting block and complete final rows using 6d nails, countersunk and filled.GLUE-DOWN INSTALLATIONGLUING THE PLANKS (Figure 1.1)(Figure 1.1) To determine a straight first starting row, snap a chalk line the width of a few boardsplus expansion space (equivalent to the thickness of the flooring) from the wall. To keepfirst rows straight and in place, nail a straight 1”x 2” or 1” x 4” holding board on thechalk line. Snap another chalk line at a comfortable working distance from theholding board (about 24”). Spread adhesive in first working area. Do not spread more adhesive than can becovered within 20 minutes. When the first section is complete, strike another parallel chalk line from the last rowinstalled, spread the adhesive and complete the section. Repeat section by section until the job is finished. Remove the starting board,spread adhesive and complete the area from the starting board to the wall. To fit the last piece, lay it upside-down with the tongue edge parallel to the tongueedge of the piece next to it, the short end butting up against the wall. Mark thecutting line on the back of the board and cut it to the correct width (save the cutoff piece for the second row). Turn it over, fit and glue it in place.
INSTALL UNDERLAYMENTSFLOATING INSTALLATIONInstall 6-mil Polyethylene vapor barrier over entire flooring surface. Overlap sheets of Polyethylene 16” and tape edges creating anairtight seal. Using 1/8” foam padding, roll out one roll at a time over vapor barrier being careful not to poke holes or otherwisedamage material during installation. Run padding up walls 1” to 1.5” and secure in place with tape. Join padding sections withtape. Tape down any additional loose edges. A “2-in-1” foam padding /moisture barrier may be substituted for Polyethylene.INSTALLING THE FLOORBoards are installed left to right with the groove side facing the wall. Stagger the ends of the boards a minimum of 8 inches onadjacent rows to avoid creating a stair step or H pattern. Leave a minimum expansion space (equivalent to the thickness of the floor)around all vertical objects such as walls, poles, and stairs. If starting wall is uneven, trace the contour of wall, using a scriber, onto firstrow of planks and cut to size.APPLICATION OF ADHESIVETo secure the wood floor in a floating application, the boards must be bonded with adhesive in the tongue and groove. Werecommend a quality waterproof PVAC glue. The glue must be applied in a continuous 1/8” bead on the top of the tongue on boththe long and short edges.GLUINGDry fit first row using stair-step pattern. Number each plank in the order of installation. When you reach the last plank in first row, turnplank 180 so tongue is flush against tongue of previous plank. Mark the plank and cut to length. Dry fit final plank of row. Begin dryfitting second row, starting with (if possible) left over piece from previous row. Be sure to stagger end of boards at least 8” to achieveeffective staggered pattern. Floating installation is completed by gluing flooring profiles together. Separate first two rows notinginstallation order. Apply a thin bead of glue to the top of the tongue on the side and end of the board. Repeat process withsubsequent planks. Press each board firmly together, tapping profiles lightly with a block and hammer if necessary. Clean excessglue from between boards with a damp cloth. If necessary, you may use straps to hold planks together to prevent gapping betweenrows. Note: Do not use tape on the surface of the floor. Tape may damage the surface and void the finish warranty. Often the last row willnot end with a full plank. When this happens, place a full row of planks on top of the last row installed. Insert a 3/8” spacer againstwall, and using a full width plank, trace distance from wall onto final row. Cut planks for final row to designated width. Apply glueand fit into place. Allow 12 hours before placing furniture on floors and 24 hours before introducing heavy objects or full traffic.Note: Do not install cabinets or walls on top of floating floors.HEATING SYSTEM INSTALLATION OVER RADIANT HEAT (FLOATING INSTALLATION ONLY)Maximum allowable temperature is 80 Fahrenheit.System must be fully operating at normal temperature for a minimum of 21 days prior to floor installation.The heating system must be turned off 24 hours prior to installation and must remain off for 24 hours after installation.Not all wood floors and species are suitable for installation over radiant heat. Please check with your retail sales advisor forsuitability of this product over radiant heated subfloors.SUBFLOORNote: Only the pre-installation and structural warranties are valid when installing over radiant heat. The subfloor should be completely dry. Moisture on a dry weight basis must not exceed 1.5% for concrete, and 6–8% for woodsubfloors. A vapor barrier should be installed on all concrete, stone, or mineral subfloors. Starting 2 days after completion of installation, gradually increase the temperature over a 7-day period to normaloperating level. Never allow the floor surface temperature to exceed 80 Fahrenheit. Maintain recommended interior humidity levels at all times, if necessary, by means of humidifiers. Room temperature should not vary more than 15 Fahrenheit season to season. Maintain 35–55% humidity in radiant heated rooms. Heating pipes must be covered with 1” of concrete or be a minimum of 1/8” below bottom of plywood subfloor. Under plywood subfloors, heat transfer plates or insulation must be in place.Important Note: Not all species or types of wood flooring are suitable for installation over radiant heat. There is a great riskof gaps or face checking occurring especially when installed over radiant heating systems. Such occurrences are notmanufacturing defects. Take the above into consideration when choosing a wood floor to be installed over radiant heat. ALL INSTALLATIONS: COMPLETING THE JOBRemove spacer wedges.Cover all expansion gaps along walls and vertical protrusions with baseboard, quarter round or other suitable moldings.Clean, sweep and vacuum installed flooring before use.Avoid placing area rugs on your newly installed hardwood floor for a minimum of two weeks to prevent discoloration.
CARE AND MAINTENANCE GUIDEPREVENTIVE MAINTENANCETo ensure the full benefit of warranties and to extend the beauty of your new hardwood floor, we recommendthe following preventive maintenance steps: Use floor mats at all entrances to help keep dirt and moisturefrom being tracked in (Figure 2.1). Area rugs arerecommended in high traffic areas and at sinks. Mats and arearugs should be slip resistant with backing that will not discolorthe floor. Clean rugs periodically to remove dirt and grit. To help guard against scratches and dents, install feltfloor protectors under furniture legs. It is importantthey are changed on a regular basis to prevent dirt,debris buildup. (Figure 2.2).Rolling castors may damage the floor. Therefore, we do notrecommend them. If you choose to use them, the rubber barreltype or double wheel types are the best option. (Figure 2.2).Do not wear high heel shoes that need repair while walking on yourhardwood floor. Some types of high heel shoes can severely damagethe surface of any floor covering.Keep your pet’s nails trimmed regularly to avoid marring or scratchingthe floorMaintain a healthy humidity range at 35-55%, which may requireeither a humidifier or a dehumidifier. Certain regions within NorthAmerica have extreme changes in humidity levels that can affectall wood floors.For cleaning, Use the appropriate cleaner type for your specificflooring finish. We recommend a cleaning system that does not allowany loose liquid to touch the floor. Suitable hardwood floor cleaner isavailable at most retail floor covering stores. Never use wax or waxproducts. DO NOT USE STEAM MOPS! Contact your floor coveringdealer for recommended maintenance and floor care products foryour specific hardwood flooring. REGULAR MAINTENANCE Do not let sand, dirt and grit build up on your floors. Immediately wipe up wet areas from spills, foreign substances, or wet feet. Dust, sweep and vacuum floors regularly. When using a vacuumcleaner, disengage the beater bar or use the “bare floor” setting toavoid damaging your floor. The vacuum head must be brush or felt,a wand attachment is preferable. (Figure 2.3) NEVER CLEAN OR WET MOP WITH WATER. Water may permanentlydamage the floor. DO NOT USE STEAM MOPS! There are many different types of prefinished hardwood floorsavailable today, and not all maintenance products are suitable forall flooring types. Polyurethane based Aluminum Oxide finishes maybe cleaned with Woodpecker Hardwood Floor Cleaner andapplicator. Oil based finished should be cleaned and maintainedwith WOCA Oil Soaps and Refresher Oils specifically designed forthose products. Consult with your retail sales advisor to determinewhat floor care products are appropriate for use on your floor.
EXCLUSIVE WARRANTYRESIDENTIAL WARRANTIESYour hardwood flooring is produced from the finest raw materials and manufactured with the highest quality control standards andis produced according to strict manufacturing and environmental standards. Our confidence in this product is reflected by theextension of this full lifetime structural and limited finish warranty to the original purchaser of the flooring.PRE-INSTALLATION WARRANTYManufacturer warrants that this product is free of defects and exceeds the industry standards. You and/or your installer should carefullyinspect each plank before installation. Any uncut planks that appear to have defects should not be installed, and quantities over the5% defect tolerance can be returned to the original place of purchase for replacement at no cost to you. Wood is a natural product,containing natural variations in color, tone, and grain. We do not warrant against natural variations in color within the floor or variationsbetween samples and the installed floor. If a defective board is installed, manufacturer will not pay cost of labor for repair or replacementof defect.LIFETIME STRUCTURAL WARRANTYEach hardwood flooring plank is engineered using the most advanced flooring technology available. We guarantee that thisproduct is free from defects in lamination and milling and will remain free of these defects for as long as you own your residence. Inthe unlikely event of delamination, warping, or cupping of the product because of manufacturing defects, Manufacturer will replaceor repair the defective flooring pieces at no cost to you.FINISH WARRANTYYour new hardwood flooring finish is warranted for the amount of years indicated. Your specific product finish warranty willappear on the carton, our website or other product literature. This warranty applies only to residential installations, provided therecommended installation and maintenance procedures are followed.ENVIRONMENTAL WARRANTYAll components of your hardwood flooring are chosen for their responsible environmental impact. All glue used to manufacture thishardwood flooring product does not have harmful levels of gas emissions. The finish does not release any harmful solvents,formaldehyde, or heavy metals. The flooring meets the requirements for both CARB phase II as well as all Lacey Act regulations.EXCLUSIONS TO WARRANTYThe following will void this warranty: Improper Installation. Instructions must be followed including the requirement that the subfloor must be dry before installation. Improper Maintenance. Maintenance instructions must be followed, and the floor cannot be wet mopped. Extreme Conditions. The humidity level in the home must be in the 30-50% range throughout the year using air conditioners,humidifiers, or dehumidifiers as appropriate. Abuse or Misuse. This warranty does not cover damage caused by stiletto heels, heavy furniture or equipment, pet claws, peturine, pebbles or sand or other items that may scratch, indent, or damage the floor. Water Damage. This warranty does not cover damage caused by moisture penetration through the subfloor, flooding, orsimilar water damage. Insect Infestation. This warranty does not cover any insect infestation after the product has left the factory. Downgraded Product. It does not apply to any products designated or sold as B-grade or Cabin grade, which is sold “as is”.Manufacturer excludes and will not pay consequential or incidental damages under this warranty. Repair, refinish, orreplacement of flooring material is the sole remedy. This warranty does not include the cost of labor if the flooring is installed bypersons other than professional installers. A professional installer is one who is licensed by the NWFA or has been contractuallycommissioned by an authorized floor covering retailer. There are no other warranties, including merchantability or fitness for aparticular purpose, expressed or implied other than those listed within this warranty. This warranty will not be deemed to havefailed its essential purpose while manufacturer is willing to repair or replace defective goods. This limited warranty is made solelyto the original purchaser and is not transferable under any circumstances. Some states do not allow the exclusion or limitation ofincidental or consequential damages and therefore, this exclusion may not apply. This warranty gives you specific legal rights,which may vary from state to state.Warranty ServiceTo obtain service under this warranty contact your dealer.You may also contact:Swiff-Train Company, 10850 Train Court, Houston, Texas 77041, U.S.A. Telephone:800-929-1222 Email: resolutions@swiff-train.com www.swiff-train.comRevised 12.2020
HVAC systems should be fully operational at least 14 days prior to flooring installation, maintaining a consistent room temperature between 60 -80 Fahrenheit, and relative humidity between 35-55%.