Transcription
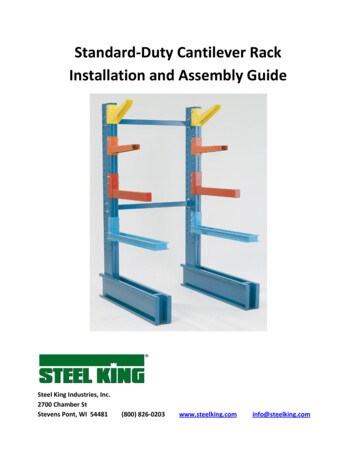
Standard‐Duty Cantilever RackInstallation and Assembly GuideSteel King Industries, Inc.2700 Chamber StStevens Pont, WI 54481(800) 826‐0203www.steelking.cominfo@steelking.com
Steel King Industries, IncStandard‐Duty Cantilever Installation GuideASSEMBLY INSTRUCTIONS:Steel King Industries recommends that this product be assembled only by qualified personnel,experienced in assembly of storage racks, and knowledgeable of all safety regulations andpractices. These instructions are intended only for use by qualified individuals using all propersafety equipment.These standard‐duty cantilever racks are heavy, and if not properlysecured during installation and assembly could fall, possible causinginjury or death as well as damage to property.Contact Steel King Industries or your local Steel King Representative for the name and contactinformation of a qualified installer. Users of this information agree to indemnify and holdharmless Steel King Industries from any and all liability.Step #1: Check the MaterialA. Check to make certain that all materials have been received. Materials should be checkedagainst the packing lists and Bill of Lading.B. Notify the shipper immediately of any shortages or product damage.Step #2: Check the Area:A. Clear the area where the rack system is to be located.B. Check the area for all obstructions, such as lights, heating ducts, pipes, building columns,etc., to insure a clear area for the installation of the standard‐duty cantilever rack.2
Steel King Industries, IncStandard‐Duty Cantilever Installation GuideStep #3: Lay Out Floor:Recommended tools: Tape MeasureChalk LineA. Establish the rack lay out by determining the aisle dimensions and the rack position.B. Snap a chalk line establishing the front edge of the upright bases. The chalk line should runthe entire length of the row of rack.Step #4: Assemble Standard Duty Cantilever Rack:Recommended tools: Air compressor,Torque wrench,1 1/8” drive impacts or equivalentA. Distribute the uprights, bases, arms and bracing for assembly near their final installedposition. Use dunnage to protect the floor during this operation.3
Steel King Industries, IncStandard‐Duty Cantilever Installation GuideB. Mark the arm elevations on the uprights. The marks should be below the top of the armconnector plate so as not to show after the arm is bolted in place.Mark arm locationson upright belowthe top of theconnector plate4
Steel King Industries, IncStandard‐Duty Cantilever Installation GuideStep #4: Assemble Standard Duty Cantilever Rack Continued:C. Bolt the arms to the uprights using the 5/8” diameter x 5 1/2” long grade 5 bolts and nuts.Some arm styles require one (1) bolt connections; others require two (2) bolt connections.Torque the bolt to 120 ft‐lbs.Step #5: Erect Upright Columns:Recommended tools: 5Fork truck or other mechanical lifting device,Air compressor,Torque wrench,1 1/8” drive impacts or equivalent
Steel King Industries, IncStandard‐Duty Cantilever Installation GuideA. Using a fork truck, carefully stand the pre‐assembled uprights with arms attached. Pleasebe careful here to protect the floor.B. Assemble a starter bay. A starter bay includes two preassembled uprights with attachedarms and all support bracing Standard‐duty cantilever racking with uprights less than 14’ require only horizontalbraces.Standard‐duty cantilever racking with uprights 14’ or higher use pre‐formed X‐braced panels.Starter Bay ConfigurationsUprights Less Than 14 Feet High6Uprights 14 Feet High or More
Steel King Industries, IncStandard‐Duty Cantilever Installation GuideStep #5: Erect Upright Columns ContinuedC. Position and attach horizontal and/or X‐panel bracing using 5/8” x 5 1/2” grade 5 bolts andnuts. Horizontal or X‐panel bracing requires the use of clips on all outside uprightlocations.Tighten all bracing.Clip required onoutside locationD. Now the balance of the uprights can be erected to complete the run. The uprights can bestood either one at a time or in groups of 2.If 2 uprights are to be erected, this should be a bay with the horizontal bracing tightened inplace.Step #6: Square, Plum, Shim, and Anchor:A. Square, plumb the uprights on the chalk lines.B. Shim the uprights and bases to maintain a vertical tolerance of 1/2” or less.Note: Proper shimming is important because it affects the alignment of the arms.7
Steel King Industries, IncStandard‐Duty Cantilever Installation GuideC. Anchor the uprights and bases using 5/8” x 4‐3/4” anchors.Proper Anchor Configurations for Single and Double Sided Standard‐Duty Cantilever RacksSingle Sided, Standard‐Duty Cantilever Anchor Configuration – Top View(2) Anchors RequiredDouble Sided Standard‐Duty Cantilever Anchor Configuration – Top ViewEither Hole, As LongAs Opposite OtherEndChoose OneEither Hole, As LongAs Opposite OtherEnd(3) Anchors Required(One on each end and one in the center)Step #7: Clean Up:A. Vacuum all dust and debris associated with setting anchors.B. Dispose of all dunnage, strapping and debris. Sweep the floor with a broom if necessary.8
Steel King Industries, IncStandard‐Duty Cantilever Installation GuideIf you have any further questions, contact your local Steel King Representative forcustomer assistance or contact Steel King Industries directly at (800) 826‐0203.WARNING: INSTRUCTIONS FOR ASSEMBLY ARE SET FORTH ON THESE PAGES. PROPER ASSEMBLY ISTHE RESPONSIBILTY OF THE PURCHASER AND IS NOT COVERED BY ANY WARRANTY OF THE SELLER.BUYER IS CAUTIONED NOT TO SUBSTITUTE PARTS OR HARDWARE. SELLER DISCLAIMS ALL LIABILITYWITH RESPECT TO ANY SUBSTITUTION OF PARTS OR HARDWARE NOT APPROVED IN WRITING BYSELLER.THE INSTALLATION DETAIL DRAWINGS THAT FOLLOW ARE INTENDED AS BASIC GUIDES TOINSTALLATION OF THE STANDARD COMPONENTS. DEPENDING UPON THE SPECIFICS OF THESYSTEM, THERE MAY BE LIMITIATIONS REGARDING THE USE OF THESE STANDARD COMPONENTSAND/OR A REQUIREMENT FOR SPECIAL INSTALLATION TECHNIQUES. ADDITIONAL INFORMATIONIS FOUND IN STEEL KING PRICE BOOKS, PUBLISHED TECHNICAL DOCUMENTS, COMPREHENSIVEINSTALLATION DRAWINGS, AND OTHER MATERIALS.9
Steel King Industries, Inc Standard‐Duty Cantilever Installation Guide 5 Step #4: Assemble Standard Duty Cantilever Rack Continued: C. Bolt the arms to the uprights using the 5/8" diameter x 5 1/2" long grade 5 bolts and nuts. Some arm styles require one (1) bolt connections; others require two (2) bolt connections.