Transcription
MediaShareUser GuideEnglish
ContentsIntroduction3MediaShare Hardware Overview3Front Panel3Back Panel3LED and Connector Descriptions3Accessingg MediaShare4Local Area Networking4MediaShare Agent4Mapped Drives4Remote Access4Resettingg Your MediaShare5Easyy Transfer Button5Accessing Transferred Content6MediaShare Agentg6Usingg MediaShare Agentg6Starting the MediaShare Agent6MediaShare Agent Menu Options7MediaShare Applicationpp10Startingg the MediaShare Applicationpp10Logginggg g into the MediaShare Applicationpp10MediaShare ApplicationppLandingg Pageg11Media Libraryy12Accessing the Media Library12Media Sources14Working with Media Source Folders15Folder Options18Albums21Working with Albums22Renaming an Album22Working with Files26Shuffle26Adding a Caption28Working with Images28Setting up Contacts29Social Media30Backupp myy MediaShare31Working with Backup my MediaShare31Preferences34Displaying the Preferences page34User Preferences35Server Preferences36Administration402
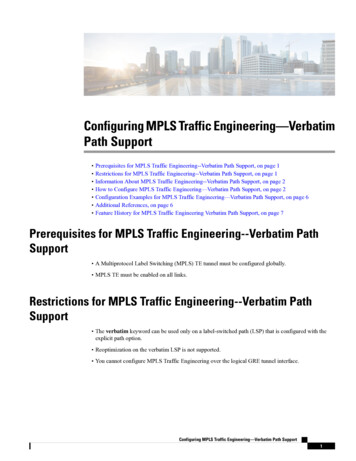
IntroductionThis chapter provides an overview of the Verbatim MediaShare system and covers the unit’s physical features, and initial setup steps. Topicsdiscussed in this chapter include: MediaShare Hardware Overview Accessing the MediaShare Resetting Your MediaShareMediaShare Hardware OverviewThis section introduces the MediaShare hardware components, including displays, ports and buttons.Front PanelThe front panel of the MediaShare includes an Easy Transfer button which is used to quickly and easily transfer all files and folders froma USB drive to MediaShare through the USB port also on the front. Status LED’s are also included to indicate the active/inactive status ofthe system.USB Port used with Easy Transfer ButtonEasy Transfer ButtonStatus LEDStatus LED’sPurposeLED StatusLeft LEDHDD ActivitySolid Green: Ready status.Blink Blue: Read/write access tointernal hard driveBlink Orange: System powering off.Middle LEDRear USB port(s) activityBlink Orange: Read/write activity to USB.Blink Blue: Read/write activity to internalhard driveRight LEDeSata port activityBlink blue during access to eSata hard driveBack PanelLED and Connector DescriptionsThe function of each MediaShare item is described in the following table.3
locationItemActivityDescriptionFrontEasy transferbuttonPush button to initiate transferTransfer all data from USB device to MediaShareFrontFront USB PortUSB port connection used withEasy Transfer buttonUsed with easy transfer button on front toautomatically transfer all data from connecteddevice to MediaShareFrontUSB Port LEDBlinks orangeBlinks orange when data transfer is proceedingbetween MadiaShare and USB deviceBackPower ButtonPush button on back of unit to turn on and offTurn on the MediaShare: Press onceTurn off the MediaShare: To correctly shutdownyour MediaShare, press and hold the powerbutton for about 5 seconds. the blur light on thefront will blink before shutting offBackEthernet PortPlug Ethernet cable into port located on back ofunit to routerConnect your router. Gigabit EthernetconnectionBackeSata PortConnect an eSata drive to eSata portConnecting an eSata drive will initiatemirroring functionalityBackUSB Port(s)Plug in an external device into the USB port(USB Storage or USB printer)Upload, download content from a connectedUSB drive. Print to a connected USB printerBackPower CableSocketPlug power cable into socket located on theback of unitPower on the MediaShare systemBackReset ButtonPush Reset buttonPushing will reset MediaShare to factorydefault settingsAccessing MediaShareMediaShare can be accessed in several ways. Depending on your needs and location, you can use one or all of the following methods toaccess your MediaShare.Local Area NetworkingUsing default network browsing tools (such as My Network Places), any system connected to your home network will recognize the MediaShareas a computer in your Workgroup. To access MediaShare on your LAN, open a browser and enter: http:// ipaddress /?login MediaShare AgentThe MediaShare Agent is software installed on a PC or Mac and is available from the bottom menu bar. During installation, itautomatically adds a shortcut icon on your desktop that directly opens the MediaShare folders. This is a drag-and-dropinterface just like any other file or folder on your hard drive and is available on demand from the shortcut. See Chapter 2,“MediaShare Agent” for more information.Mapped DrivesIn a Windows XP, Vista, 7 environment, the MediaShare agent automatically maps three drive letters (x, y and z) to network shares on theMediaShare. This provides a simple drag-and-drop interface, persistently available from within the My Computer window.Remote AccessMediaShare data can be accessed over the Internet using any web browser, which means you could take a notebook computer anywhere withwireless network connectivity and securely reach across the Internet to your private data at home. Files can be shared and even uploaded witha drag-and-drop interface, however only specific default folders can be shared over the InternetTo access and remotely copy files to and from your MediaShare:1. Go to http://www.myverbatim.com and login to your MediaShare device.2. Enter your MediaShare Name that you selected when you set up your device.3. Enter your Username and Password that you created during Setup.4. Click Sign In.4
Resetting Your MediaShareYour MediaShare system may need to be reset under the following conditions: When you want to change the name of your MediaShare system. When you forget your user id or password.Reset from the CD1. Insert your MediaShare Installation CD and run mediasharesetup.exe.You do not need to uninstall the software before resetting the system.2. Click the Documentation, Tools and More button.3. Click ResetReset Button1. Push the reset button on the back of your MediaShare for at least 10seconds or more2. MediaShare will be reset.3. Use MediaShare Installation CD to rename the server and setup username, password.Easy Transfer ButtonThe Easy Transfer button is a quick and efficient way to copy files and folders from any USB drive directly to MediaShare. Proceed as follows;1. Connect the USB Drive to the front USB port2. Push the Easy Transfer button for 1 second3. The LED beside the USB port will blink orange while data is being transferred4. Once transfer is complete the LED will stop blinking5. USB drive can then be removed5
Accessing Transferred ContentContent which was transferred from a USB drive using the Easy Transfer button can be accessed in the following folder location;MediaLibrary FamilyLibrary USB-DownloadsFigure 1-1 Easy Transfer Button – USB-Downloads FolderEach time the Easy Transfer button is pushed a new folder with the current date and time will be created. All content will be copied tothis location.MediaShare AgentUsing MediaShare AgentMediaShare Agent runs in the background allowing you to explore folders, open MediaShare Application, or check for updates. MediaShareAgent icon resides on your system tray (PC) or dock (Mac), and normally appears when you start your computer.Right-click the MediaShare Agent icon to display menu options. Selecting Preferences option allows you to also check for software updates tothe desktop applications. Some options vary between a PC and Mac. For example, login status along with Login and Logout options will onlybe shown on a PC.Right-Click the MediaShare Agent iconFigure 2-1 MediaShare Agent Icon and Menu on a PCStarting the MediaShare AgentMediaShare Agent automatically appears when you start your computer. If you exit the MediaShare Agent, the icon will disappear from theicon tray and will need to be restarted for use once more.Start the MediaShare Agent on a PCTo start MediaShare Agent on a PC, navigate to Start Programs Verbatim MediaShare Desktop Applications MediaShare Agent MediaShare Agent6
Start the MediaShare Agent on a MacTo start MediaShare Agent on a Mac, start Finder, browse to Applications MediaShare Desktop Applications, and then launch MediaShareAgentMediaShare Agent Menu OptionsNot logged in/Logged in asThe label at the top of the top of the menu displays who is currently logged into MediaShare Agent, or shows Not logged in, as appropriate.This item is available on a PC only.Figure 2-2 Log In to MediaShare ServerLog InThe Log In menu option allows you to select your MediaShare Server, and then enter your User name and Password.Figure 2-3 Log In to MediaShare Server7
Switch UserIf someone is logged into MediaShare, the Switch user menu options logs out the current user and allows another person to log in.This menu option is available on a PC only.Figure Chapter 2-4 Switch UserLog OutThe Log out menu option closes the current user’s connection to MediaShare Server. Logging out prevents other users from accessing youralbums and MyLibrary folders. To log in again, select Log In and reenter your user name and password information. This menu option isavailable on a PC only.Figure 2-5 Log OutExplore MediaShare Server FoldersMediaShare Folders lets you use Windows Explorer or Mac Finder to work with content on your MediaShare Server. Exploring folders usingthis method allows you to upload files greater than 2GB to the server. If not already logged in, this application prompts you to log in, and thenopens either Windows Explorer or Mac Finder, and displays your FamilyLibrary, MyLibrary and MyComputers folders within a network drive.MediaShare folders are available whether the MediaShare is located locally on the home network or remotely across the internet.Figure 2-6 Explore my MediaShare Folders8
Open MediaShare ApplicationThe Open MediaShare Application menu option starts MediaShare Application, which is visually a user friendly and flexible way to manageyour content and administer settings using a web browser. Launching MediaShare Application opens your default browser, prompts you to login (if not already logged in), and displays the MediaShare Server landing page where you can access your media library folders, view album,set preferences along with other server options.Figure 2-7 Open MediaShare Server Landing PageAlbums. Click the Albums icon to view albums currently available.Media Library. Click Media Library icon to view the contents of your MediaShare Server. From here you can add additional content, manageyour folders, and create albums that you can share with family and friends.Backup my MediaShare. Click Backup My MediaShare to access the server backup management tool allowing you to select which folders arescheduled to backup to a connected drive on one of the back USB ports, view the status of backups and review the amount of remaining spaceon the drive being used to backup MediaShare Server content.Preferences. Click here to change your user preferences or administer your MediaShare Server.PreferencesThe Preferences menu option on MediaShare Server agent allows you to check for software updates to desktop applications, and displays thename and IP address of the MediaShare Server on your home network.The Advanced tab shows the MediaShare Server found on your network.Figure 2-9 Agent PreferencesNote: The Preferences available on MediaShare Agent are different from the Preferences offered on MediaShare Server. For more informationabout MediaShare Server Preferences, see “Preferences” under the Chapter 2 MediaShare Application section.AboutThe About menu option displays the MediaShare Agent version installed on your comuter.Figure 2-10 About MediaShare AgentExitThe Exit menu option closes MediaShare Agent and removes the icon from the system tray.9
MediaShare ApplicationStarting the MediaShare ApplicationThe MediaShare Application runs in your browser, and allows you to access your folders within the media library, view albums, and setpreferences from any web browser. The MediaShare Application is available whether the MediaShare unit is located locally on the homenetwork or remotely across the Internet. The MediaShare Application works the same even with different computers and browsers.There are four ways to launch the MediaShare Application.From the DesktopDouble-click th e Navigate to MediaShare (www) icon located on the desktop. This icon was enabled during installationFrom the MediaShare AgentRight-click the MediaShare agent icon located on the bottom right corner of your computer, and then select Open MediaShare application.From a BrowserOpen a new browser window and navigate to www.myVerbatim.com.From the Start MenuOn a PC. To start the MediaShare Application on a PC, click Start Programs Verbatim MediaShare Desktop Applications QuickConnect Navigate to MediaShare (www).On a MAC. To start the MediaShare Application on a Mac, start Finder, browse to Applications MediaShare Desktop Applications, and thenlaunch the Smart Web shortcut.Logging into the MediaShare ApplicationWhen you launch the MediaShare Application, you will be asked to log in using the credentials you set up when you first installed yourMediaShare system.To log in:1. Select a language. Your language preference may already be set as the default.2. Enter Your MediaShare Name.3. Enter Your User Name.4.Enter Your Password.5.Click the Sign In button.Figure 3-1 MediaShare Application Login Screen10
Premium SubscriptionThe Login page gives you the option to upgrade your subscription. During your 30-day free trial period, all premium services are available.After the trial period, the Premium subscription will expire and you will no longer have access to these additional features unless you upgradeyour subscription. Subscription reminders are delivered via email 7-days before the trial ends, and then daily reminders when 5 days remainin the trial period. If you choose not to upgrade, your trial premium subscription will revert to a standard subscription.To log in:1. Click the Learn About MediaShare Premium button on the Login page.2. Review the benefits.3. Enter Your MediaShare Name, Your User Name and Your Password.4. Click Sign In.Figure 3-2 Premium UpgradeMediaShare Application Landing PageAfter you launch and login to the MediaShare Application, the MediaShare landing page appears. From this screen you have local access tothe Albums, Media Library, Backup my MediaShare and Preferences areas, as well as the Help menu, which contains a link to the User Manualand MediaShare support. You can customize the landing page by adding an image to the background. See “Use as Landing Page Background”under the section “Working With Images”.Figure 3-3 MediaShare Application Landing Page11
Main MenuThe main menu appears at the upper right corner of the Landing Page, and shows your displayname, gives you access to Help, and allows you to sign out of the application.The Help menu provides access to the user manual, and connects directly to MediaShare support.When you enter one of the application areas, such as the Albums area, the main menu on the topwill also contain a “Go To” option. This lets you toggle between the Landing page of that area andthat of the others such as; Media Library, Backup my MediaShare and Preferences.Figure 3-4 Main MenusMedia LibraryThe Media Library is where you go to view or manage all your files.Accessing the Media LibraryFrom the MediaShare landing page click Media Library (Figure 3-5)Note: If you are on of the other pages, click Go To on the Main menu in the upper right corner, and then select Media Library.Figure 3-5 Media Library Launch Page12
Entering the Media Library brings you to the Media Sources page (Figure 3-6) where you can manage your files, folders, and digital media andplace them into albums that you can share with friends and family.Figure 3-6 Media Sources Page of the Media LibraryInformation IconWhen clicked, the information icon located on the top right area of the toolbar provides detailed information about the folder you selected.Figure 3-7 Media Sources Page of the Media LibraryTip of the DayEach time you launch the Media Library, MediaShare will provide a Tip of the Day screen, giving helpful tips and tricks for using your systemto its fullest potential. You can click back or forward to see other tips. If you do not want to see the tips, you can disable it by checkingthe “Don’t show tips” box at the bottom of the screen. To enable it again, go to Preferences on the application home page and selectUser Preferences User Hide help tips Yes/No Submit. For more information, see “Preferences”.Figure 3-8 Media Sources Page of the Media Library13
Media SourcesThe Media Sources section shows your FamilyLibrary folders, MyLibrary folders, and MyComputers folders.FamilyLibraryThe FamilyLibrary folder displays FamilyDocuments, FamilyMusic, FamilyPhotos and FamilyVideos subfolders. These folders are accessibleto all users unless you block user access. These folders can also be shared with digital music adapters (DMAs) making the content availableto media players on the home network. See “Let user access family folder” under “Preferences Administration” and “Preferences ServerPreferences”For more information about working with these folders, see “Working with Media Source Folders”.Figure 3-9 FamilyLibraryNote: FamilyLibrary folders will not be available unless you have been given account access, however, even if access is blocked or Windowsnetworking is disabled, all users can access the FamilyLibrary folders through Windows Explorer/Finder.MyLibraryEach user has their own MyLibrary folders, and only that user can access these folders. The MyLibrary folder contains a users private subfolderscalled MyDocuments, MyMusic, MyPhotos and MyVideos. Content in the MyLibrary folders is private and secure, however that user can sharethe content within these folders with family, friends or the public by placing the content in an album. They can also be shared with DMAs,making the content available to media players on the home network.For more information about working with these folders, see “Working with Media Source Folders”.Figure 3-10 MyLibraryNote: Although the subfolders within MyLibrary and FamilyLibrary are intended for specific file types, any file type can be stored in any folder.14
AlbumsAlbums are created and managed from the MediaLibrary area in the same way as the other folders in Media Sources.An album allows you to group related pictures, music, videos and documents from multiple folders. An album contains references to files, butdoes not contain copies of the files themselves. This way you can have the same file in multiple albums without taking up additional space.However, if you delete a file from the folder, it will no longer be available in the albums. You can add a theme to your album by displayingbackground graphics that come with the MediaShare application. You can leave the album unshared for your own enjoyment, or you can shareit with your family, friends or everyone. The screenshot in Figure 3.11 below shows that an album called “Vacation” has been created, but thereare no files in the album yet.For detailed information about adding files and working with albums, see the “Albums” section in this manual.Figure 3-11 AlbumsWorking with Media Source FoldersSelecting a FolderSelecting a folder highlights the folder name, and displays its subfolders and files in the Files section.1.To select a folder, click the folder name. Figure 3-12 shows that the MyMusic folder is selected from the MyLibrary media source. You’ll seethat an Options menu appears.Figure 3-12 Select the MyMusic folderSee “Folder Options” for more information about these options.Expanding and Collapsing a FolderExpanding a folder shows its subfolders.1. To expand a folder, click the right arrow beside the folder name.2. To collapse a folder, click the down arrow beside the folder name. Collapsing a folder hides its subfolders. This is useful if many folders areopen, and you want to reduce clutter on the screen.15
Adding a FolderAdding a folder creates a new subfolder within the current folder. Using subfolders is a good way to keep your content organized. A new folderwithin FamilyLibrary will be accessible to all users (unless the user’s account blocks access). Only you can access a folder within MyLibrary.1. To add a foldera. Select the area where you want to add the new folder.b. Click the New Folder icon, “ ”, on the MediaSource panel.c. When prompted, enter the name of the folder.d. Click Create.The new folder will show up on the left navigation panel and in the main window.Add Folder IconNew Folder AddedFigure 3-13 Adding a FolderDeleting a FolderDeleting a folder removes it and all its files from MediaShare. Delete folders carefully.1. To delete a foldera. Select the folder from the area you want to delete on the left navigation panel.b. Click the Delete Folder icon.2. Optional Methoda. Select the folder from the main windowb. Click to display the optionsc. Select Delete from the menu. You will be asked to confirm the action.3. Click Yes to delete or No to cancel.16
Select Folder then click the “-“ delete folder icon Optional methodFigure 3-14 Deleting a FolderUploading filesUploading files copies them from your computer to the selected folder. If you upload to your MyLibrary folders, only you have access to them.If you upload a file to a folder within FamilyLibrary, any user with account access permission to this folder will be able to access it. Blockedaccounts will not have access to it. The MediaShare Application allows you to copy a file or set of files that are less than 2 GB. If you want tocopy files greater than 2 GB, use MediaShare Folders. See “Explore MediaShare Folders” or “FTP” sections for more information.1. To upload filesa. Select the destination folder from the left panel or a folder on the main window.b. From the Option menu select Upload, « », to launch the Upload window.c.Select either Manual Upload or Drag and DropUpload FilesFigure 3-15 Upload Files2. Manual Upload (Default method)Manual Upload lets you select individual files.a. Click Manual Upload.b. Click Add File, browse to the file, and then click Open.c. Optionally add more files.d. Click Upload to upload the file(s).e. Once the upload is complete, click Close.Manual UploadFigure 3-16 Manual Upload17
3. Drag and Dropa. Drag and Drop lets you drag multiple files and entire folders from Explorer/Finder.b. Click Drag and Drop. A window appears, prompting you to drag and drop your files here.c. Drag the file from Explorer/Finder and drop it into the window. You can drag multiple files or folders.d. Click Upload to upload the file.e. Once the upload is complete, close the window.Drag and DropFigure 3-17 Drag and DropFolder OptionsThe MediaShare Application uses option commands for working with folders.1. To display the options from the Media Sources list or subfolders, move the mouse over a folder.2. The word Options will appear on the folder.3. Click the arrow to display the option menu.Figure 3-18 Accessing Options from SubfoldersOpenSee “Opening a folder”.AutoplaySee “Playing Songs” and “Playing a Video”.SlideshowPlays all pictures within the folder. See “Running a Slideshow”.DownloadSee“Downloading a file”.18
UploadSee “Uploading files”.Add to AlbumSee “Adding Files to an Album”.Share Selected ItemsSee “Creating a Shared Album”.Share with DMA/Unshare with DMAEnables or disables DMA sharing. See “Sharing files with DMAs”.View DetailsSee “View Details”.Copy / CutSee “Copying a Folder”, and “Copying a file”.RenameSee “Renaming a Folder”, “Renaming an Album”, and “Renaming a file”.DeleteSee “Deleting a Folder”, “Deleting an Album”, and “Deleting a file”.View DetailsViewing details shows information about the selected folder, and allows you to edit it.1. To view detailsa. Select the folderb. Display the Options menuc. Select View Details.The details appear in the Details section, which is displayed beside the Files section. Folder details include the name of the folder, and thenumber of files and folders it contains.2. Alternatively, to view details.a. Select the folderb. Click the Information icon.The details appear in the Details section, which is displayed beside the Files section. Folder details include the name of the folder, and thenumber of files and folders it contains.Opening a folderOpening a folder shows its subfolders, and displays the subfolders and files in the Files section.1. To open a foldera. Double-click the folder name. You can also display the menu, and then select Open.Moving a folderMoving a folder puts it into a different location, along with its subfolders and files.1. To move a folder;a. Drag and drop it to another folder.b. Alternatively, you can cut and paste your files Select the folder you want to move and display the menu. Select Cut. Select the destination folder. Display the menu. Select PasteNote: You cannot cut and paste a folder to another application, and you cannot cut and paste data from another application into the MediaShare Application.19
Figure 3-19 Moving a File or FolderCopying a FolderCopying a folder puts it in an additional location, along with its subfolders and files, while keeping the original folder. If the new location iswithin FamilyLibrary, the folder will be accessible to all users (unless the user’s account blocks access). Only you can access a folder withinMyLibrary.1. To copy a foldera. Select the folder and display the menub. Select Copy.c. Select the destination folder and display the menud. Select PasteNote: You cannot copy and paste a folder to another application, and you cannot copyand paste data from another application into the MediaShare Application.Figure 3-20 Copying a File or FolderRenaming a FolderRenaming a folder changes its name.1. To rename a foldera. Select the folderb. Display the menuc. Select Rename.d. When prompted, enter the new namee. Click Rename.Note: If you rename a folder, and an album contains a reference to a file within the folder, the item will no longer be available from the album.20
Figure 3-21 Rename a folderAlbumsThe Albums section shows the albums you have created using the Media Library, and allows you to edit and share them with other users. Analbum allows you to group related pictures, music, videos and documents from multiple folders. To view your albums select Albums from theLanding Page of the MediaShare application.Displaying the Albums PageFrom the Landing page, click Albums. From one of the other pages, click Home in the Main menu, and then select Albums.Figure 3-22 Albums21
Working with AlbumsAn album contains references to files, but does not contain copies of the actual files. This way you can have the same file in multiple albumswithout taking up additional space. Albums are great ways to make specific content accessible from a library without sharing the entire library.However, if you delete a file from the folder, it will no longer be available in the albums. You can add a theme to your album by displayingbackground graphics that come with the MediaShare application. You can leave the album unshared for your own enjoyment, or you can shareit with your family, friends or everyone.Displaying the Album MenuThe MediaShare Application has a menu with commands for working with albums. To display the menu, move the mouse over an album. Anarrow will appear beside the name. Click the arrow to display the menu.Figure 3-23 Album Menu OptionsRenaming an AlbumRenaming an album changes its name.1. To rename an album, select the album, display the menu, and then select Rename. When prompted, enter the new name, and then clickRename.Note: If you rename an album that is shared with friends or with everyone, the original link will no longer work. However the link will go to a page listing all your albums.Creating an Unshared AlbumYou can add the contents of a folder to a new album that only you can see. The folder can be shared later using the Details area to modify thesettings.1. To add a new unshared albuma. Go to the Media Library section and click the New Album icon.b. Enter the Name of the album and an optional description.c. Select the theme, if desired.d. Click Submit.Once set up, you can drag and drop folders and files from folders into the album. If this is a shared album see “Creating a Shared Album”.Figure 3-24 Create an Unshared Album22
Creating a Shared AlbumYou can add the contents of a folder to a new album. The album can be shared with family and media players on the home network, and withfriends and the public on the Internet. Images in an album can be shared through RSS, Facebook or Flickr.1. To add a shared albuma. Go to the Media Library section and click the New Album icon.b. Enter the Name of the album and an optional description.c. Select the theme, if desiredd. Check the Share this album box.This will open a new set of options. See step 2 for details on these optionsFigure 3-25 Create an Unshared Album2. Set the Album Sharing options.a. Share with other family accounts Checking this option allows you to share the albums with others on the Family network. Sharing analbum with family makes it available to the other MediaShare users, unless their account blocks access. See “Let user access familyfolder”. The album will appear in their Albums page.23
b. Share with friend – Set up your Contacts To share the album with your friends, select Share with friends. Sharing an album with friendsmakes it available to selected contacts. If you check this box, you must add at least one friend. To add a friend, click the plus ( ) signby the icon. This will provide the opportunity for you to add your contacts with whom you want to share your album. See “Setting upContacts”. The first time you share an album with friends, MediaShare will prompt you for your email address. Emails sent by MediaSharenotifying your friends about shared albums will indicate they are from this email address. Each MediaShare user can set their own emailaddress. You can change your email address later.
This chapter provides an overview of the Verbatim MediaShare system and covers the unit's physical features, and initial setup steps. Topics . The MediaShare Agent is software installed on a PC or Mac and is available from the bottom menu bar. During installation, it . Enter your Username and Password that you created during Setup. 4 .