Transcription
PostgreSQL Database HandbookPostgreSQL Database Handbooki
PostgreSQL Database HandbookiiContents12345Introduction and installation11.1What’s PostgreSQL? . . . . . . . . . . . . . . . . . . . . . . . . . . . . . . . . . . . . . . . . . . . . . . . . .11.2Installing PostgreSQL . . . . . . . . . . . . . . . . . . . . . . . . . . . . . . . . . . . . . . . . . . . . . . . . .11.3Populating the database with data . . . . . . . . . . . . . . . . . . . . . . . . . . . . . . . . . . . . . . . . . . .21.4Configuring phppgadmin in Linux . . . . . . . . . . . . . . . . . . . . . . . . . . . . . . . . . . . . . . . . . .31.5PostgreSQL Windows client . . . . . . . . . . . . . . . . . . . . . . . . . . . . . . . . . . . . . . . . . . . . .6Commands and datatypes82.1PostgreSQL commands . . . . . . . . . . . . . . . . . . . . . . . . . . . . . . . . . . . . . . . . . . . . . . . .82.1.1Getting help . . . . . . . . . . . . . . . . . . . . . . . . . . . . . . . . . . . . . . . . . . . . . . . . . .82.1.2Displaying databases and tables . . . . . . . . . . . . . . . . . . . . . . . . . . . . . . . . . . . . . . .92.2PostgreSQL data types . . . . . . . . . . . . . . . . . . . . . . . . . . . . . . . . . . . . . . . . . . . . . . . . 102.3Enumerated types . . . . . . . . . . . . . . . . . . . . . . . . . . . . . . . . . . . . . . . . . . . . . . . . . . . 122.4Summary . . . . . . . . . . . . . . . . . . . . . . . . . . . . . . . . . . . . . . . . . . . . . . . . . . . . . . . 12VACUUM Command Example133.1Updating and removing rows . . . . . . . . . . . . . . . . . . . . . . . . . . . . . . . . . . . . . . . . . . . . . 133.2Introducing VACUUM . . . . . . . . . . . . . . . . . . . . . . . . . . . . . . . . . . . . . . . . . . . . . . . . 153.3Summary . . . . . . . . . . . . . . . . . . . . . . . . . . . . . . . . . . . . . . . . . . . . . . . . . . . . . . . 17PostgreSQL indexes example184.1Introducing indexes . . . . . . . . . . . . . . . . . . . . . . . . . . . . . . . . . . . . . . . . . . . . . . . . . . 184.2Examples . . . . . . . . . . . . . . . . . . . . . . . . . . . . . . . . . . . . . . . . . . . . . . . . . . . . . . . 184.3Unique indexes . . . . . . . . . . . . . . . . . . . . . . . . . . . . . . . . . . . . . . . . . . . . . . . . . . . . 214.4Multicolumn indexes . . . . . . . . . . . . . . . . . . . . . . . . . . . . . . . . . . . . . . . . . . . . . . . . . 214.5Summary . . . . . . . . . . . . . . . . . . . . . . . . . . . . . . . . . . . . . . . . . . . . . . . . . . . . . . . 21Database Creation and Data Population225.1Creating a new database . . . . . . . . . . . . . . . . . . . . . . . . . . . . . . . . . . . . . . . . . . . . . . . 225.2Populating the database . . . . . . . . . . . . . . . . . . . . . . . . . . . . . . . . . . . . . . . . . . . . . . . . 245.3More queries . . . . . . . . . . . . . . . . . . . . . . . . . . . . . . . . . . . . . . . . . . . . . . . . . . . . . 255.4Summary . . . . . . . . . . . . . . . . . . . . . . . . . . . . . . . . . . . . . . . . . . . . . . . . . . . . . . . 26
PostgreSQL Database Handbook678Common Table Expressions276.1Definition of Common Table Expressions (CTE) . . . . . . . . . . . . . . . . . . . . . . . . . . . . . . . . . . . 276.2Non-recursive Common Table Expressions . . . . . . . . . . . . . . . . . . . . . . . . . . . . . . . . . . . . . . 276.3Summary . . . . . . . . . . . . . . . . . . . . . . . . . . . . . . . . . . . . . . . . . . . . . . . . . . . . . . . 31Hot-Standby Database Replication Tutorial327.1Step 0 - Change hostnames and IP addresses as needed . . . . . . . . . . . . . . . . . . . . . . . . . . . . . . . 327.2Step 1 - Configuring the master . . . . . . . . . . . . . . . . . . . . . . . . . . . . . . . . . . . . . . . . . . . . 337.3Step 2 - Configuring the slave . . . . . . . . . . . . . . . . . . . . . . . . . . . . . . . . . . . . . . . . . . . . . 337.4Step 3 - Performing the replication . . . . . . . . . . . . . . . . . . . . . . . . . . . . . . . . . . . . . . . . . . 347.5Step 4 - Testing the replication . . . . . . . . . . . . . . . . . . . . . . . . . . . . . . . . . . . . . . . . . . . . 347.6Troubleshooting . . . . . . . . . . . . . . . . . . . . . . . . . . . . . . . . . . . . . . . . . . . . . . . . . . . . 35Backup, Restore and Migration368.1Backup, restore, and migration strategies . . . . . . . . . . . . . . . . . . . . . . . . . . . . . . . . . . . . . . . 368.2Installing Barman . . . . . . . . . . . . . . . . . . . . . . . . . . . . . . . . . . . . . . . . . . . . . . . . . . . 368.39iii8.2.1Step 1 - Create a dedicated PostgreSQL user in oldserver . . . . . . . . . . . . . . . . . . . . . . . . . . 368.2.2Step 2 - Create the .pgpass file in newserver . . . . . . . . . . . . . . . . . . . . . . . . . . . . . . . . . 378.2.3Step 3 - Set up key-based authentication . . . . . . . . . . . . . . . . . . . . . . . . . . . . . . . . . . . 388.2.4Step 4 - Configure Barman . . . . . . . . . . . . . . . . . . . . . . . . . . . . . . . . . . . . . . . . . . 388.2.5Step 5 - Configure PostgreSQL8.2.6Step 6 - Test the Barman configuration . . . . . . . . . . . . . . . . . . . . . . . . . . . . . . . . . . . . 398.2.7Step 7 - Perform the backup . . . . . . . . . . . . . . . . . . . . . . . . . . . . . . . . . . . . . . . . . 408.2.8Step 8 - Restore the backup on newserver . . . . . . . . . . . . . . . . . . . . . . . . . . . . . . . . . . 41. . . . . . . . . . . . . . . . . . . . . . . . . . . . . . . . . . . . . . . 39Automating backups . . . . . . . . . . . . . . . . . . . . . . . . . . . . . . . . . . . . . . . . . . . . . . . . . 43Connect to PostgreSQL using PHP449.1Installing the software . . . . . . . . . . . . . . . . . . . . . . . . . . . . . . . . . . . . . . . . . . . . . . . . . 449.2Connecting to the database server . . . . . . . . . . . . . . . . . . . . . . . . . . . . . . . . . . . . . . . . . . 459.3Writing the application . . . . . . . . . . . . . . . . . . . . . . . . . . . . . . . . . . . . . . . . . . . . . . . . 469.4Creating a mobile-friendly web page . . . . . . . . . . . . . . . . . . . . . . . . . . . . . . . . . . . . . . . . . 489.5Summary . . . . . . . . . . . . . . . . . . . . . . . . . . . . . . . . . . . . . . . . . . . . . . . . . . . . . . . 50
PostgreSQL Database HandbookCopyright (c) Exelixis Media P.C., 2016All rights reserved. Without limiting the rights undercopyright reserved above, no part of this publicationmay be reproduced, stored or introduced into a retrieval system, ortransmitted, in any form or by any means (electronic, mechanical,photocopying, recording or otherwise), without the prior writtenpermission of the copyright owner.iv
PostgreSQL Database HandbookvPrefacePostgreSQL, often simply Postgres, is an object-relational database management system (ORDBMS) with an emphasis on extensibility and standards-compliance. As a database server, its primary function is to store data securely, and to allow for retrievalat the request of other software applications. It can handle workloads ranging from small single-machine applications to largeInternet-facing applications with many concurrent users.PostgreSQL is developed by the PostgreSQL Global Development Group, a diverse group of many companies and individualcontributors. It is free and open-source software, released under the terms of the PostgreSQL License, a permissive free-softwarelicense. (https://en.wikipedia.org/wiki/PostgreSQL)In this ebook, we provide a compilation of PostgreSQL tutorials that will help you set up and run your own database managementsystem. We cover a wide range of topics, from installation and configuration, to custom commands and datatypes. With ourstraightforward tutorials, you will be able to get your own projects up and running in minimum time.
PostgreSQL Database HandbookviAbout the AuthorGabriel Canepa is a Linux Foundation Certified System Administrator (LFCS-1500-0576-0100) and web developer from VillaMercedes, San Luis, Argentina.He works for a worldwide leading consumer product company and takes great pleasure in using FOSS tools to increase productivity in all areas of his daily work.When he’s not typing commands or writing code or articles, he enjoys telling bedtime stories with his wife to his two littledaughters and playing with them, the great pleasure of his life.
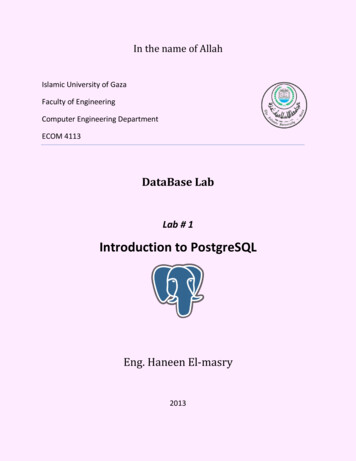
PostgreSQL Database Handbook1 / 50Chapter 1Introduction and installationWith all the Relational Database Management Systems (RDBMs) out there, it may be somewhat difficult to identify the bestsolution for your needs and to take an informed decision as to which one to choose. Thus, in this series we will provide anintroduction to PostgreSQL and share some of the reasons why you may want to consider this solution when exploring theavailable technologies for a database implementation.1.1What’s PostgreSQL?PostgreSQL, also known by its alias Postgres, is a cross-platform object-relational database management system (ORDBMsfor short). Its development started in the University of California at Berkeley in the mid 80s with a project they named simplyPOSTGRES, which did not feature SQL as query language at first. In the mid 90s, two students added SQL to the code inheritedfrom the university, and PostgreSQL was born as an open-source project. Today, PostgreSQL has been long known (and has astrong reputation for) for being able to handle significant workloads with a large number of concurrent users. In addition, itprovides bindings for many programming languages, making it an ideal solution for a client-server environment.1.2Installing PostgreSQLIn this article we will explain how to install a PostgreSQL server in Ubuntu Server 16.04 (IP address 192.168.0.54), how to loada sample database, and how to install a client application (which will serve as an administrative tool) for Linux and Windows.Step 1 - Launch a terminal and install the server and the web-based administration tool:sudo aptitude install postgresql phppgadminStep 2 - Verify that the database service is running and listening on port 5432:systemctl is-active postgresqlsudo netstat -npltu grep postgresThe first command should indicate that unit postgresql is Active, and the second command should show that the service islistening on the right port, as shown in Fig. 1.1:Figure 1.1: Verifying that PostgreSQL is running and listening on port 5432
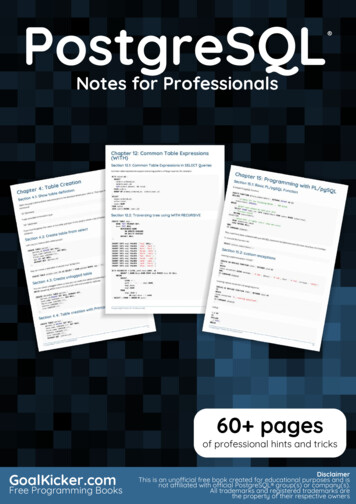
PostgreSQL Database Handbook2 / 50Step 3 - Switch to the postgres Linux account and create a new role for queries:The installation process created a new Linux account named postgres. By default, this is the only account with permissions toaccess the database prompt initially.To switch to the postgres account, dosudo -i -u postgresAnd run the following command to create a new database role named gacanepa (enter the password twice when you’re promptedto do so):createuser gacanepa --no-createdb --no-superuser --no-createrole --pwpromptAlthough the options in the above command are self-explanatory, let’s just say that this particular role will not be allowed tocreate databases or roles, and will not have superuser privileges. Other options for the createuser command are available in itsman page (which you can access from the Linux command prompt as man createuser).Step 4 - Create a new databaseWhile you’re still logged on as postgres, create a database:createdb World db1.3Populating the database with dataOnce we have created the database, it’s time to populate it with actual data we can later query:Step 5 - Download a sample databaseThe wiki links to several sample databases that we can download and use. For this example, we will download and install theworld database, which contains countries, cities, and spoken languages, among other data.wget .0.tar.gz[https://pgfoundry.org/frs/ download.php/527/world-1.0.tar.gz]tar xzf world-1.0.tar.gzStep 6 - Restore the database dump:The database dump file is located at dbsamples-01/world inside the current working directory, as shown in Fig. 1.2:cd dbsamples-0.1/worldpsql World db world.sqlFigure 1.2: Locating the database dump file to restore
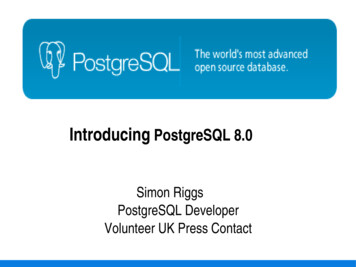
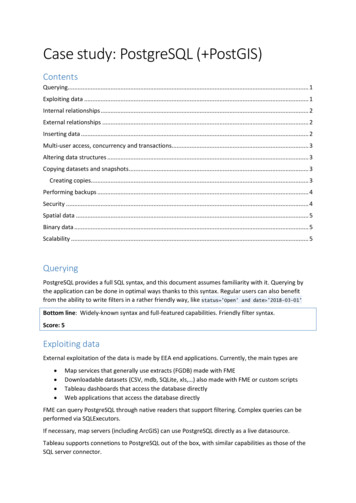
PostgreSQL Database HandbookAs the tables are created and populated with data, the output should be similar to Fig. 1.3:Figure 1.3: Restoring the database contents from the dump fileAfter completing the above 6 steps, we now have a fully-setup PostgreSQL database.1.4Configuring phppgadmin in LinuxIn order to allow remote (LAN) access to the web-based administration tool, follow these steps:Step 7 - Integrate phppgadmin with ApacheOpen /etc/apache2/conf-enabled/phppgadmin.conf, and comment out the following line:Require localthen addRequire all grantedjust below (see Fig. 1.4 for details)3 / 50
PostgreSQL Database Handbook4 / 50Figure 1.4: Configuring access permissions for phppgadminStep 8 - Grant SELECT permissions on World dbSwitch to the postgres Linux account and open the database prompt by typingpsqlThen connect to the World db database:\c World db;Finally, grant SELECT permissions to role gacanepa, and exit (q) the database prompt:GRANT SELECT ON ALL TABLES IN SCHEMA public TO gacanepa;\qSee Fig. 1.5 for details:Figure 1.5: Connecting to a database and granting SELECT permissions to a roleStep 9 - Restart Apache and PostgreSQLWe are almost there. Let’s restart Apache and PostgreSQL:
PostgreSQL Database Handbook5 / 50systemctl restart {apache2,postgresql}Step 10 - Login to phppgadminPoint your web browser to 192.168.0.54/phppgadmin and click on PostgreSQL in the left hand section. Next, enter the role andpassword you created in Step 3 above, as shown in Fig. 1.6:Figure 1.6: Logging on to phppgadminOnce there, click on the World db database and then enter a SQL query of your choice (see Fig. 1.7):SELECT A.name "City", A.district "District",B.name "Country", C.language "Language"FROM city A JOIN country B ON A.countrycode B.codeJOIN countrylanguage C ON A.countrycode C.countrycodeWHERE A.name ’Rosario’ AND C.isofficial ’TRUE’;
PostgreSQL Database Handbook6 / 50Figure 1.7: Our first query to the PostgreSQL database through phppgadminClick Execute at the bottom. The results should be as shown in Fig. 1.8:Figure 1.8: The results of our first query1.5PostgreSQL Windows clientIf you are using Microsoft Windows, in addition to phppgadmin (which you can access through a web browser), you can alsoinstall a client application named pgAdmin in order to connect to the database server. You can download it from the pgAdminPostgreSQL tools page at https://www.pgadmin.org/download/windows.php. The installation will only take a few clicks.Although it is better known in Windows environments, pgAdmin is also available for Mac OS X as well.When you’re done with the installation, make sure the following lines are present in the configuration files. Otherwise, you willNOT be able to connect to the database server from a machine other than where you installed and running.In /etc/postgresql/9.5/main/postgresql.conf:listen addresses ’*’will ensure the database server is listening on all interfaces, and because of the following line in /etc/postgresql/9.5/main/pg hba.conf:hostallall192.168.0.0/24md5
PostgreSQL Database Handbook7 / 50you can now connect to the database server from any machine in the 192.168.0.0/24 network.Once you added the above lines, open pgAdmin from Start All programs pgAdmin III. Then click on File Add serverand fill the connection details (see Fig. 1.9). If you fill the password box as shown below, the credentials will be saved in plaintext in your user profile. If you are using a shared computer that is probably not a good idea, so you may want to leave that fieldblank if that’s the case:Figure 1.9: Configuring access to our database server through pgAdminCongratulations! You have successfully installed a PostgreSQL database server and are now able to access it both from a webinterface and using a client application.
PostgreSQL Database Handbook8 / 50Chapter 2Commands and datatypesIn our previous post (PostgreSQL: Introduction and installation) we explained how to install and use a desktop and a web-basedclient to query a sample database we created and populated. We also introduced two basic commands to connect to a database (cfollowed by the database name) and to quit (q) the PostgreSQL prompt.2.1PostgreSQL commandsIn this tutorial we will introduce you to other useful PostgreSQL-specific (psql for short from now on) commands. To do so, let’sopen the psql prompt by switching to the postgres Linux account and typing psql in the command line.2.1.1Getting helpOnce in the psql prompt, type help and press Enter. The output should be similar to Fig. 2.1:Figure 2.1: Accessing the built-in PostgreSQL helpThe above figure shows the following tips - make sure you remember because they will come in handy more than once. If youneed help with SQL commands, first off type h to view a list of the available options. Once you have identified the command
PostgreSQL Database Handbook9 / 50you need help with, use q to return to the psql prompt and then type h followed by the SQL command you have chosen. Forexample, let’s say we chose ALTER USER. To see the help for that command, do\h ALTER USERas shown in Fig. 2.2:Figure 2.2: Getting help about SQL commandsOn the other hand, if you get stuck with a database management task, do ? and you will see the available psql commands groupedby categories, as seen in Fig. 2.3 (some of them are highlighted in yellow - the output is truncated for the sake of space):Figure 2.3: Getting help with psql commandsAs before, type q to exit the help and return to the psql prompt.2.1.2Displaying databases and tablesIf you find yourself examining a database server you haven’t previously worked with, or if you are not familiar with the structureof a given database, you may want to start off by listing the databases and their respective tables.
PostgreSQL Database Handbook10 / 50To list the databases, simply do lTo view the tables in the World db database (which is the one we imported in our previous tutorial), connect to it and type dtKeep in mind that you can switch from a given database to another (Alberdi in the following example) with c AlberdiThe above commands are shown in Fig. 2.4 below:Figure 2.4: Listing databases and tablesWith the psql commands above we have learned to how to list databases and switch between one and another, how to list tables,and how to get help if we get stuck along the way.2.2PostgreSQL data typesAs a preparation to creating our own databases and tables from scratch (which we will cover in an upcoming tutorial), we needto know how what are the allowed built-in, general-purpose data types for table fields. The PostgreSQL 9.5 documentation liststhe following data types and more:a) Numeric types (with corresponding storage sizes and ranges) are listed in Fig. 2.5:
PostgreSQL Database Handbook11 / 50Figure 2.5: Numeric data typesYou will often choose a numeric type for fields that will store amounts of items, grade results, etc.b) Character types (see Fig. 2.6):These types are used to store regular (English) text or character strings, typically resulting from user interaction.Figure 2.6: Character data typesc) Date/time types (see Fig. 2.7):These data types are used to indicate the date and or time when an event has been recorded in the database. If you require to storethe time zone, there’s a dedicated type for that as well.Figure 2.7: Date time data typesd) Binary type (see Fig. 2.8):You will often use this type to indicate true/false, active/inactive, and enabled/disabled statuses.
PostgreSQL Database Handbook12 / 50Figure 2.8: Binary data typeKnowing the allowed ranges for each data type is essential to choosing the right type for fields. It is also critical as far as diskusage is concerned, as a 2-byte integer (smallint) will occupy less space than a 4-byte one (integer). As a rule of thumb, onlyuse a "larger" data type if and only if a smaller type is not likely to scale well with the expected use and growth of the databasein terms of record numbers.Also, the length of character fields must be taken into account while planning -for example- a web application that will gatherdata through forms or other types of input. While in certain cases users should not be allowed to enter text of indefinite length,you should plan ahead so that they can still enter all that is necessary. Although form validation and sanitization are out ofthe scope of this tutorial, you definitely will want to make sure that your application does not present security holes and is notabuse-prone.The use of data types, among other things, contributes to data consistency in a table by ensuring that a given field will only acceptthe type of data it is configured to store.2.3Enumerated typesBesides the general purpose data types, PostgreSQL allows us to create our own data types in the form of static, ordered set ofvalues (for example, the months of the year, or the days of the week), similarly to the enum type supported in several programminglanguages. We will see the benefit of enumerated types when we create our first database and start inserting data into it.2.4SummaryNow that you have learned how to use basic psql commands and have reviewed the most used data types, we are better preparedto dive deeper into PostgreSQL database administration. Stay tuned for the next tutorial!
PostgreSQL Database Handbook13 / 50Chapter 3VACUUM Command ExampleIn the previous tutorials of this series (“PostgreSQL: Introduction and installation” and “PostgreSQL commands and datatypes”)we explained how to load a sample database (World db) into our PostgreSQL server and how to get help with both SQL and psqlcommands.In real-world scenarios, you will need to perform CRUD (Create, Read, Update, and Delete) operations on database tables allthe time. In this post we will learn how to do U (updates) and D (deletes), and show how to clean up the database by removingthe left overs resulting from these operations. As we will see in a moment, PostgreSQL provides an effective garbage collectorfor this.Without going into the nitty-gritty of what happens under the hood, we can mention briefly that the previous versions of updatedrecords or deleted table entries are not actually removed from the database. Think about the need to rollback a given transactionand this will make sense. They are just “not visible” anymore by regular means, and they keep contributing to the amount of usedhard disk space until a clean-up is performed using the VACUUM psql command. Let’s take a look at it in greater detail later.3.1Updating and removing rowsUsing the World db database, let’s update by 7% the population of all cities in the city table. Before we do that, let’s take a lookat the impact this operation would have on the current data by using a basic SELECT statement.Before a mass update or removal, using SELECT to print the records that will be impacted by that operation is a wise thing todo. Among other things, this can help you prevent undesired results (and the associated later regret), especially if you forget toadd a WHERE clause to the operation.We will print the city name, its current population, and the population after our proposed update. To round the population increaseto the nearest integer, we will use the ROUND function as shown in Fig. 3.1:
PostgreSQL Database Handbook14 / 50Figure 3.1: Displaying the results of a preliminar SQL query before updatingSELECT name AS "Name", population AS "Current population", ROUND(population * 1.07)New population" FROM city ORDER BY name;AS " -With the AS keyword you can create an alias for the associated field so that the results of the query will use it as header. As youcan see in Fig. 3.1, we renamed name and population to Name and Current population, respectively. In addition, we namedthe results of the mathematical operation as New population.Now let’s do the actual update. In this case we will not use a WHERE clause as we actually want to update all cities. This willresult in the population update of all 4079 cities currently present in the city table, as we can see in Fig. 3.2:Figure 3.2: Updating the city tableUPDATE city SET population ROUND(population * 1.07);Now let’s delete all Australian cities where the Id is greater than 135 (this will exclude Canberra, the capital, which is referencedin the country table). As before, use a SELECT first to examine the records that will be deleted:SELECT name FROM city WHERE countrycode ’AUS’;If you’re OK with it, then proceed with the DELETE operation:
PostgreSQL Database Handbook15 / 50DELETE FROM city WHERE Id BETWEEN 136 AND 143;Refer to Fig. 3.3 for details:Figure 3.3: Selecting records before deleting themOn tables that are heavily updated or where removals are performed constantly, this will translate into a lot of wasted disk space.Keep in mind that when you perform an update on a table or remove a record, the original is kept in the database.3.2Introducing VACUUMTo formally introduce VACUUM, let’s use what we learned in PostgreSQL commands and data types to display the help aboutthis command (see Fig. 3.4):
PostgreSQL Database Handbook16 / 50Figure 3.4: Displaying help about VACUUM\h VACUUM;All of the below commands can be applied to the entire database (no arguments) or a single table (name the table at the end ofthe command).To collect the garbage present in the database, just doVACUUM;However, that will not free up the space used by the old records back to the operating system - it will only clean up the old recordsand then make the space available to be reused by the same table. On the other hand,VACUUM FULL;will ensure that whatever space is freed up will be returned to the operating system.Additionally,VACUUM FULL VERBOSE;will also display messages about what’s going on.That said, let’s perform a full, verbose vacuum on the city table (refer to Fig. 3.5 for details):Figure 3.5: Performing a FULL, VERBOSE VACUUMVACUUM FULL VERBOSE city;As you can see above, VACUUM located and removed the space left behind by the deletion of the 8 records from the city tableearlier. On large scale updates and removals, this will translate into considerable space disk savings.As good as the VACUUM command is, having to run it manually could become a tedious task. Thus, by default, there’s anAUTOVACUUM daemon that is enabled and does the job for you automatically while the database server is running. You can
PostgreSQL Database Handbook17 / 50find more details about its operations in the AUTOVACUUM PARAMETERS section of the main configuration file /etc/postgresql/9.5/main/postgresql.conf.You can verify that the AUTOVACUUM process is running with:ps aux grep autovacuum grep -v grep3.3SummaryFreeing up space in tables that are constantly updated or where records are often deleted not only will help you save space, butalso improve the performance of queries performed on the table. Following the instructions shared in this article you will becontributing to the health of your database and saving valuable storage space.
PostgreSQL Database Handbook18 / 50Chapter 4PostgreSQL indexes exampleIn our previous article we discussed how to free up disk space by vacuuming tables with frequent updates and deletes. Under thehood, this procedure also helps to improve the performance of other CRUD operations performed on those tables. In this tutorialwe will explain how to optimize SELECT queries with WHERE clauses using indexes in PostgreSQL tables.4.1Introducing indexesThe best way to introduce the concept and the use of indexes in a database is using a book analogy. If you buy a new book fora college class, you will most likely start by looking at the index at the end of the book for a particular topic. There is no doubtthat this would be a much faster way to find the information that you need than thumbing through the book from the beginning.Likewise, in the context of databases, an index is an actual structure that references the information found in a given table.Particularly in PostgreSQL, an index consists of a copy of the indexed data along with the corresponding reference to its location.Thus, insert and update queries are expected to become slower on columns with indexes. That said, the first rule of thumbis: “Avoid at the extent possible creating indexes on columns with frequent bulk inserts or updates. Use indexes on columnsthat are mostly read-only or where the volume of insert / update operations is low.” Additionally, indexes can also improve theperformance of update operations that use WHERE clauses.4.2ExamplesLet’s return to the book analogy for a moment and use the World db database to illustrate the need for indexes. Let’s modify alittle the query that we used as an introductory example in the first article of this series:SELECT A.Id, A.name "City", A.district "District", B.name "Country", C.language "Language", CASE WHEN C.isofficial ’TRUE’ THEN ’Yes’ WHEN C.isofficial ’FALSE’ THEN ’No’ END " Official language?" FROM city A JOIN country B ON A.countrycode B.code JOIN countrylanguage C ON A.countrycode C.countrycode WHERE A.Id 72;The above query will return all records where the Id column in the city table is 72. Since we are performing a JOIN operationwith other tables it is to be expected that we will get more than one result. In this case, we got 3 different records based on thedifferent languages associated with this city, as you can see in Fig. 4.1:
PostgreSQL Database Handbook19 / 50Figure 4.1: Our initial queryIf SELECT operations like the above query are performed frequently searching by city.Id, it makes sense to create an index onthat column in order to improve the overall performance. Before we do that, Let’s do an EXPLAIN ANALYZE on this query byprepending this operation to the query itself. This will perform the query and indicate
introduction to PostgreSQL and share some of the reasons why you may want to consider this solution when exploring the available technologies for a database implementation. 1.1What's PostgreSQL? PostgreSQL, also known by its alias Postgres, is a cross-platform object-relational database management system (ORDBMs for short).