Transcription
CHAPTER3Setting Up Geographical Disaster RecoveryRevised: November 15, 2016 OL-28573-02IntroductionThere may be times where Prime Central or the Cisco Prime applications integrated with Prime Centralgo down. To help minimize the amount of downtime for these applications, you can implementgeographical disaster recovery in your network. Let’s begin with an overview of the geographicaldisaster recovery process and a definition of three of its key components.After completing the procedures detailed later in this section, Prime Central and integrated Cisco Primeapplications reside on both a primary and standby server. When one or more of these applications godown on the primary server, you receive a system-generated email notifying you of the problem. To dealwith the problem, you would first initiate switchover to the standby server. Switchover is the manualswitch from one server to a redundant or standby server. By initiating a switchover, you can continue tomanage and monitor your network while you figure out what’s wrong with the primary server. You canalso initiate switchover if you need to perform routine maintenance on the primary server, such asupgrading hardware or installing patches. If you resolve the problem, you switch back to the primaryserver and that’s that. However, if all of your attempts to bring the primary server back into a workingstate fail and it has become completely unreachable, you would then initiate failover. Failover isessentially the same operation as switchover, the difference being that failover indicates a major problemwith the primary server that will require some time to resolve. By initiating failover, the standby servereffectively becomes the new primary server and takes over all network management and monitoringtasks. Before you initiate failover for a server, make sure that you’ve done everything possible to bringthat server back into operation because switching to the standby server could bring about other problems.Finally, when the server previously acting as the primary server is up and running again, you would theninitiate failback, which is the process that reinstates that server as the primary server.In this section, the following topics are covered: How to prepare your network for geographical disaster recovery How to configure monitoring frequency and email notifications How to initiate switchover, failover, and failback How to integrate Cisco Prime applications with the standby server Best practices for geographical disaster recovery implementation, as well as troubleshootinginformationCisco Prime Central 1.5.3 High Availability Installation GuideOL-28573-023-1
Chapter 3Setting Up Geographical Disaster RecoveryPreparing Your Network for Geographical Disaster RecoveryPreparing Your Network for Geographical DisasterRecoveryTo prepare your network for geographical disaster recovery, you will need to configure the following: Prime Central Prime Central Fault Management Application and database replication monitors, which keep tabs on the:– Prime Central portal– Integration layer– The current status of the database– Database replication between the primary and standby nodesTypically, the Prime Central portal, integration layer, and database are located on the same server. Youcan also choose to place these components on multiple servers. If you want the integration layer to resideon its own server, you will need to complete the following procedures twice—once on the portal serverand once on the integration layer server.Note If your environment contains multiple integration layer servers, you will need to complete theseprocedures for each of those servers. Prime Central and Prime Central Fault Management patch need to be applied on both Primary andstandby machines separately. Once the patch is applied on primary, switchover and then apply thepatch on the new Primary machine.Configuring Prime Central for Geographical DisasterRecoveryYou can configure Prime Central for Geographical disaster recovery in a Primary and standby serversetup.Step 1Install Prime Central 1.5.3 onto the server that will act as the primary server.During installation, in the Embedded DB Information window, make sure that: You select the Enable backups on the database check box. You specify the desired archive log location. By default, the archive log location is set to/export/home/oracle/arch.It is critical that you enable backups on the Oracle database. Geographical disaster recovery setup willfail unless you do so.See “Installing Prime Central” in the Cisco Prime Central 1.5.3 Quick Start Guide for detailedinstallation instructions.Step 2Set up Prime Central for geographical disaster recovery on the server that will act as the standby server.a.Copy and unzip disaster recovery v1.5.3.zip into a folder on the standby server.Cisco Prime Central 1.5.3 High Availability Installation Guide3-2OL-28573-02
Chapter 3Setting Up Geographical Disaster RecoveryConfiguring Prime Central for Geographical Disaster RecoveryIn this example, we will use the /root/disaster recovery folder. When setting up geographicaldisaster recovery in your environment, overwrite this folder with the correct one.b.Ensure that the Prime Central database and installer binaries reside in the/root/disaster recovery/scripts/main/installer folder. Specifically, ensure that these files are present:– linuxamd64 12102 database 1of2.zip– linuxamd64 12102 database 2of2.zip– primecentral v1.5.3.binc.Ensure that the primary server is reachable via SSH by the following means:– IP address– Hostname (without domain name, if applicable)– Hostname with domain name (FQDN)d.Navigate to the disaster recovery distribution package folder:# cd /root/disaster recoverye.Enter the following commands to run the setup script:# cd scripts/main# chmod x pc standby setup.sh# ./pc standby setup.shf.When prompted by the setup script, enter the necessary information for the primary (active) andstandby server (such as IP address, hostname and root password).Noteg.In the hostname prompt, enter the FQDN. The host name of the primary server shouldexactly be same as the one that was used when Prime Central was being installed in it.After Prime Central has been set up on the standby server, complete the following tasks:– As the user primeusr, generate a Secure Shell (SSH) key for the primeusr user on both theprimary and standby servers by entering the following commands:# chmod 755 # /usr/bin/ssh-keygen -t rsa -N "" -b 2047 -f /.ssh/id rsa# chmod 600 /.ssh/id rsa– (On the primary server only) Share the primary server's public key with the standby server sothat the dynamic creation of a SSH between the servers does not prompt for a password.As the user primeusr, enter the following commands:# rsync -av /.ssh/id rsa.pub /.ssh/authorized keys# /usr/bin/ssh primeusr@standby-server-hostname "cat /.ssh/id rsa.pub" /.ssh/authorized keys# rsync -av /.ssh/authorized keys primeusr@standby-server-hostname: /.ssh/– (On the Standby server only) Enter the following command:# rsync -av /.ssh/authorized keys primeusr@primary-server-hostname: /.ssh/where standby-server-hostname is the hostname of the standby server.– Verify that the SSH is working and does not prompt for authentication or a password (using theFQDN hostname, non-FQDN hostname, and IP address) on both the primary and standby server.Cisco Prime Central 1.5.3 High Availability Installation GuideOL-28573-023-3
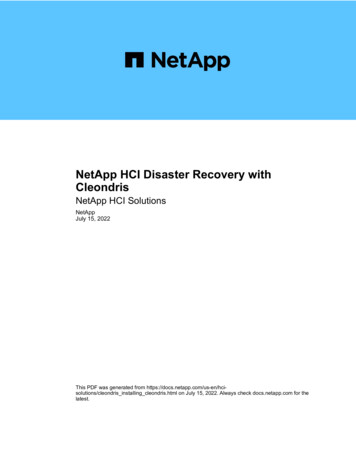
Chapter 3Setting Up Geographical Disaster RecoveryConfiguring Prime Central Fault Management for Geographical Disaster Recovery– If you are prompted to continue connecting, enter yes. (The prompt should appear only the firsttime you use SSH to connect to the node.)h.Integrate the relevant Cisco Prime applications, such as Prime Network and Prime Optical, with thestandby server. Refer to the Integrating Applications with the Standby Server, page 3-11 forinstructions.NotePrime Central services such as, portalctl and itgctl should be running on standby serverduring Domain Manager integration.Configuring Prime Central Fault Management forGeographical Disaster RecoveryYou can choose to not set up Fault Management for geographical disaster recovery at this time. However,keep in mind that you may not be able to do so later.Step 1NoteStep 2If Fault Management and Prime Central are being installed on the same machine, open/opt/primecentral/local/disaster recovery/rsync/fm/includeSync.txt file on the primary server andcomment all the lines in it. After the installation is complete, uncomment these lines.The Prime Central and Fault Management installation in the Discover Recovery (DR) site may fail if step1 is not followed because, some files in the folder “install-directory/faultmgmt” might get syncedbetween Primary and Standby servers. For Best Practices and troubleshooting the Prime CentralInstallation, see Geographical Disaster Recovery Implementation: Best Practices and TroubleshootingInformation.Install Fault Management on the Fault Management primary server.See “Installing Prime Central Fault Management” in the Cisco Prime Central 1.5.3 Quick Start Guidefor detailed instructions.Step 3SSH to the primary Prime Central server as the user primeusr and run the list command to determineFault Management’s instance ID value (in this example, 5).You will need this for Step 4f.Step 4On the standby Prime Central server, verify that the portal and integration layer are up and running.Cisco Prime Central 1.5.3 High Availability Installation Guide3-4OL-28573-02
Chapter 3Setting Up Geographical Disaster RecoveryConfiguring Prime Central Fault Management for Geographical Disaster RecoveryStep 5Set up geographical disaster recovery for Fault Management on the standby server.a.Copy and unzip the distribution package zip file into the /root/disaster recovery folder.b.Copy FM1.5.3Build.tar.gz to the /root/disaster recovery/scripts/main/installer folder.c.Untar FM1.5.3Build.tar.gz:# tar -zxf FM1.5.3Build.tar.gz# cd Disk1/InstData/VM# chmod 755 primefm v1.5.3.bind.Ensure that the Fault Management binary (primefm v1.5.3.bin) resides in the/root/disaster recovery/scripts/main/installer/Disk1/InstData/VM folder.e.Enter the following commands to run the setup script:# cd /root/disaster recovery/scripts/main# chmod x fm standby setup.shf.Verify that the Fault Management component on both the primary and standby server, as well as theprimary and standby Prime Central server, can be reached using their hostname.g.Enter the following command:– For regular standby installation:# ./fm standby setup.sh– For failback scenario:# ./fm standby setup.shh.-gfailback installWhen prompted by the setup script, enter the necessary information for the primary and standbyserver (such as IP address and root password).NoteIn the hostname prompt, enter the FQDN. The host name of the primary server should exactlybe same as the one that was used when Prime Central was being installed in it.When prompted for Prime Central database details, ensure to specify the standby database IPaddress.2. After Fault Management has been set up on the standby server, complete the following tasks:– As the user primeusr, generate a Secure Shell (SSH) key for the primeusr user on both theprimary and standby servers by entering the following commands:# chmod 755 # /usr/bin/ssh-keygen -t rsa -N "" -b 2047 -f /.ssh/id rsa# chmod 600 /.ssh/id rsa– (On the primary server only) Share the primary server's public key with the standby server sothat the dynamic creation of a SSH between the servers does not prompt for a password.As the user primeusr, enter the following commands:# rsync -av /.ssh/id rsa.pub /.ssh/authorized keys# /usr/bin/ssh primeusr@standby-server-hostname "cat /.ssh/id rsa.pub" /.ssh/authorized keys# rsync -av /.ssh/authorized keys primeusr@standby-server-hostname: /.ssh/– (On the Standby server only) Enter the following command:# rsync -av /.ssh/authorized keys primeusr@primary-server-hostname: /.ssh/Cisco Prime Central 1.5.3 High Availability Installation GuideOL-28573-023-5
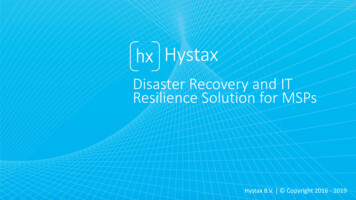
Chapter 3Setting Up Geographical Disaster RecoveryFault Management for Disaster Recovery Synchronization Failurewhere standby-server-hostname is the hostname of the standby server.– Verify that the SSH is working and does not prompt for authentication or a password (using boththe hostname and IP address).– If you are prompted to continue connecting, enter yes. (The prompt should appear only the firsttime you use SSH to connect to the server).– Make sure all the lines in /opt/primecentral/local/disaster recovery/rsync/fm/includeSync.txtfile, on the primary server, are uncommented (which were commented during Step 1).i.Configure Fault Management to send 3GPP alarm notifications to Northbound Interface for bothprimary and standby server:fmctl configimpact centraladmin pwd For example:fmctl configimpact Prime123j.Restart the Prime Central Fault Management:fmctl restartNoteIf centraladmin user’s password is changed, run Step j with the new password.Fault Management for Disaster Recovery SynchronizationFailureThis feature helps the user to get an alarm/notification if sync fails between the primary and the standbynode.If database synchronization fails, an alarm is sent to the user notifying the database sync failure alongwith the possible reason for failure. See Figure 3-1.Figure 3-1Database Synchronization Failure AlarmIf file synchronization fails, an alarm is sent to the user notifying the same.Below is the list of alarms supported for Disaster Recovery Sync Failure:Table 3-1List of Sync Fail AlarmsEvent IDDescriptionServicePC-DR-FILE-SYNC-FAILUREDR Sync Failed. File Sync failure.Disaster RecoveryPC-STANDBY-CONNECT-FAILUREDR Sync Failed. Failed to connect to the logicalstandby database.Disaster RecoveryCisco Prime Central 1.5.3 High Availability Installation Guide3-6OL-28573-02
Chapter 3Setting Up Geographical Disaster RecoveryConfiguring Monitoring Frequency and Email NotificationsTable 3-1List of Sync Fail Alarms (continued)Event IDDescriptionServicePC-DB-NOT-A-LOGICAL-STANDBYDR Sync Failed. Database is not a logical standby. Disaster RecoveryPC-SQL-APPLY-IS-NOT-RUNNINGDR Sync Failed. SQL Apply is not running.Disaster RecoveryPC-SQL-REALTIME-NOT-ON-FOR-STANDBY DR Sync Failed. SQL Real time is not on for thelogical standby.Disaster RecoveryPC-LAG-IN-STANDBY-DBDisaster RecoveryNoteDR Sync Failed. There is a lag in the logicalstandby database.File Sync and DB Sync alarms are ADMC (Automatic Delivery Manual Clear).Configuring Monitoring Frequency and Email NotificationsEven though the values you configure while completing this procedure are automatically synchronizedbetween the primary and standby servers, we recommend that you verify this has taken place. Note thatthe first time you initiate file synchronization, it can take 5 to 10 minutes for the process to start.Step 1Configure the monitoring frequency value.By default, this value is set to 5 minutes for application, file synchronization, and data replicationmonitoring. If you want to keep this as is, proceed to Step 2. If you want to set another value, do thefollowing:a.Log into the primary server as the root user.b.Enter the following commands:# cd primeusr-home-directory/local/scripts/# appmonctl stop# dbmonctl stopc.Open primeusr-home-directory/local/cron/app mon/conf/frequency conf and set the desiredmonitoring frequency value (in minutes) for the following parameters:– FREQUENCY (application)– RSYNC FREQUENCY (file synchronization)– DBMON FREQUENCY (data replication)d.Enter the following commands:# cd primeusr-home-directory/local/scripts/# appmonctl start# dbmonctl startStep 2Open primeusr-home-directory/local/disaster recovery/scripts/cron/app mon/conf/email config andspecify the users that will be notified via email whenever an event occurs, as well as the email addressfrom which these messages will be sent.A sample email config file looks like this:EMAIL IDS email id1@example.com email id2@example.com(recipients of application monitoringmessages)Cisco Prime Central 1.5.3 High Availability Installation GuideOL-28573-023-7
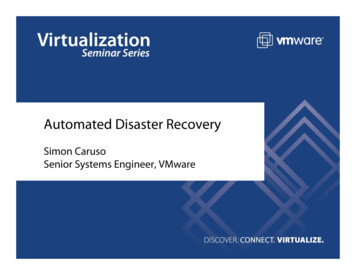
Chapter 3Setting Up Geographical Disaster RecoveryChecking the Status of Disaster Recovery NodeDB EMAIL IDS email id1@example.com email id2@example.com(recipients of database monitoringmessages)SENDER EMAIL source@example.com(sender of application monitoring messages)DB SENDER EMAIL source@example.com(sender of database monitoring messages)Note the following: The Application Monitor uses the sendmail email client. Verify that sendmail has been properlyconfigured to send notification emails. Ensure that each recipient’s email address is separated by a space. You can specify an email alias, provided that it is a valid email address. Only one sender email address can be configured at any given time. After setup, check your email client’s junk folder for any failover-related messages. If necessary, setsimilar messages as being safe to read. If the primary server, standby server, or VM belongs to a lab where DNS configuration is notavailable, open /etc/hosts and add the following entry:server-or-VM-IP-address domain-name If new customized rules file or impact policy is added, the operator should add the entry inprimeusr-home-directory/local/disaster recovery/rsync/fm/include.txt.Checking the Status of Disaster Recovery NodeTo check the status of the disaster recovery node, follow the below steps.Step 1As the root user, log into the standby server.Step 2Enter the following commands:# cd primeusr-home-directory/local/disaster recovery/scripts/main# ./primedr status (for Prime Central)[root@server main]# ./primedr statusPlease wait, fetching -------InactiveActive# ./fmdr status (for Fault Management)[root@server main]# ./fmdr statusPlease wait, fetching ----------InactiveActiveCisco Prime Central 1.5.3 High Availability Installation Guide3-8OL-28573-02
Chapter 3Setting Up Geographical Disaster RecoveryInitiating SwitchoverNoteBy default, the primeusr home directory is /opt/primecentral. You can specify another directory,if necessary.Initiating SwitchoverTo initiate the Switchover process for Prime Central and Fault Management servers, follow the belowsteps.Step 1As the root user, log into the standby server.Step 2Enter the following commands:# cd primeusr-home-directory/local/disaster recovery/scripts/main# ./primedr switch (for Prime Central)# ./fmdr switch (for Fault Management)NoteBy default, the primeusr home directory is /opt/primecentral. You can specify another directory,if necessary.NoteTo make crosslaunch work on upgrade setup, de-register and register the Prime Network afterPrime Central and Prime Network switchover.Initiating FailoverTo initiate the Failover process for Prime Central and Fault Management servers, follow the below steps.Step 1As the root user, log into the standby server.Step 2Enter the following commands:# cd primeusr-home-directory/local/disaster recovery/scripts/main# ./primedr fail (for Prime Central)# ./fmdr fail (for Fault Management)NoteBy default, the primeusr home directory is /opt/primecentral. You can specify another directory,if necessary. Also, External Oracle Database configuration is supported only in standaloneconfiguration and this External Oracle Database configuration is not supported with PrimeCentral DR configuration.Cisco Prime Central 1.5.3 High Availability Installation GuideOL-28573-023-9
Chapter 3Setting Up Geographical Disaster RecoveryInitiating FailbackNoteAfter failover, if “DR sync failed. Database is not a logical standy” alarm appears in the alarmbrowser, ignore it and clear the alarm manually.Initiating FailbackWhen a server that was previously brought into failover is operational again, and all of the geographicaldisaster recovery installation data present before the server failed (which includes the entire databaseand all of the files in the primeusr home directory) has been fully restored, it is ready for failback.Complete the following procedure on that server to reinstate it as the primary server.Step 1If the server’s data is totally erased, you first need to complete the procedure described in ConfiguringPrime Central for Geographical Disaster Recovery, page 3-2 and Configuring Prime Central FaultManagement for Geographical Disaster Recovery, page 3-4. For Prime Central, after you enter./pc standby setup.sh command, the installer detects that you are reinstalling Prime Central on theserver you are reinstating as the primary server. When prompted, enter Y to proceed with the installation.Step 2As the root user, log into the server you want to reinstate as the primary server.Step 3Enter the following commands:# cd primeusr-home-directory/local/disaster recovery/scripts/main# ./primedr failback (for Prime Central)# ./fmdr failback (for Fault Management)NoteAfter failback, if Domain Manager is down in suite-monitoring or if cross-launch fails,de-register and register the respective Domain Manager.Cisco Prime Central 1.5.3 High Availability Installation Guide3-10OL-28573-02
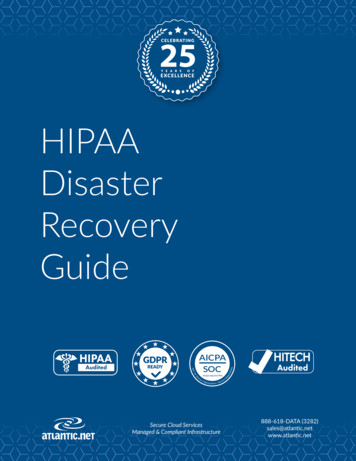
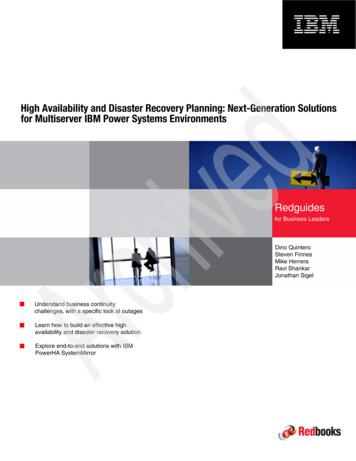
Chapter 3Setting Up Geographical Disaster RecoveryIntegrating Applications with the Standby ServerIntegrating Applications with the Standby ServerComplete the following procedure to integrate applications such as Prime Network and Prime Opticalwith the standby server.Step 1Determine the instance ID of the application on the primary server you want to integrate. To do so, runthe list command as the user primeusr.Say you want to integrate Prime Network. In the following example, Prime Network’s instance ID valueis 8.Step 2Enter one of the following commands, depending on whether you want to specify the necessary valueswhen prompted by the script (in Interactive mode) or all at once (in Non-interactive mode): Interactive mode:# % ./DMIntegrator.sh –r DMIntegrator.prop Non-interactive mode:# % ./DMIntegrator.sh -d DMIntegrator.propserver db-service-name db-user db-password portdm idwhere:– server is the IP address of the standby Prime Central database server– db-service-name is the standby Prime Central database service name (for an embedded Oracledatabase, the default is primedb)– db-user is the username of the standby Prime Central database user– db-password is the password of the standby Prime Central database user– port is the port number of the standby Prime Central database port– dm id is the instance ID value you obtained in Step 1.Cisco Prime Central 1.5.3 High Availability Installation GuideOL-28573-023-11
Chapter 3Setting Up Geographical Disaster RecoveryUpgrading to Prime Central 1.5.3 and Prime Central Fault Management 1.5.3 in a Geographical DisasterUpgrading to Prime Central 1.5.3 and Prime Central FaultManagement 1.5.3 in a Geographical Disaster RecoveryStep 1Stop application monitoring, data replication monitoring and file synchronization on Primary Server.a.Log into the primary server as the root user.b.Enter the following commands:# cd primeusr-home-directory/local/scripts/# appmonctl stop# dbmonctl stopc.Log into the primary server as the user primeusr.d.Enter the following command:# filesyncctl stopStep 2Uninstall Prime Central Fault Management 1.5.2 from standby server. Refer to Cisco Prime Central1.5.2 Quick Start Guide for uninstalling process.Step 3Uninstall Prime Central 1.5.2 from standby server. Refer to Cisco Prime Central 1.5.2 Quick Start Guidefor uninstalling process.Step 4Upgrade Prime Central 1.5.2 to Prime Central 1.5.3 on primary server. Refer to Cisco Prime Central1.5.3 Quick Start Guide for upgrading process.Step 5Upgrade Prime Central Fault Management 1.5.2 to Prime Central Fault Management 1.5.3 on primaryserver. Refer to Cisco Prime Central 1.5.3 Quick Start Guide for upgrading process.Step 6Perform Disaster Recovery setup of Prime Central 1.5.3 on standby server. Refer to Configuring PrimeCentral for Geographical Disaster Recovery, page 3-2 for setup instructions.Step 7Perform Disaster Recovery setup of Prime Central Fault Management 1.5.3 on standby server. Refer tosection Configuring Prime Central Fault Management for Geographical Disaster Recovery, page 3-4 forsetup instructions.Upgrading RHEL Operating SystemThe Operating System (OS) upgrade procedure supports Prime Central 1.5.1 customers to performupgrade of Operating System from RHEL 5.8 to 6.5 and inline upgrade from RHEL 6.5 to 6.7. For moreinformation, refer the Cisco Prime Central RHEL Operating System Upgrade guide.Cisco Prime Central 1.5.3 High Availability Installation Guide3-12OL-28573-02
Chapter 3Setting Up Geographical Disaster RecoveryGeographical Disaster Recovery Implementation: Best Practices and Troubleshooting InformationGeographical Disaster Recovery Implementation:Best Practices and Troubleshooting InformationLog file locations: During geographical disaster recovery setup, refer to the log files located in the logs folder (whichresides in the same folder as the setup scripts). While geographical disaster recovery is taking place, refer to the logs here:primeusr-home-directory/local/disaster recovery/logsProblem Prerequisites check failed.Solution Make sure the server meets all required specifications in terms of: Hard disk space RAM and swap space RHEL versionsProblem Environment setup failed.Solution Do the following: Make sure you run the script as the root user. Verify whether the Expect Unix tool is installed. If not, check the log files in the logs folder for anyerrors that occurred.Problem Oracle database standby setup failed.Solution Make sure that database backups and archive logs are enabled on the primary server.1.Log into the primary server as the user primeusr.2.Enter the following command:# emdbctl –enable backupIf any errors occur, please refer to the Cisco Prime Central 1.5.3 Quick Start Guide for moretroubleshooting information.If backups are already enabled but the Oracle database standby setup failed:1.Log into the database server as the user oracle.2.Enter the following command:# cd /standby/logs3.Check the log file named PCoracleADG.ksh *.log for any errors, where * refers to the latestavailable log file.4.Once the errors have been identified and resolved, clean up the server and run the geographicaldisaster recovery setup process again.Problem Application Monitor always reports that the File Sync operation failed.Solution Make sure that trust has been established between the primary and standby servers for the userprimeusr. If you need to establish trust, perform the tasks described in Step 2g of Configuring PrimeCentral for Geographical Disaster Recovery, page 3-2.Cisco Prime Central 1.5.3 High Availability Installation GuideOL-28573-023-13
Chapter 3Geographical Disaster Recovery Implementation: Best Practices and Troubleshooting InformationSetting Up Geographical Disaster RecoveryProblem Prime Central and Fault Management failback reports that the File Sync operation failed.Solution Make sure that trust has been established between the primary and standby servers for the userprimeusr. If you need to establish trust, perform the tasks described in Step 2g of Configuring PrimeCentral for Geographical Disaster Recovery, page 3-2.Problem Prime Central installation on the standby server failed.Solution Verify that: The standby server meets all prerequisites. You entered the right passwords when prompted by the installer. The server is configured for DNS configured or the /etc/hosts file has the right information.Refer to the Cisco Prime Central 1.5.3 Quick Start Guide for installation troubleshooting information.Problem Application integration on the standby server failed.Solution Make sure that the application’s ID value specified during the integration process is valid. Tocheck, perform the steps described in application’s integration guide.Problem Rsync failed.Solution Make sure that both the primary and standby nodes can communicate via SSH withoutauthentication (the process is described in Step 2g of Configuring Prime Central for GeographicalDisaster Recovery, page 3-2). To view more details on the Rsync failure, navigate toprimeusr-home-directory/local/disaster recovery/logs and open app mon.log.Problem Information for the integration layer is not found in the standby database.Solution Run the following commands:# cd /root/disaster recovery/scripts/main/# ./install esb dr.shProblem Oracle database restore fails on Standby (Inactive) server after performing database restore onPrimary (Active) server.Solution Run the following commands as root user on the Standby (Inactive) server:# cd primeusr-home-directory/local/disaster recovery/scripts/main/# ./recreatestandbyADG.shProblem Prime Central and Fault Management installation in the Discover Recovery (DR) site failedwith the following error log found in“install-directory/IBM Tivoli Netcool OMNIbus Web GUI Install-00.log”2016-04-22 08:23:52.343-04:00 : SEVERE : The specified installation directory for theTivoli Integrated Portal is not empty:/opt/primecentral/faultmgmt/tipv2Either remove all items from the directory or choose another installation directory.from ion Perform the following steps:1.On the Primary server, comment out all the lines in the file:install-directory/ local/disaster recovery/rsync/fm/includeSync.txt on the PrimaryserverCisco Prime Central 1.5.3 High Availability Installation Guide3-14OL-28573-02
Chapter 3Setting Up Geographical Disaster RecoveryGeographical Disaster Recovery Implementation: Best Practices and Troubleshooting Information2.On the Standby server, check if there is any left behind fault management process even after theun-installation, by using the below command:ps -ef grep faultmgmtKill the process if any, by usin
Chapter 3 Setting Up Geographical Disaster Recovery Configuring Prime Central Fault Management for Geographical Disaster Recovery Step 5 Set up geographical disaster recovery for Fault Management on the standby server. a. Copy and unzip the distribution package zip file into the /root/disaster_recovery folder. b.