Transcription
Nursing Procedure Manual
Table of Contents1Introduction1455Description of CathetersPlacementIndications for UseWarnings7Care and Maintenance79101113Catheter Flushing Protocol/Medication AdministrationBlood Draw ProcedureNeedleless Connector/Injection Cap Change ProcedureDressing Change ProcedureClearing Occlusions15 Repair Procedure1516Repair Kit/Specifications TableCatheter Repair Procedure23 Troubleshooting Guide2324252527Aspiration DifficultiesCatheter OcclusionCatheter DamageAir in LineFluid Leakage from Catheter Exit Site29 ReferencesiiHickman Leonard Broviac Central Venous CathetersNursing Procedure Manualiii
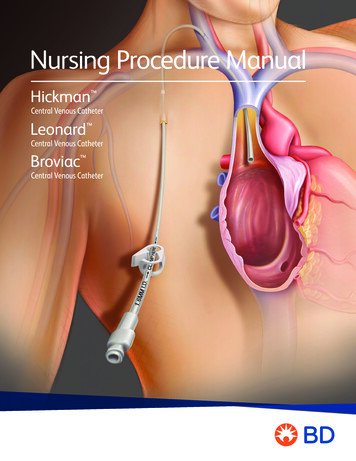
IntroductionDescription of CathetersThe Hickman , Leonard and Broviac Central Venous Catheters are made ofradiopaque medical grade silicone. Each has female luer locking adapter(s)and SureCuff Tissue Ingrowth Cuff for fixation of the catheters in thesubcutaneous tunnel.Catheter repair kits for Hickman , Leonard and Broviac Central VenousCatheters are available.WARNING: Hickman , Leonard and Broviac Central Venous Cathetersare not indicated for power-injection.Single-Lumen Catheter FeaturesAttached clampClamp HereConnector/HubSilicone catheterProtectiveclamping sleeveSureCuff TissueIngrowth CuffivHickman Leonard Broviac Central Venous CathetersNursing Procedure Manual1
Dual-Lumen Catheter FeaturesTriple-Lumen Catheter FeaturesConnectors/HubsConnectors/HubsClamp HereClamp Hererep HeClamClampHereHereClampAttached clampsAttached clampsSilicone catheterSilicone catheterSureCuff Tissue Ingrowth CuffSureCuff Tissue Ingrowth Cuff2Hickman Leonard Broviac Central Venous CathetersNursing Procedure Manual3
PlacementIndications for UseThe catheter tip is placed via one of the large central veins into the superior vena cavaabove the right atrium. The proximal end of the catheter is tunneled subcutaneouslyfor several inches to the desired exit site.Hickman , Leonard , and Broviac Central Venous Catheters are indicated for theadministration of I.V. fluids, blood products, drugs and parenteral nutrition solutions, aswell as blood withdrawal.Superior Vena CavaNOTE: While smaller lumen Broviac catheters have been used successfully for bloodwithdrawal, their small lumen sizes increase the chance of clotting.WarningsClampHereCAUTION: DO NOT USE A SYRINGE SMALLER THAN 10 ML TO FLUSH ORCONFIRM PATENCYPatency should be assessed with a 10 mL or larger syringe with sterile saline. Uponconfirmation of patency, administration of medication should be given in a syringeappropriately sized for the dose. Do not infuse against resistance.Catheter tipplacementInfusion pressures should never exceed 25 psi. Smaller syringes generate morepressure than larger syringes.AtriumWhen catheter damage or connector separation occurs, the catheter should beimmediately clamped or kinked closed to prevent any possibility of air embolism orloss of blood.VentricleUniversal precautions should be observed by all health care professionals whenperforming the procedures included in this manual.The SureCuff Tissue Ingrowth Cuff, attached to the catheter, is positioned in thetunnel. The cuff helps secure the catheter through fibrous tissue ingrowth and createsa physical barrier to help reduce the potential for infection caused by the migration ofbacteria through the subcutaneous tunnel.Chlorhexidine gluconate 2% is the suggested antiseptic to use. Alternatively, 70%isopropyl alcohol swab-sticks followed by povidone-iodine may also be used as anantiseptic. Acetone and tincture of iodine should not be used because they couldadversely affect the performance of the catheter and connectors.CAUTION: Chlorhexidine gluconate solutions should not be used by persons who areknown to be hypersensitive to chlorhexidine gluconate.Follow chlorhexidine gluconate manufacturer’s prescribing information for indications,contraindications, warnings, and precautions.Exit siteSureCuff TissueIngrowth CuffWARNING: Hickman , Leonard , and Broviac Central Venous Catheters are notindicated for power-injection.CAUTION: Some patients may be hypersensitive to heparin or suffer from heparininduced thrombocytopenia (HIT) and these patients must not have their catheterlocked with heparin flush solution.4Hickman Leonard Broviac Central Venous CathetersNursing Procedure Manual5
Care and MaintenanceCatheter Flushing Protocol/Medication AdministrationPurpose··To maintain catheter patency.To prevent mixing of incompatible medications.Routine MaintenanceFlushing frequencies from once daily to once weekly have been found to be effectivewhen the catheter is not in use. Flush with heparin after IV administration of totalparenteral nutrition, IV fluids, or after medications. For frequently accessed catheters(accessed at least every 8 hours), flushing with 10 mL of sterile saline without heparinbetween infusions has been found to be effective.NOTE: Preservative-free 0.9% Sodium Chloride USP is recommended by the InfusionNurses Society. Single-use flushing systems (sterile saline and heparin solution) such aspre-filled syringes or single-dose vials, are the preferred choices for flushing and locking.If multiple-dose containers must be used, each container should be dedicated to asingle patient.NOTE: Flush the catheter using a “pulse” or “stop/start” technique.NOTE: The catheter should be clamped between each use. Catheter clamping sequenceis determined by needleless connector/injection cap directions for use.CAUTION: DO NOT USE A SYRINGE SMALLER THAN 10 ML TO FLUSH ORCONFIRM PATENCY.Patency should be assessed with a 10 mL or larger syringe with sterile saline. Uponconfirmation of patency, administration of medication should be given in a syringeappropriately sized for the dose. Do not infuse against resistance.Supplies····6Hickman Leonard Broviac Central Venous CathetersNursing Procedure ManualGlovesAntiseptic wipes/device containing alcohol, chlorhexidine, or povidone-iodinePre-filled sterile saline syringePre-filled syringe with at least 2.5 mL heparin solution (10 -100 units/mL or perfacility protocol)7
NOTE: The appropriate heparin concentration, volume, and flushing frequency should bebased on the patient’s medical condition, laboratory tests, and prior clinical experience.Blood Draw ProcedurePurposeProcedureNOTE: For Broviac Catheters, follow the procedure below except use 2 mL sterile saline or1.5 mL heparin solution.1. Gather supplies, perform hand hygiene and don gloves per facility protocol.2. Scrub the hub of the needleless connector/injection cap with alcohol, chlorhexidine orpovidone-iodine using friction and a twisting motion for no less than 5 seconds andallow to dry.3. Insert the sterile tip of the saline syringe directly into the needleless connector/injection cap and open clamp.4. Aspirate slowly until a blood return is visualized.··To obtain blood samples for laboratory evaluation, without peripheral venipunctures.To verify venous placement prior to administration of I.V. fluids, blood products,medications and parenteral nutrition solutions.NOTE: While smaller lumen Broviac catheters have been used successfully for bloodwithdrawal, their small lumen sizes increase the chance of clotting. The larger Hickman and Leonard Catheters are intended for both infusion of I.V. fluids, medications andnutritional solutions and for withdrawal of blood samples.Supplies····Gloves7. Flush the catheter with at least 2.5 mL (or per facility protocol) of heparin solution.Do not allow the tip of the syringe plunger to bottom out against the base of thesyringe. This helps prevent a vacuum which can pull a small amount of blood intotip of catheter.···Antiseptic wipes/devices containing alcohol, chlorhexidine, or povidone-iodine8. Clamp the catheter.Procedure5. Flush the catheter with at least 10 mL of sterile saline. Remove syringe.6. Scrub the hub of the needleless connector/injection cap with alcohol, chlorhexidine orpovidone-iodine using friction and a twisting motion for no less than 5 seconds andallow to dry.3 - 10 mL pre-filled sterile saline syringesEmpty sterile syringes (if drawing into syringes)Pre-filled syringe with at least 2.5 mL heparin solution (10 -100 units/mL or perfacility protocol)Vacuum blood collection system and specimen tubes1 vacuum tube with at least a 5 mL volume for discardNOTE: Prior to blood sampling, all infusions should be stoppedMedication AdministrationComplete steps 1-6 from the Routine Maintenance section above prior tomedication administration.1. Administer medication per facility policy, scrubbing between each medication syringeor before attaching the IV tubing.2. Flush catheter with 10 mL of sterile saline between and after each medication.3. Flush the catheter with at least 2.5 mL (or per facility protocol) of heparin solution.Alternatively, may use saline without heparin for frequently accessed catheters(accessed at least every 8 hours). Do not allow the tip of the syringe plunger tobottom out against the base of the syringe. This helps prevent a vacuum which canpull a small amount of blood into tip of catheter.4. Clamp the catheter.1. Gather supplies, perform hand hygiene and don gloves per facility protocol.2. Scrub the hub with alcohol, chlorhexidine or povidone-iodine using friction and atwisting motion for no less than 5 seconds and allow to dry.3. Attach a 10 mL pre-filled sterile saline syringe to the needleless connector/injectioncap, open clamp. Verify blood return and flush the catheter.4. Pull back syringe plunger and aspirate 5 mL of blood (3 mL for pediatric) to discard.(This removes fluid from the catheter that can dilute the specimen.)NOTE: A vacuum collection specimen tube may be used to withdraw the discardsample, but be sure to use one with at least a 5 mL capacity.5. Remove syringe from needleless connector/injection cap and discard the blood filledsyringe per facility protocol.6. Scrub the hub with alcohol, chlorhexidine or povidone-iodine using friction and atwisting motion for no less than 5 seconds and allow to dry.8Hickman Leonard Broviac Central Venous CathetersNursing Procedure Manual9
7.Blood Draw Through Needleless Connector or Hub to HubAttach empty syringe/syringes and draw volumeneeded for tests.Between each syringe, scrub the hub with alcohol,chlorhexidine or povidone-iodine using friction and atwisting motion for no less than 5 seconds and allowto dry.NOTE: Alternatively you may remove the needlelessconnector and attach the syringe directly to thecatheter hub. Scrub the hub and clamp catheterbetween syringes.Blood Draw Through Vacuum Collection SystemAttach vacuum blood collection system to theneedleless connector/injection cap permanufacturer’s directions.Push blood specimen tube into vacuum collectiondevice sleeve so that needle pierces rubber stopper.Blood needed for specimen will flow into specimentube. Change tubes as needed for required tests.Remove vacuum blood collection system and sleevefrom needleless connector/injection cap.8. Scrub the hub with alcohol, chlorhexidine or povidone-iodine using friction and atwisting motion for no less than 5 seconds and allow to dry.9. Flush catheter with 20 mL sterile saline to remove blood from the line, lock withheparin solution and clamp the catheter. Do not allow the tip of the syringe plungerto bottom out against the base of the syringe. This helps prevent a vacuum whichcan pull a small amount of blood into tip of catheter.10. Change needleless connector/injection cap per facility protocol or if blood is seen inthe connector and is not cleared by flushing.··Pre-filled sterile saline syringes (one for each lumen)Antiseptic wipes/devices containing alcohol, chlorhexidine, or povidone-iodineProcedureNOTE: Catheter should always be clamped before needleless connector/injectioncap removal.1. Gather supplies, perform hand hygiene and don gloves per facility protocol.2. Using aseptic technique, open needleless connector/injection cap package andattach sterile saline syringe to connector, maintaining sterility of syringe tip. Prime theneedleless connector/injection cap with saline.3. Clamp catheter.4. Remove the old needleless connector/injection cap.5. Scrub the hub with alcohol, chlorhexidine or povidone-iodine using friction and atwisting motion for no less than 5 seconds and allow to dry.6. Attach new needleless connector/injection cap per manufacturer’s directions and twistclockwise onto the catheter hub. Avoid over-tightening.7. Unclamp the catheter and flush, per flushing protocol.8. Reclamp the catheter.Needleless Connector/InjectionCap Change ProcedureDressing Change ProcedurePurposePurpose·To prevent external infection of the central venous catheter.To minimize potential for infection.FrequencyFrequency···Every seven days, per manufacturer’s directions or per facility policy.Assess the dressing in the first 24 hours after catheter placement and change if there isan accumulation of blood, fluid or moisture beneath the dressing.·After blood withdrawal through the needleless connector/injection cap(per facility protocol).When the needleless connector/injection cap has been removed for any reason.Anytime the needleless connector/injection cap appears damaged, is leaking, bloodis seen in the catheter without explanation, or blood residue is observed in theneedleless connector/injection cap.10·Transparent membrane dressing: change every seven days and as needed if dressingis loose, damp or visibly soiled.·Gauze and tape dressing: change at least every 48 hours and as needed if dressing isloose, damp or soiled.NOTE: With a well-healed tunneled central venous access device, consideration may begiven to no dressing.Supplies··Dressing change frequency after the first 24 hours:GlovesNew sterile needleless connector/injection capHickman Leonard Broviac Central Venous CathetersNOTE: When a transparent semipermeable membrane is applied over gauze, it isconsidered a gauze dressing and must be changed every 48 hours.Nursing Procedure Manual11
NOTE: Chlorhexidine gluconate 2% is the suggested antiseptic to use by the InfusionNurses Society. Alternatively, 70% isopropyl alcohol swab-sticks followed bypovidone-iodine may also be used.·····9. Place antimicrobial patch (e.g. GuardIVa chlorhexidine patch) around the catheter atthe insertion site per facility protocol (optional).10. Apply securement device per institutional policy avoiding the placement of tapedirectly on the silicone catheter material.Supplies·······8. Apply skin protectant per facility policy and allow to dry to the touch.Sterile dressing change kit is preferred or sterile supplies1 pair sterile gloves1 pair clean glovesChlorhexidine gluconate 2% or other antiseptic solution per facility policy11. Position sterile transparent dressing over insertion site and gently smooth from centertoward edge; do not apply excessive tension to skin; shearing may result. Gauze maybe placed around the catheter if needed to absorb exudate from insertion site (gauzedressing will need to be changed at least every 48 hours).Transparent dressing large enough to cover the entire insertion siteSterile gauze (optional if insertion site is bleeding or oozing after placement)Masks (have patient turn head away from insertion site or wear a mask ifthey can tolerate)Securement device, tape or surgical stripsSterile needleless connector/injection capChlorhexidine antimicrobial patch (optional)Broviac CathetersSecure catheter out of sight for infants and children by:··Tunneling catheter to lateral back exit site.Using vests and other clothing to completely cover tubing and exit site.Do not allow child to chew or pull on tubing at any time to avoid catheter damageor breakage.Skin prep padLabelClearing OcclusionsProcedure1. Gather supplies, perform hand hygiene and don clean gloves and mask perfacility protocol.PurposeTo restore patency to a catheter with a partial or total occlusion.2. Open dressing kit or supplies maintaining asepsis.3. Carefully remove the old dressing and discard in accordance with blood and bodyfluids universal precautions. Avoid tugging on the catheter, use of scissors, or othersharp objects near the catheter.12Supplies –Thrombotic Occlusions4. Inspect the exit site for swelling, redness, exudate. During all dressing changes assessthe external length of the catheter to determine if migration of the catheter hasoccurred. The SureCuff Tissue Ingrowth Cuff should be located inside the tunneltrack. Notify physician if the cuff is seen outside the insertion site or if any problemsare observed.······5. Remove gloves and perform hand hygiene.Procedure –Thrombotic Occlusions6. Don sterile gloves.NOTE: Always clamp catheter before removal of needleless connector/injection cap.7. Cleanse skin with chlorhexidine gluconate 2% antiseptic solution using a back andforth scrubbing motion for 30 seconds. Allow to completely air dry. Alternatively, 70%isopropyl alcohol followed by povidone-iodine may can be used.1. Gather supplies, perform hand hygiene and don gloves per facility protocol.Hickman Leonard Broviac Central Venous CathetersGlovesSterile needleless connector/injection capThrombolytic solution mixed per manufacturer’s directionsAppropriately sized syringePre-filled sterile saline syringeAntiseptic wipes/devices containing alcohol, chlorhexidine, or povidone-iodine2. Clamp catheter and remove needleless connector/injection cap.Nursing Procedure Manual13
3. Scrub the hub with alcohol, chlorhexidine or povidone-iodine using friction and atwisting motion for no less than 5 seconds and allow to dry.4. Attach an empty 10 mL syringe to the catheter hub, unclamp catheter and attemptto aspirate. If aspiration is successful, withdraw clots and flush catheter with 10 mLsterile saline and clamp.5. Scrub the hub with alcohol, chlorhexidine or povidone-iodine using friction and atwisting motion for no less than 5 seconds and allow to dry.Repair ProcedureRepair Kit / Specifications Table6. Attach new sterile needleless connector/injection cap (see Needleless Connector/Injection Cap Change procedure). If aspiration is unsuccessful, proceed to step 7.CatheterDescription7. Obtain physician’s order for the use of thrombolytic solution to declot the catheter.Single-LumenNOTE: Cautions and dosing recommendations contained in medication packageinsert should be observed. Solution volume is determined by the drug manufacturer’sprescribing instructions and internal volume of the catheter (volume may be reduced ifcatheter length has been cut).8. Scrub the hub of needleless connector/injection cap with alcohol, chlorhexidine orpovidone-iodine using friction and a twisting motion for no less than 5 seconds andallow to dry.9. Aseptically attach the thrombolytic solution filled syringe to the needlelessconnector/injection cap. Unclamp catheter and administer thrombolytic solution permanufacturer’s directions. To avoid catheter rupture, do not force entire amount intocatheter if strong resistance is felt.10. Allow thrombolytic solution to dwell per drug manufacturer’s directions or perfacility protocol.11. When patency is restored, aspirate 5 mL of blood to assure removal of all drugand clots.12. Discard blood-filled syringe. Scrub the hub with alcohol, chlorhexidine or povidoneiodine using friction and a twisting motion for no less than 5 seconds and allow to dry.Repair KitProduct CodeTemporaryRepair (G)TotalLength (cm)O.D./ID.(mm)Broviac Catheter 2.7F060160024710.9/0.5Broviac Catheter 4.2 F060161022711.4/0.7Broviac Catheter 6.6F060162020902.2/1.0Hickman Catheter 9.6F060163016903.2/1.6Hickman Catheter 7.0F0601680 - white ext.0601690 - red ext.0601760 - body16 (Legs)652.3/0.8 - white1.0 - redHickman Catheter 9.0F0601680 - white ext.0601690 - red ext.0601700 - body16 (Legs)903.0/0.7 - white1.3 - redLeonard Catheter 10.0F0601680 - white ext.0601690 - red ext.0601750 - body16 (Legs)903.3/1.3 - white1.3 - redHickman Catheter 12.0F0601680 - white ext.0601690 - red ext.0601710 - body16 (Legs)904.0/1.6 - white1.6 - red 0601680 - white ext.0601690 - red ext.0601730 - blue ext.0601790 - body18 (Legs)973.3/0.8 - white0.8 - blue1.5 - red 0601680 - white ext.0601690 - red ext.0601730 - blue ext.0601740 - body18 (Legs)904.2/1.0 - white1.0 - blue1.5 - red0601720Silicone Adhesive for Catheter repair(Does not contain catheter components)Dual-LumenTriple-LumenHickman Catheter 10.0F13. Flush catheter per flushing protocol and clamp. Remove and discard syringe.Procedure – Non-Thrombotic OcclusionsHickman Catheter 12.5FFor suspected lipid deposition occlusion when a thrombolytic solution does not clear theblockage, a sterile ethanol 70% solution may be instilled and left in place for two hours.Aspirate and flush with 10 mL of sterile saline. Repeat if occlusion is unresolved.AdhesiveAdhesive Repair KitFor suspected calcium/phosphate precipitation when thrombolytic solution does not clearblockage, a sterile 0.1% N hydrochloric acid solution (use exact priming volume) may beinstilled in the catheter and left in place for one hour. The solution is then aspirated andthe catheter flushed with sterile saline solution. Sodium bicarbonate may also be used forprecipitates that are soluble in a basic solution.14Hickman Leonard Broviac Central Venous CathetersNursing Procedure Manual15
·Catheter Repair ProcedurePurposeTo repair the damaged external portion of Hickman , Leonard , and Broviac CentralVenous Catheters.When cutting the damaged external catheter segment, a sufficient length of the externalcatheter segment must remain to permit repair and prevent catheter retraction underthe skin line.DO NOT USE A SYRINGE SMALLER THAN 10 ML TO FLUSH AFTER REPAIR.ProcedureNOTE: Repair of the catheter body segment requires at leastCAUTION: Clamp catheter with an atraumatic clamp prior to preforming repair procedure.5 cm of undamaged catheter remaining external to the skin exit site. Repair of the adapterleg of multi-lumen catheters requires at least 2.5 cm of undamaged adapter leg remainingproximal to the bifurcation or trifurcation.1. Obtain a new sterile replacement kit of the correct size.CAUTION: The catheter should be clamped with an atraumatic clamp between the catheterexit site and the damaged area when damage occurs and must remain clamped during repair.3. Using aseptic technique, open needed supplies and place on sterile field.Supplies5. Place the cleaned catheter onto a sterile drape.NOTE: Chlorhexidine gluconate 2% is the suggested antiseptic to use. Alternatively, you maydefer to facility policy.6. Remove gloves, perform hand hygiene, and don new sterile gloves.Sterile repair kit4. Scrub the external segment of the catheter with preferred antiseptic solution and gauze andallow to dry. Sterile 4 in. x 4 in. gauze pads may be used to grasp catheter for scrubbing.7. Drape catheter and create a sterile field per facility policy.8. Remove plunger from syringe barrel, inject medical adhesive into syringe barrel, insertplunger, and attach blunt needle.Antiseptic solutionAtraumatic clampGauze sponges, 4 in. x 4 in. (10 cm x 10 cm)PlungerSyringeBlunt NeedleHeparin (volume and concentration per facility policy) Antiseptic wipes/devices containing alcohol, chlorhexidine, or povidone-iodine··············2. Perform hand hygiene, and don mask and clean gloves.Scalpel or sterile scissorsSterile drapesSterile glovesSurgical maskSyringeAdhesiveCapTapeTongue blade or application sticksSterile needleless connector/injection cap pre-filled with sterile salineWarnings16·The replacement segment, splicing sleeve, and stents will repair only the catheter and sizefor which the repair kit is indicated.·Avoid accidental device contact with sharp instruments and mechanical damage to thecatheter material. Use only smooth-edged atraumatic clamps or forceps.Hickman Leonard Broviac Central Venous CathetersNursing Procedure Manual17
Hickman and Leonard Adaptor Leg and Segment Attachment9. Reposition atraumatic clamp near the skin exit site.1. Insert the stent attached to the replacement catheter segment into the catheter lumen untilthe end of the replacement catheter tubing is 3 mm from the cut end of the catheter.ExitSiteExitSiteExitSiteSingle LumenReplacement SegmentStent*SHTW leeveORDamagedCatheterMultiple LumenReplacement SegmentSingle LumenRepairMulti-LumenAdapter Leg RepairMulti-LumenExternalSegment RepairSplice Sleeve10. Cut the external portion of the damaged catheter at a 90 angle just distalto the damaged area.Single LumenDamagedCatheter90 CutClampExit SiteOR90 CutDamagedCatheterLarge StentNOTE: For all catheters, do not remove the splice sleeve that is loose-mounted on thereplacement catheter segment.NOTE: If the replacement segment is to be cut to desired length, the splice connector stent canbe removed and reinserted.2. Dry space between catheter ends with a sterile 4 in. x 4 in. (10 cm x 10 cm) gauze pad. Fillthe 3 mm space with adhesive and push the catheter ends together.NOTE: If the inner lumen of the catheter retracts inside the outer sheath, the outer sheathshould be cut off flush with the inner lumen.Exit SiteWARNING: The length of the remaining external segment must be sufficientto permit catheter repair and prevent catheter retraction under the skin line.18CatheterWARNING: The length of the remaining external segment must be sufficient to permitcatheter repair and prevent catheter retraction under the skin line.ClampHereClampSmallStentBroviac Catheter External Segment AttachmentMultiple LumenClampHere3 mmreHeClamp HereDamagedCatheterpmClaClamp HereClamp HereAttachedClampHickman Leonard Broviac Central Venous Catheters1. Pull inner tubing from outer sheath 1 cm with atraumatic forceps. Insert the spliceconnector stent into the inner lumen until catheter segments are together. Lubricate withIsopropyl 70% alcohol if necessary, but be sure the alcohol is removed or evaporatedbefore proceeding.Nursing Procedure Manual19
432StentOuterSheathInnerTubingSplice Sleeve1ReplacementSegment1 cm1Insert AdhesiveInto Both EndsMultiple Lumen232. Use syringe to apply adhesive onto the exposed inner lumen and ease outer sheath over it.Roll between fingers to evenly distribute the adhesive and wipe away excessive adhesive.4Sterile Field Is No Longer Required3212. Attach sterile needleless connector/injection cap to catheter hub. Remove clamp.Aspirate the air from the replacement segment. Scrub the hub with alcohol,chlorhexidine or povidone-iodine using friction and a twisting motion for noless than 5 seconds and allow to completely air dry. Gently fill the catheter withheparin and reclamp the catheter.CAUTION: Excessive pressure may rupture joint.3. Fasten catheter repair joint to splint (application sticks or tongue blade) with tape.Avoid contact of the adhesive with the patient’s skin for 48 hours.Splice Sleeve Securement (For all catheter repairs)2341. Use syringe to apply adhesive onto the outside of the catheter around the spliced joint,covering an area about 2.5 cm overall length. Slide the splice sleeve down and center it overthe joint. Inject adhesive underneath each end of the splice sleeve. Roll the splice sleevebetween fingers to distribute and extrude excess adhesive. Wipe away excess adhesive.1Splice SleeveNOTE: If necessary, the catheter may be used for infusion after four hours. The jointwill not achieve full mechanical strength for 48 hours. The splint may be removed atthat time.12Insert AdhesiveInto Both EndsSingle Lumen3420Hickman Leonard Broviac Central Venous CathetersNursing Procedure Manual21
Troubleshooting GuideAspiration DifficultiesPossible Causes·Failure to flush according to Catheter Flushing Recommendations, resulting inlumen obstruction.··Catheter opening may suck up against vein wall with aspiration.···Blood clot, fibrin sheath, or particulate matter obstructing valve when catheter is aspirated.–A clot or other obstruction in the catheter lumen can produce a one-way valve effect.During infusion, the catheter wall expands slightly and allows fluid to flow around theobstruction. During aspiration, the catheter wall contracts slightly, tightening downaround the obstruction and preventing aspiration.–Fibrin sheaths can form quickly after insertion of a central venous catheter.Advancement of the fibrin sheath can lead to valve obstruction. Fibrin may be pulledinto and obstruct the catheter valve when aspiration is attempted, but offer noresistance to infusion.Kinked catheter outside or inside the body.–Suture constriction at the catheter skin exit site, cuff, or vessel insertion site.–Catheter may be pulled too tight through skin tunnel, causing kink at vessel insertionsite, or where it curves into the subcutaneous tunnel.–Catheter may be curled or kinked within the vessel, or under the dressing.Malposition of catheter tip (i.e., jugular vein, outside of vein).Compression or transection of the catheter between the clavicle and the first rib. See PinchOff Troubleshooting.Possible Solutions1. Visually check catheter for any exterior kinks, or constricting sutures. If sutures are present,their removal may release the constriction and allow aspiration. A removable suture wing issupplied with the insertion tray to prevent suture constriction at the exit site.2. If no resistance to infusion is noted, attempt to flush with 10 mL sterile saline. Then pull backgently on syringe plunger 2-3 mL, pause and proceed with aspiration.22Hickman Leonard Broviac Central Venous CathetersNursing Procedure Manual23
NOTE: If resistance to infusion is noted, check for signs of extravasation. If present, notifyhealthcare provider of possibility of catheter leakage or transection and embolization.3. Attempt to aspirate with a 20 mL syringe (creates a greater vacuum). If resistance is stillpresent, follow facility protocol for the use of thrombolytic or other solution to clear catheter.4. If occlusion remains, notify healthcare provider. Obtain an order
7. Unclamp the catheter and flush, per flushing protocol. 8. Reclamp the catheter. Dressing Change Procedure Purpose To prevent external infection of the central venous catheter. Frequency Assess the dressing in the first 24 hours after catheter placement and change if there is an accumulation of blood, fluid or moisture beneath the dressing.