Transcription
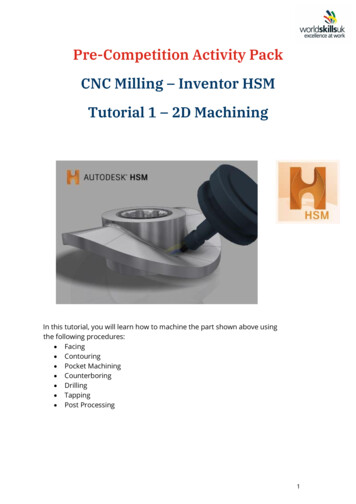
Pre-Competition Activity PackCNC Milling – Inventor HSMTutorial 1 – 2D MachiningIn this tutorial, you will learn how to machine the part shown above usingthe following procedures: Facing Contouring Pocket Machining Counterboring Drilling Tapping Post Processing1
Before proceeding, please create a 3D model ofthe part on the picture below. Drawing can befound on the next page.2
3
To Perform FacingThe tutorial begins with a facing operation to clear the top face of the stock andensure that it is completely flat.1. On the ribbon, click CAM tab2D Milling panelFace.This creates a new facing operation and opens the Operation dialog box whereyou can edit the individual parameters controlling the toolpath, as well as select theactual geometry to machine.Each tab on the Operation dialog box is divided into a number of groups. Inthis tutorial, the necessary settings are changed in each appropriate group as yougo along.Tool tab1. On the Tool tab, click.2. This opens the Tool Library where you can select from existing tools in alibrary ordefine a new tool.3. From the Sample Libraries Tutorial tool library, select tool #1 - Ø50 mmface.4. Clickto close the Tool Library dialog.Geometry tab1. Click the Geometry tab.4
The Face strategy automatically detects the size of the stock which is shown asan orange outline on the part.In this example, the default stock and stock contours work fine and so thestock size need not be specified manually.Automatically detected stock sizePasses tabThe parameters on the Passestab control how the actual facingtoolpath is laid out. The Passextension setting specifies thedistance to extend the passesbeyond the machining boundary.1. Click the Passes tab.2. Change Pass extension to: 5 mmStart the Calculation1. Clickat the bottom of the Operation dialog box, or right-click in the graphics window and select OK from the marking menu, toautomatically start calculating the toolpath.The toolpath is now calculated and a preview appears in the graphics window.5
By default, the cutting parts of a toolpath are coloured in blue, lead moves ingreen, and rapid moves in yellow. The start and end of the toolpath are indicatedby a red and a green triangle respectively.To Contour the PartNext, run a contouring toolpath along the outside of the part.1. On the ribbon, click CAM tab2D Milling panel2D Contour.Tool tab1. On the Tool tab, click.2. Remember: Tool definitions can be saved in a library or just for the part youwork on. In this example, we will save the tools in the part only. You canalways copy the tools to a library at a later time, if you wish to re-use them.3. Add a new tool with modified dimensions.4. Click.6
5. You can use the default tool type and dimensions (an Ø8 mm flat mill) forthis tutorial, but increase the flute length to be able to cut the entire heightof the part (22 mm).6. Click the Cutter tab.7. Change Flute length to: 25mm8. Attention: If you decide to execute this toolpath on a machine tool, ensurethat the tool number corresponds with the tool position in your toolchanger on the machine tool, i.e. that on position 6 you have an 8 mm flatend mill cutter.9. Click the OK button to create your new tool.10.Click the Select button to select the tool for your operation and close theTool Library dialog.Feed & Speed GroupExpand the Feed & Speed group and change the following parameters:1. Spindle speed to: 3000 rpm2. Cutting feedrate to: 800 mm/minAttention: If you decide to execute this toolpath on a machine tool, you willalso need to set the feed & speed parameters according to the material you areusing, and the capabilities of your tool and machine.Geometry tab1. Click the Geometry tab. Ensure that the Contour selections button isactive so that you can select the outside edge of the part geometry to runthe tool around.7
2. Move the mouse over the bottom front edge. When it highlights, click onit. The bottom contour of the part is chain selected automatically.3. An arrow then appears near the chained contour indicating thedirection of the toolpath. You can reverse the direction of a selectededge by simply clicking the arrow.4. Do not close the Operation dialog box if you are satisfied with yourselection, as that will end the 2D Contour operation. Instead, simplyproceed to the next step of this tutorial.Heights tab1. Click the Heights tab. A preview of the heights is shown.8
Preview of heights: The top orange plane represents the Clearance Height. The secondolive green plane represents the Retract Height. The green plane represents the FeedHeight. The light blue plane is the Top Height. The dark blue plane is the BottomHeight.To make sure that the tool gets all the way through the stock, lower the bottomheight by 1 mm.2. From the Bottom Height drop-down menu, select Model bottom.3. Change Bottom offset to: -1.0 mmObserve that the preview plane moves in the graphics window.Tip: Observe that the various heights can also be adjusted using the mini-toolbar.Simply click the heights plane you wish to change and dynamically drag thearrow manipulator to the value you want. You can also enter the value directly inthe mini-toolbar text field.9
Start the Calculation1. Clickat the bottom of the Operation dialog box, orright-click in the graphics window and select OK from the markingmenu, to automatically start calculating the toolpath.The toolpath is calculated and shown in the graphics window.Important: Notice that in the CAM Browser, a new Setup has been createdautomatically. This is automatically done when creating a new operation beforea setup has been created. A setup defines a number of settings used in all theoperations contained within the setup. For example, the WCS can be changed inthe setup.10
Machine the PocketThe next operation is to machine the pocket with the central circular boss on the topsurface of the part.1. On the ribbon, click CAM tab2D Milling panel2D Pocket.Tool tab1. On the Tool tab, click thebutton and select the tool #2 - Ø8mm flat from the library.2. Clickto close the Tool Library dialog.Geometry tab1. Click the Geometry tab. The contours of the pocket to be cleared are selectedhere.2. Click anywhere on the face at the bottom of the pocket.3.4.5. Note: Selecting faces for 2D geometry automatically uses all edges of the face for thecontours. However,if two adjacent faces are selected, the edges they shareare not included in theselection.11
Heights tab1. By default, the 2D Pocket operation machines from the top of the stock to the levelof the selected contours. This is exactly what is needed in this operation, so there isno need to change any heights.Passes tab1. Click the Passes tab.2. This group of settings controls how the 2D pocket toolpath is calculated. Toclear out the pocket, the toolpath is generated in a number of Z levels, startingfrom the top of the stock and going down in steps of 2 mm to the bottom of thepocket.3. Enable the Multiple Depths check box.4. Change Maximum roughing stepdown to: 2.0 mm5. Change Finishing stepdowns to: 16. We do not want to leave any stock in this operation, and since this is a roughingoperation, the default is to leave stock.7. Disable the Stock to Leave check box.Start the Calculation1. Clickat the bottom of the Operation dialog box, or right-click in thegraphics window and select OK from the marking menu, to automaticallystart calculating the toolpath.The toolpath is now calculated and shown in the graphics window.12
Machine the CounterboresThe next step is to machine the two counterbores at the top left and right corners of thepart.1. On the ribbon, click CAM tab2D Milling panelBore.Tool tab1. On the Tool tab, click thebutton and selectthe tool #2 - Ø8 mm flat from the library.2. Clickto close the Tool Library dialog.Geometry tab1. Click the Geometry tab. The Circular face selections button should be active.Select the cylindrical faces of the two holes with the largest diameter at thetop corners of the part.2. If necessary, zoom in and click anywhere on the cylindrical surface of the upperlarge hole.13
3. Do the same to select the other hole in the opposite corner.Passes tab1. Click the Passes tab. Here we control how the helix toolpath is calculated.2. Change Pitch to: 2.0 mmStart the Calculation1. Clickat the bottom of the Operation dialog box, or right-click in thegraphics window and select OK from the marking menu, to automatically startcalculating the toolpath.The toolpath is now calculated and shown in the graphics window.14
Drill HolesThe next step is to drill the two small holes at the top left and right corners of the workpiece.1. On the ribbon, click CAM tabDrilling panelDrill.Tool tabChange the default tool.1. On the Tool tab, click the2. Click thebutton.button.3. This procedure creates a tool with default dimensions and cutting data. The defaultis a Ø10 mm drill. We will use most of the defaults, but change some of the cuttingparameters a bit.4. Click the Cutter tab.5. Change Type to Drill by selecting it from the drop-down menu.6. Change Diameter to 5 mm.15
7. Click the OK button to create your new tool.8. Click the Select button to select the tool for your operation and close the ToolLibrary dialog.Geometry tab1. Click the Geometry tab. Ensure that Selected faces is selected from the Holemode: drop-down menu and that the Hole faces selection button is active.2. Zoom in, and select the cylindrical face of the smaller diameter hole at the top leftcorner of the part.3. Enable the Select same diameter check box. Doing so automatically selects theidentically sized small hole at the top right of the part.16
Heights tab1. Click the Heights tab and enable the Drill tip through bottom checkbox.2. Change Break-through depth to: 1 mmCycle tab1. Click the Cycle tab.2. Select Chip breaking - partial retract from the Cycle type: drop-down menu.Start the Calculation1. Clickat the bottom of the Operation dialog box, or right-click in thegraphics window and select OK from the marking menu, to automatically startcalculating the toolpath.17
To Tap HolesA tapping operation differs only from a drilling operation in the type of cycle chosen fromthe Cycle tab. To simplify this step of the operation, we will just copy the existingdrilling toolpath and edit it to create the new tapping toolpath.1. In the CAM Browser, right-click on the Drill1 node. (Do not be concerned if yourDrill node appears with a number other than Drill1.)2. Select Duplicate from the pop-up context menu. This creates a copy of theoperation below the original one.3. Left-click on the new operation (Copy of Drill1).4. Enter a new name, such as Tapping M6 and press Enter.5. Next, you edit the tool and parameters.6. Right-click on the operation Tapping M6.7. Select Edit from the pop-up context menu.Tool tabCreate and select a new tapping tool.1. On the Tooltab, click the button to open theTool Library2. Click thebutton.3. On the General tab, change Number to 8.4. On the Cutter tab, change Type to Tap (Right Hand).5. Change Diameter to 6 mm.6. Change Flute length to 15 mm.7. On the Feed & Speed tab, change Spindle speed to 400 rpm.8. Click the OK button to create your new tool.18
9. Click the Select button to select the tool for your operation and close the ToolLibrary dialog.Important: If you want to run this toolpath on your machine tool, you may also need to setthe Pitch parameter on the Cutter tab, as well as adjust the feed and speedparameters. The correct values can be found in the tool manufacturer's catalogue.Cycle tabNow, make this a tapping cycle instead of a drilling cycle.1. Click the Cycle tab and select Tapping from the Cycle type: drop-down menu.Start the Calculation1. Clickat the bottom of the Operation dialog box, or right-click inthe graphics window and select OK from the marking menu, to calculate thetoolpath. The resulting toolpath should look like this:You have now completed all the machining strategies for this part. Continue to PostProcess the Toolpaths to finish the tutorial.19
To Post Process the ToolpathsIn this final step of the tutorial, all toolpaths are post processed to produce the NC-code tobe used by the machine tools. Before starting the post processing, it is good practice toregenerate all toolpaths and then simulate them. Doing so enables you to spot any errors inthe toolpaths and rectify them.1. Start by clicking Setup1 at the top of the CAM Browser.2. On the ribbon, click CAM tabToolpath panelGenerate3. You may receive a dialog box message that the selected operation is alreadyvalid. This means that your toolpaths are good. You can click Yes to optionallyregenerate them, or click No to leave them untouched and exit the dialog box.4. Now, click CAM tabToolpath panelSimulate.5. Tip: As an alternative, you can also right-click on the Setup folder in the CAMBrowser and select Simulate (All) from the pop-up context menu.6. The Simulation player is displayed in the graphics window.7.8.9. Click the Play button on the Simulation player to playback the defined toolpaths.10.When the simulation is complete, click the Close button in the Simulationdialog box, or right-click in the graphics window and select Close from the markingmenu.11. Next, click CAM tabToolpath panelPost Process.12.The Post Process dialog box is displayed.13. Tip: As an alternative, you can also right-click on the Setup folder in the CAMBrowser and select Post Process (All) from the pop-up context menu.20
14. Select heidenhain.cps - Generic Heidenhain from the Post Configuration dropdown menu.15. Accept the default output folder or choose another.16. Accept the default program name/number or provide another.17. Start the post processor by clicking the Post button.18. Click the Save button.19. Because the Open NC file in editor check box is enabled by default in thePost Process dialog box, the post processed file is automatically loaded intoInventor HSM Edit.From the editor you can edit, inspect, and tran
CNC Milling – Inventor HSM Tutorial 1 . this tutorial, the necessary settings are changed in each appropriate group as you go along. Tool tab 1. On the Tool tab, click . 2. This opens the Tool Library where you can select from existing tools in a library or define a new tool. 3. From the Sample Libraries Tutorial tool library, select tool #1 - Ø50 mm face. 4. Click to close the Tool .
