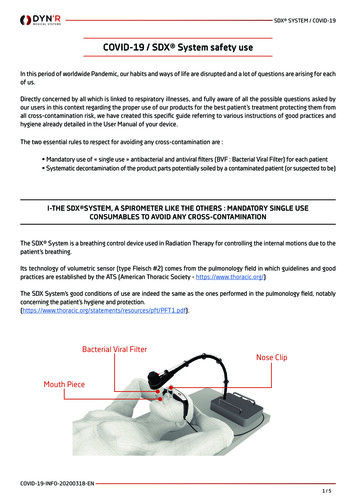
Transcription
SDX 10.5Apr 19, 20 16IntroductionRelease NotesNetScaler SDX Hardware and Component Compatibility MatrixHardware InstallationCommon Hardware ComponentsField Replaceable UnitsHardware PlatformsSummary of Hardware SpecificationsPreparing for InstallationInstalling the HardwareInitial ConfigurationLights Out Management Port of the NetScaler SDX ApplianceGetting Started with the Management Service User InterfaceUpgrading the Components of a NetScaler SDX ApplianceUpgrading the Management ServiceUpgrading the XenServer SoftwareUploading and Applying a XenServer HotfixInstalling the XenServer Supplemental PackUpgrading a NetScaler InstanceManaging and MonitoringCreating SDX Administrative DomainsManaging the RAID disk allocationNetScaler SDX Licensing OverviewManaging InterfacesJumbo Frames on NetScaler SDX AppliancesConfiguring SNMP on NetScaler SDX AppliancesConfiguring Syslog Notificationshttps://docs.citrix.com 1999-2017 Citrix Systems, Inc. All rights reserved.p.1
Configuring Mail NotificationsConfiguring SMS NotificationsMonitoring and Managing the Real-T ime Status of Entities Configured on NetScaler DevicesMonitoring and Managing Events Generated on NetScaler InstancesCall Home Support for NetScaler Instances on NetScaler SDXSystem Health MonitoringConfiguring the Management ServiceConfiguring Authentication and Authorization SettingsConfiguring the External Authentication ServerConfiguring Link Aggregation from the Management ServiceConfiguring a Channel from the Management ServiceBacking Up and Restoring the Configuration Data of the SDX AppliancePerforming a Factory ResetProvisioning NetScaler InstancesBandwidth Metering in NetScaler SDXSetting up a Cluster of NetScaler InstancesConfiguring and Managing NetScaler InstancesConfiguring Authentication and Authorization SettingsConfiguring the External Authentication ServerConfiguring Link Aggregation from the Management ServiceConfiguring a Channel from the Management ServiceBacking Up and Restoring the Configuration Data of the SDX AppliancePerforming a Factory ResetMonitoring NetScaler InstancesUsing Logs to Monitor Operations and EventsUse Cases for NetScaler SDX AppliancesConsolidation When the Management Service and the NetScaler Instances are in the Same NetworkConsolidation When the Management Service and the NetScaler Instances are in Different NetworksConsolidation Across Security Zoneshttps://docs.citrix.com 1999-2017 Citrix Systems, Inc. All rights reserved.p.2
Third-Party Virtual MachinesSECUREMAT RIX GSBInterScan Web SecurityWebsense ProtectorBlueCat DNS/DHCPCA Access GatewayPalo Alto Networks VM-SeriesNITRO APIObtaining the NIT RO PackageHow NIT RO WorksJava SDKREST Web ServicesConverting a NetScaler MPX Appliance to a NetScaler SDX ApplianceConverting a NetScaler MPX 11515/11520/11530/11540/11542 Appliance to a NetScaler SDX11515/11520/11530/11540/11542 ApplianceConverting a NetScaler MPX 8005/8010/8015/8200/8400/8600/8800 Appliance to a NetScaler SDX8010/8015/8400/8600 ApplianceConverting a NetScaler MPX 14020/14030/14040/ 14060/14080/14100 Appliance to a NetScaler SDX14020/14030/14040/ 14060/14080/14100 ApplianceConverting a NetScaler MPX 24100 and 24150 Appliance to a NetScaler SDX 24100 and 24150 ApplianceConverting a NetScaler MPX 14020 40G, MPX 14040 40G, MPX 14060 40G, MPX 14080 40G Appliance to a NetScalerSDX 14020 40G, SDX 14040 40G, SDX 14060 40G, SDX 14080 40G ApplianceConverting a NetScaler MPX 25100 40G, MPX 25160 40G Appliance to a NetScaler SDX 25100 40G, SDX 25160 40GApplianceSDX Command ix.com 1999-2017 Citrix Systems, Inc. All rights reserved.p.3
IntroductionSep 0 1, 20 16T he Citrix NetScaler SDX appliance is a multitenant platform on which you can provision and manage multiple virtualNetScaler machines (instances). T he SDX appliance addresses cloud computing and multitenancy requirements by allowing asingle administrator to configure and manage the appliance and delegate the administration of each hosted instance totenants. T he SDX appliance enables the appliance administrator to provide each tenant the following benefits:One complete instance. Each instance has the following privileges:Dedicated CPU and memory resourcesA separate space for entitiesT he independence to run the release and build of their choiceLifecycle independenceA completely isolated network. T raffic meant for a particular instance is sent only to that instance.T he Citrix NetScaler SDX appliance provides a Management Service that is pre-provisioned on the appliance. T heManagement Service provides a user interface (HT T P and HT T PS modes) and an API to configure, manage, and monitor theappliance, the Management Service, and the instances. A Citrix self-signed certificate is prepackaged for HT T PS support.Citrix recommends that you use the HT T PS mode to access the Management Service user interface.https://docs.citrix.com 1999-2017 Citrix Systems, Inc. All rights reserved.p.4
Release NotesDec 31, 20 13Release notes describe the enhancements, changes, bug fixes, and known issues for a particular release or build of CitrixNetScaler software. T he NetScaler SDX release notes are covered as a part of NetScaler release notes.SDX 10.5 adds support for the following:Console AccessSSL Certificate and Keys for NetScaler InstancesManagement Service StatisticsMonitoring and Managing the Real-time Status of Entities Configured on NetScaler DevicesCommand Line Interface Support for Management InterfaceCall Home Support for NetScaler Instance on NetScaler SDXInitial Setup WizardMonitoring and Managing Events Generated on NetScaler InstancesProvisioning a PaloAlto VM-Series InstanceFor detailed information about SDX 10.5 enhancements, known issues, and bug fixes, see: NetScaler 10.5https://docs.citrix.com 1999-2017 Citrix Systems, Inc. All rights reserved.p.5
NetScaler SDX Hardware and ComponentCompatibility MatrixApr 11, 20 17Before you decide to upgrade any component of NetScaler SDX, make sure to refer the following points:Some NetScaler SDX features have minimum version requirements across various NetScaler SDX components. Refertable 2 for detailed information.Any combinations of Management Service and NetScaler versions are supported as long as they meet minimum versionrequirements for a particular hardware platform.1. Refer T able 1 for NetScaler SDX hardware, Management Service and NetScaler version compatibility.2. Refer table 2 for specific feature-component compatibility.A NetScaler SDX appliance is always shipped with a validated and tested release bundle (that includes a specificcombination of Management Service, XenServer and XS Supplemental Pack versions), and will work out of the box. It isadvised that users looking to upgrade any of these components upgrade to an appropriate release bundle asrecommended on the Citrix download page"XenServer and supplement packs should be upgraded based on a feature’s requirement, else they should be kept asthose shipped from the factory. Refer table 2 to understand the feature-component compatibility information. If youneed to upgrade XenServer and supplemental packs, then you must download the images for XenServer andsupplemental packs from the Citrix NetScaler SDX Download page.Make sure to check the Citrix NetScaler SDX download page for the recommended hot fixes applicable for theManagement Service version.T he latest table 1 "NetScaler and Management Service Versions for NetScaler SDX Platform" and table 2 "NetScaler SDXFeatures and Components Compatibility" are available here.https://docs.citrix.com 1999-2017 Citrix Systems, Inc. All rights reserved.p.6
Hardware InstallationJan 21, 20 16All NetScaler SDX appliances share common components, but different platforms have different additional components.T herefore, installation requirements can vary among platforms. Before installation, make sure that your site is suitable foryour appliance and that you have completed all necessary preparations. T his is also the time to read the cautions andwarnings. You are then ready to mount the appliance in a rack, connect it, and start it up. For initial configuration, you canconnect a computer to the appliance's network or to its serial-console port. After initial configuration, you can configurethe Lights Out Management port, so that you have management access to the appliance even if your network goes down.T he Citrix NetScaler SDX appliance is a multi-tenant platform on which you can provision and manage multiple virtualinstances of NetScaler.T he Citrix NetScaler SDX product line consists of:Citrix NetScaler SDX 8015/8400/8600Citrix Netscaler SDX 11500/13500/14500/16500/18500/20500Citrix Netscaler SDX 11515/11520/11530/11540/11542Citrix Netscaler SDX 17500/19500/21500Citrix Netscaler SDX 17550/19550/20550/21550Citrix Netscaler SDX 22040/22060/22080/22100/22120Citrix Netscaler SDX 24100/24150Citrix Netscaler SDX trix.com 1999-2017 Citrix Systems, Inc. All rights reserved.p.7
Common Hardware ComponentsJan 28 , 20 11Each platform has front panel and back panel hardware components. T he front panel has an LCD display and an RS232serial console port. T he number, type, and location of ports— copper Ethernet, copper and fiber 1G SFP, and 10G SFP —vary by hardware platform. T he back panel provides access to the fan and the field replaceable units (power supplies,CompactFlash card, and solid-state and hard-disk drives).On some NetScaler SDX appliances, the LCD on the front panel displays the appliance's model number, but the numbershown might not be the licensed model number. To view the licensed model number of any SDX appliance, log on to theManagement Service and check the licensed model number in the top left corner of the screen. For example, if you havepurchased an SDX 11515 license, the LCD screen displays CIT RIX NSSDX-11500, and the Management Service screendisplays NetScaler SDX (11515).T he LCD backlight on the NetScaler SDX 22040/22060/22080/22100/22120 is always on. For all other SDX appliances, theLCD backlight lights up only when the appliance is restarted or powered on. T he backlight on these appliances remains onfor some time and automatically turns off.On the appliance’s back panel, system status LEDs indicate the overall status of the appliance. T he following tabledescribes the indicators of the system status LED.Note: System status LEDs are available on only the SDX 22040/22060/22080/22100/22120 and SDX 24100/24150appliances.LED ColorLED Indicat esOFFNo powerGreenAppliance is receiving powerRedAppliance has detected an errorOn the appliance’s back panel, power status LEDs indicate the status of each power supply. T he following table describesthe indicators of the power status LED.LED ColorLED Indicat esOFFNo powerGreenAppliance is receiving powerRedPower supply has detected an errorhttps://docs.citrix.com 1999-2017 Citrix Systems, Inc. All rights reserved.p.8
T he port LEDs show whether a link is established and traffic is flowing through the port. T he following table describes theLED indicators for each port. T here are two LED indicators for each port type.T able 1. LED port -st at us indicat orsP ort T ypeLEDLocat ionLEDF unct ionLED ColorLED Indicat es10G SFP (10Gbps)T opSpeedOffNo connection.Solid blueT raffic rate of 10 gigabits per second.OffNo link.Solid greenLink is established but no traffic is passing through theport.BlinkinggreenT raffic is passing through the port.OffNo link.Solid greenLink is established but no traffic is passing through theport.BlinkinggreenT raffic is passing through the port.OffNo connection.YellowT raffic rate of 1 gigabit per second.OffNo connection, or a traffic rate of 10 megabits persecond (Mbps).GreenT raffic rate of 100 Mbps.YellowT raffic rate of 1 gigabit per second.OffNo link.Solid greenLink is established but no traffic is passing through theBottom1G SFP (1 Gbps)LeftRightEthernet T raffic is passing through the port. 1999-2017 Citrix Systems, Inc. All rights reserved.p.9
P ort T ypeManagementLEDLocatLeft ionLEDFunct ionSpeedgreenLED ColorLED Indicat esOffNo connection, or a traffic rate of 10 megabits per(RJ45)second (Mbps).RightLink/ActivityGreenT raffic rate of 100 Mbps.AmberT raffic rate of 1 gigabit per second.OffNo link.Solid yellowLink is established but no traffic is passing through theport.BlinkingT raffic is passing through the port.yellowOn each power supply, a bicolor LED indicator shows the condition of the power supply.T able 2. LED P ower Supply Indicat orsP ower Supply T ypeLED ColorLED Indicat esACOFFNo power to any power supply.Flashing REDNo power to this power supply.Flashing GREENPower supply is in standby mode.GREENPower supply is functional.REDPower supply failure.OFFNo power to any power supply.Flashing REDNo power to this power supply.Flashing BLUEPower supply is in standby mode.BLUEPower supply is functional.REDPower supply failure.DChttps://docs.citrix.com 1999-2017 Citrix Systems, Inc. All rights reserved.p.10
Ports are used to connect the appliance to external devices. NetScaler appliances support RS232 serial ports,10/100/1000Base-T copper Ethernet ports, 1-gigabit copper and fiber 1G SFP ports, and 10-gigabit fiber SFP ports. AllNetScaler appliances have a combination of some or all of these ports. For details on the type and number of portsavailable on your appliance, see the section describing that platform.RS232 Serial PortT he RS232 serial console port provides a connection between the appliance and a computer, allowing direct access to theappliance for initial configuration or troubleshooting.All hardware platforms ship with an appropriate serial cable used to connect your computer to the appliance. Forinstructions on connecting your computer to the appliance, see "Installing the Hardware."Copper Ethernet PortsT he copper Ethernet ports installed on many models of the appliance are standard RJ45 ports.T here are two types of copper Ethernet ports that may be installed on your appliance:10/100BASE-T portT he 10/100BASE-T port has a maximum transmission speed of 100 megabits per second (Mbps). Most platforms have atleast one 10/100BASE-T port.10/100/1000BASE-T portT he 10/100/1000BASE-T port has a maximum transmission speed of 1 gigabit per second, ten times faster than the othertype of copper Ethernet port. Most platforms have at least one 10/100/1000Base-T port.To connect any of these ports to your network, you plug one end of a standard Ethernet cable into the port and plug theother end into the appropriate network connector.Management PortsManagement ports are standard copper Ethernet ports (RJ45), which are used for direct access to the appliance for systemadministration functions.1G SFP and 10G SFP PortsA 1G SFP port can operate at a speed of 1 Gbps. It accepts either a copper 1G SFP transceiver, for operation as a copperEthernet port, or a fiber 1G SFP transceiver for operation as a fiber optic port.T he 10G SFP ports are high-speed ports that can operate at speeds of up to 10 Gbps. You need a fiber optic cable toconnect to a 10G SFP port. If the other end of the fiber optic cable is attached to a 1G SFP port, the 10G SFP portautomatically negotiates to match the speed of the 1G SFP port.P ort s Compat ibilit yT he 10G slot supports copper 1G transceivers, which can operate at up to 1 Gbps in a 10 Gbps slot.Note: You cannot insert a fiber 1G transceiver into a 10G slot.Note: You cannot insert a 10G transceiver into a 1G slot.https://docs.citrix.com 1999-2017 Citrix Systems, Inc. All rights reserved.p.11
1G Pluggable MediaT he following table lists the maximum distance specifications for 1G transceivers.T able 3. Copper 1G SF P Dist ance Specif icat ionsSKUDescript ,CitrixNetScaler 1GSFP (100m) - 4P ackT ransmit t erCableT ypicalWavelengt h(nm)T ypeReach(m)n/aCategory5 (Cat-5)CopperCable100 mP roduct sSDX 8015/8400/8600, SDX22040/22060/22080/22100/22120,SDX 24100/24150EW3X0000235,EW3Z0000087T able 4 . Short Reach F iber 1G SF P Dist ance Specif icat ionsSKUDescript ionT ransmit t erWavelengt h(nm)F iber T ypeT ypicalReach(m)P roduct sEW3A0000234,EW3B0000234,CitrixNetScaler 1G850nm(nominal)50/125umMMF,550 mSDX 8015/8400/8600, 000234,EW3E0000234,SFP EthernetSX (300m) - 4P 2000MHzkm (OM3)50/125umMMF,500MHz-SDX 24100/24150550 mkm (OM2)50/125um550 mMMF,400MHzkm62.5/125umMMF,200MHz-300 mkm (OM1)62.5/125um300 mMMF,160MHzkmhttps://docs.citrix.com 1999-2017 Citrix Systems, Inc. All rights reserved.p.12
T able 5. Short Reach F iber 1G SF P Dist ance Specif icat ionsSKUDescript ionT ransmit t erF iber T ypeWavelengt 10,CitrixNetScaler1G rt Range(300m) Single850nm(nominal)T ypicalP roduct sReach(m)50/125umMMF,2000MHzkm (OM3)550 m50/125umMMF,550 mSDX 8015/8400/8600, SDX11500/13500/14500/16500/18500/20500,SDX 11515/11520/11530/11540/11542,SDX 17500/19500/21500, SDX22040/22060/22080/22100/22120, SDX24100/24150500MHzkm (OM2)EW3X0000710,EW3Z000058550/125umMMF,400MHz-550 mkm62.5/125um275 mMMF,200MHzkm (OM1)62.5/125umMMF,160MHz-220 mkmT able 6. Long Reach F iber 1G SF P Dist ance Specif icat ionsSKUDescript ionT ransmit t erWavelengt h(nm)F iberT ypeT ypicalReach(m)P roduct er 1GSFP1310nm(nominal)9/125umSMF10 kmSDX 8015/8400/8600, SDX22040/22060/22080/22100/22120,SDX 24100/24150EW3D0000712,Ethernet LXEW3E0000712,EW3F0000712,- ocs.citrix.com 1999-2017 Citrix Systems, Inc. All rights reserved.p.13
T able 7 . Long Reach F iber 1G SF P Dist ance Specif icat ionsSKUDescript ionT ransmit t erWavelengt hF iberT ype(nm)T ypicalReachP roduct s(m)EW3A0000711,Citrix1310nm9/125um10 kmSDX 8015/8400/8600, SDXEW3B0000711,EW3C0000711,NetScaler 1GSFP(nominal)SMFEW3D0000711,EthernetSDX 17500/19500/21500, SDXEW3E0000711,EW3F0000711,Long Range(10km) -22040/22060/22080/22100/22120, 16500/18500/20500,SDX 58610 GE Pluggable MediaT he following table lists the maximum distance specifications for 10G transceivers.T able 8. Short Reach F iber 10G SF P Dist ance Specif icat ionsSKUDescript ionT ransmit t erF iber T ypeT ypicalWavelengt 00710,EW3C0000710,NetScaler10G SFP /20500,SDX km (OM3)SDXEW3E0000710,EW3F0000710,Short Range(300m) 300 mP roduct s82 mMMF,14020/14030/14040/14060/14080/14100,SDX 17500/19500/21500, SDX17550/19550/20550/21550, SDX500MHzkm (OM2)50/125umMMF,SDX 8015/8400/8600, SDX22040/22060/22080/22100/22120, SDX24100/2415066 m400MHzkm62.5/125um33 mMMF,200MHzkm (OM1)62.5/125um26 mMMF,160MHz-https://docs.citrix.com 1999-2017 Citrix Systems, Inc. All rights reserved.p.14
kmT able 9. Long Reach F iber 10G SF P Dist ance Specif icat ionsSKUDescript ionT ransmit t erF iberT ypicalWavelengt hT ypeReach(nm)P roduct C0000711,NetScaler10G SFP F0000711,Long Range(10km) -14020/14030/14040/14060/14080/141,00SDX 17500/19500/21500, SDXEW3P0000558,Single17550/19550/20550/21550, 0 kmSDX 8015/8400/8600, SDX11500/13500/14500/16500/18500/20500,SDX 100/22120, SDX24100/24150 1999-2017 Citrix Systems, Inc. All rights reserved.p.15
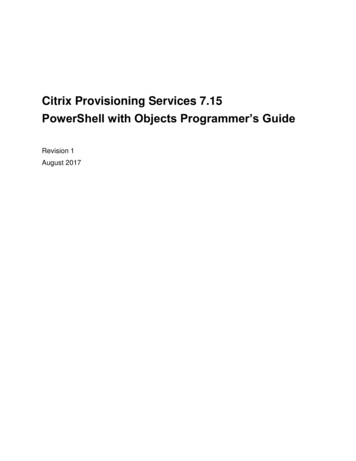
Field Replaceable UnitsJan 28 , 20 11Citrix NetScaler field replaceable units (FRU) are NetScaler components that can be quickly and easily removed from theappliance and replaced by the user or a technician at the user's site. T he FRUs in a NetScaler appliance can include DC or ACpower supplies, and solid-state or hard-disk drives, and a direct attach cable (DAC).Note: T he solid-state or hard-disk drive stores your configuration information, which has to be restored from a backupafter replacing the unit.For appliances containing two power supplies, the second power supply acts as a backup. T he SDX22040/22060/22080/22100/22120 and SDX 24100/24150 appliances can accommodate four power supplies, and requiretwo power supplies for proper operation. T he third and fourth power supplies act as backup.T he appliance ships with a standard power cord that plugs into the appliance’s power supply and an NEMA 5-15 plug on theother end for connecting to the power outlet on the rack or in the wall.For power-supply specifications, see "Hardware Platforms," which describes the various platforms and includes a tablesummarizing the hardware specifications.Note: If you suspect that a power-supply fan is not working, please see the description of your platform. On someplatforms, what appears to be the fan does not turn, and the actual fan turns only when necessary.On each power supply, a bicolor LED indicator shows the condition of the power supply.Electr ical Saf ety Pr ecautions f or Power Supply R eplacem entMake sure that the appliance has a direct physical connection to earth ground during normal use. When installing orrepairing an appliance, always connect the ground circuit first and disconnect it last.Always unplug any appliance before performing repairs or upgrades.Never touch a power supply when the power cord is plugged in. As long as the power cord is plugged in, line voltages arepresent in the power supply even if the power switch is turned off.Replacing an AC Power SupplyCitrix NetScaler SDX platforms can accommodate two power supplies, except the SDX 22040/22060/22080/22100/22120and SDX 24100/24150 platforms which can accommodate four power supplies. All NetScaler appliances function properlywith a single power supply, except the SDX 22040/22060/22080/22100/22120 and SDX 24100/24150 platforms whichneed two power supplies for proper operation. T he other power supplies serves as a backup. All power supplies must be ofthe same type (AC or DC).Note: If the appliance has only one power supply, you have to shut down the appliance before replacing the power supply.If the appliance has two power supplies, you can replace one power supply without shutting down the appliance, providedthe other power supply is working.T o inst all or replace an AC power supply on a Cit rix Net Scaler appliance1. Align the semicircular handle perpendicular to the power supply. Loosen the thumbscrew and press the lever toward thehandle and pull out the existing power supply, as shown in the following figure.Note: T he illustration in the following figures might not represent the actual NetScaler appliance.https://docs.citrix.com 1999-2017 Citrix Systems, Inc. All rights reserved.p.16
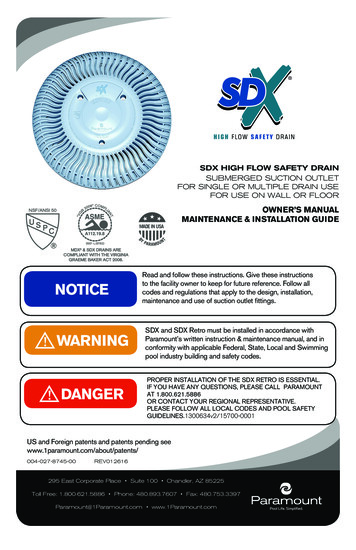
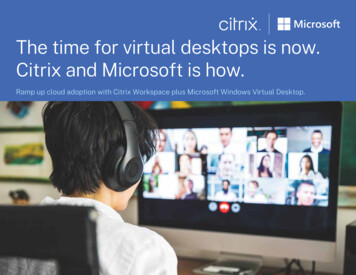
Figure 1. Removing the Existing AC Power Supply2. Carefully remove the new power supply from its box.3. On the back of the appliance, align the power supply with the power supply slot.4. Insert the power supply into the slot and press against the semicircular handle until you hear the power supply snap intoplace.Figure 2. Inserting the Replacement AC Power Supply5. Connect the power supply to a power source. If connecting all power supplies, plug separate power cords into thepower supplies and connect them to separate wall sockets.Note: NetScaler appliances emit a high-pitched alert if one power supply fails or if you connect only one power cable to anappliance in which two power supplies are installed. T o silence the alarm, press the small red button on the back panel ofthe appliance. T he disable alarm button is functional only when the appliance has two power supplies.Replacing a DC Power SupplyCitrix NetScaler SDX platforms can accommodate two power supplies, except the SDX 22040/22060/22080/22100/22120and SDX 24100/24150 platforms which can accommodate four power supplies. All NetScaler appliances function properlywith a single power supply, except the SDX 22040/22060/22080/22100/22120 and SDX 24100/24150 platforms whichneed two power supplies for proper operation. T he other power supplies serves as a backup. All power supplies must be ofthe same type (AC or DC).Note: If the appliance has only one power supply, you have to shut down the appliance before replacing the power supply.If the appliance has two power supplies, you can replace one power supply without shutting down the appliance, providedthe other power supply is working.T o inst all or replace a DC power supply on a Cit rix Net Scaler appliance1. Loosen the thumbscrew and press the lever towards the handle and pull out the existing power supply, as shown in thefollowing figure.Note: T he illustration in the following figures might not represent the actual NetScaler appliance.Figure 3. Removing the Existing DC Power Supplyhttps://docs.citrix.com 1999-2017 Citrix Systems, Inc. All rights reserved.p.17
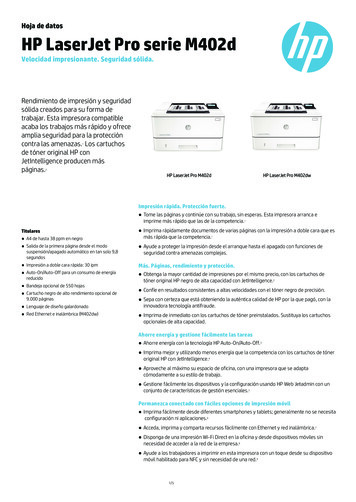
2. Carefully remove the new power supply from its box.3. On the back of the appliance, align the power supply with the power supply slot.4. Insert the power supply into the slot while pressing the lever towards the handle. Apply firm pressure to insert the powersupply firmly into the slot.Figure 4. Inserting the Replacement DC Power Supply5. When the power supply is completely inserted into its slot, release the lever.6. Connect the power supply to a power source. If connecting all power supplies, plug separate power cords into thepower supplies and connect them to separate wall sockets.Note: NetScaler appliances emit a high-pitched alert if one power supply fails or if you connect only one power cable to anappliance in which two power supplies are installed. T o silence the alarm, press the small red button on the back panel ofthe appliance. T he disable alarm button is functional only when the appliance has two power supplies.A solid-state drive (SSD) is a high-performance device that stores data in solid-state flash memory.Replacing a Solid-State DriveTo replace a solid-st at e drive on SDX 2204 0/22060/22080/22100/22120 and SDX 24 100/24 150 appliancesNote: NetScaler SDX 22040/22060/22080/22100/22120 and SDX 24100/24150 appliances are shipped with four SSDs,which contain pre-installed configurations of the NetScaler software. From the left, the first and second SSDs are mirroredand store the configurations of the SDX appliance. T he third and fourth SSDs, which are also mirrored, provide storage forthe NetScaler instances running on the SDX appliance. All the SSDs are hot-swappable.You can purchase up to four additional SSDs, in groups of two.1. Locate the SSD on the back panel of the appliance. Push the safety latch of the drive cover down while pulling out onthe drive handle to disengage. Pull out the faulty drive.Figure 5. Removing the Existing Solid-State Drivehttps://docs.citrix.com 1999-2017 Citrix Systems, Inc. All rights reserved.p.18
2. Verify that the replacement SSD is of the correct type for the platform.3. Pick up the new SSD, open the drive handle fully up, and insert the drive into the slot as far as possible. T o seat the drive,close the handle flush with the rear of the appliance so that the drive locks securely into the slot.Important: When you insert the drive, make sure that the Citrix product label is at the right.Figure 6. Inserting the Replacement Solid-State DriveAfter you replace one of the SSDs, the configuration on the other SSD in the mirrored SSD is copied to the replacementSSD.Note: NetScaler SDX 22040/22060/22080/22100/22120 and SDX 24100/24150 appliances support up to 80 instances.However, the mirrored SSDs in the third and fourth slots provide only enough storage for up to a maximum of 30instances. T o provision more instances on the appliance, you must purchase and install additional SSDs.To add addit ional SSDs on SDX 2204 0/22060/22080/22100/22120 and SDX 24 100/24 150 appliancesPut the first new SSD into the leftmost empty slot, and put the second new SSD into the adjacent empty slot.To replace a solid-st at e drive on any ot her SDX applianceReplacement solid-state drives (SSDs) contain a pre-installed version of the NetScaler software and a generic configurationfile (ns.conf), but they do not contain SSL-related certificates and keys, or custom boot settings. After installing thereplacement SSD, you have to restore the configuration files and customized settings from backup storage. If no backupsare available, you have to reconfigure the appliance. T he files to be restored might include:/flash/nsconfig/ns.conf: T he current configuration file./flash/nsconfig/ZebOS.conf: T he ZebOS configuration file./flash/nsconfig/license: T he licenses for the NetScaler features./flash/nsconfig/ssl: T he SSL certificates and keys required for encrypting data sent to clients or servers.https://docs.citrix.com 1999-2017 Citrix Systems, Inc. All rights reserved.p.19
/nsconfig/rc.netscaler: Customer-specific boot operations (optional).1. In the configuration utility of the Management Service, navigate to Configuration System, and in the System pane,click Shutdown Appliance.2. Locate the SSD on the back panel of the appliance. Push the safety latch of the drive cover to the right or down,depending on the platform, while pulling out on the drive handle to disengage. Pull out the faulty drive.Note: T he illustration in the following figures might not represent your actual NetScaler appliance.Figure 7. Removing the Existing Solid-State Drive3. Verify that the replacement SSD is the correct type for the platform.4. Pick up the new SSD, open the dri
Websense Protector BlueCat DNS/DHCP CA Access Gateway Palo Alto Networks VM-Series NITRO API Obtaining the NITRO Package How NITRO Works Java SDK . All NetScaler SDX appliances share common components, but different platforms have different additional components. Therefore, installation requirements can vary among platforms. .