Transcription
Access Control Software Manual
Access Control Software ManualCONTENTS1. Function overview.12. Installation environment.23. Concept description.34. Installation and Uninstallation. 44.1 Installation.44.2 Uninstallation. 105. Function instroduction.115.1 Add device.115.2 Department management. 165.2.1 Add department. 165.2.2 Modify department’s name. 185.2.3 Modify administrative subordination relationship.195.2.4 Delete department. 205.3 User management.215.3.1 Add user. 215.3.2 Modify employee’s information. 225.3.3 Enroll fingerprint through fingerprint device. 245.3.4 Enroll the fingerprint through fingerprint reader.295.3.5 Upload & download user’s information and fingerprint. 325.3.6 Data import & export through U disk.365.4 Privilege management.385.4.1 Time zone setting. 395.4.2 Management of access control group. 435.4.3 Group setting. 45
Access Control Software Manual5.4.4 Unlocking combination setting.475.4.5 Holiday setting.495.4.6 User’s specified privilege.515.5 Report.575.5.1 Monitor record report.575.5.2 Alarm report. 585.6 Device management. 605.6.1 Read information from fingerprint reader.605.6.2 Communication setting. 605.6.3 Wiegand. 615.6.4 Verification.635.6.5 Power management.645.6.6 Access control. 655.6.7 Mifare. 655.6.8 Other settings. 665.7 System management.695.7.1 Build database. 695.7.2 Set database. 705.7.3 Database management. 715.7.4 Operator management.745.7.5 System parameter setting. 76MSDE installation. 816. Appendix. 826.1 Connection of access control machine and system. 826.1.1 Connection through RS232.826.1.2 Connection through RS485.866.1.3 Connection through TCP/IP.906.2 Real-time monitor. 94
Access Control Software Manual6.3 Map. 966.4 License to detect the fingerprint device. 997. Solution to problem.1028. SOFTWARE USE LICENSE AGREEMENT. 104
Access Control Software Manual1. Function overviewAccess control is a device system supervises in-and-out passage. Itis mainly used to authorize in-and-out personnel and record theirprocess. Access control software can set in-and-out privilege easily andmanage the personnel effectively.Access control software is applicable for access control machinesof various modes. It can connect a number of access control machinesworking at the same time and monitor in-an-out personnel at the realtime.Refer to the following for detailed functions: Manage personnel’s basic files and record personnel’s basicinformation Provide various database interfaces. Upload and download personnel’s information Control personnel’s in-and-out time zone . Monitor in-and-out state with machines connected with network. Download records from fingerprint reader regularly. Operator sets up the system to ensure security. Query in-and-out record & alarm record and export the data invarious formats. Detect the positions where access control devices lie in the way ofmap. Control access control machine remotely, initializing machine andoperating machine synchronously. Group the devices or carry out subarea management. Manage personnel’s privileges in group.1
Access Control Software Manual2. Installation environmentComputer:above Pentium l66,more than 64M Memory,at least100Mhard disk spaceOperation system:Microsoft Windows 2000 or Microsoft Windows XPWindows2000 operation system is suggested and PentiumIII500 128Mcomputer is the least requirement.2
Access Control Software Manual3. Concept descriptionMachines connected with network, and real time monitor: eitherconnected with Ethernet or 485, fingerprint reader can be added to themanagement software to execute management. After adding all thefingerprint readers, click “Monitor”, and the monitor starts in turns.Record the monitoring information at the real time: able to monitorthe fingerprint identification records and going-out button records oneach fingerprint reader and save these records to the database for laterquery.Query record: able to query the records when they are enough. Whilequerying, a variety of conditions are specified, such as fingerprint readeridentification, time zone , and department and so on.Privilege management: add and modify user’s privilege on eachfingerprint reader and upload the information to the reader.Department management: add and modify departments’ information.User management: download user and his fingerprint. Modify user’sinformation and privilege. Add code for user. Add user and upload userand his fingerprint by using U are U.Open the door remotely: press “Open” button to open the selected doorremotely.Synchronous time: reader’s time agrees with computer’s time.Upgrade firmware: upgrade reader’s running program.Initialize fingerprint reader: able to initialize the fingerprint readerduring device management3
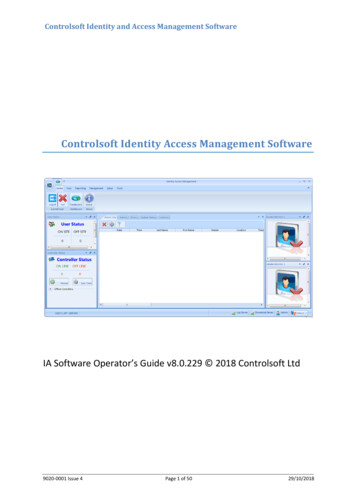
Access Control Software Manual4. Installation and Uninstallation4.1 InstallationBefore installation, other running programs are suggested to be closed toavoid conflict.Notice: The displayed picture may seem different from the actualcontent in the compact disk. If so, the contents in the compact diskprevail.Put compact disk into CD driver, and the installation program will runautomatically.Picture 4-1 Select using methodCancelTip: Select 【CancelCancel】button in the window of installation program,installation can be cancelled.4
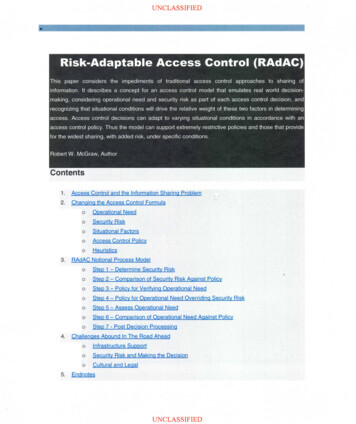
Access Control Software Manual1) A dialogue box of End User Software License Agreement will beAgreeNextshown later, as in picture 4-2. Select 【AgreeAgree】, and click【NextNext】.Picture 4-2 End User Software License Agreement2) The installation path will be shown in later dialogue box, as inNextpicture 4-3. You can select your desired path and click 【NextNext】.5
Access Control Software ManualPicture 4-3 Select installation position3) You will be asked to install what kinds of components in the nextwindow, as shown in picture 4-4. All components are suggested toNextbe installed. Then click【NextNext】6
Access Control Software ManualPicture 4-4 Select installation components4) The position where shortcut is created will be shown later, as inpicture 4-5. You can select your desired position and name and clickNext【NextNext】.7
Access Control Software ManualPicture 4-5 Select shortcuts’ positionThen installation path and mode will be shown, as in picture 4-6. ClickInstallation【InstallationInstallation】to start copying files. In the end, a dialogue boxindicating installation completed appears, as shown in picture 4-7. ClickFinish【FinishFinish】, and the whole installation is over.8
Access Control Software ManualPicture 4-6 Installation path and components showPicture 4-7 Installation complete4.2 Uninstallation9
Access Control Software ManualIf you don’t want to preserve this software in Window, you canoperate as the following steps:1) Close access control software.ontrol Panel2) Enter【My ComputerComputer】, enter【ControlPanel】with double clicks.add/delete program3) Enter【add/deleteprogram】 window with double clicks, selectFingerprint Access Control Management System【FingerprintSystem】, and clickdelete【deletedelete】, then start uninstallation according to the tips.4) The above processes cannot delete all the files related with thissoftware. It is necessary to enter the installation catalog to deleteaccess control’s folders.10
Access Control Software Manual5. Function instroduction5.1 Add deviceFunction Introduction【FunctionIntroduction】 To achieve real time monitor, data upload &download, remote open and other functions, the software needscommunication connection between fingerprint and software. It onlyneeds to add and save the device communication parameters to thesystem during the first employment.Operation Steps【OperationSteps】1. Two methods to enter access control system:1)doubly click shortcut “Fingerprint Access Control ManagementSystem”2 ) Click menu: start- program- fingerprint access controlmanagement system- fingerprint access control management system2. Method to enter device management and add machine:Click menu: access control management- equipment management.Shortcut key F211
Access Control Software Manual3. Click “add device”,a window will appear, as shown in the followingpicture. The system supports RS232/485 and Ethernetcommunication. Refer to the appendix for specific connectingmethods. After setting connecting parameters, click “testconnection” to verify the connection. If you want to add a“batch add””.number of devices once, please click“12
Access Control Software Manual”, the machine will be listed in the form of machine name.4. Click “OKOK”The privilege side shows the machine’s communication parameters.5. After exit from the device management window, you can catch sightof the device’s icon shown on the program’s main interface, as inthe following picture. The device’s connecting parameters will bepreserved in the system. If you want to operate the device, you canonly click its icon.Tip: Click the right key of the mousemouse,, and you can see a shortcutmenu which shows the related operation items.6. Device classification: Device classification means setting up subareaof the device or carrying out group management. Click “addclassification” on the main interface of the device management,open the window to add classification, input related names, saveand exit. Then drag the device to the related groups on themanagement interface.13
Access Control Software ManualDifferent classifications and their devices can be seen on the interface ofmonitor center, as shown in the following picture.14
Access Control Software Manual15
Access Control Software Manual5.2 Department management5.2.1 Add departmentOperation Steps【OperationSteps】1. Enter “department management” interface, click menu: accesscontrol management- department management,as shown below:2. The company’s name can enter: system management- systemparameter setting, to modify company’s information.3. Click “add” to add department,and input the department’s name, asshown below:16
Access Control Software Manual4. If a number of departments need to be added once, input onedepartment’s name, click “save and add”, and input anotherdepartment’s name, as shown below:5. After inputting department’s name, click “ save and exit”, thus thedepartment is added to the list, as shown below:17
Access Control Software Manual5.2.2 Modify departmentdepartment’’s nameOperation Steps【OperationSteps】1、 Select the department which needs modification and click“modify”, modify the name on the modification interface.2、 After modification, click “ save and exit’, as shown below:“Overseas Department” has been changed into “TechnicalDepartment”.18
Access Control Software Manual5.2.3 Modify administrative subordination relationshipOperation Steps【OperationSteps】1、 Select the department which is to be dragged by clicking left keyof the mouse, as shown below:2、 Drag the department to target position, as shown below:19
Access Control Software Manual5.2.4 Delete departmentOperation Steps【OperationSteps】Select the name of the department which is to be deleted, click “delete”,and select “yes” or “no”, as shown below:Notice: If a department has recruited employees, or there issubordination department under a department, then the departmentcannot be deleted.20
Access Control Software Manual5.3 User management5.3.1 Add userOperation Steps【OperationSteps】1.Method to enter interface of “user management”:Click menu:: access control management- user managementshortcut key F42.Click “add”, add new user, as shown below. Input user’s number,name and so on, click “save and exit”, or click “save and add” toadd another employee’s information.3. Then the added user’s information will be shown on the managementinterface.21
Access Control Software Manual5.3.2 Modify employeeemployee’’s informationFunction introduction【Functionintroduction】Set user’s photos, subordination department,fingerprint enrollment and so on. The fingerprint reader supportsChinese display but does not support Chinese input. If you need todisplay the name on the reader, you can download user’s informationfrom the reader to the software. After the name has been changed intoChinese, upload it to the reader.Operation Steps【OperationSteps】1.Method to enter “user management”:Click menu: Access control management- user managementSelect employee: select user in “user list”, click “modification”, andmodify user’s information on the pop-up interface,as shown below:22
Access Control Software Manual3. Add picture: the system support directly selecting photos from files.Click “obtain from files”, enter the dialogue box of image file select,select an image file, click “open”, and the image file will be addedsuccessfully, as shown below:23
Access Control Software Manual5.3.3 Enroll fingerprint through fingerprint deviceFunction Introduction【FunctionIntroduction】Collect user’s fingerprint and preserve it in thedatabase. After fingerprint enrollment, please upload fingerprintinformation to the specified reader.Operation Steps【OperationSteps】1.Method to enroll fingerprint through fingerprint device:Click menu: access control management- user management2.Click “add”, add new user or select user in user list and click“modification”.24
Access Control Software Manual3.Select “enrollment with sensor”, click “enroll”, and enter thefingerprint enrollment interface, as shown below:4.Click the finger whose fingerprint is to be enrolled, and the systementers a state to receive enrollment, as shown below:25
Access Control Software Manual5.After the finger finishes its press on the fingerprint collecting device,the system enters the following state shown in the picture:6. Press 3 times with the same finger according to the tips, click “yes”after successful enrollment, return to user’s information editing interface,and click “save and exit” as shown below:26
Access Control Software Manual7.Fingerpring verification: select “enrollment with sensor”- click“verification”, the following interface will appear to check if thefingerprint enrollment is done or not.9.Press the finger on the device, if the following dialogue box appears,then the enrollment failed, please return to step 3-6 for anotherenrollment.27
Access Control Software Manual10.The enrollment succeeds if the following dialogue box appears.11.After enrollment, click “upload user’s information” on usermanagement interface, and upload the user’s information and fingerprintto specified device after entering the following interface:28
Access Control Software Manual12.You can select “ Cache Mode” to upload user’s information. In thisway, if the transmission fails, the entire user’s information won’t beuploaded to the device, or the user’s information will be uploaded to thedevice before the transmission fails.5.3.4 Enroll the fingerprint through fingerprint readerFunction Introduction【FunctionIntroduction】Enroll fingerprint directly on the specifiedfingerprint reader. After enrollment, the information has beenpreserved into the reader and the local database. Therefore, there is noneed to upload fingerprint data to the enrolling fingerprint reader.Operation Steps【OperationSteps】1.Method to enroll fingerprint on fingerprint readerClick menu: access control management- user management2.Click “add” in user list, add new user or select user in user list andclick “modification”, then enter user’s information editing interface.29
Access Control Software Manual3.Select reader’s name, as shown below:4.Click “connect device” to connect fingerprint reader, as shown below:5.Click “enrollment” to enter “fingerprint enrollment” interface, asshown below:30
Access Control Software Manual6.Click the finger whose fingerprint is to be enrolled, and the systementers a state to receive enrollment, as shown below:7.Place your finger on the reader according to the tips, as shown below:31
Access Control Software Manual8.Press 3 times with the same finger according to the tips. If theenrollment is successful, the following picture will appear. If failed,please repeat the operation of step 6-8 until successful.5.3.5 Upload & download useruser’’s information and fingerprint5.3.5.1 Download user from deviceFunction Introduction【FunctionIntroduction】 Download user’s information and fingerprintdata in reader to the computer. The information modification can bedone through this way.Operation Steps【OperationSteps】1.Method to enter “download user from device”:Click menu:: access control management- user management, andselect “download from device”2.Enter “download user’s information” interface as shown below. Allthe readers in this system will be shown in the device informationform. Select the target reader, as shown in the following picture:” and “fingerprint informationNotice: Select “useruser’’s informationinformation”information””32
Access Control Software Manual3.Download user’s data. Click “download” to download user andfingerprint data. The system will automatically preserve user’sinformation and fingerprint data to the database.33
Access Control Software Manual5.3.5.2 Upload useruser’’s informationFunction Introduction【FunctionIntroduction】Upload user’s information and fingerprint datain computer to the fingerprint reader. The modification of user’sinformation in reader or uploading user’s fingerprint to the reader canbe achieved in this way.Operation Steps【OperationSteps】1.Method to enter “upload user’s information”:1 ) Click menu: access control management- user management,select “upload user’s information”2.Ener “upload user’s information” interface, as shown below:34
Access Control Software Manual3.Select employee and fingerprint reader, and click “upload” to uploadinformation. You can select “high speed mode” to upload user’sinformation. In this way, the user’s information can be uploaded wholly.If transmission fails, the entire user’s information won’t be uploaded tothe device, or the user’s information will be uploaded to the devicebefore the transmission fails.Notice: Select useruser’’s information or fingerprint data to uploaduseruser’’s information or fingerprint data.Tips : While uploading or downloading user’s information, devicemonitor must be stopped first if the communication method between PCmachine and fingerprint reader is RS485/232. However, there is no needto stop device monitor first if the communication method is Ethernet andthe user’s information can be directly uploaded and downloaded.35
Access Control Software Manual5.3.6 Data import & export through U disk5.3.6.1 Import useruser’’s data through U diskFunction Introduction【FunctionIntroduction】 Import user’s data preserved in U disk to thesystem.Operation Steps【OperationSteps】1.Method to enter “ import through U disk”Click right key of the mouse on user management interface, andselect “import through U disk”2. Enter “import through U disk” interface, as shown below:3.Click “detect U disk user” to detect user’s data in U disk. Click “addnew user to computer” to add new user or select the user that is to beadded to the database in the list and click “cover computer data”. Closethe window after operation, then you can see the imported user’s data inuser list.36
Access Control Software Manual5.3.6.2 Export data to U diskFunction Introduction【FunctionIntroduction】 Export the selected user to U disk and savethere .Operation Steps【OperationSteps】1.Select the user to be exported to U disk2.Method to enter “export to U disk”Click right key of the mouse on user management interface, andselect “export to U disk”.3.The system will give tips after selection of “export to U disk”.4.Verify the exported data, and the operation will be completed after“export successfully” appears.37
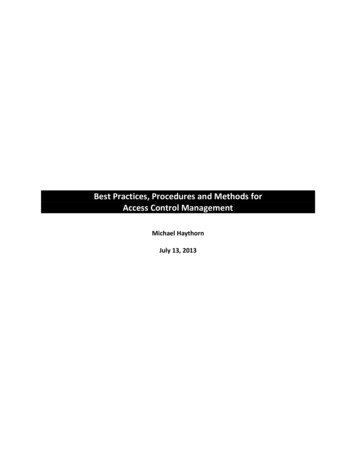
Access Control Software Manual5.4 Privilege managementFunction Introduction【FunctionIntroduction】 Privilege management is to set unlockingtime of enrolled user and access control. Every user’s privilege settingconsists of three time zone setting and a grouping setting. “or” existsamong time zones. There are three time zone in grouping too, and “or”exists among them as well.Simply speaking, to make enrolled user in unlocking state: firstly,the subgroup user belongs to must exist in unlocking combination (itis allowed to be in a combination with other subgroups); secondly, thepresent unlocking time should be during the user’s time zone or anyeffective time of group’s time zone .The system default the unlocking combination as well as the newenrolled user as the first group. Therefore, it is normal to default the newenrolled user as unlocking state. If there is no subgroup user belongs toin unlocking combination settings, the user cannot unlock.All the users must be in one subgroup which can be : subgroup 1,subgroup 2, subgroup 3, subgroup 4, and subgroup 5. Assign groupinformation to the users to execute management of unlockingcombination privilege.The following passage will describe how to set time zone, grouping,unlocking combination, etc. and how to upload the information to thefingerprint reader.Relationship diagram of user defined privilege, access controlgroup and group38
Access Control Software ManualUpload controlgroup(Y/N)NoDefaultedprivilege(Y/N)NYNSet accesscontrol group ingroups (Y/N)Y. Upload user’sdefined privilegeYN. No user ‘sverificationYY. device setting. Thetime zone of user’saccess control agreesCombination ofgroup and accesscontrol group( Y/N)with group or user’sRefertotime zone.5.7.5-1formSet user’s privilege5.4.1 Time zone setting【 Function IntroductionIntroduction】 Set time zone when unlocking happens ifuser’s fingerprint verification gets done.39
Access Control Software ManualOperation Steps【OperationSteps】1.Method to enter “time zone setting”:Click menu: access control management- time zone option to enterthe interface of time zone setting.2.Enter “time zone settings” interface, as shown below:3.Add time zone. Select “add” to enter time zone setting interface andset time zone that can be used by users.4.After setting, click “save and exit”, the setting will be saved anddisplayed synchronously in the list, as shown below:40
Access Control Software Manual5.Modify time zone. If it is necessary to modify some time zones whichhave been specified, select the time zone in the list, as shown below:6.Click “modification” to enter time zone setting interface and modifythe time zone.41
Access Control Software Manual7.After modification, click “save and exit”, the new one will be savedand synchronously displayed in the list, as shown below:Notice: Set a day’s starting time bigger than ending time, thenonly fingerprint verification can be done. For example, the starting timeof Sunday is 12:00, and the ending time is 11:00. After setting, pleaseupload the time zone to the device.42
Access Control Software Manual5.4.2 Management of access control groupunction Introduction【FunctionIntroduction】Access control group is to make users intogroups. It is convenient for the management of access control with manydevices. For example: a factory has many access control machines.User’s access control time differs on different machines. Therefore, anumber of access control groups can be set to define user’s time ondifferent machines. The setting can be uploaded to the access controlmachine once, then the machine will work effectively.【Operation Steps】1.Method to enter “ access control group management”:Click menu: access control management- access control groupmanagement2.Enter “access control group management” interface, as shown below:3.Build access control group. Click “add” and input name and selecttime zone in the editing interface. Then click “save and exit” orclick “save and add” to add new access control group, as shownbelow:43
Access Control Software Manual4.Then the added access control group will be shown on themanagement interface. For access control group modification,please click “modification”5.Personnel distribution: the personnel will be distributed to differentaccess group to execute management. Click “personnel distribution” onthe management interface, as shown below:44
Access Control Software ManualTips:1.2.3.The access control group is to manage the users in groups. It isdifferent from the group setting in privilege management.“Group” in group setting means group in devices. One devicecan own 5 groups.“Group” in access control group is subordinate to group. Tomake user employ time zone of access control group, pleaseselect access control group in menu: “privilege management”- “group setting” and upload access control privilege.5.4.3 Group settingFunction Introduction【FunctionIntroduction】 Set time zone when fingerprint verificationgets done for user’s subgroup.Operation Steps【OperationSteps】1.Method to enter “group setting”:Click menu: access control management- privilege managementand select group setting interface.45
Access Control Software Manual2.Enter “ group setting” interface as shown below:3.Edit the groups. Select the group needing editing and click“modification”, as shown below:46
Access Control Software Manual4.Select time zone when fingerprint verification gets done in the dropdown list, click “save and exit” and the data gets saved.5.4.4 Unlocking combination settingFunction Introduction【FunctionIntroduction】 Set user’s unlocking combination: one ormore than one (5 persons at most) person’s fingerprint verification canlead to unlocking.Operation Steps【OperationSteps】1.Method to enter “unlocking combination”Click menu: access control management- privilege management,and select unlocking combination setting interface.2.Enter “unlocking combination setting” interface, as shown below47
Access Control Software Manual3.Edit unlocking combination. Select an unlocking combination recordand click “modification”, or click unlocking combination recordtwice to enter modification interface, as shown below:Select subgroup in the drop-down list. Select unlocking48
Access Control Software Manualcombination subgroup from group 1 to group 5. Click “save andexit” to save the setting.Tips:1. If you select subgroup 2 & 3 in group 1&2, employees insubgroup 2&3 are the ones whose fingerprint verification canlead
Access Control Software Manual 21 5.3 User management 5.3.1 Add user 【 Operation Steps 】 1.Method to enter interface of "user management ": Click menu:: access control management- user management shortcut key F4 2.Click "add ", add new user, as shown below. Input user 's number,