Transcription
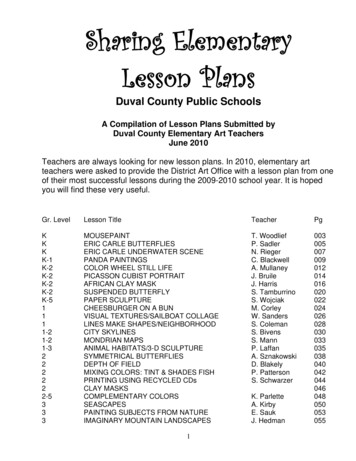
Sharing ElementaryLesson PlansDuval County Public SchoolsA Compilation of Lesson Plans Submitted byDuval County Elementary Art TeachersJune 2010Teachers are always looking for new lesson plans. In 2010, elementary artteachers were asked to provide the District Art Office with a lesson plan from oneof their most successful lessons during the 2009-2010 school year. It is hopedyou will find these very useful.Gr. LevelLesson 222-5333MOUSEPAINTERIC CARLE BUTTERFLIESERIC CARLE UNDERWATER SCENEPANDA PAINTINGSCOLOR WHEEL STILL LIFEPICASSON CUBIST PORTRAITAFRICAN CLAY MASKSUSPENDED BUTTERFLYPAPER SCULPTURECHEESBURGER ON A BUNVISUAL TEXTURES/SAILBOAT COLLAGELINES MAKE SHAPES/NEIGHBORHOODCITY SKYLINESMONDRIAN MAPSANIMAL HABITATS/3-D SCULPTURESYMMETRICAL BUTTERFLIESDEPTH OF FIELDMIXING COLORS: TINT & SHADES FISHPRINTING USING RECYCLED CDsCLAY MASKSCOMPLEMENTARY COLORSSEASCAPESPAINTING SUBJECTS FROM NATUREIMAGINARY MOUNTAIN LANDSCAPEST. WoodliefP. SadlerN. RiegerC. BlackwellA. MullaneyJ. BruileJ. HarrisS. TamburrinoS. WojciakM. CorleyW. SandersS. ColemanS. BivensS. MannP. LaffanA. SznakowskiD. BlakelyP. PattersonS. 30350380400420440460480500530551K. ParletteA. KirbyE. SaukJ. Hedman
3333-43-53-53-53-53-53-53-544444444-55-----RHYTHM DECORATED CONTAINERSPICASSO’S BLUE GUITARSLANDSCAPE: FOCUS ON DEPTHMONET’S GARDENSUNRISE/SUNSET SILHOUETTESMODIGLIANO PORTRAITSAFRICAN MASKSJUNGLE LANDSCAPEBEFORE/AFTER POP ART STILL LIFEEGYPTIAN SARCOPHAGUSFRACTURED PORTRAITSROY LICHTENSTEIN SELF PORTRAITSART HISTORY: POP ART FOODVAN GOGH SUNFLOWERSLINES AND SPACERADIAL DESIGN/BALANCEMEXICAN YARN LANDSCAPESCOMPLEMENTARY COLORSBI-LATERAL SYMMETRYSCRIMSHAWSOLAR SYSTEMFISH PAINTINGFLORIDA HIGHWAYMEN LANDSCAPEADVENTURES IN ROLLER COASTING/COLLAGE2E. CheekJ. HerigJ. SneadJ. HuebnerJ. PetryK. SchmidtM. WelchL. BarauskasP. O’BannonT. AsheJ. DennisE. LudwinskiS. CannizzaroS. GroganP. GilderM. ViaforaE. MironD. GuthrieA. CampbellS. CoffeyJ. BottD. GoodlingJ. MarraraK. 3096098100102104107109111113
ArtLesson PlanT. Woodlief – Art Resource TeacherGrade Level: KindergartenDate:Instructional Focus/Project Title:Part 1: Color mixing activityMousepaintMedium: Tempera, crayonPart 2: Draw MiceArt Element/Principle:ColorVisual Art Standard:Goals/ Objectives:( x ) Skills & Techniques( x) Creation & Communication( ) Cultural & Historical Connections( ) Aesthetic & Critical Analysis( x) Applications to LifeStudents will show knowledge ofbasic color theoryVocabulary:Primary colors, secondary colors, red,yellow, blue, green, violet, orangeResources:Book: Mousepaint by Ellen Stohl WalshActivity/Procedures:Part 1: Read children’s book Mousepaint byEllen Stohl Walsh. Distribute supplies.Have students trace the circle pattern withpencil 3 times horizontally across page,equally spaced, using hand as measuringtool. Squeeze a quarter size dollop of red,yellow, and blue paint onto a paper plate.Using document camera, lead studentsthrough color mixing, making a differentsecondary color in each circle. Remindthem to rinse brush between colors. Placeon drying rack.Part 2: Lead students through steps to addbody parts to circles to create mice. On eachone, have students color ears to showknowledge of primary colors mixed tocreate secondary colored body. Addbackground.Materials/Supplies:Part 1: Paper (white, 6” x 18”),Pencil, 3”circle pattern,tempera paint: red, yellow, bluepaintbrush, paper plates, water cupsAssessment:Technology:document camera and projector todisplay book as it’s read and todemonstrate color mixing( ) Teacher Observation( ) Class critique( ) Project Rubric (self assessment)Part 2: Painting from part 1 andcrayons3
raftsmanshipAnd neatnessShows accurateknowledge of colormixingCompleted within 2class sessions4
ArtLesson PlanTeacher: Patricia L. SadlerSchool: 234/236Grade Level: KDate:Instructional Focus/Project Title:Eric Carle style of artwork (The VeryHungry Caterpillar) & life cycles of abutterflyMedium: crayons, watercolor paint,paperPart 1: Student’s making different papersPart 2: Student’s assemble artworkVisual Art Standard:Goals/ Objectives:( x ) Skills & Techniques( ) Creation & Communication( ) Cultural & Historical Connections( ) Aesthetic & Critical Analysis(x ) Applications to LifeUsing different elements and principals ofdesign, student will learn to make anillustration similar to the artist Eric Carle.Integrated with science and readingResources: Eric Carle books, life cycle of abutterfly chart, student examples ofpapers and artworkVocabulary: collage, cut, glue, scribble,patterns, color, shapes, textures, crayonresist, life cycles of butterflies: egg,caterpillar, cocoon, butterfly,Activity/Procedures: Part 1:1. Teacher models how Eric Carle’sbooks are made. Eric Carle is theauthor & artist. He makesdifferent types of papers to use inhis collage illustrations.2. Students will scribble or makepatterns evenly over entire paperwith different color crayons.Students water colors over entirepaper, and make a crayon resist.Part 2:1. Review. Students select variouspatterned papers to trace and cutout shapes to make a picture.Some pieces may be precut(butterfly, bush, flowers).Students will make an EricCarle's style picture. Add googleeyes and mouth.Art Element/Principle:Color, Shapes, Patterns, TexturesMaterials/Supplies:Part 1: 12”x18” white drawing paper,crayons, watercolor paint, brushes, waterbowlsPart 2: Paper strips from Part 1, 9”x12”white paper, scissors, glue, forms to trace,navy bean, 2”x2” brown tissue paper,google eyes, marker.Teacher prep: Cut paintings into smallerpieces for students to make collage (i.e.:strips for legs to be cut from). Have basicpatterns for students to trace (i.e.:circle/lids for caterpillar body, sun)5
Assessment:Technology:( x ) Teacher Observation( ) Class critique( x ) Project Rubric (self assessment)Notes: Project can last 3 days or moredepending on what you have studentscut and class times. Students can cutstrips for bottom of picture or have themcolor green grass and blue sky. Glue onsun, bush with flowers, navy bean (egg),cocoon (wad- up tissue paper), butterfly,and caterpillar body parts with legs/fur.*This project can be done with anygrade & any subject genre.RUBRIC 1MasteredPicture has extradetails andtextures to createan outstandingpicture story of abutterfly life cycle.Proper use of toolsand techniques.Artwork doneneatly.Differentiated Instruction:Visuals, directions posted and modeled,special tools for students needs (i.e.: largehandled brushes), teacher assistance.23Satisfactory UnsatisfactoryStudent meetsstandard. Picturehas details, doneneatly, usesproper tools andtechniques toshow a butterflylife cycle.6Student is workingtoward the standard.Picture doesn’t haveenough details.Artwork notcompleted.Techniques not doneneatly. Needsadditional help usingtools.
ArtLesson PlanTeacher: Nora RiegerSchool: Merrill Road ElementaryGrade Level: KindergartenDate: 3-29-10 (lesson takesfour sessions to complete)Instructional Focus/Project Title: EricCarle underwater scenePart 1:Medium: Paint and collageVisual Art Standard:( ) Skills & Techniques( ) Creation & Communication( ) Cultural & Historical Connections( ) Aesthetic & Critical Analysis( x ) Applications to LifeVocabulary: neutral, texture, primarycolors, secondary colorsPart 2:Art Element/Principle: color, line,shape, textureGoals/ Objectives: Student willbe exposed to Eric Carle’s work,and use Eric Carle as a model fortheir own art.Resources: Any Eric Carle bookMaps:Reproductions:Materials/Supplies:Day 1- Sandpaper, neutralwatercolors, neutral colored crayons,Day 112x18grey paperVocabulary-neutral/texture- discuss standard/vocabulary (being Day 2- 9x12 white paper, varioustexture sheets, primary color crayons,an artist/writer is Eric Carle’syellow/red/blue tempra paintcareer)Day 3- 12x18 paper, green/yellow/blue- examine Eric Carle books- Texturize paper with sandpaper and crayons, green/yellow/blue/paintDay 4- papers created on threeneutral crayonsprevious days- “Play Piano” on paper with neutralcolored watercolor sets- Closing (review what we learned)Activity/Procedures:Day 2Vocabulary- Primary colors-review standard/ learn new vocabulary-texturize paper using texture sheets andprimary colored crayons-paint on paper using primary colors(exploratory)Day 3Vocabulary- Secondary colors, line-Review standard, learn what secondary7
colors are-students create freeform lines on paperwith yellow, green, and blue crayons-students paint paper with yellow, blue,and green paint (exploratory examinationof secondary colors) students can tryscrafffito as wellDay 4Vocabulary- collageReview standard/ talk about new term,collage- students cut paper from day 1 to resemblesand at bottom of oceanAnd glue to paper-students cut primary colored paper inhalf- then cut one half of that paper into ahalf circle-remaining piece of primary paper is cutinto strips-strips glued to jellyfish to resembletenticles-students can do an accordion fold onjellyfish legs-fast finishers can create another jellyfish orfish to go in their backgroundAssessment:Technology:(x ) Teacher Observation( ) Class critique( ) Project Rubric (self tisfactoryCraftsmanshipAnd neatnessShowed RadialSymmetry/BalanceCompleted within1 class session8
ArtLesson PlanPANDA PAINTINGS – “PANDA-MONIUM” PART ITeacher:C. BlackwellSchool: MLK ElementaryGrade Level: K - 1Date:Instructional Focus/Project Title:Panda-monium Panda PaintingsMedium:Tempera Paint / Oil PastelPart 1: Drawing the PandaPart 2: Painting the PandaPart 3: Painting the PandaArt Element/Principle:Shape/SizeVisual Art Standard:Goals/ Objectives:( x) Skills & Techniques( ) Creation & Communication( ) Cultural & Historical Connections( ) Aesthetic & Critical Analysis( ) Applications to LifeThe student will understand: How todraw a panda and know that pandascome from China/Asia. Compare andcontrast a picture of a “real” pandawith a pretend panda (Kung FuPanda). Understand the meaning ofproportion.The student will create: a work of artthat shows the use of overlappingshapes in correct proportions to createa panda, and bamboo. The studentswill paint the pandas and bamboousing correct techniques for ary:AsiaChinaPandaTempera PaintProportionEndangered Animal/SpeciesBambooZenActivity/Procedures:Part 1 (Drawing Pandas)- Show the pictures of the pandasand where they live on the map.- Discuss what endangered animalsare.- Handout paper- Step-by-step draw the pandas withMaps:Books:Zen Ties by Jon J. MuthZen Shorts by Jon J. Muth(Caldecott Honor Book)Reproductions:Pictures of “real” pandasPictures of Kung Fu PandaMaterials/Supplies:Light Blue Construction PaperTempera Paint:BlackWhiteGreenBrushesPencilsPictures of Pandas9
----the students using a series ofoverlapping circles and ovals.Have the students make sure thatthey don’t have any UFO’s (unidentified floating objects) in theirpictures.The panda’s body parts should be“connected” and overlapping andthe panda should be sitting on theground not floating or levitating.Talk about the wordproportion making sure that thepanda parts look like the sizesbelong together.Collect the pandas.Show the pictures of Kung FuPanda and ask if that is a “real”panda ? What type of panda is he?What do we call it when we makebelieve?Compare and contrast the pandas.Pictures of Kung Fu PandaElmo and ProjectorZen Ties and Zen Shorts by Jon MuthFor displaying the paintings:Large Cardboard Tube like thebulletin board paper comes onPaper Grocery BagsLt. Green Construction PaperDk. Green Construction PaperI had my Art Club students takegrocery bags open them and wrinklethem like the bark on bamboo theyhot glued the bags around the tubesmaking bamboo stalks .then hotglued leaves onto them. When I putthe panda paintings up at school wepropped the “bamboo” stalks underthem for a great display.Part 2 (Painting Pandas)- Review vocabulary.- Handout pictures.- Demonstrate how to hold paintbrushes correctly.- Talk briefly about how tempera isdifferent from the watercolor paintsthey have already used this year.- Have the students identify thewhite parts of the panda that theywill be painting this week.--Have the students paint the grassand bamboo turning their paperto reach all the areas not reachingacross their paintings.Clean up and set paintings aside.Read from Zen Ties make theconnection that this is anotherpretend panda. Ask how theyknow that this panda is also apretend panda?Part 3 (Painting Pandas)- Pass out Pandas10
-Review vocabularyHave students identify the parts ofthe panda that are black that theywill be painting this week.- Have the students clean up whenthey are done.- Set the paintings aside to dry.- Read from Zen Ties.- If time permits compare andcontrast some of the pandas in theclass.Assessment:( x ) Teacher Observation( ) Class critique( ) Project Rubric (self assessment)Notes:I send all participating teachers an email with a link to the “Panda-cam” atthe National Zoo. It is a good tie in forthe classroom. It can be made into aclass job to be the “panda monitor”.They can then use this for charting orreport writing instead of charting theweather. It is up 24/7 and they caneven check it from zoo.si.edu/Animals/GiantPandas/11
ArtLesson PlanTeacher: Angela MullaneyGrade Level:K-2School: Twin Lakes Academy ElementaryDate: June 10, 2010Instructional Focus/Project Title:Color Wheel Still LifePart 1: Use the primary and secondaryMedium:TemperaArt Element/Principle:Visual Art Standard:( ) Skills & Techniques( ) Creation & Communication( ) Cultural & Historical Connections( ) Aesthetic & Critical Analysis( ) Applications to LifeVocabulary: Knows primary colorsKnows secondary colorsMixes primary colors to make secondary colorsRecognizes /understands Still LifeKnows background and foregroundcolors to paint a still lifePart 2: Complete background and adddetailsColorGoals/ Objectives:Knows primary colorsKnows secondary colorsMixes primary colors to make secondary colorsRecognizes /understands Still LifeKnows background and foregroundResources:Color wheelReproductions:“The Blue Vase” by Cezanne“Sunflowers” by MonetActivity/Procedures:Materials/Supplies:2. Students will then paint a blue vase in the lowerarea of the paper but not touching the bottom. Anyorganic shape for the vase is fine.Primary colors (tempera),Brushesegg cartons (cut into sections of 6 cups) withthe tree primary colors for each studentwater containerspaper towelswhite paper1. Discuss primary and secondary colors inregards to the color wheel2. Begin with primary colors. Have each student paintthree yellow circles spaced apart in the top half area oftheir paper.3. Have students then draw a curved or diagonal lineacross their paper slightly below the middle of thepaper. The line should disappear behind the blue vaseand reappear on the other side for a background tableedge.4. Students will then fill in from the back edge of thetable downward to the bottom edge of the paper andaround the bottom of the blue vase with red paint tocreate the table top.5. In an empty section of the egg carton, eachstudent will mix yellow and red paint to makeorange and paint orange petals in a radialpattern around their yellow circles6. Use another empty egg carton section to mixyellow and blue for green, and paint the leavesand stems for the flowers.12
7. Next use the last empty egg carton section tomix purple and use a small paintbrush to fill inthe remaining background.8. When paint is dry, use craypas or blackmarker to add details.Assessment:Technology:( x ) Teacher Observation(x ) Class critique(x ) Project Rubric (self assessment)Notes:This lesson could be used for different subjectmatter broken down into 6 color raftsmanshipand neatnessKnows primary andsecondary colorsKnows backgroundand foreground13
ArtLesson PlanTeacher: J. BruileSchool: Loretto/ Kings Trail Elem.Grade Level: K-2Date: 6-10Instructional Focus/Project Title:Medium:Oil Pastel on Construction PaperPart 1: 45 min. class discussion ofPicasso and his many styles (focusingmainly on Abstract Cubist Portraits)Part 2: 45 min. class for creating theportrait using the various materialsArt Element/Principle:Color, Shape, Texture, LineVisual Art Standard:Goals/ Objectives:( ) Skills & Techniques( ) Creation & Communication( ) Cultural & Historical Connections(x) Aesthetic & Critical Analysis( ) Applications to LifeStudents will learn about Picasso’sCubist period and create abstractportraits in that same style, usingexcellent craftsmanship!!!Resources:PICASSO CUBIST PORTRAITVocabulary:PicassoFacial ity/Procedures:Day 1: Start out the lesson by introducingthe students to Picasso and his life, art andinfluence. As you go through the timelineof his life, discuss the related style of artduring that period (Blue, Rose, Cubist)Make sure to have lots of examples of eachstyle to accompany the discussion,especially Cubism. See if you can get yourhands on the video “Dropping in onPicasso,” it’s very good for younger kids.Also, discuss facial features and howPicasso portrayed them in his abstractcubist portraits. Break down eachindividual part so they can grasp thetechnique he used; hair is made fromvarious lines, ears are letter c’s, nose isletter L, eyes are totally different shapesand colors, and do not line up. Discussprofiles and how Picasso used them in hisportraits.Day 2: Pass out 6 pre-cut geometric shapesMaps: Spain and ParisReproductions: Any Picasso work during hisAbstract Cubist period; DORA MAR is great!Video: Dropping in on Picasso , 25 min.Materials/Supplies:*9x12’ any color construction paper*6 various sized geometric shapes onvarious colored const. paper*Glue Stick*Oil Pastels14
from various colored constr. paper andhave students use oil pastels to rub overeach piece to add texture. Then they willdraw 1 facial feature on each piece; 2 ears,2 eyes, 1 mouth, 1 nose. They are toposition the pieces on a 9x12’ colored paperhow they imagine Picasso might. Next theywill glue them down and add hair andother textured marks with oil pastel. Theycome out very bright and very imaginative,and the kids won’t be able to stop sayinghis name for weeks, so get ready!Assessment:Technology:( ) Teacher Observation( x) Class critique( ) Project Rubric (self tisfactoryCraftsmanshipAnd neatnessShowed RadialSymmetry/BalanceCompleted within1 class session15
ArtLesson PlanTeacher: Julie HarrisSchool:: Hendricks Avenue ElementaryGrade Level: k-2Date: 10/2009Instructional Focus/Project Title:African Clay maskPart 1: see proceduresMedium: clay and mixedVisual Art Standard:Benchmark VA.A.1.1.1 – The student usestwo-dimensional and three-dimensionalmedia, techniques, tools, and processes todepict works of art from personal experience,observation, or imaginationGLES: K – uses forming techniqueswith materials such as clay and paper1st – demonstrates additiveand subtractive forming techniques2nd – utilizes additive andsubtractive sculpturaltechniques in creating clayPart 2:Art Element/Principle:texture, additive and subtractivetechnique, slip, clayGoals/ Objectives:For the Kindergarten – 2nd grade artstudents to create an African clay masksand understand the concepts of texture,additive and subtractive clay techniques,African masks and clay by producing aclay mask so that, when given clay, andtextured items, and press moulds thestudents create a clay mask with Africancharacteristics using texture and theadditive and subtractive method.Benchmark VA.A1.1.3 – The studentdistinguishes within and among art materials,techniques, processes, and organizationalstructures, such as elements and principles ofdesignGLES: K – identifies elements of art(for example, line, shape, color, texture)1st – applies differentmaterials, techniques, and processes to worksof art2nd – compares, contrasts, andapplies elements of art (forexample, lineshape,color, texture)Benchmark VA.C.1.1.1 – The student knowsspecific works of art belong to particularcultures, times, and places16
GLES: K – views and discusses art fromvarious cultures, time periods, andplaces1st – demonstrates knowledgeof art that represents specificcultures, time periods, andplaces2nd – groups similar worksbased on specific cultures,time periods, and places((((() Skills & Techniques) Creation & Communication) Cultural & Historical Connections) Aesthetic & Critical Analysis) Applications to LifeVocabulary:Clay - granite-type rock that has beendecomposedSlip – liquefied clayTexture- surface quality of an objectResources:Maps: map of world and africaReproductions: masks from Africa inpersonal collection and African mask postersfrom visual education centerAdditive Technique – adding to the claySubtractive Technique – taking away fromthe clayActivity/Procedures:Materials/Supplies:Mini- LessonCardboard, textured items (plastic spoonsShow students several examplesand forks and other texture items), clay,of African masks and discuss theZiploc bags, raffia, slip, press mouldsart elements(line, shape, color, texture) foundin the masks. Ask the question, “Whatmasks are used for?” LocateAfrica on the map.- Emphasize and state the definitionof texture.- Demonstrate the additive claytechnique using slip and a pressmould- Demonstrate the subtractive claytechnique using a spoon- Demonstrate how texture can beapplied using the various art toolsin the bin that each table will besupplied with- Lastly, demonstrate the use ofshoe polish for the finishing coat-17
on clayWork Period:- Students will be provided withclay that has been rolled into aslab- Students create a geometric shapefor the head- Using the additive or thesubtractive method students formeyes, nose and a mouth- Texture can then be added to themask.- Unfinished masks will be storedin a Ziploc bag to hold inmoisture.- Once student completes mask,teacher will fire the masks in thekiln.- Finishing of mask will be donewith shoe polish to add color tothe clay.- Lastly, raffia is hot glued to theback of the mask to represent hair.- Teacher will walk around to assiststudents in the mask making process.Closing:- Clean up process to include a 5minute warning before time to cleanup- Closing to include the definitions oftexture and additive and subtractiveclay techniquesAssessment:(I used this one ) Teacher Observation( ) Class critique( ) Project Rubric (self assessment)Technology:noneNotes:18
anshipAnd neatnessShowed RadialSymmetry/BalanceCompleted within1 class sessionRubric:-Content: Concepts of texture, additive and subtractive techniques in clay, and Africanmasks-Creativity: Use and personal choice of textured items and color of raffia, Choice offacial expression on mask-Composition: Mask representing Africa no bigger then a one-gallon Ziploc bag-Craftsmanship: Mask must be of average thickness and additive components must beapplied using slip19
ArtLesson PlanTeacher: Steve TamburrinoSchool:Grade Level: K-2Date: June 15, 2010Instructional Focus/Project Title:Suspended ButterflyPart 1:Medium:Tempera on tag board and Chinette plate;glitter, salt, dirt, sand, river rocks, pipecleanerPart 2:Art Element/Principle:Line, shape, form, space, color, value,texture; pattern, balance, unity, variety,movementVisual Art Standard:Goals/ Objectives:(V.A.A.1.1.1, 1.1.2, 1.1.3, 1.1.4 ) Skills & Techniques(V.A.B.1.1.4 ) Creation & Communication( ) Cultural & Historical Connections( ) Aesthetic & Critical Analysis( ) Applications to LifeTo create imaginative, 3d assemblies ofbutterflies suspended from platformsVocabulary:Shape, line, space, color, value, pattern,balance, unity, variety, movement, form,wings, antennae, landscape, blendingResources:Activity/Procedures:Fold tagboard in half width-wise and drawhalf set of butterfly wings. Cut out andpaint “underside” a single, blended colorof the students own creation usingblending skills already taught.Materials/Supplies:6 x 9 tag boardPencilScissorsTempera paint & brushPipe cleanersStaplesGlueGlitterSaltFine dirt and/or sandSmall river rocksJumbo paper clipsPaper tapeDuct tapeIn the second session, the top will bepainted in colorful patterns usingphotographs of butterflies as examples,keeping in mind the unity created by themirror-image designs. The (upside down)plates will then be painted as landscapes.Grass, logs, trees, sky, rivers, etc. will bediscussed.Maps:Reproductions:In the third session, students will beinstructed in the careful application of glueto decorate the top side of their wings withglitter and salt, and the landscape with theaforementioned plus dirt, sand, small riverrocks, etc. Students can also select twopipe cleaners of the same or different20
colors, which will then be twisted togetherthe length of the wings with the exceptionof an extra inch to be formed into antennae.The instructor will then fold the wingstogether in order to staple the pipe cleaner(the body) in place, with just the antennaesticking out. The wings will then be foldedback down by the instructor at the pointwhere the staples are located.At a separate time, the instructor will thenattach the butterflies to their respectivelandscapes using a partially unfolded,jumbo paper clip. The more you unfold,the higher the butterfly will be off thelandscape. Keep most of the two “Uturns” intact, but spread out the ends alittle for stability. The smaller U-turn willbe attached to the underside of thebutterfly using paper tape. The larger Uturn will be used to attach the butterfly tothe landscape by piercing a hole into theplate with the tip of the paper clip, slippingthe large U-turn of the paper clip throughthe plate and taping it to the undersideusing a square piece of duct tape.Instructor, use your eye to locate thebutterfly in the most appealing positionbefore you pierce the plate!Assessment:Technology:( ) Teacher Observation( ) Class critique( ) Project Rubric (self tisfactoryCraftsmanshipAnd neatnessShowed RadialSymmetry/BalanceCompleted within1 class session21
ArtLesson PlanTeacher: Shavaun WojciakSchool: ItinerantGrade Level: K-5Date:Instructional Focus/Project Title:Paper SculpturePart 1: Discuss what a sculpture is.Part 2: Design a sculpture.Part 3:Build armature.Part4: Wrap in paper mache.Art Element/Principle:Line, Form, Balance, UnityMedium: Paper MacheVisual Art Standard:Goals/ Objectives:(x ) Skills & Techniques( x ) Creation & Communication( x ) Cultural & Historical Connections( x) Aesthetic & Critical Analysis(x ) Applications to LifeStudents will learn the basics ofbuilding a paper sculpture.Vocabulary:Armature, Form, Sculpture, Balance,Scale, ProportionResources:Activity/Procedures:K-2 Students will cover a bottle withpaper strips dipped in liquidstarch/water, or glue/water. They canmake “flowers” to put in the vase withpipe cleaners and tissue paper.Photos are from an ASD class.3-5 Students will make a free formarmature using foam pieces from TSD,pipe cleaners, and other found objects tocreate turtles, owls, fish, etc. Use themasking tape to hold the dry armaturetogether.Then they can use the stripmethod to layer the paper for 2-3 classperiodsMaterials/Supplies:Liquid StarchStrips of craft paper in various colorsFoam scraps and pads from Teacher’sSupply DepotPipe CleanersMasking TapeMagazines and pictures of nature: Owls, seaturtles, fish, etc.Reproductions: Chihuly works, ClaesOldenburgESE/ESOL:One on One and peer help22
Assessment:( x ) Teacher Observation( x ) Class critique( x) Project Rubric (self assessment)Technology:Chihuly DVD from the BellagioNotes:This may take some practice. For specialeffects you can use bleeding tissuepaper, but use analogous colors. I preferthe non- bleeding craft paper that isplentiful at Elementary yCraftsmanshipand NeatnessShowed BalanceCompletedProjectCreativeApproach23
ArtTeacher:Lesson PlanM. CorleySchool: Alimacani ElementaryGrade Level: 1Date:Instructional Focus/Project Title:Cheeseburger on a BunMedium:mixedPart 1: Draw burger and surroundingshapes. Start craypas colorPart 2: Apply paper to buns: continuecraypas; crayon resist to table andbackgroundArt Element/Principle:Shape, color, textureVisual Art Standard:Goals/ Objectives:( x ) Skills & Techniques( ) Creation & Communication( ) Cultural & Historical Connections( ) Aesthetic & Critical Analysis( x ) Applications to LifeClaes OldenburgRecognizing art in everyday objects;Identify food, color and shape;drawing enlarged and overlappingitemsResources:Vocabulary:Pop Art, overlap, shape, color, texture,curvy linesActivity/Procedures:1. Intro to Pop Art with visuals2. Draw step-by step starting at top ofburger3. Draw milkshake, overlappingburger4. Color appropriate shapes withcraypas5. Consider size proportion of otheritems and add mustard, ketchup6. Pickles, fries, etc.; allow student touse imagination7. Tear paper to fill in bun shapes tocreate texture8. Watercolor resist on table andbackground; more advanced calsscan use tempera with patterns.9. Accommodations for less materialscrayons and craypas or use stencilsto start shapesMaps:Reproductions: Claes Oldenburg visuals pg.52 large book Art ConnectionsMaterials/Supplies:Large white paperPencilCraypasTempera or watercolor setsPaint brushesTorn brown paperGlue24
Assessment:Technology:( ) Teacher Observation( ) Class critique( ) Project Rubric (self tisfactoryCraftsmanshipAnd neatnessShowed RadialSymmetry/BalanceCompleted within1 class session25
ArtLess
Resources: Eric Carle books, life cycle of a butterfly chart, student examples of papers and artwork Activity/Procedures: Part 1: 1. Teacher models how Eric Carle's books are made. Eric Carle is the author & artist. He makes different types of papers to use in his collage illustrations. 2. Students will scribble or make
