Transcription
Creating a dog house using Google SketchUpintroducingGOOGLE SKETCHUP
Project: The first thing we will do in SketchUp is tomake a basic dog house. We will try out different colors andmaterials in this process. We will create windows, doors anduse translucent colors for the windows. This project willallow you to get started using SketchUp and get familiar withthe basic features. Feel free to be creative with thisassignment. By using just a few basic tools you can quicklydesign a fun, colorful house and it won’t take long for you tostart designing a much more complex ones!Design, organize, and collaborate
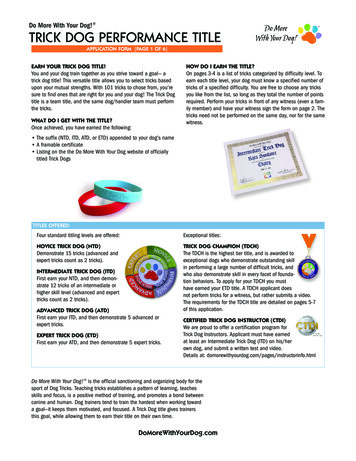
Step 1:DirectionsStart with a Rectangle, and Push/Pull it up to a box.
Step 2:DirectionsTo make the roof, start with a line on the roof betweenmidpoints.
Step 3:DirectionsUse Move on this line, pulling it up (in the blue direction)to make the roof.
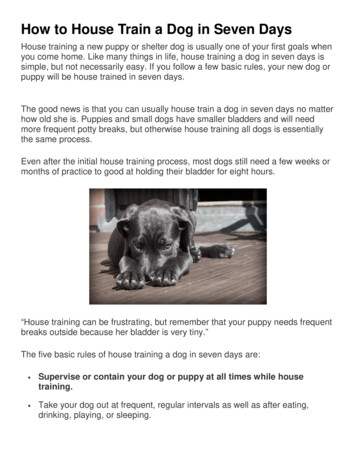
Step 4:DirectionsAdd a rectangle on the front face, to make a door.
Step 5:DirectionsTo make a more interesting door, add an arc at the top(use the Arc tool).
Step 6:DirectionsUse the Eraser tool to erase the top edge of the rectangle,so the door is one face.
Step 7:DirectionsTo remove the door face, right-click on it and chooseErase.
Step 8:DirectionsNow you can see into the house.
Step 9:DirectionsTo make a window, add a rectangle on the side.
Step 10:DirectionsOf course, windows don't have to be rectangles! Use Line andmake some strange shape for a window. Be surethat you see “On Face” while making lines, or the lines mightend up sticking out of the house.
Step 11:DirectionsBe sure to end the window shape where you started. Ifyour lines are correct, the edges around the windowwill be thin.
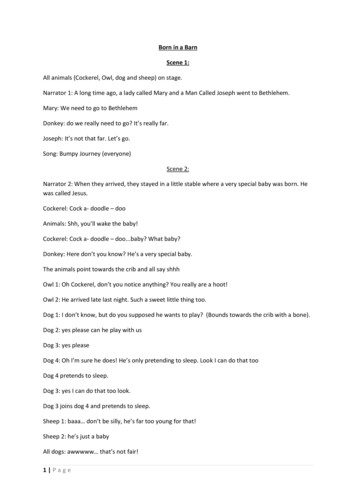
Step 12:DirectionsNow we can add color our dog house, starting with the roof.Click the Paint Bucket tool to open the Materialswindow. Open the “Roofing” folder and click one of theswatches (I'm using the red metal roof).
Step 13:DirectionsThen click the roof faces. Don't forget to paint both sidesof the roof.
Step 14:DirectionsFor the walls, I'm using tan bricks from the “Bricks andCladding” folder.
Step 15:DirectionsHere are the painted sides of the house.
Step 16:DirectionsFor the windows, you can use colors in the “Translucent”folder.
Step 17:DirectionsThese windows are so plain - let’s make them moreinteresting. Add some vertical stripes to this window.
Step 18:DirectionsThen paint the stripes using different translucent colors.
Step 19:DirectionsIf you don't want people to see straight into your house,you probably want to replace that door. Just use Lineto redraw any of its edges, and the face comes back.
Step 20:DirectionsIf you don't want people to see straight into your house,you probably want to replace that door. Just use Lineto redraw any of its edges, and the face comes back.
Step 21:DirectionsTo personalize the dog house, you can add text using the3D Text tool.
Step 22:Directions3D Text requires that you enter a specific font and size, so you mighthave to try a few times to get the exacttext you want. It also comes into the model as a component, so if youwant to change it, you need to edit thecomponent first (or explode the component).
The first thing we will do in SketchUp is to make a basic dog house. We will try out different colors and materials in this process. We will create windows, doors and use translucent colors for the windows. This project will allow you to get started using SketchUp and get familiar with the basic features. Feel free to be creative with this .