Transcription
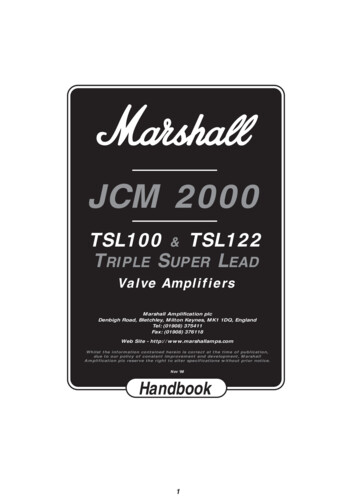
JCM 2000TSL100 & TSL122T RIPLE S UPER L EADValve AmplifiersMarshall Amplification plcDenbigh Road, Bletchley, Milton Keynes, MK1 1DQ, EnglandTel: (01908) 375411Fax: (01908) 376118Web Site - http://www.marshallamps.comWhilst the information contained herein is correct at the time of publication,due to our policy of constant improvement and development, MarshallAmplification plc reserve the right to alter specifications without prior notice.Nov ‘98Handbook1
WARNING! - Important safety instructionsA.B.C.D.E.ALWAYS fit a good quality mains plug conforming to the latest B.S.I. standards where necessary (UK only).NEVER attempt to by-pass the fuses or fit ones of the incorrect value.NEVER attempt to replace fuses or valves with the amplifier connected to the mains.DO NOT attempt to remove the amplifier chassis, there are no user serviceable parts.Refer all servicing to qualified service personnel. Servicing is required when the apparatus has been damaged in any way, suchas the power supply cord or plug is damaged, liquid has been spilled or objects have fallen into the apparatus, the apparatus hasbeen exposed to rain or moisture, does not operate normally or has been dropped.F. NEVER use an amplifier in damp or wet conditions.G. ALWAYS unplug this apparatus during lightning storms or when unused for long periods of time.H. Protect the power cord from being walked on or pinched particularly at plugs, convenience receptacles and at the point where theyexit from the apparatus.I. DO NOT switch the amplifier on without the loudspeaker connected.J. ENSURE that any extension cabinets used are of the correct impedance.K. PLEASE read this instruction manual carefully before switching on. Follow all instructions and heed all warnings.WARNING : This apparatus must be earthed!WARNING : Do not obstruct ventilation grille and always ensure free movement of air around the amplifier!USA ONLY - DO NOT defeat the purpose of the polarised or grounding type plug. A polarised plug has two blades with one widerthan the other. A grounding type plug has two blades and a third grounding prong. The wide blade or the third prong are provided foryour safety. When the provided plug does not fit into your outlet, consult an electrician for replacement of the obsolete outlet.KEEP THESE INSTRUCTIONSIntroductionThe Triple Super Lead series of 100 watt amplifiers takes the acclaimed formula of the groundbreaking Dual Super Lead series and placesan immense amount of control and flexibility at your fingertips.As the name implies, the Triple Super Lead is a three channel amp. Each channel has a full range of independent controls for gain,volume and EQ functions, to maximise its sonic qualities and balance that channel against the others. Further to that, the master sectionhas the capability to enhance and modify the sonic palette even further by providing controls for reverb, fx loop mixes, presence and deepEQ, virtual power reduction and even muting the power amp output for silent recording via the inbuilt speaker emulating DI circuit.Although the three channels of the TSL are named ‘Clean’, ‘Crunch’ and ‘Lead’, DO NOT let these names mislead you into thinking thatyou will only get those functions. Alternatively, think of the TSL as three classic valve amplifiers in one. As you would expect fromindependent amps, each has a wide range of tones, depending on how you you set it up, and you are able to footswitch between them.Read on and we will take you through what each channel can do.Because of the immense functionality of the TSL, it may be that you find, at first, that the front panel control layout is, perhaps, slightlydaunting. Do not worry, a great deal of thought has gone into the layout of the controls and, with the help of this manual and a littlepatience from yourself, we feel that you will soon learn how easy your TSL actually is to use.WHAT YOUR TSL WILL and WON’T DO !Before going into what your TSL amp can do, let’s discuss what it won’t do. Firstly, remember that your tone comes from you andnobody, or nothing, else. Your technique is what makes you the player that you are, nobody else in the world sounds exactly like you.That’s how special you are! Having the best gear in the world is not going to make you play like anybody else but what it will do is helpyou to achieve your aims, by expanding your creative possibilties and generally making life a lot easier.Likewise your guitar, pickups and strings have an immense influence on your final tone. Guitars come in (basically) three differentflavours - Single coil pickups over 25 1/2” scale length (names usually start with the letter F), Humbucking pickups over a shorter scalelength, usually 24 3/4” (names usually start with a G) and thirdly a combination of humbuckers over a 25 1/2” scale length. All theseguitars sound different and although the choice is personal, one type will do a better job than another depending on what type of musicyou want to play.Also different woods and build techniques have a very significant affect on the final tone, i.e. most Humbucking guitars use a lot ofmahogany and a glued in neck, whilst most single coil guitars woods of a totally different resonance (alder, maple, ash, etc) and aseparate bolt on neck construction.Despite what some other amp manufacturers may claim about their products, no amplifier can make one type of guitar sound like atotally different type of guitar.The TSL100 and TSL122 are no different in this respect !What we would like to claim however (and virtually guarantee), is that your TSL100 will maximise the potential of your guitar in a waythat you may never have thought possible and without a doubt will spur your musical creativity onto new horizons.5 Way Foot ControllerYour TSL100 or TSL122 come supplied with a 5 way foot controller for channel, reverb and FX loop switching. It comes complete with an8 metre (approx 26 ft) long lead ending in a 6 pin DIN plug to connect into the footswitch connector on the rear panel of your amplifier,(see rear panel details).Once connected the controller will give you instant access to and visual indication of each of the 3 channels, plus reverb on/off and fxloop on/off. To allow proper operation it is important to remember that both channel mode pushswitches on the front panel (locatedbetween the Clean and Crunch / Lead channels) MUST be pushed IN. As the FX loops are switched entirely out of the amplifier circuit untilan FX device is plugged into either of the FX loop jack sockets, the FX switch and LED indicator on the foot controller are completelyinoperative until the loops are connected. Unless this is done the FX LED will not light up, no matter how many times the switch isdepressed!One benefit of having a foot switched FX loop is that it can be used as a secondary master volume if no FX are connected. This isachieved by inserting a shorted dummy jack plug into the Loop A Return jack socket to access the loop circuitry, switch OFF the FXfootswitch and set your loudest required volume on the individual channel master volumes. Now switch the FX footswitch ON (LED glowsred) and set your quieter volume using the FX Mix controls (Clean Mix for Clean channel, Crunch / Lead Mix for Overdrive). Rememberthat these controls will now work back to front to a normal volume control, i.e. anticlockwise is loudest (same as normal signal) andclockwise is quietest. Now you can toggle between these settings by using the FX footswitch.2
CLEAN CHANNEL(Please refer to diagram A, Page 6)1. Mode Select5. Treble, Middle, Bass ControlsTo access the Clean channel (if the foot controller is NOT connected) release the Clean - OD1/OD2 pushswitch. If the footswitch IS connectedboth mode switches MUST be pushed in, and then press the Cleanpushswitch on the foot controller. The Clean LED (green) on the frontpanel and the clean LED on the footswitch should now both beilluminated.These are the time honoured passive type of network that help make aguitar amp what it is. By being before the gain stages these controlswork in a slightly different way to being after the gain stages, as youwould normally find on a distortion type preamp (and as pioneered byMarshall). By instead of processing an already formed sound, the EQhelps form the voice of the sound. For instance, turning the Mid controldown will clean up the body of the tone and help give the characteristic‘twang’ of country music (coupled with a Txlxcaxter of course !).As you can see, the controls available in the ‘Clean’ mode are: Gain,Volume, Treble, Middle, Bass rotary controls and Mid Boost pushswitch(preamp) and Reverb, FX Mix, Presence rotary controls and Deeppushswitch (at master level).Also turning the Mid down will help when undertaking funkier rhythmwork, to enable the treble to cut through and not muddy up thefrequencies needed for the lead instrument(s). Obviously, altering theTreble and Bass controls will have the affect of tailoring the high andlow frequencies in your tone. When playing at high levels (gain as wellas volume) turning the Bass down will help maintain note definition andaid projection. Try turning the Treble down and Mid up a bit for the soloin that warm romantic ballad, with the right amount of gain, you will berewarded with some sweet clean sustain.Two more pushswitches are available, but remember these affect thewhole amplifier as well (these are marked PowerAmp V.P.R. and OutputMute).FUNCTIONS2. Gain ControlMaster Section ControlsAs with most amplifiers, this controls the sensitivity of the input sectionof the preamp. At low settings the preamp will be ultra clean with a verybright character. As you turn the control up, the sound will becomefuller and warmer (some may say ‘fatter’), with a more pronouncedbottom end. Set at the top end of the control’s range (depending on thetype of guitar and pickups, etc) a very warm sustaining breakup will startto occur, depending on the EQ settings, as described below.At the other end of the panel you will find the ‘Clean’ master sectionwith the following controls :6. Reverb ControlThis will vary the inbuilt Accutronics spring reverb from a faint shimmerto deep and luxurious, this will affect the ‘Clean’ channel only.3. Volume Control7. FX Mix ControlThis sets the amount of signal generated by the preamp out into thepower amp section. When using very clean ‘Gain’ settings, you maywant to turn this up higher than when using higher ‘Gain’ settings toachieve a suitable stage sound level. The FX loop comes after thiscontrol, which will help you balance the FX level with the otherchannels.When using the extensive FX looping facility on the rear panel, thiscontrol will adjust the FX mix for the clean channel only, from totallydry (0) through varying degrees of parallel mix (1-9) to a full seriesconnected loop (10). For more information see FX Loop section8. Presence Control and Deep SwitchNOTE : Many different ‘clean’ amp textures can be created by balancingthe ‘Gain’ and ‘Volume’ controls.The presence control will boost the upper mid / lower treble part of thetone giving it more up-front brilliance, great for cutting throughoveractive cymbals. The Deep switch gives the tone a very resonanttexture as it interacts with the low frequencies of the loudspeakers. Thisis great for filling out the bottom end at low volumes but will also give aresonant but controlled growl to the tone at high volumes.4. Mid Boost PushswitchThis works in conjunction with the passive EQ controls by disconnectingthe Mid control from the circuit, then reconfiguring the way the Trebleand Bass controls work. One way of using this function is to set theGain control high, Treble and Bass midway and with sufficient outputvolume setting, you will be rewarded with a very singing, sustainingBlues / Jazz Rock lead type tone, as characterised by many Chicago,Texan and Californian players, particularly those using more vintagetype amps. This tone can then be modified by using the Treble, Bass andPresence controls.CRUNCH CHANNEL9. V.P.R. and Mute PushswitchesPlease see later section.(Please refer to diagram B, Page 7)1. Mode Select4. Tone Shift PushswitchTo access the crunch channel (if the foot controller is NOT connected) front panel pushswitch marked ‘Clean - OD1 / OD2’ should bedepressed and the one marked ‘OD1 / OD2’ should be released. If thefoot controller IS connected both switches MUST be pushed in and thenpress the Crunch switch on the foot controller. The Crunch LED(yellow) on the front panel and the Crunch LED on the foot controllerwill now be ON.This takes the traditional, slightly middly Marshall passive postdistortion EQ network and reconfigures it to produce a more midscooped tone. Whilst mid-scooped tone is usually associated with‘Metal’, please do not be afraid to experiment with the shifted tonesettings even if metal is not your thing, as it is very useful in deepeningthe tone at low volumes.5. Treble, Middle, Bass ControlsThe controls available in the ‘Crunch’ mode are Gain, Volume, Treble,Mid, Bass rotary controls and Tone Shift push-button (on the preampsection), Reverb, FX Mix, Presence rotary controls and Deep pushswitchon the master. These are also shared with the ‘Lead’ channel.As stated above, these are the traditional Marshall post distortion EQcontrols and as such affect the character of the distorted signal. It issuggested that initially you set the controls midway and experiment fromthere, rather than the ‘everything on 10’ method favoured for the earliernon-master Marshall amps. Remember, increasing the treble is going tomake the distortion more ‘fizzy’ and ‘cutting’, whereas increasing themid will make the distortion more fluent and sustaining but probably notas dynamic (in the modern sense). Try what you will, there are manytextures to discover.FUNCTIONS2. Gain ControlAgain this controls the input sensitivity of the channel but with the effectof being capable of much more gain and hence more dramatic distortion.At low settings, the channel is relatively clean (although darker in tonethan the clean channel) and makes a good alternative for gentler, bluesystyle solos. With a bit more gain the tone becomes more aggressivelytraditional Marshall rock with the emphasis on chunky power chords.Take the gain control to the limit and we enter modern high gain crunchterritory, with probably more gain and dynamics than othermanufacturers would put on their lead channels!6. Master Section ControlsAs with the Clean channel the Reverb, FX mix, Presence, and Deepfunctions can be adjusted independently of the Clean channel butremember these controls are also used in conjunction with the Leadchannel.3. Volume ControlAgain this controls the balance and level of the crunch channel againstthe rest of the TSL.3
LEAD CHANNEL(please refer to diagram C, Page 8)1. Mode SelectOutput MuteTo access the Lead channel - both front panel ‘mode select’pushswitches must be pushed in (with or without the foot controllerconnected). If using the foot controller press the Lead switch. The LeadLED (red) on the front panel and on the foot controller will now beilluminated.By the nature of the ‘V.P.R.’ circuit, we can now turn off the signal tothe output valves. As the speaker emulating DI output is connected tothe same place, this enables the TSL to be DI’d for silent recording, yetmaintain the compression and harmonics of a push-pull valve stage.Power and Standby SwitchesFUNCTIONSThese are a very important part of your valve amplifier and to helpmaximise the life of your output valves. Please remember these simplebut important rules :As you can see the control line up in the ‘Lead’ mode is identical to the‘Crunch’ mode, except now you are using the other row of controls.Operation of the ‘Lead’ channel is exactly the same as the ‘Crunch’channel, but with a lot more gain and compression to play with. Thischannel will still clean up with low gain settings or from the guitar’svolume control. BUT, when wound up the dynamics and response ofthis channel will follow your every move. When speed picking the ampwill follow every note without blurring and when playing slow legatoruns, the amazing sustain will bloom into controlled feedback hangingon for as long as you want. Experimenting with the Gain, Volume andEQ controls will yield an extremely wide palette of tonal textures.1. Always turn the Power switch on first, wait for at least a minute, 2 ifpossible. This enables the valves to reach their working temperaturebefore the HT voltage is applied.2. Then turn on the Standby switch. This applies the HT voltage to thevalves and makes the amp work.3. When stopping for a break, turn Standby switch off only. This allowsthe valves to remain at their working temperature (where they arehappiest !) and you do not need to go through the warm up cycle againwhen you are ready to resume playing.OTHER FRONT PANEL CONTROLSIn the section marked ‘POWER AMP’ there are two pushswitches, onemarked ‘V.P.R.’ and the other marked ‘Output Mute’, these work in thefollowing way:4. At the end of the gig turn the Standby switch off first, wait a fewseconds and then turn the Power switch off.Another important rule to remember, to help prolong valve and amplifierlife is after turning off at the end of a gig, let your amp cool down beforemoving it and certainly before putting into the back of the truck on a coldnight. Remember this and your valves (tubes) will love you for it.V.P.R. - Virtual Power ReductionWhen this switch is depressed, the power amp circuit is modifiedallowing it to emulate a lower powered amp, approximately 25 watts.This is done between the phase splitter (inverter) valve and the outputvalves. In this way, as compared to other methods of power reduction,all four output valves remain running and connected in pentodeoperation, thereby all valves wear evenly and maintain the full tonefuldynamics of that type of connection.TSL100 & TSL122 REAR PANEL(refer to diagram D, Page 9)The TSL rear panel contains a number of functions to not only make theamp work but also to expand its versatility.sockets are marked 4 & 8 Ohm Parallel Jacks and are connected to the 4& 8 Ohm Impedance selector. These are used when using either nonMarshall cabinets of a different impedance (either 4 or 8 ohms) or whenusing multiple speaker systems (i.e. when using two stacked Marshall4x12” cabs or when using an extension cab with the TSL122 combo).Remember to set the Output Selector to the appropriate setting! (item 4)i.e. 2 x 16 Ohm loads 8 Ohms, 1 x 4 Ohms 4 Ohms, 2 x 8 Ohms 4Ohms. If in doubt consult your Marshall dealer.1. Footswitch ConnectorThe supplied foot controller is connected to the amplifier via this 6 pinDIN socket to allow remote switching of Channels, Reverb and FXfunctions. See section on 5 way foot controller for details.2. Effects Loop A & Effects Loop BWARNING! - Under no conditions operate your TSL amplifier without aloudspeaker type load connected, otherwise costly damage may result!The TSL supports two effects loops, which can be used in a variety ofways.You may notice that the TSL122 2x12” combo has two different types ofloudspeaker (1 x Marshall Celestion Vintage and 1 x Marshall CelestionHeritage), this is because combining the characteristics of the twospeakers helps reproduce the unique tone capabilities of this amp. Wecare about your tone!Loop A when used on its own, is the master loop for the amp and willchannel switch from clean to overdrive when you change channels,allowing you to set the individual mix from the front panel Mix controls.Loop B is the specific loop for using effects on the overdrive channels(Crunch / Lead) and if used on its own will only provide effects when onthese channels, leaving the clean channel totally dry.To further extend the TSL122 combo’s capabilites there is a matching2 x 12” cabinet - the TSLC212. This cabinet is the perfect match for thecombo as it features a similar speaker configuration.When Loop B is in use Loop A becomes available for use solely on theClean channel. This means that you can have two totally different FXsystems, one for clean and one for overdrive.5. Emulated Line OutThis XLR connector provides a superb loudspeaker emulated outputsignal, suitable for either connecting into a PA system or for directrecording, without resorting to using microphones or external DI units.As stated earlier, by using the “output mute” function, silent recordingcan be accomplished, enabling late night project studio sessions to becarried out with the minimum of stress. This socket can be connected ina variety of ways. See diagram E.Each loop has its own ‘loop level’ pushswitch, enabling you to select theright send and return levels to suit whatever effects system you are using.With the switch ‘out’, the level within the loop is high (suitable for mostpro rack fx). With the switch ‘in’, the level within the loop is set at amuch lower signal level (suitable more for floor pedals or lesser spec’drack units).Note: The loops are in parallel mode until the mix controls are at 10when the loop converts to series mode. Also, remember that as the loopsare between the preamp and the power amp, this is NOT the place fordistortion type effects units.6. Mains Input, Mains Fuse, HT FuseThe mains input and fuse provide and protect your amplifier with theincoming electric power, enabling it to operate. Please see specifications(and amplifier rating) for more details. If in doubt consult your Marshalldealer. The HT fuse protects your amplifier from an internal fault withthe HT voltage supply. If this blows, it would probably indicate that anoutput valve has failed. If this happens, consult your Marshall dealer orservice centre, regarding replacement and service.3 & 4. Loudspeaker Outputs & Impedence SelectThere are three loudspeaker jacks provided on the TSL amps. One isdedicated to 16 Ohm use only and is marked as such. This is for usewhen using either a single 16 Ohm cabinet (Marshall 4x12” of course!)on the TSL100 head or the internal speakers on the TSL122 combo.Using this socket negates the use of the other sockets! The other twoWARNING! For your protection and safety, your amplifier must beserviced by qualified personnel only.4
Diagram E - Line Out XLR ConnectionsA333322221111XLR Channel Input On Mixer(Note: Line Level-Approx OdBV)2 Core Screened Balanced Mic LeadB332211NCUnbalanced XLR to Jack Screened LeadC332211Jack PlugLine Level Jack Input On Mixer Etc.NCUnbalanced XLR to Jack Screened LeadJack PlugLow Level Jack Input On Mixer (ie Mic Input)SPECIFICATIONOutput power(typical) 120 watts at 5% THD into 4/8/16 ohms.Mains input117V 60Hz or 230V 50Hz (standard) - others to special order.(To alter amplifier for different mains voltage specification to that delivered (i.e. 120V to 230V etc), pleasecontact your country’s Marshall distributor or main service centre.)Mains power input375 watts.Mains fuseT4A - 117V or T2A - 230VHT fuseT1AValve (Tube) complement4 x ECC83 (12AX7) - preamp and phase splitter (inverter).4 x EL34 - output. Marshall - Svetlana fitted as standard.WARNING!!If the loudspeaker is disconnected a high voltage can be present at theseoutput terminals. Operation in this manner can damage your amplifier,therefore ensure that the loudspeaker is properly connected.WARNING : RISK OF HAZARDOUS ENERGY!AVIS : ENERGIE ELECTRIQUE DANGEREUSE!5
Diagram A - Clean ChannelFront Panel - TSL122 Combo - Clean ChannelJCM 2000 T462GAINCLEANOD1 / OD268 2100INPUT448100VOLUMEOD1 - CRUNCHOD2 - LEADS U P ER L EA DR IP LE62MIDBOOST4648 LEMIDDLE4646100100646446100648 2LEADOD22VOLUME6CRUNCH68 2100GAIN488 2010TONESHIFT8210010FX MIX6461001006464100648 28 20REVERB468 22BASS4100LEADCRUNCH1006100106468 28 210061548 2CLEAN8 2PRESENCE10OFF8DEEP8 20OFFOUTPUTMUTEV.P.R.8100ONPOWERTSL 122POWER AMP987ONSTANDBYFront Panel - TSL100 Head - Clean Channel4T SL 10 0OFFOFFV.P.R.OUTPUTMUTEPOWER AMPONONPOWERDEEP4646LEADCRUNCH8 2468 2468 28624610010010010010010010010464646464646464628 2108CLEAN8 2100100FX MIXREVERB768 2100BASS8 00GAIN462OD1CRUNCH8 2JCM 2000 TOD2LEAD8 20PRESENCE9468 20STANDBY462CLEANCLEANOD1 / OD2OD1 - CRUNCHOD2 - LEAD1468 2100BASS4RIPLE68 2100MIDDLE548010S UPER L EAD62MIDBOOSTTREBLE4468 21008100VOLUMEGAIN32INPUT
Diagram B - Crunch ChannelFront Panel - TSL122 Combo - Crunch ChannelJCM 2000462CLEANOD1 / OD268 2100INPUT4GAIN480OD1 - CRUNCHOD2 - LEADT R IP LE S U P ER L EA D10VOLUME62MIDBOOST4648 ECT4461001006464100648 28 2100TONESHIFT828100106468 210100REVERBFX MIX46460100464LEADCRUNCH100PRESENCE46100106468 2CLEAN8 28 28 210054368 20BASS48 2210021MIDDLE66LEADOD2TREBLE44CRUNCH68 2GAIN410OFF8DEEP8 20OFFV.P.R.OUTPUTMUTE8100ONONSTANDBYPOWERTSL 122POWER AMP6Front Panel - TSL100 Head - Crunch Channel4T SL 10 0OFF2OFFOUTPUTMUTEV.P.R.POWER AMPONONPOWERSTANDBYDEEP46468 2468 246LEADCRUNCH468 2468 286246010010010010010010010010464646464646464628 2010PRESENCECLEAN8 2100FX MIX6010REVERB8 2100BASS8 LEANOD1 / OD2OD1 - CRUNCHOD2 - LEAD100462CRUNCH8 2100MODESELECTLEAD8 2JCM 2000 TOD21468 2100BASS4RIPLE68 2010MIDDLE48010TREBLES UPER L EAD62MIDBOOST460108 2010VOLUME8GAININPUT
Diagram C - Lead ChannelFront Panel - TSL122 Combo - Lead ChannelJCM 2000 T46210GAINCLEANOD1 / OD268 20INPUT448010VOLUMEOD1 - CRUNCHOD2 - LEADS U P ER L EA DR IP LE62MIDBOOST4648 ECT4461001006464100648 28 2100TONESHIFT82836100106468 28 2100BASS48 2210021MIDDLE66LEADOD2TREBLE44CRUNCH68 2GAIN4104FX MIX6460100464LEADCRUNCH100PRESENCE46100106468 2CLEAN8 20REVERB48 28 210010OFF8DEEP8 20OFFV.P.R.OUTPUTMUTE8100ONONSTANDBYPOWERTSL 122POWER AMP65Front Panel - TSL100 Head - Lead Channel4T SL 10 0OFFOFFOUTPUTMUTEV.P.R.POWER AMPONONPOWERSTANDBYDEEP462468 24646LEADCRUNCH8 2468 2468 286246010010010010010010010010464646464646464628 2010PRESENCECLEAN8 2100FX MIX6010REVERB8 2100BASS8 IN32CLEANCLEANOD1 / OD2OD1 - CRUNCHOD2 - LEAD100460102OD1CRUNCH8 2100JCM 2000 TOD2LEAD8 21460108 2BASSRIPLE460108 2MIDDLE8TREBLES UPER L EAD460102MIDBOOST460108 2VOLUME8GAININPUT
Diagram D - Rear PanelsRear Panel - TSL122 Combo!MAINS FUSE(T2A - 230V)(T4A - 120V)MAINS INPUT120V 60 Hz375 WattsHT FUSET1AWARNING!:RISK OF HAZARDOUS ENERGY!8 Ohm4 OhmSELECTEMULATEDLINE OUTAVIS!:ENERGIE ELECTRIQUE DANGEREUSE!LOUDSPEAKER OUTPUTSEFFECTS LOOP BLOOPLEVEL(4 & 8 Ohm PARALLEL JACKS)16 Ohm ONLYNote: 16 Ohm Output Jack negates use of others.REFER TO MANUAL FOR FULL DETAILS. SE REFERER AU MANUEL POUR PLUS DE DETAILS.4LOOPLEVELSENDRETURNSENDWARNING!: SHOCK HAZARD. DO NOT OPEN. TO REDUCE THE RISK OF FIREOR ELECTRIC SHOCK DO NOT EXPOSE THIS EQUIPMENT TO RAIN OR MOISTURE.THIS APPARATUS MUST BE EARTHED.AVIS!: RISQUE DE CHOC ELECTRIQUE. NE PAS OUVRIR. POUR EVITER LESRISQUES D’INCENDIE ET DE DECHARGES ELECTRIQUES, N’EXPOSEZ JAMAIS CETAPPAREIL A L’HUMIDITE OU A LA PLUIE. CONNECTER CET APPAREIL A LA TERRE.123CAUTION!: TO REDUCE THE RISK OF FIRE REPLACE FUSES WITH THE SAMETYPE AND RATING ONLY. DISCONNECT SUPPLY CORD BEFORE CHANGING FUSE.TO REDUCE THE RISK OF ELECTRIC SHOCK DO NOT REMOVE COVER. NO USERSERVICEABLE PARTS INSIDE. REFER SERVICING TO QUALIFIED SERVICE PERSONNEL.ATTENTION!: POUR EVITER LES RISQUES D’INCENDIE UTILISER UN FUSIBLEDE MEME TYPE ET DE MEME CALIBRE. DEBRANCHER AVANT DE REMPLACER LEFUSIBLE. POUR EVITER LES RISQUES DE DECHARGES ELECTRIQUES, NE PASOUVRIR LE COUVERCLE. CET APPAREIL NE COMPORTE AUCUNE PIECESUSCEPTIBLE D’ETRE REPAREE PAR VOS SOINS. FAITES TOUJOURS APPEL AUN TECHNICIEN QUALIFIE POUR TOUTE REPARATION.{Made in England by:5RETURNFOOT CONTROLLER1 - Use EFFECTS LOOP A only as Master Loop (on all three channels)LOOP MODE 2 - Use EFFECTS LOOP B only for effects on OD channels (CRUNCH & LEAD) only3 - Use EFFECTS LOOPS A and B for separate effects on CLEAN & OD channelsMarshall Amplification plc, Bletchley, Milton Keynes, England.6EFFECTS LOOP ARear Panel - TSL100 Head1 - Use EFFECTS LOOP A only as Master Loop (on all three channels)LOOP MODE 2 - Use EFFECTS LOOP B only for effects on OD channels (CRUNCH & LEAD) only3 - Use EFFECTS LOOPS A and B for separate effects on CLEAN & OD channelsCAUTION!: TO REDUCE THE RISK OF FIRE REPLACE FUSES WITH THE SAME TYPEAND RATING ONLY. DISCONNECT SUPPLY CORD BEFORE CHANGING FUSE.TO REDUCE THE RISK OF ELECTRIC SHOCK DO NOT REMOVE COVER. NO USERSERVICEABLE PARTS INSIDE. REFER SERVICING TO QUALIFIED SERVICE PERSONNEL.ATTENTION!: POUR EVITER LES RISQUES D’INCENDIE UTILISER UN FUSIBLE DEMEME TYPE ET DE MEME CALIBRE. DEBRANCHER AVANT DE REMPLACER LE FUSIBLE.POUR EVITER LES RISQUES DE DECHARGES ELECTRIQUES, NE PAS OUVRIR LECOUVERCLE. CET APPAREIL NE COMPORTE AUCUNE PIECE SUSCEPTIBLE D’ETREREPAREE PAR VOS SOINS. FAITES TOUJOURS APPEL A UN TECHNICIEN QUALIFIE POURTOUTE REPARATION.{FOOT CONTROLLEREFFECTS LOOP AWARNING!: SHOCK HAZARD. DO NOT OPEN. TO REDUCE THE RISK OF FIRE ORELECTRIC SHOCK DO NOT EXPOSE THIS EQUIPMENT TO RAIN OR MOISTURE.THIS APPARATUS MUST BE EARTHED.EFFECTS LOOP BLOOPLEVELSENDAVIS!:RISQUE DE CHOC ELECTRIQUE. NE PAS OUVRIR. POUR EVITER LES RISQUESD’INCENDIE ET DE DECHARGES ELECTRIQUES, N’EXPOSEZ JAMAIS CET APPAREIL AL’HUMIDITE OU A LA PLUIE. CONNECTER CET APPAREIL A LA TERRE.!SENDMarshall Amplification plc, Bletchley, Milton Keynes, England.LOUDSPEAKER OUTPUTSLOOPLEVELRETURNMade in England by:WARNING!: RISK OF HAZARDOUS ENERGY!AVIS!: ENERGIE ELECTRIQUE DANGEREUSE!RETURN16 Ohm ONLY(4 & 8 Ohm PARALLEL JACKS)EMULATEDLINE OUTHT FUSEMAINS INPUTMAINS FUSET1A120V 60 Hz375 Watts(T2A - 230V)(T4A - 120V)4 Ohm8 OhmSELECTNote: 16 Ohm Output Jack negates use of others.REFER TO MANUAL FOR FULL DETAILS. SE REFERER AU MANUEL POUR PLUS DE DETAILS.123456
Blues / Jazz Rock lead type tone, as characterised by many Chicago, Texan and Californian players, particularly those using more vintage type amps. This tone can then be modified by using the Treble, Bass and Presence controls. 5. Treble, Middle, Bass Controls These are the time honoured passive type of network that help make a guitar amp what .

