Transcription
BIOCHEMISTRY LABORATORYMANUALCHE 4350Andrew J. Bonham, Ph.D.,AnnaMarie Drotar, Ph.D.,Kelly M. Elkins, Ph. D.BONHAMCHE 4350SPRING 20131
TABLE OF CONTENTSTitle Page1Table of Contents2Introduction3Laboratory Safety4-6Avoiding Contamination Issues7Module 1: Biochemistry Laboratory Basic Skills81 Scientific papers, lab notebooks, and the science of biochemistry9-102 Pipetting & Buffer preparation11-18Module 2: Protein Purification and Characterization19Introduction & Purification Scheme193 Resin elution from lysed yeast20-214 Ammonium sulfate precipitation and in silico protein investigation22-285 Cation-exchange column chromatography29-326 Protein characterization and quantification by UV-Vis & Bradford assay33-407 SDS-polyacrylamide gel electrophoresis (SDS-PAGE)41-468 Cyclic voltammetry or activity assay of Cytochrome c redox47-49Module 3: DNA Modifying Enzymes & Molecular Cloning509 DNA Purification of plasmid and Primer Design51-5510 PCR and and in silico protein cloning56-6011 Restriction digest and ligation of PCR and plasmid vector61-6212 Agarose gel electrophoresis63-6513 Bacterial transformation of ligation products66-67Module 4: Enzyme Kinetics6814 Kinetics of Tyrosinase69-7315 Inhibition of Tyrosinase74-77Appendix: Formal research lab reports in the style of Biochemistry78-79BONHAMCHE 4350SPRING 20132
WELCOME TO THE BIOCHEMISTRY LABORATORY!This Biochemistry laboratory seeks to model work performed in a biochemical researchlaboratory. The course will guide you through basic lab techniques, investigations into DNAand enzyme kinetics, an intensive purification and characterization of an unreported protein,and will culminate in a formal research paper in the format of an article published inBiochemistry.Module 1 is concerned with basic lab skills. In these labs, we will learn how scientists thinkand write about biochemistry and perform experiments. We will also learn to accurately andprecisely measure small volume of liquid while avoiding sample contamination. Lastly, wewill learn to compute and create buffer solutions—a cornerstone of biochemistry.Module 2 will allow us to purify the protein cytochrome c from a yeast species(Saccharomyces cerevisiae) using various fractionation techniques includinghomogenization, centrifugation, and column chromatography. We will characterize ourproducts using biochemical methods including gel electrophoresis, UV-Vis spectroscopy,and electrochemistry. Using modeling software on the computer, the structure and functionof model, comparison cytochrome c proteins will be investigated. As a result of this project,we will determine the molecular weight, the approximate number and type of aromaticresidues, characteristic UV-Vis spectra, and denaturation/renaturation properties ofcyctochrome c.Module 3 looks into the processes used to isolate, purify, amplify, and characterize DNA.We will isolate and purify DNA from a bacterial source, and design and then use then usethe polymerase chain reaction (PCR) to amplify a DNA region of interest to ascertain thenature of the DNA we purified. Finally, we will perform in silico studies of DNA cloning,followed by DNA restriction and ligation for transformation into a bacterial expressionsystem—molecular cloning.Module 4 is focused on enzyme kinetics, the measurement of the extent and mechanismby which enzymes catalyze biological reactions. We will investigate these processes bylooking at the activity of tyrosinase found in mushrooms, which catalyze oxidation ofvarious substrates. We will also investigate the effect of enzyme inhibitors of thesereactions.The emphasis of the lab is on learning to perform complex biochemical techniques, as wellas on analyzing and interpreting data and using graphing programs. Lab instructions andreport expectations are explained in the pages that follow.BONHAMCHE 4350SPRING 20133
Laboratory SafetyRules for a Safe Lab EnvironmentSafety in the chemistry laboratory involves a cautious attitude and an awareness of potentialhazards. Usually potential accidents can be anticipated and prevented. If safety precautionsare followed, fewer accidents will occur. The number of laboratory accidents can be reducedif every student follows all of the directions given for the experiment and by the instructor.Special note should be taken of specific instructions that are given in an experiment toeliminate recognized potential hazards.A. General Regulations1. MSUD is not responsible for damage to personal effects.2. Whenever students are performing authorized experiments in the laboratory, an instructoris expected to be present or a student needs explicit permission from the instructor to work inthe laboratory in which case the student must have a partner present in the lab.3. Any breakage of glassware or other breakable laboratory equipment is to be immediatelyreported to the laboratory instructor. DO NOT CLEAN UP THE BROKEN GLASS. Yourlaboratory instructor will clean up and dispose of all broken glassware and equipment.4. Electronic devices, such as cellular phones and pagers, and any personal entertainmentdevices must be turned off prior to the beginning of the lab period. Failure to comply willresult in dismissal.5. No visitors should attend class without the prior consent of the instructor6. Failure to comply with laboratory rules and regulations will result in expulsion from thelaboratory and referral to the Department Chair for further action.B. Student Responsibility1. LOCATE THE SAFETY EQUIPMENT. Find the eyewash, safety shower, fireextinguishers, fire blanket, first-aid kit and all exits that are to be used in an emergency.2. PROTECT YOUR EYES. Eye protection (safety goggles) are to be worn at all timeswhile working in the laboratory room. Failure to abide by this policy will result in expulsionfrom the lab and a grade of zero for the assigned lab experiment.3. LONG HAIR NEEDS TO BE PULLED BACK.4. SHOES WORN TO LAB MUST COVER YOUR FEET COMPLETELY. Since brokenglass and spilled chemicals are all too common occurrences in lab, your feet will need moreprotection than that afforded by open-toed shoes or sandals. NO OPEN- TOED SHOES,NO CROCS.5. Students must be dressed properly for lab. WEAR CLOTHES THAT WILL PROVIDEYOU WITH THE MAXIMUM PROTECTION AND COVERAGE AS POSSIBLE. OLDJEANS OR SLACKS ARE TO BE WORN TO THE LABORATORY. NO SHORTS.Shirts must cover to top of bottoms. Long skirts are allowed if they fall at the ankle.6. FOOD AND DRINK ARE NOT ALLOWED IN THE LABORATORY ROOM.7. DO NOT TASTE ANY CHEMICAL. To prevent the entry of any chemical substance intoyour mouth, it is best not to put any object in your mouth such as pens, pencils or fingers inthe laboratory room. After lab is finished, hands should be washed with soap before leavingBONHAMCHE 4350SPRING 20134
the laboratory room.8. DO NOT SMELL CHEMICALS DIRECTLY. Use your hand to waft the odor to yournose if you are directed to note an odor in an experimental procedure.9. When dealing with any biological material or chemical, take all necessary precautions toavoid skin contact, use adequate equipment and ventilation, and treat all samples withextreme care.10. Wear gloves when working with the samples and chemicals.C. Housekeeping Rules1. REPORT ALL CHEMICAL SPILLS TO YOUR LABORATORY INSTRUCTOR.CLEAN UP ALL SOLID AND LIQUID SPILLS IMMEDIATELY.2. DO NOT POUR ANY CHEMICALS INTO THE SINK OR DISPOSE OF ANYCHEMICALS IN THE TRASH WITHOUT PRIOR AUTHORIZATION.3. BEAKERS SHOULD BE USED TO OBTAIN STOCK MATERIALS. If, whendispensing stock solutions you obtain too much, DO NOT RETURN EXCESSSTOCK SOLUTIONS BACK INTO THE STOCK SOLUTION CONTAINERS. This willcontaminate the stock solution.4. READ THE LABEL ON ALL STOCK SOLUTIONS AND CHEMICALS CAREFULLY.5. DO NOT INSERT A DROPPER OR PIPET INTO A STOCK SOLUTION CONTAINER.Pour a small amount of the stock solution into a beaker and then insert your dropper or pipetinto the beaker.6. TAKE NO MORE OF A CHEMICAL THAN THE EXPERIMENTAL PROCEDUREREQUIRES. Carefully read the procedure and determine the quantity of each stock solutionand/or chemical you need. Obtain only that amount. If you take too much, share it with yourneighbor. NEVER RETURN THE EXCESS TO THE STOCK CHEMICAL BOTTLE.7. DO NOT PUT PAPER OR SOLID WASTE INTO THE SINKS.8. Material Safety Data Sheets (MSDS) are available for all chemicals used in the laboratory.D. Accident and Emergency Procedures1. Each individual is to report any accident, no matter how small, to the laboratory instructor.If necessary, the laboratory instructor will give a written report of the incident to theDepartment Chair.2. Should an incident occur and a staff or faculty member is not immediately available,contact the Health Center at Auraria at 303-556-2525 for assistance or call 911.E. Medical or Hospitalization Insurance InformationIf you are involved in an accident, all medical expenses will be your responsibility or yourguardian's responsibility. If appropriate, please check with your guardians to see whetheryou are covered by medical insurance.BONHAMCHE 4350SPRING 20135
F. ContractIf you do not submit the signed contract to your Laboratory Instructor, you will not beallowed into the laboratory or be allowed to perform any laboratory work.I, the undersigned, have read the discussion of good laboratory safety rules and practicespresented in this laboratory manual. I recognize it is my responsibility to observe thesepractices and precautions while present in the laboratory. I understand if I do not complywith these regulations, I will be asked to leave the laboratory by my instructor and willreceive a grade of ZERO for that experiment. I understand that if I willfully destroy labequipment, I will be expected to pay for the damage caused.Signature of StudentDatePrint Full NameSemesterCourseSectionLaboratory InstructorBONHAMCHE 4350SPRING 20136
Avoiding Contamination Issues: Standard Laboratory Practices1. Gloves should be worn when working with samples.2. Gloves are changed whenever they may have become contaminated.3. Biological waste should be double bagged in autoclave bags and taken directly to theautoclave.4. Label all samples clearly with your name, date, and contents.5. Sterilized microcentrifuge tubes and sterile aerosol resistant pipet tips are used whenpossible.6. Pipet tips are changed between each sample. They do not need to be changed whenaliquoting kit reagents, buffers, or other liquids repeatedly.7. Equipment (centrifuges, pipettors, racks, etc) is cleaned as needed after each use.8. Protein and reagents are stored in the freezer after use. Chemicals are stored as directedby instructor.Pipettor Proper Use & Warnings1. Do NOT turn the adjustment knobs on pipettors past the maximum volume. This willdamage the pipettor, and you will be responsible for the replacement cost ( 250).2. Be consistent in your technique. Place the tip below the surface of your sample toroughly the same depth every time. Similarly, the pressure you put on the first stop shouldbe consistent.3. Always look at what you are doing.4. If you are worried about your pipettor accuracy, perform a calibration check with aweighboat and water. 1 uL of H2O 1 mg.5. If you are unsure of proper pipettor technique, review Lab 2 and consult the instructor.BONHAMCHE 4350SPRING 20137
Module 1: Basic Biochemistry Laboratory SkillsBONHAMCHE 4350SPRING 20138
1 Scientific Papers, Lab Notebooks, and the Science of BiochemistryObjectiveIn this lab session, we will discuss and explore the process of science. Specifically, we willfocus on what constitutes data, which data goes in a lab notebook versus a scientific paper,and how biochemistry is advancing.SafetyThis experiment has no special safety requirements, although the instructor will brief you onsafety concerns in the lab classroom.BackgroundThis lab section will serve as an introduction to the practical science of biochemistry.As the chemical processes of life are complex and subtle, biochemists must be verycareful and clear in their thinking and technique in order to tease out information onthe complexity of life. This, in general, is the process that all science follows, theScientific Method. This technique for understanding the world has been formulatedin many ways. One simple formulation of how to proceed in science is as follows:1. Make an observation, or a series of observations.2. Form a hypothesis, a possible explanation for the observations.3. Perform an experiment that will either confirm or deny the hypothesis.4. Analyze your results – do they support your hypothesis?5. Report your findings to others, to avoid duplication of work and to raise thebar of knowledge.6. Invite others to reproduce and confirm your results.Real scientists engage in this scientific method every day, slowly uncovering thecomplexity and intricate workings of the world. In this course, you will, as much aspossible within a teaching framework, engage in this method as well.In most experiments this semester, the initial observation has been made to you, interms of expected results and prior knowledge of a topic provided. However, youstill need to form a hypothesis, perform the experiment, analyze your results, andreport your findings. You will do this in two ways: in a lab notebook, and in formallab reports.The Lab Notebook is your journal of what actually happens in the lab. A labnotebook should contain many things: a Table of Contents to aid navigation of the notebook a date on each page a written introduction / explanation to yourself of the importance of theexperiment Procedural notes (if following a published procedure, there is no need to copythe procedure verbatim. Just reference it, and note changes) Values collected (i.e., if a protocol called for using 5.0 grams of NaCl, howmuch did you actually use? 4.998 g?) All results collected, along with observations (did the tube turn pink, and theprotocol didn’t mention that? That’s an observation!) Analysis of the data – legible tables, graphs, and calculationsBONHAMCHE 4350SPRING 20139
Brief conclusions Answers to analysis and comprehension questionsLab reports are a more formal presentation of your results, and often omit “trivial”details, such as what size beaker you obtained a sample in. Instead, they focus onclearly explaining the significance of the experiment, and give a careful, wellreasoned and clearly worded analysis of the results, leading the reader to theconclusion.In this course, we will help you use your lab notebook and lab reports like a scientist.Lastly, science cannot progress without the ability to understand the proceedingwork-- we are all “standing on the shoulders of giants”. To that end, the ability toread and process scientific literature is invaluable—and harder than it sounds!Scientific writing has a style and set of expectations unique to it, and each field has acomplex set of abbreviations, expected background knowledge, and conventions.But learning to read scientific literature will allow you, especially in the field ofbiochemistry, to sort popular press on scientific developments from what thescientists actually reported. Moreover, it will help you develop a scientific writingstyle and a greater appreciation for the work of science.Materials Lab Notebook Computer with internet connectionProcedure:1. Review the scientific article provided by the instructor and answer the analysisquestions below.2. Prepare your lab notebook for future experiments, making sure that your name ispresent, and preparing a Table of Contents on page 1.Questions/Analysis1. What is discussed in the Abstract of the paper? If you read just the Abstract, would youknow the conclusion of the study? Would you be able to repeat the experiment?2. What is not included in the Materials and Methods section that you would expect toinclude in a lab notebook?3. What is the difference between a Results section and a Discussion section?Comprehension QuestionsProvided by instructorBONHAMCHE 4350SPRING 201310
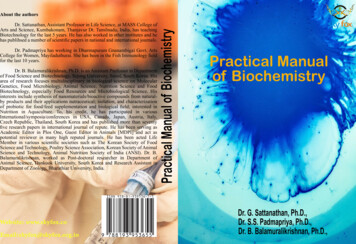
2 Pipetting and Preparing BuffersObjectiveTo learn how to precisely use calibrated variable volume micropipettors, measure samplesusing a spectrophotometer, and prepare buffers.SafetyWear gloves, goggles, and work in the hood and use extreme care when handling strongacids and bases. Report and clean up all spills immediately. Do not drop micropipettors. Donot turn pipettors above or below their volume limits, as this can DESTROY the pipettor.Do not ingest chemicals. Wash your hands prior to leaving lab. Use the balances carefullyand be careful not to spill chemicals in them. Do not move the balances.BackgroundPipettorsThis “experiment” is meant to introduce you to a number of skills that are essential tosuccess in the laboratory. These skills include the accurate use of pipettes and makingsolutions and buffers. As a biochemical scientist, you need to be able to accurately usecalibrated variable volume micropipettors to add and transfer small amounts of reagents andsamples precisely and accurately. This lab is a chance to test the accuracy of our tools andyour understanding of how to appropriately set the micropippetors to precisely deliver theamount of liquid required. You also need to be able to accurately prepare solutions anddilutions.Automatic pipettes are used to accurately transfer small liquid volumes. Glass pipettes arenot highly accurate for volumes less than 1 milliliter (1 ml), but the automatic pipettes areboth accurate (less than 1% error) and precise (less than 0.5%). These are continuouslyadjustable digital or rotary pipettes. Each pipette (Fig. 2.1) can be set to transfer any volumewithin its own volume range (Fig. 2.2) using specially designed tips (Fig. 2.3).Fig. 2.1 Parts of the pipettor. http://www.rainin.com/pdf/pipetman manual.pdfBONHAMCHE 4350SPRING 201311
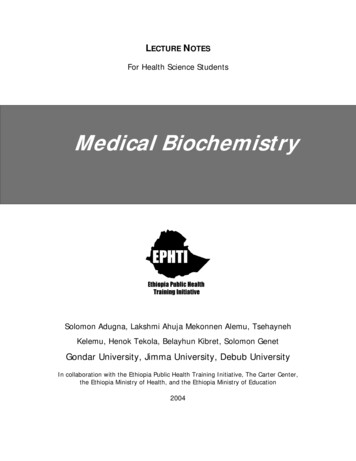
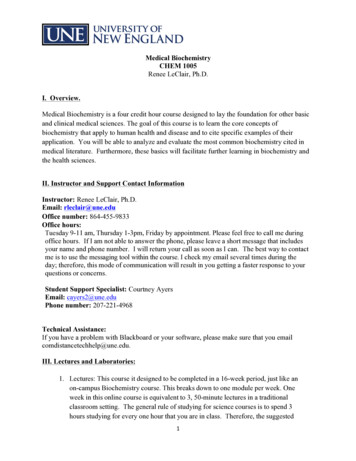
Fig. 2.2 Pipet tips. The tips can be purchased with or without the filter barrier(white disk). jpgFig. 2.3 How to set and read a pipettor’s ipettes.pptFig. 2.4 Attaching the disposable tip and transferring liquid.http://www.rainin.com/pdf/pipetman manual.pdfBONHAMCHE 4350SPRING 201312
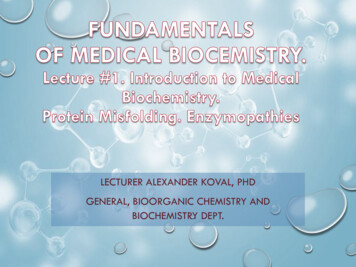
First, set the volume to transfer (Fig. 2.3), then attach the disposable tip, depress the plungerto the first stop, immerse the tip in the sample, slowly draw up the sample with the tipcompletely immersed, pause for viscous samples, withdraw the tip, dispense the sample bypressing the plunger through the first stop to the second stop vertically, withdraw the pipet,release the tip into the trash (Fig. 2.4).In this experiment, you will pipette water into a number of small weighboats. The amount ofwater dispensed, and therefore the accuracy with which you pipette, will be determined byweighing. 1.0000 mL of pure water weighs 1.0000 g. We can measure mass using a balance.The balance in our lab is precise to /- 0.0001 g. The delivery of the micropippetor can beexamined and checked using the balance (e.g. 0.1000 mL should weigh 0.1000 g). Fromthese measurements, you can determine the accuracy and precision of your pipettors.Accuracy is how close a measured value is to the actual (true) value (even after averaging).Precision is how close the measured values are to each other (Fig. 2.5).Fig. 2.5 Examples of Precision and jpgBuffersThere are three definitions for acids and bases which you have covered in general chemistry.These include the Arrhenius (an acid is an H donor and a base is an OH- donor), BronstedLowry (an acid is an H donor and a base is an H acceptor, e.g. NH3), and Lewis (an aciddonates a share in an electron pair and a base accepts a share in an electron pair) definitions.Strong acids and bases ionize completely. Strong acids include HNO3, H2SO4 (first protononly), HCl, HBr, HI, HClO4. Strong bases include LiOH, NaOH, RbOH, Mg(OH)2,Ca(OH)2, Sr(OH)2, and Ba(OH)2. Adding a strong acid or a strong base to a salt createsweak acids and weak bases, respectively.Water is an example of a solvent and a weak acid/base “amphoteric” solution as it canperform either function. It forms 1 x 10⁻⁷ M H and OH- in solution. This is the basis of thepH and pOH scales: by taking the -log of the H and OH- concentrations, we get the pH andBONHAMCHE 4350SPRING 201313
pOH (both 7 in pure water). Since the concentrations of H and OH- are identical, thesolution is neutral. Conversely, a solution is acidic if the [H ] [OH-] and the pH 7 and isbasic if the [H ] [OH-] and the pH 7. The special equilibrium constant for water, Kw, isequal to [H ][OH-] or 1 x 10-14. The pKw can be determined by taking the - log of the Kw or14. Thus, the pH pOH 14.Weak acids and bases dissociate 10% forming an equilibrium of the product and reactantsall present in the final solution. Combining these with a conjugate acid or base (common ionsalt), strong acid, or strong base creates a buffer.A pH buffer is a solution that resists large changes in pH due to small additions of acid (H )or base (OH-) (Arrhenius definition). It contains a mixture of a conjugate acid (H donor)and a conjugate base (H acceptor); usually a weak acid and a salt of its conjugate base or aweak base and a salt of its conjugate acid. Common examples include a solution of aceticacid (weak acid) and sodium acetate (salt of its conjugate base); or a solution of ammonia(weak base) and ammonium chloride (salt of its conjugate acid). Both conjugate components(weak acid, “HA;” weak base, “A-”) must be present in comparable concentrations (within afactor of 10) to have a buffer system: 0.1 [A-]/[HA] 10. The sum of the bufferconcentration is the sum of the concentrations of the conjugate components: [HA] [A-] concentration of common ion. Buffers work best at a pH near the pK of the ionizing groupand the pKa is often used in solving pH problems with buffers. A useful equation for solvingbuffer problems is the Henderson-Hasselbalch equation:pH pKa log([A-]/[HA])This lab is focused on learning to use a pH meter effectively, and how to make buffers atvarious pH values.Materials various variable volume micropipettes (10 µL, 100 µL, 1000 µL) various constant volume micropipettes (5 µL, 25 µL, 50 µL) volumetric flasks balance weigh boats deionized water and water bottles salts (Tris base, sodium acetate, phosphoric acid or phosphate salts) acids and bases (0.1 M and 1.0 M and 12 M HCl & 0.1 M and 1.0 M NaOH) tips Erlenmeyer flasks pH metersBONHAMCHE 4350SPRING 201314
ProcedurePipettorsPart AYour job is to design a method for calibrating your micropipettors. You need to collectenough data to determine which pipettor is the best to use when the range of volumesoverlap. One of your instructors will demonstrate proper technique in using the pipettors.You will have available:Deionized waterpipettors and tipsAnalytical balanceweighing boatsfilter paper.Each student in the groups should collect a set of data so errors between users can bedetected. You should think about what other information you may need to look up in theliterature. How many replications do you need to take ?Part BNow you need to design a protocol to determine the precision of a spectrophotometerreading. You will have 4 different plastic cuvettes. Does the precision depend on whetheryou always use the same sample cuvette or do different cuvettes give the same precision?The sample absorbs light at 405 nm.You will have available:deionized watersolution of para-nitrophenol.Part CEffect of cuvette composition on the absorption of light. Check the spectrum of both a quartzand a plastic cuvette from 240 to 500 nm.Questions & Analysis for Pipettors1.2.3.4.Tables of data for the weight of water delivered for each pipettor and each volumeexamined.Calculation of:a.) meanb.) standard deviationc.) standard error of the meand.) 95% confidence limitsTemperature and water density.Calculation of % error for each pipettor at each volume examined.BONHAMCHE 4350SPRING 201315
5.6.7.Tables of data for the spectrophotometer measurement for the absorbance of p-NO2phenol(Always include the wavelength used.)a.) using 1 cuvetteb.) using 4 cuvettesCalculation of: a.) mean b.) standard deviation c.) standard error of the meand.) 95% confidence limitsShort Conclusion, addressing (a) the precision and accuracy of each pipettor, (b) theprecision of the spectrophotometer, and (c) the difference between using the samecuvette versus using different cuvettes in a series of measurements.Answer these questions about pipettors:1. Which of the pipettors you used to dispense 200 ul was the more accurate ? Explain.2. Which pipettor was the more precise ? Explain.3. Did the precision and accuracy vary for the 1000 ul pipette, depending on volumedispensed ? Explain.4. Which pipettor would you use if you needed to dispense 200 ul ? Explain.Answer these spectrophotometer questions:1. What is the precision of the spectrophotometer ? Explain.2. Does changing cuvettes for different trials affect the precision ? Explain.3. What kind of cuvette would you use to measure the absorbance of a solution ofDNA at 260 nm ? Explain.Comprehension Questions:1. Definition of a buffer.2. Calculations of pH, pKa, or ratio of (conjugate base) / (conjugate acid) for a buffer.3. Diagram a combination electrode.4. Write the equation which relates measured voltage to pH.5. Give reasons for standardizing pH meters.6. Diagram the components of a spectrophotometer.7. Write the equation for Beers Law and define the variables.8. Define absorption and absorption spectrum.9. Relate the UV-visible spectrum to type of transition and wavelengths of light involved.BONHAMCHE 4350SPRING 201316
BuffersPart A. Making a BufferEach team will make a buffer of a different pH. The reagents available for this exercisewill be stock solutions of:a.) 1 M HCl b.) 1 M NaOHc.) 0.5 M KH2PO4d.) 0.5 M Tris basee.) 0.5 M acetic acidThe following solid chemicals may also be provided:a.) KH2PO4 (m.w. 136.086 g/mol)b.) K2HPO4 (m.w. 174.2 g/mol)c.) Tris base (m.w. 121.14 g/mol)The pKa for the second ionization of phosphoric acid is 6.86, while that of Trisbase is 8.0. The pKa of acetic acid is 4.76.Each aisle will make a buffer according to the following table. The final bufferconcentration in all cases should be 0.05 M. The final volume should be 100 mL.TeampH16.026.537.047.558.0Part B. Buffer Exercises1. Cool 20 mL of your buffer in an ice bath, for at least 15 min. Record the temperatureand pH.2. While you are waiting for your buffer to cool, dilute the original buffer 1:5. Measureand record the pH of the diluted buffer at room temperature.3. To 20.0 mL of the 0.05M buffer add 0.5 mL of 0.1M HCl. Add the same amount ofHClto 20.0 mL of water. Measure the pH of both solutions and of pure water.4. To another 20.0 mL sample of the buffer add 0.5 mL 0.1M NaOH. Add the sameamount of NaOH to 20.0 mL of water. Check the pH of both solutions.5. Get a sample of each of the other team’s buffers. Check the pH of each buffer with yourpH meter.Questions & Analysis for BuffersInclude a statement of purpose and procedural notes, then include:1. Buffer compound chosen for your given pH.2. Calculation of how much stock solution or solid is needed.3. Record of pH of final solution.4. Record of the temperature and pH of your buffer after cooling.5. Record of how you diluted your buffer and the final pH of the dilution.6. Record of the pH of your buffer after adding HCl and NaOH.7. Record of the pH of water after adding HCl and NaOH.BONHAMCHE 4350SPRING 201317
8. Conclusions, including the effects of temperature and dilution on the pH of a buffer andthe relative effects of adding HCl and NaOH to your buffer vs. pure water.Comprehension Questions:1. If you diluted your buffer by taking out 10 mL and bringing the final volume to 50 mL,what would be the final buffer concentration ? What would you predict the pH ofthe diluted buffer to be ? Explain using the Henderson–Hasselbach equation.How does your prediction match the results of your exercise?2. Calculate the concentration of the conjugate acid and conjugate base in your originalbuffer.3. How did the temperature affect the pH of your buffer? At what temperature should youmeasure the pH of a buffer?4. Calculate the expected pH when 0.5 mL of 0.1M HCl or NaOH is added to 20.0 mLpure water. Do the same calculation when the same amount of HCl or NaOH is added to20.0 mL of your original 0.05M buffer. Compare the calculated pH to the actualmeasured pH.5 If you have 50 mL of 0.05 M potassium phosphate buffer pH 7.0 and you added 2.0 mLof 0.1 M HCl what would the final pH be? What would the pH be if 2.0 mL of 0.1 MNaOH was added to the same amount of the original buffer?BONHAMCHE 4350SPRING 201318
Module 2: Purification and Characterization ofcytochrome c from Saccharomyces cerevisiaeIn this module, we will be purifying the protein cytochrome c from common baker’s yeast(Saccharomyces cerevisiae) as an example of a true biochemical experiment. Cytochrome cis an essential protein of the electron transport chain in the mitochondria of cells, serving totransport electrons between Complex III (co-enzyme Q - cytochrome c reductase) andComplex IV (cytochrome c oxidase) via a process of oxidation and reduction. Cytochromec is a small protein ( 12,000 Daltons) that contains a heme co-factor. As cytochrome cperforms an essential role in the cell’s energy metabolism, it is present in essentially alleukaryotic cells. Because of this, small changes in the sequence and structure ofcytochrome c from different organisms have allowed powerful glimpses into theevolutionary process in the field of evolutionary biology. In our set of experiments, we willfollow this course; first isolating cytochrome c from the cell, and then characterizing andinvestigating it’s unique behavior.You will begin with a solution of
BIOCHEMISTRY LABORATORY MANUAL CHE 4350 Andrew J. Bonham, Ph.D., AnnaMarie Drotar, Ph.D., Kelly M. Elkins, Ph. D. BONHAM CHE 4350 SPRING 2013 2 TABLE OF CONTENTS Title Page 1 Table of Contents 2 Introduction 3