Transcription
Hydroponics:Know How to GrowTips & tricks for Starting OutInnovative learning tools for skills training
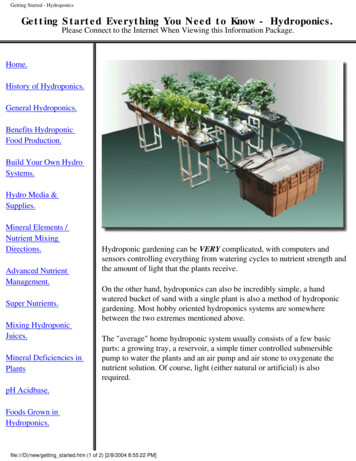
Getting started with HydroponicsConsidering hydroponics for your school or classroom?Use this guide to gain an understanding of how to usethese systems in any program.Hydroponics is a method of growing plants in water without the use of soil.The water uses a nutrient solution to feed the plants and help them grow. Thistype of growing method can help plants grow to full-term faster, generate largerharvests, and create healthier plants.
How to get startedMaterials needed: Seeds Nutrients Rock wool Growing trayHydroponics systems: LightsThe LED light array mimics sunlight (including the red-and-bluelight spectrum) to help the plants grow. FansThe fans help strengthen and reduce injury and disease to theplants. They always run at a consistent speed Water PumpsThe water pumps circulate the water so that vital nutrients canmove to the plant roots.Grow chartBe aware of the average germination times for plants. Start the germination tray, then set up the hydroponicssystem while the seeds are germinating. Below is a list of average timelines for growth of popular plants.PlantCabbagesPlanting and Harvesting Cheat SheetDirect Light NeededGerminationYesDays to Maturation4-1065-85Cucumbers6-1055-65Green ttuceYes4-1035-65RadishesYes3-1050-60Swiss ChardYes7-1055-656-1455-90TomatoesBEFORE HARVEST: Start growing new seeds 7-10 days before harvesting the plants in the hydroponicssystem. This will allow movement of new plants from the germination tray directly to the hydroponics systemwithout many or any days between harvest and new growth.
The benefits of hydroponicsSaves spaceDepending on your system, you can grow four times the amount ofplants in the same amount of space you’d use to grow plants in atraditional soil methodUses less waterGrowing plants in water actually uses 90% less water than traditionalsoil farmingFast grow timesSome plants can grow twice as fast in a hydroponics system thanksto the system’s precise delivery of water, nutrients and oxygenNo chemicalsHydroponically grown plants do not need pesticides, which makesthe crop safer to eat and is better for the environmentIncrease food securityAllow for year-round growing and harvesting no matter what theweather does outside, allowing for food security no matter whatclimate you encounter“They may have had math homework, history lectures, but studentswalk in and see this hydroponicssystem, learn about the hands-onopportunities, and they’re excited.”Brent Nelson, Agriculture Teacher,FFA Advisor Franklin Junior Senior High School Franklin, ILHas been using Realityworks’ Plant Producer HydroponicsEducation System since Summer 2019
Grow your food. Grow your mind.How growing plants can increase student engagementSTEM education creates critical thinkers, increases scienceliteracy, and e nables the nextgeneration o f innovators.STEMEngaging kids inthe growingprocess encour ages conver sations about futurecareers inagriculture,culinary, businessmanagement,engineering and technology,and more.CareerExplorationResearch shows that studentswho grow their own foodincrease their preferences forfruits and vegetables.Fresh isBestSchool gardens can be powerfultools for educating studentson environmental issues andsustainability practices.Sustainability
Hydroponics options from Realityworks, Inc.Plant Lab Educational Hydroponics SystemExperiment with varying quantities of greens while addressing key plantscience, STEM and sustainability efforts with the Plant Lab EducationalHydroponics System. Its three vertical shelves connect to individual watersources, enabling experimentation with plants, water levels and nutrientson each level.System includes:Specifications: Plant sites: 33 LED grow lights Fans Water pump 2-gallon water tank/shelf Reusable grow cups Germination tray, seeds, and rockwool 1-year limited warranty Plant sites: 33 Dimensions: 56” x 28” x 15” Shelf spacing (grow height): 10” Weight: 75 lbs. Water capacity: Three 2-gallon tanks, one per shelf Fans: one fan per shelf unit Voltage: 120v, 60HzPlant Producer EducationalHydroponics SystemGrow production-level quantities of greens while addressing keyplant science, STEM and sustainability efforts with the Plant ProducerEducational Hydroponics System. Its three vertical shelves connectto a single water source, enabling equal nutrient allotment andconcentrated growth on each level.System includes:Specifications: System control panel withsensor monitoring Plant sites: 42 LED grow lights Fans Water pump 7-gallon water tank Reusable grow cups Germination tray, seeds, and rockwool 1-year limited warranty Dimensions: 74” x 31” x 15” Shelf spacing (grow height):20” bottom, 12” middle, 12” top Weight: 100 lbs. Water capacity: one 7-gallon tank Fans: two fans per shelf unit Voltage: 120v, 60HzSystem control panel with sensor monitoring855.351.8938 www.realityworks.comJOIN US ON05042020-AJ Hydroponics Getting Started Guide 05/2020Connect with us to join ongoing conversations about engaginglearners, technology tips and issues facing all areas of education. 2020 Realityworks, Inc. All rights reserved.
Hydroponics SystemsUser GuideThe Plant Lab and Plant Producer EducationalHydroponics Systems allow you to growproduction-level quantities of greens whileaddressing key plant science, STEM, andsustainability efforts.
Table of ContentsIntroduction to Hydroponics Educational Systems. 3Parts IdentificationPlant Lab. 4Plant Producer. 4Assembly InstructionsUnboxing. 5Plugging in the Unit. 5Accessory Kit. 5Water. 5Standard SettingsWater Pumps. 6Lights.6Fans. 6Grow Screen Instructions (Plant Producer System Only). 6Guide to Growing PlantsStep 1: Prep and Growth Understanding. 7Step 2: Germination Tray and Rockwool. 8Step 3: Preparing the Hydroponics System. 9Step 4: Nutrients. 9Step 5: Seed Planting. 10Step 6: Checking Levels. 10Step 7: Harvesting. 10Step 8: Cleaning Prior to the Next Planting. 11Need More Help?. 122Realityworks Hydroponics Educational Systems - User Guide
Introduction to Hydroponics Educational SystemsEach system comes with curricula and slide presentations to teach students more aboutwhat hydroponics is. The curriculum addresses growing produce as well as accessory kitmaterials and a user guide to begin growing right away. Use them to engage more students inagriculture programs, incorporate STEM concepts into your curriculum, and teach relevant, indemand skills that modern agriculture careers require.Plant Lab includes: 33 plant sitesLED grow lightsFansWater pump2-gallon water tank/shelf (qty 3)Reusable grow cupsGermination tray, seeds, and rockwool1-year limited warrantyPlant Producer includes: System control panel with sensor monitoring42 plant sitesLED grow lightsFansWater pump7-gallon water tankReusable grow cupsGermination tray, seeds, and rockwool1-year limited warrantyRealityworks Hydroponics Educational Systems - User Guide3
Parts identification1. Plant Lab EducationalHydroponics System2. Plant Producer EducationalHydroponics System3. System control panel4. Water tank5. Lights6. Fans7. Water and nutrient access hole8. Germination tray9. Humidity dome10. Rockwool11. Reusable grow cups12. Teaspoon (Plant Lab System only)13. Starter seeds*8109111213*Brands may vary76774Realityworks Hydroponics Educational Systems - User Guide6
Assembly InstructionsUnboxing1. Use a box cutter, cutting on the corner from the top and down to the bottom on opposite corners to remove thebox from the unit.2. Use a two-person lift to move the unit out of the box.3. Use the wheels of the unit for movement once it is removed from the packaging.4. Remove the plastic protective film.5. Make sure the hydroponics system is on a level surface.Plugging in the UnitPlant Lab System1. Assemble the power cord by plugging the cord into the power brick, then plug theother end into the system. The outlet is located on the back of the unit, near thepower switches.2. Plug the power cable into a electrical wall outlet.3. Use the suction cups on the back of the pump to secure it to the inset in thebottom of the tray.4. Plug the pump power cord into the corresponding power cable on the shelf.Plant Producer System1. Assemble the power cord by plugging the cord into the powerbrick, then plug the other end into the system. The outlet is located on the backof the unit, below the bottom shelf.2. Plug the power cable into a electrical wall outlet.3. Make sure the pump is in the fully-open position as shown4. Use the suction cups on the back of the pump to secure it to the bottom of the tray.Accessory KitA starter kit is included to start planting right away. This is a sample of the productsthat can be sourced after initial usage from many different retail and online stores. 1 pack of starter seeds Rockwool Germination tray with humidity dome for seed developmentRealityworks Hydroponics Educational Systems - User Guide5
Water1. Fill each of the tanks to the appropriate capacity. Plant Lab System: fill each of the three tanks with 2 gallons of water Plant Producer System: fill the tank with 7 gallons of water2. Add the nutrients (see Step 4, page 9, for more details) and let the water circulate for24 hours. This will allow the water to reach room temperature and will leach anychlorine out of the water. Plant Lab System: use teaspoon to fill system with nutrients through the waterand nutrient access hole, then place spoon over hole to prevent algae growthPL3. Turn the system on. Plant Lab System: flip the power switch on the lower left-hand side of the unit Plant Producer System: flip the power switch on the upper right-hand side of the unit4. Add water regularly to prevent water levels from dropping too low, letting water sit for 24 hours prior toadding to the tank as noted in the above step.5. Units will beep once every 50 minutes when the water levels drop too low. Plant Lab System: beeping begins when the water levels drop to 0.5-1 gallon in the 2-gallon tanks Plant Producer System: beeping begins when the water level drops to 2-3 gallons in the 7-gallon tankStandard SettingsWater PumpsThe water pumps circulate the water so that vital nutrients can move to the plant roots.Plant Lab System: Water pumps run on a 50-minute schedule that begins when the water pump is first turned on Each water pump follows this schedule: 20 minutes on, 30 minutes offPlant Producer System: The water pump runs on a 50-minute schedule that begins when the water pump is first turned on The water pump circulates through all three shelves and follows this schedule: 20 minutes on, 30 minutes offLightsThe LED light array mimics sunlight (including the red-and-blue light spectrum) to help the plants grow.PL Plant Lab (PL) System The lights run on a 24-hour schedule that begins when they are turned on: 10 hours on,14 hours off. Use the LED power switch next to the standard power switch to turn the lights on. Plant Producer System: the lights run on a 24-hour schedule based on the selected settings:Light SettingsLights ONLights OFFSlow Growth8 hours16 hoursNormal Growth10 hours14 hoursFast Growth12 hours12 hours The grow light start time can be changed by pressing the grow light button until it beeps, then pressing or - to adjust Press the grow light button again to advance to the next hour/min digit The grow light stop time cannot be changed; it runs for 8, 10, or 12 hours from the start time depending on the growthsetting (see Grow Screen Instructions, page 7, for more details)FansThe fans help strengthen and reduce injury and disease to the plants. They always run at a consistent speed. Plant Lab System: the fans follow the pump schedule (20 minutes on, 30 minutes off) Plant Producer System: the fans follow the set light schedule6Realityworks Hydroponics Educational Systems - User Guide
Grow Screen Instructions (Plant Producer System Only) DISPLAY: Display is automatically on when the lights are in AUTO mode. Press any button for 3 seconds to turn thedisplay on when the lights are off. TIME: Change the clock to the correct time by pressing time for 3 seconds and using the or - to adjust each digit.Press time to change between digits until all are set to the correct time. TEMP: Shows the current temperature of the room where the system is located. GROW SETTING: Choose from Fast Growth, Normal Growth, and Slow Growth by pressing the Grow Setting button(Lights, page 6, for more information). GROW LIGHT: Press the Grow Light button to adjust which shelves are lit. Shelf lights will rotate in the following order: All three shelf lights on without auto next to icon on screen All lights are off, display is off and can be viewed by pressing any button for 3-5 seconds All shelves lit with auto icon on screen Bottom shelf lights on, middle and top shelves off Top and middle shelf lights on, bottom shelf off Top and bottom shelf lights on, middle shelf off Top shelf lights on, bottom and middles shelves off FANS: turn the fans off and on; cannot change the speed of the fans. WATER FLOW ICON: spins when the pump is running. GROW LIGHT ICON: reflects which shelves are turned on. Will state AUTO when it is on the growth setting schedule. WATER LEVEL ICON: flashes when reservoir is low. FANS ICON: spins when the fans are on and stops when they are off.To perform a factory reset, press the and - buttons together for 5 seconds and listen for it to beep.Guide to Growing PlantsThere are many ways to grow plants using hydroponics systems and many different variables to consider. This guide isa recommendation of an 8-step process to prepare and use the hydroponics system. Read through all 8 steps prior tostarting the growing process.Step 1: Prep and Growth Understanding Plan on what plants to grow based on the goals of the program. Some recommendations are cabbage, cucumber,green beans, kale, leaks, lettuce, radishes, swiss chard, and tomatoes Below is a sampling of seed companies that offer online ordering and direct shipping of seeds. Larger retailers likeamazon.com, homedepot.com, walmart.com and other chain stores are also available. Local, regional, or nationalseed suppliers are also resources for seeds.1.2.3.4.5.6.7.Johnny’s Selected Seeds Winslow, ME www.johnnyseeds.comSeed Savers Exchange Decorah, IA www.seedsavers.orgBaker Creek Heirloom Seeds Mansfield, MO www.rareseeds.comBurpee Seeds and Plants Warminster, PA www.burpee.comTerritorial Seed Company Cottage Grove, OR www.territorialseed.comSeeds of Change Rancho Dominguez, CA www.seedsofchange.comFerry-Morse Seed Company Fulton, KY www.ferrymorse.comRealityworks Hydroponics Educational Systems - User Guide7
8. Southern Exposure Seed Exchange Mineral, VA www.southernexposure.com9. High Mowing Organic Seeds Wolcott, VT www.highmowingseeds.com10. Fedco Seeds Waterville, ME www.fedcoseeds.com11. Nichols Garden Nursery Albany, OR www.nicholsgardennursery.com12. Botanical Interests Broomfield, CO www.botanicalinterests.com13. Renee’s Garden Seeds Felton, CA www.reneesgarden.com14. Peaceful Valley Farm & Garden Supply Grass Valley, CA www.groworganic.com Nutrients need to be purchased prior to growing plants. There are many different nutrient types that can bepurchased. Recommended options are detailed below: General Hydroponics Floraduo A & B Fertilizer – 1 quart MFG recommendations:Type of GrowthMild Grow BlendStrong Grow BlendTransitional Grow BlendMild Bloom BlendStrong Bloom BlendFloraduo A2 tsp/gallon of water3 tsp/gallon of water2 tsp/gallon of water1 tsp/gallon of water1 tsp/gallon of waterFloraduo B1 tsp/gallon of water1 tsp/gallon of water2 tsp/gallon of water2 tsp/gallon of water3 tsp/gallon of water General Hydroponics Flora Bloom Fertilizer – 1 Quart MFG recommendations: Maintain pH at 5.5 - 6.5 Measure accuratelyType of gs¼ tsp/gallon of water ¼ tsp/gallon of water ¼ tsp/gallon of waterMild Growth1 tsp/gallon of water1 tsp/gallon of water1 tsp/gallon of waterAggressive Growth3 tsp/gallon of water3 tsp/gallon of water3 tsp/gallon of waterTransition to Bloom2 tsp/gallon of water2 tsp/gallon of water2 tsp/gallon of waterBlooming/Ripening1 tsp/gallon of water1 tsp/gallon of water1 tsp/gallon of water Be aware of the average germination times for plants. Start the germination tray, then set up the hydroponicssystem while the seeds are germinating. Below is a list of average timelines for growth of popular plants.Planting and Harvesting Cheat SheetPlantCabbagesCucumbersGreen BeansKaleLeeksLettuceRadishesSwiss ChardTomatoesDirect Light NeededYesGermination4-10Days to YesBEFORE HARVEST: Start growing new seeds 7-10 days before harvesting the plants in the hydroponics system.This will allow movement of new plants from the germination tray directly to the hydroponics system withoutmany or any days between harvest and new growth.Step 2: Germination Tray and RockwoolOnce seeds are chosen, it is important to make sure there is time to start the plants in a germination tray beforemoving them into the hydroponics system. The germination tray includes the following: germination tray, humiditydome, a package of rockwool, and a package of lettuce.8Realityworks Hydroponics Educational Systems - User Guide
Rockwool is a natural fiber made from basalt and chalk and heated to a hightemperature. It is then spun in a chamber to create fibers, much like how cottoncandy is made. Chalk is naturally high in pH and it is important to soak the rockwoolin water to lower its pH level. Prepare the rockwool:1. Match the number of rockwool pieces with the number of seeds beingplanted.2. Soak the rockwool in water for 15-20 minutes, then drain the water from it for1-2 minutes.3. Place the rockwool into the germination tray.4. Put one seed into the small divot of each rockwool piece.5. Place the germination humidity dome onto the germination tray.6. Put the germination tray in a location that has sunlight like a sunlit windowsillor the hydroponics system with the grow lights on.7. Check daily and use a water mister to spray the rockwool when it looks driedout.8. Check standard germination time for the seeds being used. See Step 5 (page 10) for more information on seed planting Reusing rockwool:1. Rockwool can often be reused 2-3 times if cleaned properly.2. Wash off the rockwool in a sink after the plant has been removed and remove any roots or algae that may haveformed from the nutrients and moisture.3. Do not squeeze the cubes of rockwool when wet. If you need to remove some of the water from the cubes,simply shake them gently. If squeezed, the rockwool will compress which would hinder the benefits of waterholding capacity and oxygen movement.NOTE: Rockwool will not break down in a landfill. Rather than throwing rockwool away, it’s recommended to breakit up into pieces and work it into your garden or potting soil to help increase water retention.Step 3: Preparing the Hydroponics SystemIt is important that the following steps are completed in order when first opening the hydroponics system:1. Make sure the hydroponics system is on a level surface.2. Prepare the hydroponics system at least 2-3 days before adding plants to the system.3. Plug the system in (please reread Plugging in The Unit, page 5)4. Add water and nutrients to the tank(s), and let the water circulate for 24 hours before adding plants.5. Inspect around the system for any leaks, as unforeseen damage may occur from shipping.NOTE: The Plant Producer Hydroponics System tank holds 7 gallons (56 pounds) ofwater. Do not lift the full tank when filling and removing water. Before removing thetank, disconnect the water float and remove the pump from the reservoir. Removethe water with a pitcher or pump. Once it is to a weight that is movable by a dolly ora cart, lift the tank using proper lifting technique.Step 4: NutrientsMix nutrients into the water reservoir at least 24 hours before adding plants to the hydroponics system. Watershould be checked for pH and for EC (Electrical Conductivity). EC measures the potential for electrical current to betransported by water. It is measured in Seimens (S) and allows nutrients to move to plants more easily.Test these two variables by using meters that can be purchased online or at a hydroponics store. These are the generalrecommended levels for the EC and pH when testing the water:Realityworks Hydroponics Educational Systems - User Guide9
pH LOW pH: If the pH is below the level needed by the plant, it is time to add new water into the system. Please rereadthe Water section (pg 5) before adding any new water. HIGH pH: If the pH is above the level needed by the plant, add nutrients to raise the acidic levels of the water.Nutrients are acidic, so it is a good solution to bring the water back down within the recommended range. If EC is alsohigh, the tank should be drained and filled with fresh water and nutrients.EC LOW EC: If the EC is low, the plants have consumed the nutrients in the water and more nutrients should be added tothe tank. HIGH EC: If the EC is high, too many nutrients were added and more water needs to be added to the tank.The next page has a reference chart to help with a more exact recommendation for many different types ofhydroponic plants. For all nutrients, the manufacturing company is the best reference for pH recommendation andthe amount of the nutrients to use. Check both pH and EC together.EC and pH Values for Different Hydroponic CropsPlantpH RangeEC 500Green 00-2200Swiss Chard6.2-6.81800-2300Tomatoes5.5-6.52000-5000Step 5: Seed PlantingWhen the roots of the germinating seed begin to emerge from the bottom of the rockwool, it is time to move thegerminated seeds to the hydroponics unit. Germination should begin to happen about 3-4 days after the seeds areplanted in the rockwool. Wait about 4 more days until the roots emerge from the bottom of the rockwool beforemoving plants to the hydroponic trays. Place one rockwool piece into each grow cup.Try and put the roots near or through the grow cups when placing the rockwool and plant into the cups. This will helpthe roots access the water more easily once in the hydroponics system.Step 6: Checking LevelsOnce all plants are in the hydroponic grow cups, it is necessary monitor the growth of the plants and check the levelsof the water and nutrients. Water levels will begin to decrease as water evaporates. As the plants grow, they willconsume increasing amounts of water and nutrients.There are some recommendations to follow:Type of GrowthGrowth DescriptionEarly GrowthPlant is just placed into the hydroponics systemLate GrowthPlants are growing but not quite to harvestHarvestPlants are ready to harvest or will be within a week’s timeLevel Check Timing1-2 times per week2-3 times per week3-4 times per weekIt is important to check on the plants periodically to ensure that they are growing as expected. Monitoring andchecking on the plants in a systematic format (record-keeping or journaling) will help to keep optimal growth.10Realityworks Hydroponics Educational Systems - User Guide
The following is a recommended schedule per tank being used:Water Levels 2 times a week with under half of the plant spots being used 3 times a week with over half of the plant spots being usedEC and pH Balance 2 times a week with under half plant spots being used 4 times a week with over half plant spots being usedStep 7: HarvestingWhen it is time to harvest, start to remove the plants from the water andthe baskets they have been growing in. Start by taking plants from the frontand working backwards. It is best to have a tray, bowl, or holder of the plantmaterial being harvested. Having a trash can or compost bin to put the wasteof the plant is also good for easy cleanup.Tips to harvesting: Start with the front plants and move back on each shelf Take the grow cups out, then clip the base of the leaves/plant (edibleportion) with a knife or scissors, or tear off by hand Once the plants are harvested, pull the roots out of the rockwool and throwthem or place into composting bin Clean off the rockwool for reuse if desiredStep 8: Cleaning Prior to the Next PlantingOnce the crop is harvested, clean up the hydroponics unit to start another planting. Remember that seeds shouldbe planted about 7-10 days before harvesting the current crop to make sure they are ready to put into thehydroponics system.To clean up the hydroponics system:1. Turn off the power and unplug the cord from the wall outlet.2. Clean up the rockwool for reuse (optional) or purchase new rockwool.3. Drain water from the system: Plant Lab Hydroponics System: Disconnect the water pump in each tray before removal. Plant Producer Hydroponics System:a. Remove the tray covers from all three shelves.b. Beginning with the top tray and working down, use a paper towel to push the water into the drain.c. Disconnect the water float and remove the pump from the reservoir.d. Remove the water with a pitcher or pump. Once it is to a weight that is movable by a dolly or a cart, lift thetank using proper lifting technique.5. Clean the tank(s) and tray covers with warm soapy water from a bucket. Do not pour soap/bleach directly into thereservoir. Bleach can be used to clean the hydroponics system, but it is suggested to use less than a ¼ capful ofbleach for every 1-2 gallons of water. If bleach is used, wait an additional 24 hours before filling the tank with water.6. Rinse thoroughly to remove the soap and bleach (if used).7. Remove all visible green algae that may have accumulated from the previous harvest.8. Cloth dry or let air dry before adding new water.9. Once clean and dry, new water can be added. The recommendation is to let water sit/circulate for 24 hours beforeadding any plant life to the hydroponics system.Realityworks Hydroponics Educational Systems - User Guide11
Need More Help?Additional Help and InformationOnline Product SupportWe’re here to help! Our online product support features video tutorials, downloadabledocuments, frequently asked questions and product notices, all of which make it easy foryou to get support for products, software and more, day or night. Find our online productsupport area here: https://www.realityworks.com/knowledge-base/Online StoreSupplies, accessories, select simulators, curriculum and more are available for purchase fromour website 24 hours a day!www.realityworks.com 800.830.1416 2019 Realityworks, Inc. All rights reserved.1053610-01 12/2019
Getting started with Hydroponics Considering hydroponics for your school or classroom? Use this guide to gain an understanding of how to use these systems in any program. Hydroponics is a method of growing plants in water without the use of soil. The water uses a nutr