Transcription
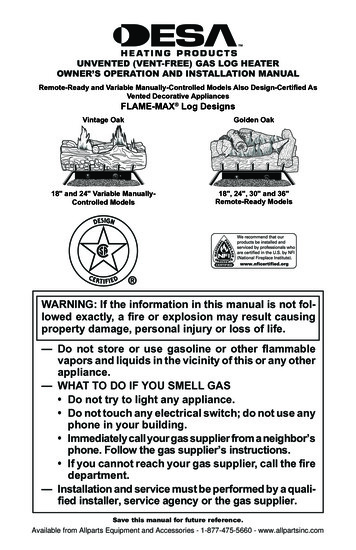
UNVENTED (VENT-FREE) GAS LOG HEATEROWNER’S OPERATION AND INSTALLATION MANUALRemote-Ready and Variable Manually-Controlled Models Also Design-Certified AsVented Decorative AppliancesFLAME-MAX Log DesignsVintage OakGolden OakHIOFFPilotLO18" and 24" Variable ManuallyControlled Models18", 24", 30" and 36"Remote-Ready ModelsWARNING: If the information in this manual is not followed exactly, a fire or explosion may result causingproperty damage, personal injury or loss of life.— Do not store or use gasoline or other flammablevapors and liquids in the vicinity of this or any otherappliance.— WHAT TO DO IF YOU SMELL GAS Do not try to light any appliance. Do not touch any electrical switch; do not use anyphone in your building. Immediately call your gas supplier from a neighbor’sphone. Follow the gas supplier’s instructions. If you cannot reach your gas supplier, call the firedepartment.— Installation and service must be performed by a qualified installer, service agency or the gas supplier.Save this manual for future reference.Available from Allparts Equipment and Accessories - 1-877-475-5660 - www.allpartsinc.com
WARNING: Improper installation, adjustment, alteration, service or maintenance can cause injury or property damage. Refer to this manual for correct installationand operational procedures. For assistance or additional information consult a qualified installer, serviceagency or the gas supplier.WARNING: This appliance is for installation only in asolid-fuel burning masonry or UL127 factory-built fireplace or in a listed ventless firebox enclosure. It is design-certified for these installations in accordance withANSI Z21.11.2. Exception: Do not install this appliancein a factory-built fireplace that includes instructionsstating it has not been tested or should not be used withunvented gas logs.WARNING: This is an unvented gas-fired heater. It usesair (oxygen) from the room in which it is installed. Provisions for adequate combustion and ventilation air mustbe provided. Refer to Air for Combustion and Ventilationsection on page 6 of this manual.This appliance may be installed in an aftermarket,* permanently located, manufactured (mobile) home, wherenot prohibited by local codes.This appliance is only for use with the type of gas indicated on the rating plate. This appliance is not convertible for use with other gases.* Aftermarket: Completion of sale, not for purpose of resale, from the manufacturerTABLE OF CONTENTSSafety Information. 3Local Codes. 4Product Identification. 5Optional Remote Control Accessories. 5Unpacking. 5Product Features. 5Air For Combustion and Ventilation. 6Installation. 8Operating Heater. 17Inspecting Burners. 22Cleaning and Maintenance. 23Troubleshooting. 24Specifications. 28Wiring Diagram. 29Service Hints. 29Technical Service. 29Replacement Parts. 29Illustrated Parts Breakdown and Parts List. 30Accessories. 34Warranty Information.Back CoverAvailable from Allparts Equipment and Accessories - 1-877-475-5660 - www.allpartsinc.com
Safety InformationWARNING: This product contains and/or generates chemicalsknown to the State of Californiato cause cancer or birth defectsor other reproductive harm.IMPORTANT: Read this owner’smanual carefully and completelybefore trying to assemble, operate or service this fireplace.Improper use of this fireplacecan cause serious injury ordeath from burns, fire, explosion, electrical shock and carbonmonoxide poisoning.DANGER: Carbon monoxidepoisoning may lead to death!Carbon Monoxide Poisoning: Early signs of carbonmonoxide poisoning resemble the flu, with headaches, dizziness or nausea. If you have these signs,the heater may not be working properly. Get freshair at once! Have heater serviced. Some peopleare more affected by carbon monoxide than others.These include pregnant women, people with heartor lung disease or anemia, those under the influenceof alcohol and those at high altitudes.Natural and Propane/LP Gas: Natural and propane/LP gases are odorless. An odor-makingagent is added to these gases. The odor helps youdetect a gas leak. However, the odor added to thegas can fade. Gas may be present even though noodor exists.Make certain you read and understand all warnings. Keep this manual for reference. It is yourguide to safe and proper operation of this heater.WARNING: Do not allow fansto blow directly into the heater.Avoid any drafts that alter burnerflame patterns. Ceiling fans cancreate drafts that alter burnerflame patterns. Altered burnerpatterns can cause sooting.Due to high temperatures, theappliance should be located outof traffic and away from furnitureand draperies.Do not place clothing or otherflammable material on or nearthe appliance. Never place anyobjects on the heater.Heater base assembly becomesvery hot when running heater.Keep children and adults awayfrom hot surface to avoid burnsor clothing ignition. Heaterwill remain hot for a time aftershutdown. Allow surface to coolbefore touching.Carefully supervise young children when they are in the roomwith heater. When using the handheld remote accessory (RemoteReady models only), keep selector switch in the OFF position toprevent children from turning onburners with remote.WARNING: Any change tothis heater or its controls canbe dangerous.You must operate this heaterwith a fireplace screen in place.Make sure fireplace screen isclosed before running heater.WARNING: Do not use ablower insert, heat exchangerinsert or other accessory not approved for use with this heater.Keep the appliance area clearand free from combustible materials, gasoline and other flammable vapors and liquids.Available from Allparts Equipment and Accessories - 1-877-475-5660 - www.allpartsinc.com
safety informationContinued1. This appliance is only for use with the type ofgas indicated on the rating plate. This applianceis not convertible for use with other gases.2. Do not place propane/LP supply tank(s) inside any structure. Locate propane/LP supplytank(s) outdoors (propane/LP units only).3. If you smell gas shut off gas supply do not try to light any appliance do not touch any electrical switch; do not useany phone in your building immediately call your gas supplier from aneighbor’s phone. Follow the gas supplier’sinstructions if you cannot reach your gas supplier, callthe fire department4. This heater shall not be installed in a bedroom orbathroom, unless installed as a vented appliance.See Installing Damper Clamp Accessory forVented Operation, page 12.5. Before installing in a solid fuel burning fireplace,the chimney flue and firebox must be cleanedof soot, creosote, ashes and loose paint by aqualified chimney cleaner. Creosote will igniteif highly heated. A dirty chimney flue may create and distribute soot within the house. Inspectchimney flue for damage. If damaged, repair flueand firebox before operating heater.6. Do not burn solid-fuel in a masonry or UL127factory-built fireplace in which a vent-freeroom heater is installed.7. If fireplace has glass doors, never operate thisheater with glass doors closed. If you operateheater with doors closed, heat buildup inside fireplace will cause glass to burst. Make sure there areno obstructions across openings of fireplace.8. To prevent the creation of soot, follow the instructions in Cleaning and Maintenance, page 23.9. Before using furniture polish, wax, carpetcleaner or similar products, turn heater off. Ifheated, the vapors from these products maycreate a white powder residue within burnerbox or on adjacent walls and furniture.10. This heater needs fresh, outside air ventilation torun properly. This heater has an Oxygen Depletion Sensing (ODS) safety shutoff system. TheODS shuts down the heater if enough fresh airis not available. See Air for Combustion andVentilation, page 6. If heater keeps shuttingoff, see Troubleshooting, page 24.11. Do not run heater where flammable liquids or vapors are usedor stored under dusty conditions12. Do not use this heater to cook food or burnpaper or other objects.13. Do not use heater if any part has been exposedto or under water. Immediately call a qualifiedservice technician to inspect the room heaterand to replace any part of the control system andany gas control which has been under water.14. Do not operate heater if any log is broken. Donot operate heater if a log is chipped (dimesized or larger).15. Turn heater off and let cool before servicing,installing or repairing. Make sure the selectorswitch is in the OFF position (Remote-ReadyModels Only). Only a qualified service personshould install, service or repair heater.16. Make sure the selector switch is in the OFFposition when you are away from home for longperiods of time (Remote-Ready Models Only).17. Remote-ready heaters must not be connectedto any external electrical source.18. Operating heater above elevations of 4,500feet may cause pilot outage.19. To prevent performance problems, do notuse propane/LP fuel tank of less than 100 lb.capacity (propane/LP units only).20. Provide adequate clearances around air openings.Local CodesInstall and use heater with care. Follow all localcodes. In the absence of local codes, use the latest edition of The National Fuel Gas Code ANSIZ223.1/NFPA 54*.*Available from:American National Standards Institute, Inc.1430 BroadwayNew York, NY 10018National Fire Protection Association, Inc.Batterymarch ParkQuincy, MA 02269Note: Where listed vented decorative logs arerequired, thermostat operation is not permitted.State of Massachusetts: The installation must be made by a licensed plumberor gas fitter in the Commonwealth ofMassachusetts.Sellers of unvented propane or naturalgas-fired supplemental room heaters shallprovide to each purchaser a copy of 527CMR 30 upon sale of the unit.Vent-free gas products are prohibited forbedroom and bathroom installation in theCommonwealth of Massachusetts.Available from Allparts Equipment and Accessories - 1-877-475-5660 - www.allpartsinc.com
ProductIdentificationFlame-Max Vintage Oak LogsOne PieceBurnerLog SetThere are four optional remote controls thatcan be purchased separately for Remote-ReadyModels Only: wall switch hand-held ON/OFF remote wall thermostat hand-held thermostat remoteSee Accessories, page 34.The wall thermostat or hand-held thermostatmay not be used where vented decorative listingis required.UnpackingPiezo IgnitorBurner AssemblyControl KnobFlame-Max Golden Oak LogsOne PieceLog SetOptionalRemoteControlPiezo IgnitorOptionalSelectorSwitchOptional RemoteControl AccessoriesFlameBaseAdjustmentControl AssemblyKnobKnobFigure 1 - Product IdentificationCAUTION: Do not remove thedata plates from the grate assembly. The data plates containimportant warranty and safetyinformation.1. Remove logs and heater base assembly fromcarton. Note: Do not pick up heater base assembly by burners. This could damage heater.Always handle base assembly by grate.2. Remove all protective packaging applied tologs and heater for shipment.3. Check all items for any shipping damage. Ifdamaged, promptly inform dealer where youbought heater.Product FeaturesOperationThis heater is clean burning. It requires no outsideventing. There is no heat loss out a vent or up achimney. Heat is generated by both realistic flamesand glowing coals. This heater is designed for ventfree operation with flue damper closed. It has beentested and approved to ANSI Z21.11.2 standard forunvented heaters. State and local codes in someareas prohibit the use of vent-free heaters. Thisheater may also be operated as a vented decorative(ANSI Z21.60) product by opening the flue damper(non-thermostat models only).Safety DeviceThis heater has a pilot with an Oxygen Depletion Sensing (ODS) safety shutoff system. TheODS/pilot is a required feature for vent-free roomheaters. The ODS/pilot shuts off the heater if thereis not enough fresh air.Piezo Ignition SystemThis heater has a piezo ignitor. This system requires no matches, batteries, or other sources tolight heater.Available from Allparts Equipment and Accessories - 1-877-475-5660 - www.allpartsinc.com
Air For Combustionand VentilationWARNING: This firebox shallnot be installed in a confinedspace or unusually tight construction unless provisions areprovided for adequate combustion and ventilation air. Read thefollowing instructions to insureproper fresh air for this andother fuel-burning appliancesin your home.Today’s homes are built more energy efficientthan ever. New materials, increased insulation andnew construction methods help reduce heat lossin homes. Home owners weather strip and caulkaround windows and doors to keep the cold air outand the warm air in. During heating months, homeowners want their homes as airtight as possible.While it is good to make your home energy efficient,your home needs to breathe. Fresh air must enteryour home. All fuel-burning appliances need freshair for proper combustion and ventilation.Exhaust fans, fireplaces, clothes dryers and fuelburning appliances draw air from the house tooperate. You must provide adequate fresh air forthese appliances. This will insure proper ventingof vented fuel-burning appliances.PROVIDING ADEQUATEVENTILATIONThe following are excerpts from National FuelGas Code, ANSI Z223.1/NFPA 54, Section 5.3,Air for Combustion and Ventilation.All spaces in homes fall into one of the three following ventilation classifications:1. Unusually Tight Construction2. Unconfined Space3. Confined SpaceThe information on pages 6 through 8 will helpyou classify your space and provide adequateventilation.Unusually Tight ConstructionThe air that leaks around doors and windowsmay provide enough fresh air for combustion andventilation. However, in buildings of unusuallytight construction, you must provide additionalfresh air.Unusually tight construction is defined asconstruction where:a. walls and ceilings exposed to the outside atmosphere have a continuouswater vapor retarder with a rating ofone perm (6 x 10-11 kg per pa-sec-m2) orless with openings gasketed or sealedandb. weather stripping has been added onopenable windows and doors andc. caulking or sealants are applied toareas such as joints around windowand door frames, between sole platesand floors, between wall-ceiling joints,between wall panels, at penetrationsfor plumbing, electrical and gas linesand at other openings.If your home meets all of the three criteriaabove, you must provide additional fresh air.See Ventilation Air From Outdoors, page 8.If your home does not meet all of the threecriteria above, proceed to DeterminingFresh-Air Flow For Heater Location.Confined and Unconfined SpaceThe National Fuel Gas Code, ANSI Z223.1/NFPA54 defines a confined space as a space whosevolume is less than 50 cubic feet per 1,000 Btuper hour (4.8 m3 per kw) of the aggregate inputrating of all appliances installed in that space andan unconfined space as a space whose volume isnot less than 50 cubic feet per 1,000 Btu per hour(4.8 m3 per kw) of the aggregate input rating ofall appliances installed in that space. Rooms communicating directly with the space in which theappliances are installed*, through openings notfurnished with doors, are considered a part of theunconfined space.* Adjoining rooms are communicating only ifthere are doorless passageways or ventilation grillsbetween them.determining fresh-air flowfor Heater locationDetermining if You Have a Confined orUnconfined SpaceUse this work sheet to determine if you have aconfined or unconfined space.Space: Includes the room in which you will installheater plus any adjoining rooms with doorless passageways or ventilation grills between the rooms.Available from Allparts Equipment and Accessories - 1-877-475-5660 - www.allpartsinc.com
air for combustionand ventilationContinued1.Determine the volume of the space (length xwidth x height).Length x Width x Height cu. ft.(volume of space)Example: Space size 20 ft. (length) x 16 ft.(width) x 8 ft. (ceiling height) 2,560 cu. ft.(volume of space)If additional ventilation to adjoining room issupplied with grills or openings, add the volumeof these rooms to the total volume of the space.2. Multiply the space volume by 20 to determinethe maximum Btu/Hr the space can support.(volume of space) x 20 (Maximum Btu/Hr the space can support)Example: 2,560 cu. ft. (volume of space) x 20 51,200 (maximum Btu/Hr the space can support)3. Add the Btu/Hr of all fuel burning appliances inthe space.Vent-free heaterBtu/HrGas water heater*Btu/HrGas furnaceBtu/HrVented gas heaterBtu/HrGas fireplace logsBtu/HrOther gas appliances* Btu/HrTotal Btu/Hr* Do not include direct-vent gas appliances. Direct-vent draws combustion air from the outdoorsand vents to the outdoors.Example:40,000 Btu/HrGas water heater33,000 Btu/HrVent-free heater 73,000 Btu/HrTotal 4. Compare the maximum Btu/Hr the space cansupport with the actual amount of Btu/Hr used.Btu/Hr (maximum the space can support)Btu/Hr (actual amount of Btu/Hr used)Example: 51,200 Btu/Hr (maximum the spacecan support)73,000 Btu/Hr (actual amount ofBtu/Hr used)The space in the example is a confined space becausethe actual Btu/Hr used is more than the maximumBtu/Hr the space can support. You must provide additional fresh air. Your options are as follows:A. Rework worksheet, adding the space of an adjoining room. If the extra space provides an unconfinedspace, remove door to adjoining room or addventilation grills between rooms. See VentilationAir From Inside Building.B. Vent room directly to the outdoors. See Ventilation Air From Outdoors, page 8.C. Install a lower Btu/Hr heater, if lower Btu/Hr sizemakes room unconfined.If the actual Btu/Hr used is less than the maximum Btu/Hr the space can support, the space isan unconfined space. You will need no additionalfresh air ventilation.WARNING: If the area inwhich the heater may be operated is smaller than that definedas an unconfined space or if thebuilding is of unusually tightconstruction, provide adequatecombustion and ventilation airby one of the methods describedin the National Fuel Gas Code,ANSI Z223.1/NFPA 54 Section 5.3or applicable local codes.VENTILATION AIRVentilation Air From Inside BuildingThis fresh air would come from an adjoining unconfined space. When ventilating to an adjoiningunconfined space, you must provide two permanentopenings: one within 12" of the ceiling and onewithin 12" of the floor on the wall connecting thetwo spaces (see options 1 and 2, Figure 2). Youcan also remove door into adjoining room (seeoption 3, Figure 2). Follow the National Fuel GasCode, ANSI Z223.1/NFPA 54, Section 5.3, Air forCombustion and Ventilation for required size ofventilation grills or ducts.12"VentilationGrills IntoAdjoiningRoom,Option 1Ventilation GrillsInto Adjoining Room,Option 2OrRemoveDoor intoAdjoiningRoom,Option312"Figure 2 - Ventilation Air from InsideBuildingAvailable from Allparts Equipment and Accessories - 1-877-475-5660 - www.allpartsinc.com
air for combustionand ventilationContinuedVentilation Air From OutdoorsProvide extra fresh air by using ventilation grills orducts. You must provide two permanent openings:one within 12" of the ceiling and one within 12"of the floor. Connect these items directly to theoutdoors or spaces open to the outdoors. Thesespaces include attics and crawl spaces. Follow theNational Fuel Gas Code, ANSI Z223.1/NFPA 54,Section 5.3, Air for Combustion and Ventilation forrequired size of ventilation grills or ducts.IMPORTANT: Do not provide openings for inletor outlet air into attic if attic has a thermostatcontrolled power vent. Heated air entering the atticwill activate the power vent.OutletAirVentilatedAtticOutletAirTo AtticToCrawlSpaceInletAirInlet AirVentilatedCrawl SpaceFigure 3 - Ventilation Air from OutdoorsInstallationNOTICE: This heater is intendedfor use as supplemental heat.Use this heater along with yourprimary heating system. Do notinstall this heater as your primary heat source. If you have acentral heating system, you mayrun system’s circulating blowerwhile using heater. This will helpcirculate the heat throughout thehouse. In the event of a poweroutage, you can use this heateras your primary heat source.WARNING: A qualified service person must install heater.Follow all local codes.NOTICE: State or local codes mayonly allow operation of this appliance in a vented configuration.Check your state or local codes.WARNING: Make sure theselector switch is in the OFFposition before installing heater(Remote-Ready Models Only).WARNING: Before installingin a solid fuel burning fireplace,the chimney flue and fireboxmust be cleaned of soot, creosote, ashes and loose paint bya qualified chimney cleaner.Creosote will ignite if highlyheated. A dirty chimney flue andfirebox may create and distributesoot within the house. Inspectchimney flue for damage. Ifdamaged, repair flue beforeoperating heater.WARNING: Seal any freshair vents or ash clean-out doorslocated on floor or wall of fireplace. If not, drafting may causepilot outage or sooting. Use aheat-resistant sealant. Do notseal chimney flue damper.WARNING: Never install theheater in a bedroom or bathroom unless installed as a vented appliance, see page 11 in a recreational vehicle where curtains, furniture, clothing, or other flammable objectsare less than 42" from the front,top, or sides of the heater in high traffic areas in windy or drafty areasAvailable from Allparts Equipment and Accessories - 1-877-475-5660 - www.allpartsinc.com
InstallationContinuedCAUTION: This heater createswarm air currents. These currentsmove heat to wall surfaces nextto heater. Installing heater nextto vinyl or cloth wall coverings oroperating heater where impurities(such as, but not limited to, tobacco smoke, aromatic candles,cleaning fluids, oil or kerosenelamps, etc.) in the air exist, maydiscolor walls or cause odors.Important: Vent-free heaters add moisture tothe air. Although this is beneficial, installing heaterin rooms without enough ventilation air may causemildew to form from too much moisture. See Airfor Combustion and Ventilation, page 6.CHECK GAS TYPEUse the correct gas type (natural or propane/LP)for your unit. If your gas supply is not correct, donot install log set. Call dealer where you boughtlog set for proper type fireplace.WARNING: This applianceis equipped for (natural or propane/LP) gas. Field conversionis not permitted.INSTALLATION AND CLEARANCESFor Vent-Free OperationWARNING: Maintain theminimum clearances. If you can,provide greater clearances fromfloor, ceiling, and adjoining wall.Minimum Fireplace Clearance toCombustible MaterialsSide Wall: 16"Ceiling: 42"Carefully follow the instructions below. This willensure safe installation into a masonry, UL127listed manufactured fireplace, or listed vent-freefirebox.Minimum Clearances For Side CombustibleMaterial, Side Wall and CeilingA. Clearances from the side of the fireplacecabinet to any combustible material and wallshould follow diagram in Figure 4.Example: The face of a mantel, bookshelf,etc. is made of combustible material andprotrudes 3 1/2" from the wall. This combustible material must be 4" from the side of thefireplace cabinet (see Figure 4).Note: When installing your gas logs intoa manufactured firebox, follow fireboxmanufacturer’s instructions for minimumclearances to combustible materials.B. Clearances from the top of the fireplace opening to the ceiling should not be less than 42".NOTICE: Manual control heatersmay be used as a vented product.If so, you must always run heaterwith chimney flue damper open.If running heater with damperopen, noncombustible materialabove fireplace opening is notneeded. Go to Installing DamperClamp Accessory for VentedOperation, page 11.Minimum Noncombustible MaterialClearancesIf Not Using MantelNote: If using a mantel proceed to If Using Mantel. If not using a mantel, follow the informationon page 10.ExampleLOG SIZING REQUIREMENTSMinimum FireboxLog Size HeightDepth18"17"14"24"17"14"30"17"14"36"17"14"* Measured at 14" *Minimum 16" from Side WallFigure 4 - Minimum Clearance forCombustible to WallAvailable from Allparts Equipment and Accessories - 1-877-475-5660 - www.allpartsinc.com
InstallationContinuedYou must have noncombustible material(s) abovethe fireplace opening. Noncombustible materials(such as slate, marble, tile, etc.) must be at least1/2" thick. With sheet metal, you must have noncombustible material behind it. Noncombustiblematerial must extend at least 8" up (for all models).If noncombustible material is less than 12", youmust install the fireplace hood accessory (24", 30"and 36" Models Only). See Figure 5 for minimumclearances.NoncombustibleRequirements forMaterial Distance (A) Safe Installation12" or moreBetween 8" and 12"Less than 8"Noncombustiblematerial OK.24", 30" or 36" Models: Install fireplacehood accessory(GA6050, GA6052, orGA6053 see Accessories, page 34).18" Model: Noncombustible material OK.Noncombustiblematerial must beextended to at least8". See Between 8"and 12", above. Ifyou cannot extendmaterial, you mustoperate heater withflue damper open.If Using MantelYou must have noncombustible material(s) abovethe fireplace opening. Noncombustible materials(such as slate, marble, tile, etc.) must be at least1/2" thick. With sheet metal, you must have noncombustible material behind it. Noncombustiblematerial must extend at least 8" up (for all models).If noncombustible material is less than 12", youmust install the fireplace hood accessory (24", 30"and 36" Models Only). Even if noncombustiblematerial is more than 12", you may need the hoodaccessory to deflect heat away from your mantelshelf. See Figure 5, page 10, and Figures 6 and 7for minimum clearances.IMPORTANT: If you cannot meet these minimumclearances, you must operate heater with chimneyflue damper open. Go to Installing Damper ClampAccessory for Vented Operation, page 11.Mantel Shelf10"Underside ofMantel Shelf8"6"2 1/2"All minimumdistances arein Log Set24"/30"/36"Models8"8"14"17"20"18" Model(A)Minimum NonCombustibleMaterial HeightDistances toUnderside ofMantelTop ofFireplaceOpeningFigure 6 - Minimum Mantel ClearancesWithout Using HoodMantel Shelf12"Undersideof MantelShelf10"8"6"2 1/2"MinimumNoncombustibleMaterialFigure 5 - Heat Resistant Material (Slate,Marble, Tile, etc.) Above FireplaceAll minimumdistances arein inches8"12"Min.Hood(GA6050,GA6052 orGA6053)15"18"Distances toUnderside ofMantel20"Top ofFireplaceOpeningFigure 7 - Minimum Mantel ClearancesWhen Using HoodAvailable from Allparts Equipment and Accessories - 1-877-475-5660 - www.allpartsinc.com
InstallationContinuedMantel ClearancesIn addition to meeting noncombustible materialclearances, you must also meet required clearancesbetween fireplace opening and mantel shelf. Ifyou do not meet the clearances listed below, youwill need a hood.Determining Minimum Mantel ClearanceIf you meet minimum clearance between mantelshelf and top of fireplace opening, a hood is notrequired (see Figure 6).Determining Minimum Mantel ClearanceWhen Using a HoodIf minimum clearances in Figure 6 are not met, youmust have a hood. When using a hood there arestill certain minimum mantel clearances required.Follow minimum clearances shown in Figure 7when using hood.NOTICE: Surface temperaturesof adjacent walls and mantelsbecome hot during operation.Walls and mantels above thefirebox may become hot tothe touch. If installed properly,these temperatures meet therequirement of the nationalproduct standard. Follow allminimum clearances shown inthis manual.NOTICE: If your installation doesnot meet the minimum clearances shown, you must do oneof the following: operate the logs only with theflue damper open raise the mantel to an acceptable height remove the mantelFloor ClearancesA. If installing appliance on the floor level, youmust maintain the minimum distance of 14"to combustibles (see Figure 8).B. If combustible materials are less than 14" tothe fireplace, you must install appliance atleast 5" above the combustible flooring (seeFigure 9).CombustibleMaterial14"Min.Noncombustible MaterialFigure 8 - Minimum Fireplace ClearancesIf Installed at Floor LevelHearthCombustibleMaterial5"Min.Figure 9 - Minimum Fireplace ClearancesAbove Combustible FlooringINSTALLING DAMPER CLAMPACCESSORY FOR VENTED OPERATIONNote: When used as a vented heater, appliancemust be installed only in a solid-fuel burningfireplace with a working flue and constructed ofnoncombustible material.If your heater is a manually-controlled model, youmay use this heater as a vented product. Thereare three reasons for operating your heater in thevented mode.1. The fireplace does not meet the clearanceto combustibles requirements for vent-freeoperation.2. State or local codes do not permit vent-freeoperation.3. You prefer vented operation.If reasons number 1 or 2 above apply to you, youmust permanently open chimney flue damper. Youmust install the damper clamp accessory (to order,see Accessories, page 34). This will insure ventedoperation (see Figure 10, page 12). The damperclamp will keep damper op
and firebox before operating heater. 6. Do not burn solid-fuel in a masonry or UL127 factory-built fireplace in which a vent-free room heater is installed. 7. If fireplace has glass doors, never operate this heater with glass doors closed. If you operate . heater with doors closed,
