Transcription
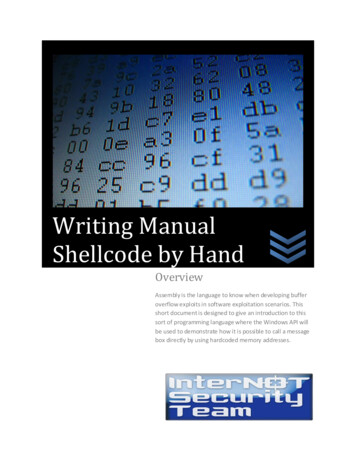
Writing ManualShellcode by HandOverviewAssembly is the language to know when developing bufferoverflow exploits in software exploitation scenarios. Thisshort document is designed to give an introduction to thissort of programming language where the Windows API willbe used to demonstrate how it is possible to call a messagebox directly by using hardcoded memory addresses.
ContentsChapter 0 – Prerequisites .2Chapter 1 – Preparing the Environment .3Chapter 2 – Writing a Dummy Popup .5Chapter 3 – Writing a “LOL” Popup .10Chapter 4 – Using the Stack for a Popup .13Chapter 5 – The Easy Way – Part 1 .17Chapter 6 – The Easy Way – Part 2 .20Ending Words & References.28Page 1
Chapter 0PrerequisitesToolsArwin de::Blocks (http://www.codeblocks.org/)OllyDbg (http://www.ollydbg.de/version2.html)GoalsCreate minimalistic shellcodeInclude custom text inputThis is for educational purposes only.Page 2
Chapter 1Preparing the EnvironmentFirst download and install the Code Blocks IDE environment, which you’re going to use tocompile the Arwin source code. Simply download “arwin.c” from the link in the previouschapter and open this in Code Blocks or your own preferred C compiler.When you’ve opened this file in Code Blocks, browse to the “Build” menu and choose “Build”.Figure 1.0.1 – Compiling Arwin.c in Code::BlocksPage 3
Now you’re ready to use Arwin, which will be located in the same directory as where the sourcecode is located. Browse to this location in a command prompt window. If the directory is locateddeep within your computer, consider copying arwin.exe to a directory near the root.Then issue the following command without quotes: “arwin.exe User32.dll MessageBoxA”.When you’ve done this, you’ll be searching for the MessageBoxA function within User32.dllFigure 1.0.2 – Using Arwin.exe to find the MessageBoxA memory addressIf you’ve done this right, you’ll see a text string like: MessageBoxA is located at It is important to note, that this address is not static and it is therefore usually not the same onanother machine. If you’re running Windows Vista or 7, then the address will change each timeyou reboot your computer. If you’re running certain IPS’s on Windows XP, this will occur too.After remembering these precautions, note down the memory address Arwin returned.In our shellcode we’re going to assume User32.dll is already loaded within the given executablewhich we are injecting our own shellcode into directly and manually. A file which already hasthis DLL file loaded when it is run is: GenuineCheck.exeYou can of course, use other files as well but I will be using this executable as an example.(Any executable file with a graphical user interface should have User32.dll loaded.)Page 4
Chapter 2Writing a Dummy PopupOpen OllyDbg and if you haven’t downloaded this program yet, then download it and make sureyou get version 2.0 which has a lot of improvements and new features. One of the new features isthe ability to change the PE header directly, which we’re going to do later on.Figure 2.0.1 – An executable file within OllyDbgPage 5
Simply open your executable file as shown in Figure 2.0.1, and take a quick look at it. Don’t tryto understand what all of it means. In the lower right we have our stack, which stores values,variables, arguments, pointers, etc.Essentially the same, hexadecimal values because binary values are harder to read.In the lower left we have our “Hex Dump” window, which is useful when we’re followingperhaps a dynamic change of our shellcode, such as an encoding sub-routine.The upper right is our registers and flags, while the upper left is the “disassembly window”where we can single-step aka trace through our assembly opcodes, aka (CPU) instructions.Basically when we press F7 once, then one instruction is executed by your computer.This may add or remove values from the stack, alter the registers, and of course if more opcodesaka instructions are used, then the hardware of the computer may be used along with perhapsAPI libraries to show pop boxes, connect to a remote attacker, or shut the computer down.In essence the only limitation with Assembly is the hardware and your imagination.Since we’re not going to use the original program behind, change a good amount of the firstcouple of instructions visible to NOP’s, so it is easier to see your own injected shellcode.1. Select aka mark a region of opcodes shown in the “disassembly window”.2. Right click and browse to "Edit" then select: "Fill with NOPs".All you should see is a lot of “NOP” instructions now. Press F7 a couple of times and see howyou execute one NOP at a time. This opcode doesn’t do anything, so don’t worry if you executemany of them. As you may see, EIP changes each time you execute one NOP. This register thatyou can see on the right, points to the current instruction you’re going to execute next.F8 is used to jump over “CALL” opcodes but also single-step through our shellcode as well,while F9 executes the entire code until an event occurs, such as a popup box requiring attention.Our initial dummy popup code looks like this:MOV EAX, 0x7e4507eaXOR EBX, EBXPUSH EBXPUSH EBXPUSH EBXPUSH EBXCALL EAXFigure 2.0.2 – Dummy Popup ShellcodePage 6
As you can see, I’m using this memory address: 0x7e4507ea to call the MessageBoxA function.Make sure not to use this address since it will most likely be different on your system. Use theaddress you found with the Arwin tool mentioned earlier.The reason why we begin with a “dummy” is to make it easier to understand, how the call andassigned variables function together, inside your computer. Here is an explanation of the code:1) Change EAX to 0x7e4507ea2) XOR EBX with EBX. This alters EBX to 0. (zero)3) Push the value of EBX to the stack.4) Push the value of EBX to the stack.5) Push the value of EBX to the stack.6) Push the value of EBX to the stack.7) Call the memory address which EAX is pointing to.Note: In our case, we’re calling MessageBoxA()Why push the value of EBX 4 times to the stack? Because MessageBoxA takes 4 arguments!Here’s the MSDN syntax:int WINAPI MessageBox(in opt HWND hWnd,in opt LPCTSTR lpText,in opt LPCTSTR lpCaption,inUINT uType);Figure 2.0.3 – MessageBoxA syntaxHere’s the full resource: 8VS.85%29.aspxI will explain what the arguments means later on and how to use them with Assembly code. Butfor now you should double-click a NOP instruction after or where the current Instruction Pointer(EIP) is pointing to. If you don’t know where EIP is pointing to, look at the very left side in yourdebugger where the memory addresses are.The memory address which is highlighted is the next instruction which will be executed whenyou hit and press F7. When you’ve double-clicked a NOP instruction, begin to write the code inyourself. Make sure to use your own memory address for MessageBoxA as described earlier.When you’ve done this, press F7 once and see how EAX now contains your memory addresswhich you used Arwin to find, if you press F7 again then EBX will become 0 and if you press F74 times more the stack will have 4 new values of 0 (zero) each.Now you’re at the “CALL EAX” instruction. If you want to, you can press F7 all the waythrough the function call, but if you just need to see your message box work or not, then press F8and watch the beautiful yet very empty popup box.Page 7
If your popup looks like the one included in the screenshot below, then you’ve done right.Figure 2.0.4 – A Dummy Popup working in OllyDbgThis is of course, not very impressive. Even a monkey can be taught how to do this, so we’llcontinue onwards and learn how to provide a custom text message now, which there are twoways which you can use in order to do this.Before we do this, mark the shellcode you wrote. Then right-click it, browse to “Edit” and select“Binary copy” in order to save it. Paste the output into notepad and remove the spaces between.This is the (hexadecimal) binary version of your recently created popup box. If you re-open theexecutable file you used by pressing CTRL F2, overwrite the first couple of instructions withNOPs and then select a good amount of NOPs to overwrite with your binary code, then you canenter the “Edit” menu by right-clicking again and now you select “Binary paste”.Whenever you use “Binary paste”, make sure to select enough opcodes!Page 8
If you don’t, then only a part of your shellcode will be shown or some of the opcodes may beincomplete and therefore they may resemble something else which it shouldn’t. Therefore youshould as previously mentioned, always select enough opcodes aka instructions.Before we continue I’d like to explain more about our dummy popup shellcode.Q: Why is XOR used?A: Because this avoids 0-bytes (00), which otherwise kills shellcode.Q: What is the Stack used for in this scenario?A: It’s used to store arguments for MessageBoxA and possibly even custom text!Q: I pressed F7 at “CALL EAX” and noticed a value was pushed onto the stack, why?A: This value is the current EIP (Instruction Pointer) which is used to return back to the original codewhen a “RETN” opcode is executed. If this value wasn’t pushed onto the stack, then the computer wouldreturn to whatever other value is stored on the stack, resulting in massive failure.Q: I saw something like this on the stack, what does it mean?0006FFB400000000 . ; hOwner NULL0006FFB800000000 . ; Text NULL0006FFBC00000000 . ; Caption NULL0006FFC000000000 . ; Type MB OK MB DEFBUTTON1 MB APPLMODALA: hOwner is the owner of the window, we’ll use zero since we can. Text is a pointer to ASCII text storedsomewhere in the memory, caption is the same as text and type means what kind of buttons (and more)that the popup box should display, do, require, etc.An “ASCII Pointer” generally points to a memory address, containing a string in ASCII format with a 00byte in the end to close the string. All this functionality will be explained in the next couple of chapters.Page 9
Chapter 3Writing a “LOL” PopupIt’s time for a message box with at least some words in it, so we’ll start with 3 letters including a0-byte due to a (32-bit) register can contain 4 bytes at once. We’ll use the phrase “LOL” withoutquotes, which equals “4C4F4C” in hexadecimal representation.A quick note is that our arguments has to be pushed in reverse order, so the last argument wepush to the stack is actually the first in the MessageBoxA (API) function call.Figure 3.0.1 – Encoding “LOL” with XORPage 10
First we’re going to encode our string “LOL” by XOR’ing it. The complete string with a 0-bytelooks like this: 004C4F4C. In Little Endian order it looks like this: 4C4F4C00, which is seen infigure 3.0.1 and afterwards XOR’d with 11111111 which alters it to: 115D5E5DWe’re going to push this text string to the stack and use the stack pointer (ESP) as a reference toour string. It may sound a little bit confusing but in essence it is actually quite simple.Figure 3.0.2 – Custom “LOL” Popup BoxThe code used in the above figure is almost the same as our dummy popup code except that ourcustom string is included and that 2 more registers has been used. Very shortly described, ourXOR’d string is inserted into EBX, then XOR’d with 1111 1111 which returns 004C4F4C.Then EBX (our string) is pushed onto the stack and the current stack pointer is copied into EDIfor future reference, because the stack pointer changes each time something is pushed onto thestack. Then ESI (0) is pushed to the stack, then EDI twice (our string) and then ESI.Now EAX is called, and as you can see in the above figure, our arguments are correct.Page 11
You might want to try this out yourself, so copy the code below and adapt it to your B010FBBCCHex dumpB8 EA07457E31F631FFBB 5D5E5D1181F3 111111115389E756575756FFD0CommandMOV EAX,7E4507EAXOR ESI,ESIXOR EDI,EDIMOV EBX,115D5E5DXOR EBX,11111111PUSH EBXMOV EDI,ESPPUSH ESIPUSH EDIPUSH EDIPUSH ESICALL EAXFigure 3.0.3 – Custom “LOL” Popup CodeI should mention that you actually don’t need the XOR EDI, EDI opcode but I added it to makethings a bit more clear. The only thing you need to change in the above code is MOV EAX toinclude the memory address for MessageBoxA which you found earlier using Arwin.Do not try to copy these opcodes directly into OllyDbg, write them yourself. Pay attention to theopcode with our custom string, because if you write it wrong then our string may be displayedwrong or not at all. It’s very important you do things right, since there’s no margin for error.When you’ve created your “LOL” popup box, do a binary copy which you can use later on:B8 EA 07 45 7E 31 F6 31 FF BB 5D 5E 5D 11 81 F311 11 11 11 53 89 E7 56 57 57 56 FF D0Figure 3.0.4 – Binary opcodes for a “LOL” popupAs you can see for yourself, we’ve used 29 bytes to create a message box saying “LOL”. It doesnot get any more efficient than this so make sure you understand it before continuing onto thenext chapter which will include more advanced shellcode.Page 12
Chapter 4Using the Stack for a PopupAfter creating our popup with the words “LOL”, we’re ready to progress onto something a bitmore advanced. The text string I’m going to use is: “Hello, this is MaXe from InterN0T.net”.In short we’re going to push the string to the stack and then point to it. Easier said than done, butit is far from impossible. All it takes is time, and you got plenty of that to learn this. You mightwonder why learn how to call a popup box? Well if you can do that, then you’re able to learn byyourself how to use the rest of the API!First we have to encode our string in hexadecimal, if you use The XSSOR, make sure to use“Machine Hex Encoding” and remove these “\x” so the string looks similar to the example.48 65 6c 6c 6f 2c 20 74 68 69 73 20 69 73 20 4d 61 58 65 20 66 72 6f6d 20 49 6e 74 65 72 4e 30 54 2e 6e 65 74Figure 4.0.1 – Hexadecimal Encoding of our StringThe above characters could be opcodes but they are in fact our string in its encoded form. Sincewe’re going to push the string to the stack we need to do more work with it, yes this is painfulbut in the end it’ll work and show the string as it should.To begin with we add a 00-byte in the end of our string. Furthermore our string should bedividable by 4, if it isn’t we add more 00-bytes. In our case after the first 00-byte we added, wenotice that we need to add 2 more bytes to make our string more workable.So there’s 3x 00-bytes after the last byte (74), and to save ourselves trouble from doubling ortripling the work we have to do with the string due to the Little Endian Architecture, we read the4 last bytes and put these in 1 row and then the next 4 bytes in the next row.The first row with the 3x 00-bytes added looks like this: 00 00 00 74, the next row: 65 6E 2E 54.Continue with this procedure until you reach the last 4 bytes and put them on the last row. Thereason why we have to do this is because the last byte is read first on the IA-32 platform. Now itwill probably become even more confusing later on, but if it works then you did it right.Page 13
To make it more clear, I’ve made a complete example C6C6548Figure 4.0.2 – Our string in Little Endian formatAs you can see, my first 4 bytes doesn’t have 3x 00-bytes. I used “20” which equals a simplespace, instead of two of the 00-bytes. I will use the example above, for the rest of this chapter.The code and technique we’re going to use is relatively the same as our “LOL” popup code, theonly difference is that we have to do some XOR magic with the first line (1) in our string andthen push all of it to the stack, and then use the stack pointer to point to it.Figure 4.0.3 – Our string gets pushed to the stackPage 14
In the screenshot on the previous page, you’re able to see that the string is pushed in yes, reverseorder which is exactly how it should because this is how the Intel Architecture works. I know it’sseems strange, but I promise there are more obscure things out there.In essence row 2 to 10 was just pushed to the stack, while row 1 contained a 00 byte which hadto be encoded which I did by XOR’ing the string with 1111 1111. Exactly the same trick I usedin our “LOL” popup code, except that we’re using a longer string this time and that it’s only thefirst 4 bytes (actually the 4 last) that needs to be encoded.Figure 4.0.4 – Working custom popup box with no 00-bytesWhen our string is pushed onto the stack, the stack pointer which points to our string is copiedinto the EDI register for future reference, then ESI (0) is pushed onto the stack twice. Then EDIis pushed which contains our ASCII (stack) pointer to our custom string, and finally ESI again(0) in order to complete the amount of necessary arguments.Finally EAX is called and our popup box should be executed without any problems.Page 15
As per usual the code is available in the example below for you to 0FBBF5010FBBF6B8 EA07457EBB 6531311181F3 111111115368 542E6E6568 65724E3068 20496E7468 66726F6D68 6158652068 6973204D68 6869732068 6F2C207468 48656C6C89E731F656565756FFD0MOV EAX,7E4507EAMOV EBX,11313165XOR EBX,11111111PUSH EBXPUSH 656E2E54PUSH 304E7265PUSH 746E4920PUSH 6D6F7266PUSH 20655861PUSH 4D207369PUSH 20736968PUSH 74202C6FPUSH 6C6C6548MOV EDI,ESPXOR ESI,ESIPUSH ESIPUSH ESIPUSH EDIPUSH ESICALL EAXFigure 4.0.5 – Custom Popup Box CodeIf you want to try this code right out of the box, on your own machine then simply edit the firstinstruction to the memory address pointing to MessageBoxA() on your system, and then entereach opcode manually into your debugger.All of the push arguments are a bit tedious to push, so copy these one by one and insert them.If you’re really lazy, then you can use the binary codes below which are the push opcodes thatpushes row 2 to 10 of our string. Remember, to select a large amount of opcodes in your debugger before your paste it in, and afterwards double-check all of the instructions indeed werepasted correctly into your debugger.The fastest way to check this, is to check the first opcode is correct and that the last opcode iscorrect, and of course that the entire shellcode looks like the code in figure e 4.0.6 – Binary Push Opcodes (Row 2 to 10)Play a little with this and when you feel ready to continue onto the next chapter which is going touse another approach, then make sure you understood the previous parts because the next way isthe hardest but also somewhat the most interesting.Page 16
Chapter 5The Easy Way – Part 1In this chapter we’re going to simply add our string to the end of our shellcode. This means thatwe’ll have a 00-byte in the end of our shellcode which may not work in real buffer overflowscenarios but in this test case it doesn’t really matter. We’ll solve that problem later on!Now you may remember that we need to point to our string somehow, and that this pointer usesmemory addresses. Just copy “EIP” into another register, is what you may think. This isn’tpossible so we actually have to calculate the EIP, no kidding.There are many ways to Rome and my method is just one of them. It’s made of pure logic andhow the Assembly opcode “CALL” functions. This opcode pushes the current instruction pointerwhen executed and then it jumps to the memory address or register defined.We can use this to our advantage by taking this value from the stack and storing it in a register,but we have to be careful because we can’t just take a value from the stack witho ut putting itback, since this may cause unexpected errors and more in real shellcode. (I.e. backdoors)Take a look at this sub-routine I made: (Pseudo Code)PUSH---- SOI ---- (Start of Instructions)POP EDIPUSH EDIRETNNOP---- EOI ---- (End of Instructions)CALL ESPFigure 5.0.1 – Calculating EIP Sub-routineIn short: Push the binary values between SOI and EOI to the stack, and then call the stack whichjumps directly to the stack, take the EIP from the stack into EDI, push the same value back andthen return to where the last pushed value on the stack is pointing to.This may seem a bit weird, but now EDI contains EIP, and we need that!Page 17
So how do we find out the binary values of POP EDI, PUSH EDI, RETN and NOP? Quitesimple, we write these in our debugger one by one but don’t execute them. This results in thesebinary opcodes: 5F 57 C3 90Now don’t forget that these values needs to be in Little Endian order, so reverse them till theylook like this: 90 C3 57 5F and then implement them in your PUSH opcode, and write it in yourdebugger like this: PUSH 90C3575FWe also need to create some dummy code to make things a lot easier. The code we’re going touse almost looks like all the previous examples we’ve used, where we use ESI for our null (0)values and EDI for our ASCII pointer which refers to our custom text BC8010FBBC968 5F57C390PUSH 90C3575FFFD4CALL ESP90NOP31F6XOR ESI,ESIB8 EA07457EMOV EAX,7E4507EA66:83C7 01ADD DI,190NOP56PUSH ESI56PUSH ESI57PUSH EDI56PUSH ESI90NOPFFD0CALL EAXFigure 5.0.2 – Dummy Popup CodeNow this code does not include our text string yet, but when it’s done then we need to place itafter the last CALL EAX opcode. I’ve added a few NOP’s in this code to separate the differentparts so it is easier to read and understand.The first 2 opcodes calculates EIP and when the first NOP is hit, EDI contains the value of EIP.This changes though as we continue to execute our code, so after we’ve written all these opcodesmanually into our debugger we need to adjust “ADD DI, 1” to add the amount of bytes there isfrom CALL ESP till our text string. In short the space from the first NOP and till the beginningof our text string. This equals 21 in decimal and in hexadecimal, 15.This is very important to keep in mind that you’re working with hexadecimal and not ordinarydecimal values. If you forget this like I occasionally do, your shellcode will fail at some point.Now our text string needs to be encoded into binary (hexadecimal) code before pasting it into ourdebugger. The string I’m going to use is: “Did you know InterN0T.net is the best community?”.Page 18
When we’ve encoded it by e.g. using The XSSOR, removed \x from the string and added a 00byte it looks like the example 3f00Figure 5.0.3 – Our string encoded in binary formYou may wonder why I did not reverse it into Little Endian? Well we don’t need to do that whenwe’re using our text string this way. This saves us some trouble, but there’s still the 00-byte atthe end which we’ll have to deal with later on. But for now let us just see if it works.Figure 5.0.4 – Working custom messageboxIt works as you can see. Don’t worry about the “opcodes” after CALL EAX, since we’re goingto assume that we won’t execute these afterwards. If we wanted to make sure this wouldn’thappen we could jump somewhere else in memory or perform a system exit call.There’s no need to worry about that, since you can learn this later on if it’s required.Page 19
Chapter 6The Easy Way – Part 2We got our custom message box working in the last chapter but we would like to eliminate the00-byte which could cause our shellcode to be terminated in a real buffer overflow scenario.In order to do this we have to either encode that part of our shellcode or encode all of it! This isboth fun and interesting to do even though it is also a bit strange at first. We’re going to encode apart of our shellcode by “XOR’ing” it, which I have also explained in my other paper aboutbypassing anti-virus scanners.In this case we need to use another approach since we have to assume we do not know any hardmemory addresses, which means we have to either calculate the start and the end of our string,search for the start and the end and then encode that or what I find the most easy, encode theamount of bytes there is in our shellcode.First we need to know how big our previous shellcode 46DFF566E206DD4 90 31 F6 B8 EA 07 45 7E 6657 56 90 FF D0 20 44 69 64 206F 77 20 49 6E 74 65 72 4E 3069 73 20 74 68 65 20 62 65 7375 6E 69 74 79 3F 00Figure 6.0.1 – Binary Custom Popup BoxThe above binary code is exactly 77 bytes long aka 4D in hexadecimal. This is very useful asyou’ll see when we implement our custom XOR encoder which will also function as a decoder,making things easier for us.In essence our encoder (and decoder) will have to find out the memory address of the first byte toencode and then loop through X amount of bytes which will be XOR’d. These amounts of bytesare equal to how big our custom popup box is.In order to find the first memory address of the first byte to XOR encode, we’re going to use ourprevious method used to calculate EIP and then add a value to it and thereby adjusting it.Page 20
Now before I go ahead and explain this, a typical problem with XOR encoding in the “section”of the program you’re writing your custom opcodes to, is that it’s not writable by the program.If it isn’t writable you’ll get an Access Violation Error, and the “XOR” opcode won’t work.Therefore open the Memory Map in OllyDbg by pressing ALT M or the “M” icon. Find thename of the executable file you’re injecting your code into, and look for “PE Header”.Then double-click this and scroll down to where you see “.text” mentioned again.Figure 6.0.2 – PE Header of our executable fileNow double click the “Characteristics” line and edit only the first hexadecimal character to E.This will make the .text section executable, readable and most importantly: Writeable.If you want to know more about these sections and how they function, then I suggest you readmy paper about bypassing anti- virus scanners but also read up on PE files since this shouldexplain everything you may want to know about this topic.Page 21
Now in order to use this change, we need to save these changes and open the new file.Do this by right clicking the marked and changed line, browse to “Edit” and select: “Copy toExecutable”. When you’re in this new window, right click and choose “Save file”. Now open thenewly created file which you hopefully saved under a new filename.After we’ve done this we’re ready to write our custom encoder with the following BB9010FBBBC010FBBBD68 5F57C390PUSH 90C3575FFFD4CALL ESP66:83C7 10ADD DI,1031C9XOR ECX,ECX80C1 4DADD CL,4D8037 0DXOR BYTE PTR DS:[EDI],0D47INC EDIE2 FALOOP SHORT 010FBBB9Figure 6.0.3 – Custom XOR EncoderYou might remember the first line, this calculates the EIP and at the third line where EDI containthe current EIP, we add 16! Yes that’s six-teen, not 10 because we’re working with hexadecimalnumbers and not decimal numbers. This is very important to keep in mind.Then ECX is zeroed out (nulled) so we can use this to count down from 77 bytes. ADD CL, 4Dadds 77 to ECX and the reason why we use CL and not ECX is to avoid 00 bytes in ourshellcode since ADD ECX takes 4 bytes as input while CL takes 1 byte.XOR BYTE PTR DS:[EDI],0D. Now that may be giving you headache but it’s actually quitesimple. Another explanation of this instruction could be: XOR the Byte with 0D, which EDI ispointing to. This will change the byte to another value, which is good to avoid Anti-Virusscanners and also in order to avoid 00 bytes.When this XOR instruction is executed the first time, EDI is pointing to the byte right after theLOOP opcode. After XOR has been executed, EDI is increased by 1 so it points to the next byte.Then a jump is performed back to “XOR” and 1 is deducted from ECX.This procedure continues until ECX is equal to 0. When ECX is 0, the “LOOP Jump” is nottaken and therefore the rest of the shellcode is executed.Now this encoder will mess up our popup box completely, but it’ll encode it and avoid the 00byte which is our goal. When this code has been encoded, we can copy this new and muchobfuscated code, and when that is run it automatically decodes itself without any changes made.It isn’t that efficient in this case, but if our payload containing a lot of 00-bytes it would be veryefficient in my opinion since it’s hard to write any smaller encoder than that.Page 22
First write the encoder yourself in the debugger, and if your shellcode is longer or shorter than 77bytes then make 100% sure that you have calculated the right value for the “ADD CL” opcode.Furthermore, when you write “LOOP SHORT” in your debugger, do NOT use the memoryaddress I used. Look to the left of your debugger at where the “XOR” opcode is, then note thememory address and write that in exactly as it is.If you want to check that you have written the right memory address, select the LOOP opcodeonly and you shoul
3) Push the value of EBX to the stack. 4) Push the value of EBX to the stack. 5) Push the value of EBX to the stack. 6) Push the value of EBX to the stack. 7) Call the memory address which EAX is pointing to. Note: In our case, we’re calling MessageBoxA() Why push the value of EBX 4 times to the