Transcription
Thanksgiving Crafts eBookThanksgiving Crafts: Projects to Give, Decorate and EntertainCopyright 2009 by Prime Publishing LLCAll rights reserved. No part of this book may be reproduced or transmitted in any form or by any means,electronic or mechanical, including photocopying, recording, or by any information storage or retrievalsystem, without written permission from the publisher, except in the case of brief quotations embodiedin critical articles and reviews.Trademarks are property of their respective holders. When used, trademarks are for the benefit of thetrademark owner only.Published by Prime Publishing LLC, 3400 Dundee Road, Northbrook, IL 60062 – www.primecp.comFind thousands of free crafts, decorating ideas, handmade gifts and more at www.FaveCrafts.com.2
Thanksgiving Crafts eBookLetter from the EditorsDear Reader,We are excited to present our latest craft eBook with 30 craft projects for Thanksgiving, including PaperCrafts, Decorations, Table Accents and Thanksgiving Crafts for kids. Welcome family and friends to aThanksgiving feast at your home with homemade decorations and table accents. Themes includeturkeys, pilgrims, pumpkins, leaves and warm autumn colors. Find just the right project to make yourhouse warm and inviting this Thanksgiving.Thanksgiving is a special holiday during which we Americans gather with our loved ones, share a feastand most importantly, remember the good things in our lives. Thanksgiving reminds us to be thankfulfor these good things, value others and to share what we can, just as the Native American did with thePilgrims at the first Thanksgiving feast. With such a wonderful message, let’s honor Thanksgiving withthe same excitement as the other end‐of‐year holidays.You can find more free Thanksgiving crafts and other upcoming holiday crafts at www.FaveCrafts.com.Our eBooks, like all our craft projects, are absolutely FREE to members of our crafting community.Please feel free to share with family and friends and ask them to sign up at our website for ourfree e‐mail newsletter.Sincerely,The Editors of Find thousands of free crafts, decorating ideas, handmade gifts and more at www.FaveCrafts.com.3
Thanksgiving Crafts eBookThanksgiving Crafts Table of ContentsPaper Crafts . 6Be Thankful Sign with Bird . 6Autumn Squirrel Wood Box . 7Give Thanks Card. 8Turkey Day Thanksgiving Card . 9Thanksgiving Pumpkin Card . 10Give Thanks Tag . 10Thanksgiving Place Card Holders . 12Pumpkin Gift Box . 13Decorations . 14Crochet Thanksgiving Turkey Wreath . 14Happy Thanksgiving Woodburned Plaque . 17Autumn Riches Cone Trio . 18Wall Art Fall Wreath . 20Harvest Indian Corn . 22Pumpkin Patch Garland. 24Textured Leaf Trio . 26Square Autumn Basket. 28Find thousands of free crafts, decorating ideas, handmade gifts and more at www.FaveCrafts.com.4
Thanksgiving Crafts eBookTable Accents . 30Air Freshener Turkey Centerpiece . 30Sparkle and Shine Pumpkins . 32Autumn Harvest Centerpiece. 33Autumn Votive Centerpiece . 35Autumn Table Runner . 37Fall Leaves Placemat Set . 38Autumn Leaves Carved Box. 39Metallic Leaves Candle . 40Thanksgiving Crafts for Kids . 41Easy Turkey Napkin Rings. 41Tom the Turkey Pumpkin . 42Turkey Table Accents . 44Thanksgiving Indian and Pilgrim Table Toppers . 45Thankful Pins . 48Decorative Cartoon Turkey . 49Find thousands of free crafts, decorating ideas, handmade gifts and more at www.FaveCrafts.com.5
Thanksgiving Crafts eBookPaper CraftsBe Thankful Sign with BirdRemember to "Be Thankful" this Thanksgiving or anytime with this beautiful sign adorned with die‐cutleaves and bird. As a daily reminder, this sign can be customized to fit your decor.Materials: Sizzix Bigz Die ‐ Bird w/Leaves & FlowerPlain PaperFoamInkRibbonStampWood SignInstructions:Paint wood sign base desired color. Die‐cut Leaf shapes out of foam and adhere to a stamp block tocreate a stamp. Stamp Leaves onto wood sign. Stamp sentiment onto contrasting plain paper, ink edges,mat and adhere to the sign. Die‐cut shapes out of colored plain paper and adhere to the sign. Embellishwith ribbon.Find thousands of free crafts, decorating ideas, handmade gifts and more at www.FaveCrafts.com.6
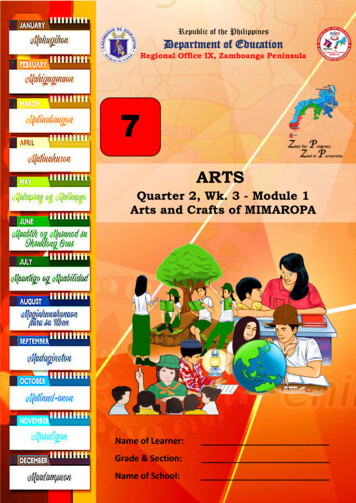
Thanksgiving Crafts eBook Autumn Squirrel Wood BoxBy: Melony Bradley for Uchida of America,Corp.This cute squirrel box is a a great project to dowith kids! Decorate a wood box for the autumnseason or Thanksgiving with punched papershapes. Beacon Adhesives Zip Dry PaperGlueMarvy Paper Trimming Buddy‐ straightbladeInstructions:1. Use the Garden Craft Markers to paintthe wood box alternating colors oforange, yellow and white. Use blackmarker to outline front of box and towrite “Harvest Fun” on wood box.2. Punch the following from the cardstock:Dark Brown‐ one large oval, onescalloped oval, two circles, two countryheartsLight Brown‐ one scalloped heart, fourmedium hearts, one flowerWhite‐ two country heartsMaterials: Marvy Uchida Garden Craft Markers‐white, yellow, orangeMarvy Uchida Clever Lever Craft Puncho Giga ‐ Scalloped Hearto Super Jumbo ‐ Ovalo Extra Jumbo ‐ Flower, scallopedovalo Jumbo ‐ Heart, circle, CountryheartMarvy Uchida Le Plume marker‐ blackSmall wood box with oval handlesCardstock‐ dark brown, light brown,whiteMedium wiggle eyes‐ two3. Use the paper trimmer to cut darkbrown cardstock to 2” square. Cut threevery small strips for the acorn stems.Cut rounded tops off hearts to formacorns. Cut circles in half to form caps.Use Le plume pen to make details andto outline acorns and caps. Glue acornto cap and stems. Cut flower in half toform squirrel hands. Use Le plumemarket to outline scalloped heart,hands, and to draw details on oval fortail.4. Assemble squirrel from punches andadhere to front of wood box as shown.Use marker for mouth and to outlinewhite hearts for teeth. Glue wiggle eyeson squirrel.Find thousands of free crafts, decorating ideas, handmade gifts and more at www.FaveCrafts.com.7
Thanksgiving Crafts eBookGive Thanks CardBy: Deena Ziegler for SizzixExpress your "Thanks" and celebrate the story of Thanksgiving with this lovely homemade card craftfeaturing a little American Indian. What a great craft for Thanksgiving.Materials: Sizzix Sizzlits Die Set 4PK ‐ Decorative Corners SetSizzix Sizzlits Decorative Strip Alphabet Die ‐ Baby Says Yeah!Sizzix Movers & Shapers Pro Die Set ‐ Card, #10 & Window Panes, Three #2Sizzix Sizzlits Die ‐ Girl, American IndianPlain PaperPatterned PaperRibbonChalkPenInstructions:Fold plain paper to form card. Attach patterned paper and ribbon. Die‐cut Corner Set from cardstockand attach to card. Die‐cut Baby Says Yeah Alphabet strip from cardstock and attach word “Thanks” tocard. Die‐cut Boy from several colors of cardstock. Layer colors and embellish with chalk and pen. Attachto card.Find thousands of free crafts, decorating ideas, handmade gifts and more at www.FaveCrafts.com.8
Thanksgiving Crafts eBookTurkey Day Thanksgiving CardBy: Terri Sproul, www.terrisproul.comA vintage stamp and autumn inks create a warm and inviting Thanksgiving card. Use as place cards onyour Thanksgiving table or send as invitations.Materials: Cardstock: Brown and orange and gloss whiteRibbon:Ink: Memories Chalk ink “Creamy Coffee” and “Washed Tan”And Memories India InkStamp: from PSX – “thanksgiving setting”Instructions:1. Cut Glossy Cardstock to 3” x 2 ¾”. Using Direct to paper technique apply both “Creamy Coffeeand Washed Tan” Chalk ink to glossy cardstock. Rub over ink with soft cloth (tissue). Stamp“Thanksgiving Setting” using Memories India Ink.2. Cut Dark Brown Cardstock to 4 ½” x 3 1/8”. Matt Stamp Image offset.3. Cut Orange cardstock 5 ½” x 8 ½” – fold in half to make card base.4. Adhere Matt and ribbon to card.Find thousands of free crafts, decorating ideas, handmade gifts and more at www.FaveCrafts.com.9
Thanksgiving Crafts eBookThanksgiving Pumpkin CardBy: Terre Fry for SpellbindersHeartfelt details, such as hand sewn pumpkin edges, and a vintage image create a beautiful card forThanksgiving. Use for scrapbooking, invitations or display as decoration this Thanksgiving.Materials: Spellbinders S4‐227 PumpkinsSpellbinders S7‐017 On The Vine Border GrandCrate Paper‐ Little Sprout CollectionCrafty Secrets, Thanksgiving SentimentsCopic MarkersCore'dinations, ColorCore CardstockSCRAPBOOK ADHESIVES by 3LClearsnapSmooch InkVintage ButtonsEmbroidery FlossJuteInstructions:Terre created a Thanksgiving Day card with the captivating Pumpkins die, giving it vintage appeal. Bysanding, airbrushing and adding hand sewn ribs to the pumpkins, she created a realistic look that willlast all season! She trimmed leaves and vines from On The Vine Border Grand to add charm and detail.Give Thanks TagFind thousands of free crafts, decorating ideas, handmade gifts and more at www.FaveCrafts.com.10
By: DecoArtThese tags make great table favors, fall gift tagsor additions to your fall and Thanksgivingdecorations. Hang these tags from your napkinrings or the backs of chairs to spruce up yourThanksgiving table. DA238 ‐ Canyon OrangeDA242 ‐ FawnDA269 ‐ Foliage Green ‐‐‐ NEW!!Supplies Assorted ribbonsAdhesivePermanent ink pensWooden or chipboard tagInstructions:1. Use flat brush to base tag with Fawn.Spatter with Burnt Umber and thenagain with Snow White.2. Base word and flourish vine with BurntUmber.3. Decorate words with dots of FoliageGreen, Baby Pink, and Snow White.Materials:DecoArt Products RequiredLaurie Speltz's Instant Images IIT01 ‐ 3/4 in. Flat BrushIIJ06 ‐ Pumpkins & Vines JournalTemplateIIT06 ‐ 3/8 in. Duo ToolIIT07 ‐ 1/4 in. Duo Tool4. Leaves on vine and near words areCanyon Orange. Shade edges with BurntUmber.5. Add dots with Burnt Umber, FoliageGreen, and Baby Pink.6. Adhere ribbons onto tag.7. Finish with adding pen work and dots ofSnow White and Baby Pink.Americana Acrylics DAO1 ‐ Snow (Titanium) WhiteDAO31 ‐ Baby PinkDAO64 ‐ Burnt UmberHelpful HintRefer to template and tool packages foradditional information on template and toolusage and techniques.
Thanksgiving Crafts eBookThanksgiving Place Card HoldersBy: Traci Armbrust from AccuCutThese cute place card holders can be reused every year. If you have a big crowd at your Thanksgivingtable then this is the perfect paper craft for you. These will make the table look nicely decorated as wellInstructions:1. Adhere plaid cardstock to chipboard.Cut coasters. Smudge edges with ink.2. Cut 1" strip for plain coaster and 1 1/2"strip for scalloped coaster. Adherestrips to coasters as shown.3. Wrap ribbon around coasters alongstrips. Tape ribbon to coaster backs.Materials: GrandeMARKo Roller Die Cutting System AccuCut Dies:o Coasters #2 Long Cuto Easel #1 Largeo Leaf‐Oak & Acorn SmallChipboard ‐ KraftMaking Memories Ribbon ‐‐ AntiqueRanger Inc., Tim Holtz Distress Ink Stamp Pads ‐‐ Frayed Burlap, Black SootK&Company Designer Adhesives, QuickDry Craft BondMy Mind's Eye, Tres Jolie Oui Oui andBonjour CardstockBazzill Basics Paper ProductsCreative Imaginations Sonnets Swatch Book Impress‐Ons Embellishments Take the time to create two or moredifferent styles of place cards to add apersonal touch to your Thanksgiving table.4. Back coaster with another coaster cutfrom cardstock.5. Adhere light brown cardstock tochipboard. Cut acorn bottoms. Cutacorn tops from dark brown cardstock.Ink all edges. Adhere tops to bottoms.Tie ribbon around acorns.6. Adhere acorns to coasters as shown,using pop dots.7. Cut light green leaves. Smudge edgeswith distress ink. Bend leaves in halfand adhere crease only to coasters.8. Adhere acorns in middle of leaves.9. With rub‐ons or stamps, spell outguests' names along strips abovewrapped ribbon.10. Cut orange and black easels. Ink edges.Attach parts of easels. Place coastersonto easels.Find thousands of free crafts, decorating ideas, handmade gifts and more at www.FaveCrafts.com.12
Thanksgiving Crafts eBookPumpkin Gift BoxBy: Deena Ziegler for SizzixUse this pretty gift box adorned with bright orange pumpkins in the fall. Use as a hostess gift or a partyfavor at autumn gatherings, including Thanksgiving. Also makes great decorative storage.Materials: Sizzix Bigz XL Die ‐ Box, TakeoutSizzix Sizzlits Die Set 3PK ‐ Pumpkins, Leaves & Vines SetSizzix Sizzlits Decorative Strip Alphabet Die ‐ Baby Says Yeah!Plain ‐cut Box from plain paper, assemble and attach ribbon handle. Cut square of cardstock, ink edgesand stamp. Die‐cut Baby Says Yeah Alphabet from several colors of cardstock and attach word “Fall” totag. Attach tag to Box with twine and ribbon. Die‐cut Pumpkins from several colors of cardstock andattach to Box. Embellish with paint and chalk.Find thousands of free crafts, decorating ideas, handmade gifts and more at www.FaveCrafts.com.13
Thanksgiving Crafts eBookDecorationsCrochet Thanksgiving Turkey WreathPumpkins.1 ball of E will make 25 Leaves.By: Lily Sugar'n CreamCrochet a Thanksgiving wreath with festivecrochet turkey and pumpkins. This wreathcrochet pattern is a great way to decorate forthe Thanksgiving meal. Crochet Hook: Size 4 mm (U.S. G or 6)crochet hook or size needed to obtaingauge.Stuffing2 glue‐on eyesStraw wreath 12 ins [30.5 cm] indiameterHot glue gun and glue sticksDried wheat sheaves for decoration1 yd [.9 m] 1¼ ins [3 cm] wide ribbonfor bowGauge: 16 sc and 16 rows 4 ins [10 cm].Instructions:Materials: Yarn: Lily Sugar’n Cream (Solids: 70.9 g/ 2.5 oz)Contrast A (00004 Ecru) 1 ballContrast B (00095 Red) 1 ballContrast C (01130 Warm Brown) 1 ballContrast D (01628 Hot Orange) 1 ballContrast E (00082 Jute) 1 ballContrast F (00084 Sage Green) 1 ball1 ball each of A, B, C and D will make 2Turkeys.1 ball of E will make 14 Small or 10 LargeTURKEYTail: With C, ch 8. Join with sl st to form ring.1st row: (WS). Ch 2. 8 hdc in ring, changing to Ain last hdc. Turn. 8 sts.2nd row: With A, ch 1. (1 sc in next hdc. 2 sc innext hdc) 4 times. Turn. 12 sts.3rd row: Ch 1. 1 sc in back loop only of each scto end of row, changing to C in last sc. Turn.4th row: With C, ch 2. 2 hdc in each sc to end ofrow. Turn. 24 sts.5th row: Ch 3 (counts as first dc). Miss first hdc.1 dc in each hdc to end of row, changing to A inlast dc. Turn.6th row: With A, ch 1. 1 sc in each dc to end ofrow. Turn.7th row: Ch 1. 1 sc in back loop only of each scto end of row, changing to C in last sc. Turn.8th row: With C, ch 3. 1 dc in first sc. (Ch 1. 1 dcin next sc) 23 times. Turn.9th row: Ch 3. (Miss ch‐1. 1 dc in next dc. Ch 1)23 times. 1 dc in top of turning ch, changing toA in last dc. Turn.Continued on Next PageFind thousands of free crafts, decorating ideas, handmade gifts and more at www.FaveCrafts.com.14
Thanksgiving Crafts eBook10th row: With A, ch 1. 1 sc in first ch‐1 sp.[Miss 1 dc. (1 hdc. 1 dc. 1 hdc) in next ch‐1 sp.Miss 1 dc. 1 sc in next ch‐1 sp] 11 times. Missnext dc. (1 hdc. 1 dc. 1 hdc) in next ch‐1 sp. Sl stin top of turning ch. Fasten off.BODY: (make 2 pieces alike)With C, ch 15.1st row: 1 sc in 2nd ch from hook. 1 sc in eachch to end of ch. Turn. 14 sts.2nd row: Ch 1. 1 sc in each sc to end of row.Turn.3rd row: Ch 1. Draw up a loop in each of next 2sc. Yoh and draw a loop through all loops onhook ‐ Sc2tog made. 1 sc in each sc to last 2 sc.Sc2tog. Turn.4th and 5th rows: Rep 3rd row, changing to B atend of 5th row. Turn. 8 sts at end of 5th row.6th row: With B, rep 3rd row, changing to A atend of row. Turn. 6 sts.7th row: With A, ch 1. 2 sc in first sc. 1 sc ineach sc to last sc. 2 sc in last sc. Turn. 8 sts.8th row: Ch 1. 1 sc in each sc to end of row.Turn.9th and 10th rows: Ch 1. Sc2tog. 1 sc in each scto last 2 sc. Sc2tog. Turn. 4 sts after 10th row.11th row: Ch 1. (Sc2tog) twice. Fasten off.BEAK: With D, ch 5.1st row: 1 sc in 2nd ch from hook. 1 sc in eachch to end of ch. Turn. 4 sts.2nd row: Ch 1. (Sc2tog) twice. Turn. 2 sts.3rd row: Ch 1. Sc2tog. Fasten off.Wattle: With B, ch 7. Fasten off.LEGS: (make 2)With D, ch 3.1st row: Sl st in 2nd ch from hook. Sl st in lastch. (Ch 3. Sl st in 2nd ch from hook. Sl st in lastch) twice.Next row: Ch 1. Draw up a loop at base of eachtoe. Yoh and draw through all 4 loops on hook.Ch 4. Sl st in 2nd ch from hook. Sl st in each oflast 2 ch.Fasten off.Finishing: Sew Beak to Body as shown inpicture. Sew Wattle to base of Beak. Sew thetwo Body pieces tog, leaving bottom open, andstuff lightly. Sew bottom closed. Sew Legs tobottom of Body. Attach eyes and sew Body toTail.PUMPKINS (make 2 each of small and large)Small Pumpkin Body:With D, ch 4. Join with sl st to form ring.1st rnd: Ch 1. 8 sc in ring. Sl st to first sc.2nd rnd: Ch 1. 2 sc in each sc around. Sl st tofirst sc. 16 sc.3rd and 4th rnds: Ch 1. 1 sc in each sc around.Sl st to first sc.5th rnd: Ch 1. (Sc2tog. 1 sc in each of next 2 sc)4 times. Sl st in first st. 12 sc.Stuff with small amount of stuffing.6th rnd: Ch 1. (Sc2tog) 6 times. Sl st in first st. 6sc.7th rnd: Ch 1. (Sc2tog) 3 times. Fasten off(bottom of Pumpkin).Large Pumpkin Body:With D, ch 4. Join with sl st to form ring.1st rnd: Ch 1. 8 sc in ring. Sl st to first sc.2nd rnd: Ch 1. 2 sc in each sc around. Sl st infirst sc. 16 sc.3rd rnd: Ch 1. (1 sc in next sc. 2 sc in next sc) 8times. Sl st in first sc. 24 sc.4th and 5th rnds: Ch 1. 1 sc in each sc around.Sl st in first sc.6th rnd: Ch 1. (Sc2tog. 1 sc in each of next 2 sc)6 times. Sl st in first st. 18 sc.7th rnd: Ch 1. (Sc2tog. 1 sc in next sc) 6 times.Sl st in first st. 12 sc.Stuff with small amount of stuffing.8th rnd: Ch 1. (Sc2tog) 6 times. Sl st in first st. 6sc.Continued on Next PageFind thousands of free crafts, decorating ideas, handmade gifts and more at www.FaveCrafts.com.15
Thanksgiving Crafts eBook9th rnd: Ch 1. (Sc2tog) 3 times.Fasten off (bottom of Pumpkin).STEM: (make 1 for each Pumpkin)With E, ch 3. Sl st in 2nd ch from hook. Sl st in last ch. Fasten off.FINISHINGWith D, sew through center of Pumpkin 5 times, each time bringing yarn around the body at evenlyspaced intervals. Draw tightly and fasten securely. Sew Stem in place to foundation ch at top ofPumpkin.LEAVES (make 4)With F, ch 12.1st rnd: (RS). 1 sc in 2nd ch from hook. 1 sc in next ch. 1 hdc in next ch. 1 dc in each of next 4 ch. 1 hdc innext ch. 1 sc in each of next 2 ch. 3 sc in last ch.Working into other side of ch, proceed as follows:1 sc in each of next 2 ch. 1 hdc in next ch. 1 dc in each of next 4 ch. 1 hdc in next ch. 1 sc in next ch. 2 scin next ch. Join with sl st to first sc. Fasten off.ASSEMBLYUsing photo as a guide, glue Turkey to base of Wreath. Glue one large and one small Pumpkin to Wreathon either side of Turkey with 2 Leaves under the Pumpkins, as shown in picture. Add wheat sheaves andribbon bow.Find thousands of free crafts, decorating ideas, handmade gifts and more at www.FaveCrafts.com.16
Thanksgiving Crafts eBookHappy Thanksgiving Woodburned PlaqueBy: Chris Wallace for Walnut HollowDecorate for Thanksgiving with this beautifulwood‐burning project featuring a harvestwreath. A stamp helps creates the wreathwhich is then wood‐burned and colored with oilpencils. You can use any Thanksgiving stampyou like for this project.Instructions:1. To prepare wood for stamping andwoodburning, use sandpaper to lightlysand wood surface to a smooth finish.2. Use ink stamp pad to apply ink torubber stamps. Press onto center ofplaque and lift. Refer to picture forplacement suggestions.3. Before using Creative Woodburner Detailer, read directions and follow allsafety precautions. Attach Mini‐FlowPoint to tool. Tighten with pliers. Usetape to secure stand to hard surface.Place tool on stand. Plug into electricoutlet and let heat for 4‐5 minutes.Practice on a scrap of wood beforebeginning project.Materials: Walnut Hollow #24414 CreativeWoodburner DetailerWalnut Hollow #3500 BasswoodCountry Planks, SmallWalnut Hollow #9912 Oil ColoredPencils, 12 Color SetPSX Rubber Stamp #K‐1541PSX Rubber Stamp #G‐1367 (or userubber stamps of your choice)Ink Stamp PadOther supplies: eraser, paper towel,pliers, Q‐tip or blending stick,sandpaper, spray varnish, tape4. Use Mini‐Flow Point to burn all the linesof the stamped image. Do not presshard. Let the point glide over the wood.For darker woodburning, move slowlyand woodburn the lines more thanonce. When woodburning is complete,unplug tool and let cool.5. Use eraser to remove any smudgemarks.6. Use Oil Colored Pencils to add color towoodburned images. Use Q‐tip orblending stick to blend colors.7. Apply 2‐3 coats of spray varnish for aprotective finish.Find thousands of free crafts, decorating ideas, handmade gifts and more at www.FaveCrafts.com.17
Thanksgiving Crafts eBookAutumn Riches Cone TrioBy: Ed Smith for STYROFOAM Brand FoamNo season boasts more glorious color than autumn. From the rich handmade‐paper to the fruits,feathers and greenery, this design will dazzle you.Materials: STYROFOAM Brand Foam:o Block, 12" x 2" x 4"o Cones, 6" x 3", threeHandmade paper, 8‐1/2" x 11" sheets: red‐orange,two; olive green, two; gold, oneArtificial fruits: red grape clusters, two; berrysprays, six; pomegranates, four; pear, oneSilk floral stems, one each: velvet sunflowers; fallleavesDried grain stems, threeQuail feathers, twoMedium pinecones, threeChenille stem, any colorWooden floral picksFine‐gauge floral wireFloral U‐pinsFloral shears or wire cuttersSerrated knifeCandle stub or paraffinRulerDisposable foam paintbrushPaper towelsScissorsLow‐temp glue gun and glue sticksThick, white craft glueSteps:1. Wax serrated knife with candle stubs or paraffin. Cut small equal slices from one side of eachfoam cone so they will rest flat against work surface.2. Using disposable brush, apply glue to one sheet of paper at a time. Wrap two cones with red‐orange, one with gold, and foam block with olive green paper; trim excess and let dry.Continued on Next PageFind thousands of free crafts, decorating ideas, handmade gifts and more at www.FaveCrafts.com.18
Thanksgiving Crafts eBook3. Glue cones to foam block as shown. For added strength, glue and insert a wooden pick throughblock into widest part of each paper‐covered cone.4. Twist chenille stem ends together, forming hanging loop. Glue and insert loop into top back ofblock; secure with floral pins. Note: Hang swag before adding fillers in order to achieve properbalance in finished piece.5. Using photo as guide, glue and insert pear and pomegranates into top of center cone. Insertgrapes, then sunflowers, into remaining cones. Fill in spaces with fall leaves. Insert berries intoright cone so they cascade down side. Insert one berry spray vertically into right cone. Insertfeathers in left cone. Insert dried grain stems into center cone. Fill in spaces with dried grains,berries and leaves as desired. Glue pinecone to tip of each cone. Trademark of The Dow Chemical Company ("Dow") or an affiliated company of Dow.For more project ideas, please see styrofoamstyle.com.Find thousands of free crafts, decorating ideas, handmade gifts and more at www.FaveCrafts.com.19
Thanksgiving Crafts eBookWall Art Fall Wreathby Cheri Wenger for GlueArts.comHere is a fun decorative fall wreath prohect that scrapbookenthusiasts who love patterned papers and cardstocks willlove.Materials: Adhesive: Glue Arts Wall Art Décor Adhesive (12”x 12 sheets ”)Cardstock: (Deja Views) Global Views Double SidedPaper Pack (available at Michael’s)Cutters: (QuicKutz ) Silhouette Digital CraftCutter; (Fiskars) Paper Trimmer and (Xacto) cuttingknifeInstructions:1. This first step assumes that you have installed and launched the ROBO Master softwareprovided with your Silhouette digital craft cutter. Choose the leaf 0026 graphic from the patternlibrary. Cut and paste Into a new letter size document, name and save the file. Now, you canbegin to layout your document. Stretch and scale the leaf to make varied sizes and widths. Youcan also flop the direction to make it face the opposite way. Next, open the flourish 0009 file,cut & paste design, ungroup elements and scale choices to desired sizes and directions. Create½” – ¾” circles in empty spaces. Position these on page to fit multiple designs on one page. Savefinal file.2. Trim cardstock to 8‐1/2” x 12”. You will need about 4‐5 different sheets of coordinating colorsand patterns. Apply the first sheet to a sheet of Wall Art adhesive making sure that the side youwant to show is face up. If you are adhering to something reflective or clear, you will need tomake sure that the colors and patterns on the back side of your papers coordinate.3. Use your paper trimmer to trim excess Wall art adhesive and carrier sheet away from patternedcardstock. Do not remove white top sheet yet. Flip over and rub back side to transfer adhesiveto the cardstock. Now turn over and remove top white sheet and place the cardstock with clearcarrier sheet face down onto the Silhouette cutting pad and rub to make sure it is attached andthat there are no bumps.Continued on Next PageFind thousands of free crafts, decorating ideas, handmade gifts and more at www.FaveCrafts.com.20
Thanksgiving Crafts eBook4. You will need to insert and align the carrier sheet with your patterned cardstock into theSilhouette per the directions provided with the software.5. Choose FILE CRAFT ROBO from pull down menu to cut out the graphics. Next, selectCardstock 40‐60lb from the pull down menu in the pop up window. (If you are using heaviercardstock, you will need to change out this setting and the recommended cutting blade). Onceall your settings are done, choose cut. When finished cutting use left hand wheel on theSilhouette to remove the carrier sheet with patterned paper.6. Leave patterned cardstock on carrier sheet. Using the point of a cutting blade, remove eachdigital graphic. Make sure the clear adhesive carrier sheet is not still attached to the back side orit will not stick. Start randomly placing leaves and swirls onto
Thanksgiving Crafts eBook Find thousands of free crafts, decorating ideas, handmade gifts and more at www.FaveCrafts.com. 7 Autumn Squirrel Wood Box By: Melony Bradley for Uchida of Americ