Transcription
70-680 Study Guideto be used as an internal resource onlyIntroductionThis free study guide is for Microsoft's 70-680 exam, Windows 7, Configuring. This guide is intended to besupplemental to your books and other study materials. If you find any corrections or would like to suggestadditions, please contact me @MrNetTek2000@yahoo.com.Installing, Upgrading, and Migrating to Windows 7 (14 percent)Perform a Clean InstallationUpgrade to Windows 7 From Previous Versions of WindowsMigrate User ProfilesDeploying Windows 7 (13 percent)Capture, Prepare, and Deploy a System ImageConfigure a VHDConfiguring Hardware and Applications (14 percent)Configure DevicesConfigure Application CompatibilityConfigure Application RestrictionsConfigure Internet ExplorerConfiguring Network Connectivity (14 percent)Configure IPv4 and IPv6 Network SettingsConfigure Network SettingsConfigure Windows FirewallConfigure Remote ManagementConfiguring Access to Resources (13 percent)Configure Shared ResourcesConfigure File and Folder AccessConfigure User Account Control (UAC)Configure Authentication and AuthorizationConfigure BranchCacheConfiguring Mobile Computing (10 percent)Configure BitLocker and BitLocker To GoConfigure DirectAccessConfigure Mobility OptionsConfigure Remote Connections11/6/2012Computer Systems Engineer
70-680 Study Guideto be used as an internal resource onlyMonitoring and Maintaining Systems that Run Windows 7 (11 percent)Configure Updates to Windows 7Manage DisksMonitor SystemsConfigure Performance SettingsConfiguring Backup and Recovery Options (11 percent)Configure BackupConfigure System Recovery OptionsConfigure File Recovery Options70-680 Study Guide - Perform a Clean InstallationOverview:Windows 7 is the latest release of the Windows series of operating systems by Microsoft. It can be used on arange of personal computers like desktops, laptops, and notebooks.This guide will help you to perform a custom installation or clean installation, which means installing a newWindows 7 operating system on a computer.System Requirements:Before installing Windows 7 on your computer, ensure that your computer has: 1 gigahertz (GHz) or faster 32-bit (x86) or 64-bit (x64) processor1 gigabyte (GB) RAM (32-bit) or 2 GB RAM (64-bit)16 GB available hard disk space (32-bit) or 20 GB (64-bit)DirectX 9 graphics device with WDDM 1.0 or higher driverClean Installation Instructions:21/6/2012Computer Systems Engineer
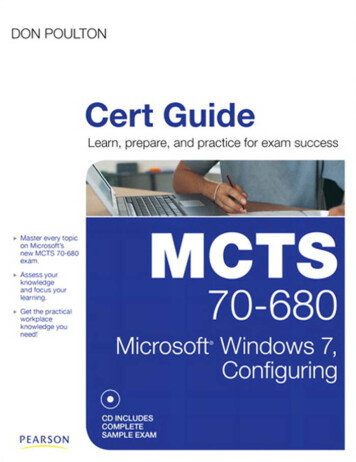
70-680 Study Guideto be used as an internal resource onlyInsert the Windows 7 setup DVD into the disk drive. The Windows setup will automatically start the installation.If your computer does not start with the Windows 7 Setup DVD, then make the required changes in your BIOSand make your CD/DVD drive the primary boot device. Select the language that you want to use during the installation process.31/6/2012Computer Systems Engineer
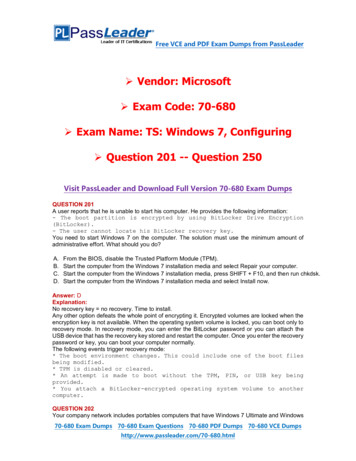
70-680 Study Guideto be used as an internal resource only Next, click the Install Now button to initiate the installation. The Setup transfers some temporary files fromthe DVD to your computer. The Please read the license terms page appears. Select the I accept the licenseterms check box.41/6/2012Computer Systems Engineer
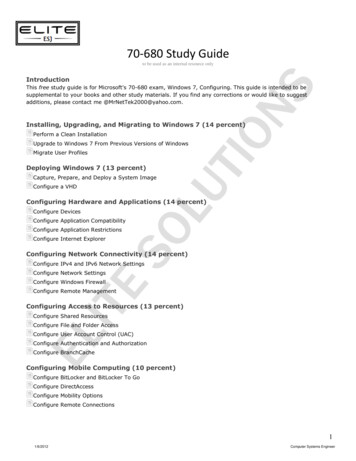
70-680 Study Guideto be used as an internal resource only Select the Custom (advanced) install option.51/6/2012Computer Systems Engineer
70-680 Study Guideto be used as an internal resource only Select the hard disk drive or partition on which you want to install Windows 7.61/6/2012Computer Systems Engineer
70-680 Study Guideto be used as an internal resource only Setup copies the program files to your system. 71/6/2012Computer Systems Engineer
70-680 Study Guideto be used as an internal resource only Toward the end of the installation process, your system restarts several times, and then Setup updates theregistry settings. Next, Windows prompts you to perform some post-installation tasks, like selecting the username and the computer name.81/6/2012Computer Systems Engineer
70-680 Study Guideto be used as an internal resource only Set the system password for your user account and enter a hint for the password.91/6/2012Computer Systems Engineer
70-680 Study Guideto be used as an internal resource only Type the activation key. Set the date and time. Select the appropriate network settings and create a group depending on the type of Network you havechosen. Your Windows 7 installation is ready for use.Dual Booting Windows 7 with Windows Vista:To install Windows 7 on a computer in dual boot mode, which is already running Windows Vista, follow thesesteps:101/6/2012Computer Systems Engineer
70-680 Study Guideto be used as an internal resource only If you need to create a new partition on your system’s hard disk to accommodate the new operating system(Windows 7), follow these steps:1) In Windows Vista, click Start, right-click My Computer, and click Manage.2) Click Disk Management in the left pane. You can now view the current partitioning scheme on your system.111/6/2012Computer Systems Engineer
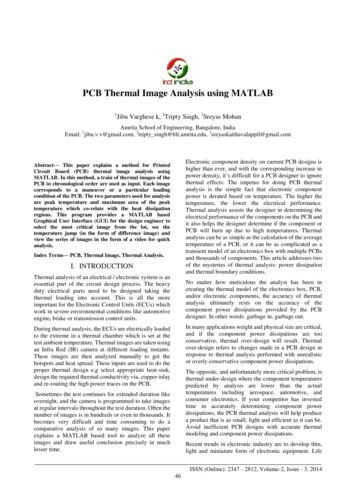
70-680 Study Guideto be used as an internal resource only3) Right-click on the partition that you want to resize. The screen shows information on the capacity of thedrive. In addition, it provides you the option to enter the amount you'd like to ―shrink‖ your partition by. Therecommended minimum partition size for Windows 7 is 16GB. Select 16GB or a larger size for your partition,and then click Shrink Volume.121/6/2012Computer Systems Engineer
70-680 Study Guideto be used as an internal resource only131/6/2012Computer Systems Engineer
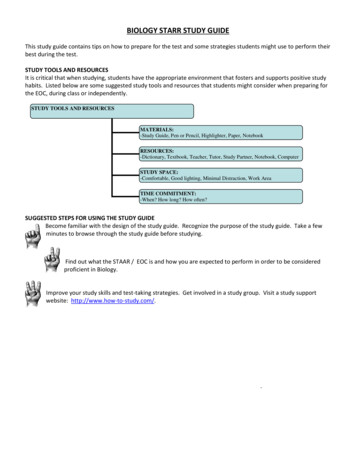
70-680 Study Guideto be used as an internal resource onlyYou can now see the unallocated space on your hard disk with the capacity you specified, situated just afteryour now resized original partition.4) Right-click the unallocated volume, select New Simple Volume, and assign it a drive letter.5) Perform Quick format of the new volume using the NTFS file system and the default allocation unit size. Thevolume label is optional, but you can assign it the label - Windows 7, which will help you to recognize thepartition during installation process. After creating the partition, perform clean installation of Windows 7 by following procedure given earlier inthis guide. After the installation process is complete, you’ll have a new entry for Windows 7 on your boot screenwhen you first start-up your computer. On the boot screen, choose the Operating System with which you wantto start your computer. Windows 7 can also be dual booted with Windows XP, or you can triple boot your systemwith Windows7, Windows XP and Windows Vista.Installing Windows 7 From a USB Drive:For this installation, you’ll require the following: USB Drive (minimum 4 GB)Windows 7 installation filesFollow these steps to convert your USB drive into a bootable USB drive, which you can then use for Windows 7installation:1.2.3.4.Connect the USB drive. Note that the USB drive should not have any data. If it has any data, move yourdata to some other location.Click Start, then click All Programs, and then click Accessories.Right-click CMD, and select Run as administrator.At the command prompt, type the following commands, as shown below:DISKPARTLIST DISK (This command will list the disk numbers for all the hard disk drives and USB drives on yoursystem.)SELECT DISK 2 (As system has listed the USB drive as DISK 2)CLEANCREATE PARTITION PRIMARYACTIVEFORMAT FS NTFS (This process will take some time to complete)ASSIGNEXIT141/6/2012Computer Systems Engineer
70-680 Study Guideto be used as an internal resource only151/6/2012Computer Systems Engineer
70-680 Study Guideto be used as an internal resource only5.Insert your Windows7 DVD into the DVD drive and check the drive letter of the DVD drive. Suppose thedrive letter is D. Type the following command at the command prompt:D: CD BOOT (where D is the drive letter for DVD)CD BOOT6.Next, type the following command at the command prompt:BOOTSECT.EXE /NT60 F: (where F is the drive letter for the USB drive.)7.Copy the contents of the Windows 7 installation DVD to the USB drive.The USB drive is now ready for installation. You will need to change the BIOS to boot from the USB drive. Toperform an installation using the USB drive, follow the procedure for clean installation of Windows 7 as givenearlier in this guide.Installing Windows 7 Using Windows Deployment Services:Windows Deployment Services (WDS) is the updated and redesigned version of Remote Installation Services(RIS). With WDS you can install Windows operating systems over the network. This eliminates the need toinstall Windows on individual computers using the local CD drive or DVD drive. WDS uses the Pre-BootExecution environment (PXE) or Trivial File Transfer Protocol (TFTP) service on the host computer to boot fromthe WDS Server.You need to install the WDS service on the computer that you want to use as a WDS Server. Here we’ll installand configure this service on Windows Server 2008. On the WDS Server PXE and TFTP servers are required fornetwork booting of the client on which installation is to be done. Follow these steps to install WDS on WindowsServer 2008:161/6/2012Computer Systems Engineer
70-680 Study Guideto be used as an internal resource only1.2.Open Server Manager, click Add Roles and then click Next.On the Select Server Roles screen, select Windows Deployment Services, and then click Next.171/6/2012Computer Systems Engineer
70-680 Study Guideto be used as an internal resource only3.On the Role Services screen, select Deployment Server and Transport Server, then click Next and thenclick Install.181/6/2012Computer Systems Engineer
70-680 Study Guideto be used as an internal resource only4.Next, configure the PXE Server settings. Select Respond to all (known and unknown) client computersand then click Finish. Once a computer is linked to a computer account object in AD DS, the computer isconsidered ―prestaged‖ or "known". For security reasons, you may opt to select PXE to only respond toknown computers, or if you make the selection used in our instructions, you may want to click the Forunknown clients, notify administrator and respond after approval checkbox.Adding a Boot image on the WDS Server:Boot images are Windows images that are used to boot a client computer, and install an operating system onthe computer. To add a boot image on the WDS Server, perform these steps:1.2.Click Start, then click Administrative Tools, and then click Windows Deployment Services.Open the Windows Deployment Services management console.191/6/2012Computer Systems Engineer
70-680 Study Guideto be used as an internal resource only3.Right-click the Boot Images node and then click Add Boot Image.201/6/2012Computer Systems Engineer
70-680 Study Guideto be used as an internal resource only4.Click Browse to locate the boot image you want to add. Select Boot.wim from the /sources folder on theWindows 7 installation DVD.211/6/2012Computer Systems Engineer
70-680 Study Guideto be used as an internal resource onlyAdding an Install Image on the WDS Server:1.2.3.Click Start, then click Administrative Tools, and then click Windows Deployment Services.Open the Windows Deployment Services management console.Right-click the Install Images node and then click Add Install Image.221/6/2012Computer Systems Engineer
70-680 Study Guideto be used as an internal resource only4.Specify a name for the image group and then click Next.5.Click Browse to locate the default install image (Install.wim), which is located in the \Sources folder ofthe product DVD, and then click Open.Enter a name and click Save.Next select Upload image to WDS Server.Repeat the process if you want to add more than one Install Image to your WDS Server. You must addat least one boot image and one install image before you will be able to boot to the WindowsDeployment Services server and install an image.6.7.8.Installing From an Install Image:After you have at least one boot and one install image on the server, you can deploy an install image assumingyou meet the following requirements: The client computer must be capable of performing a PXE boot.Your user account must be a member of the Domain Users group.The client computer must have at least 512 MB of RAM, which is the minimum amount of RAM for usingWindows PE.231/6/2012Computer Systems Engineer
70-680 Study Guideto be used as an internal resource only The client must meet the system requirements for the operating system of the install image.To perform a PXE boot on a computer to install an image, use the following procedure.1.2.3.4.5.Configure the BIOS of the computer to enable PXE booting, and set the boot order so that it is bootingfrom the network first.Restart the computer, and when prompted, press F12 to start the network boot.Select the appropriate boot image from the boot menu. (This boot image selection menu will beavailable only if you have two or more boot images on the server.)Follow the instructions in the Windows Deployment Services user interface.When the installation is completed, the computer will restart and Setup will continue as it would in aregular clean installation.70-680 Study Guide - Upgrade to Windows 7 fromprevious versions of WindowsUpgrading Windows Vista to Windows 7:Upgrades to Windows 7 from windows Vista are only supported by Vista Service Pack1 and Service Pack 2editions. All the Windows Vista device drivers are compatible with Windows 7. Following type of upgrades aresupported from Windows Vista to Windows 7: Windows Vista Home Basic (SP1, SP2) 32-bit (x86) and 64-bit (x64) can be upgraded to Windows 7Home Basic, Home Premium and Ultimate 32-bit (x86) and 64-bit (x64).Windows Vista Home Premium (SP1, SP2) 32-bit (x86) and 64-bit (x64) can be upgraded to Windows 7Home Premium and Ultimate 32-bit (x86) and 64-bit (x64).Windows Vista Business (SP1, SP2) 32-bit (x86) and 64-bit (x64) can be upgraded to Windows 7Professional, Enterprise and Ultimate 32-bit (x86) and 64-bit (x64).Windows Vista Enterprise (SP1, SP2) 32-bit (x86) and 64-bit (x64) can be upgraded to Windows 7Enterprise 32-bit (x86) and 64-bit (x64).Windows Vista Ultimate (SP1, SP2) 32-bit (x86) and 64-bit (x64).Following types of upgrades are not possible from windows Vista to Windows 7: Cross-architecture in place upgrades (for example, x86 to x64) are not supported from Vista to windows7.241/6/2012Computer Systems Engineer
70-680 Study Guideto be used as an internal resource only Cross-language in place upgrades (for example, en-us to de-de) are not supported.Cross-media type in-place upgrades (for example, from Staged to Unstaged or from Unstaged toStaged) are also not supported.Follow these steps to upgrade Windows 7 from Windows Vista:1.2.3.4.5.6.7.8.Insert the Windows 7 DVD. The DVD does not have an auto run option on the Windows Vista. Open theDVD drive in My Computer and double click setup.exe. (If you are performing an upgrade, the Windowsinstallation process will not delete the old version. It will rename the Windows Root folder.) You can alsouse other media for installation like a USB drive or the downloaded Windows 7 setup. Click setup.exe filefrom the media that you are using for installation, to start the installation process.Click Install now on the Install Windows screen begin the installation. You can also check thecompatibility of your computer with Windows 7 operating system, by clicking Check CompatibilityOnline.By selecting Go online to get the latest updates for installation, you can get the latest updates to helpensure a successful installation, and to help protect your computer against security threats. Yourcomputer will need to be connected to the Internet during Windows 7 installation to get these updates.On the Please read the license terms page, click I accept the license terms, and then click Next.On the Which type of installation do you want page, click Upgrade. This will present you withcompatibility report. This is used to help you determine what may not work properly after the upgrade.Setup starts installing Windows 7 on your computer by copying the program files to your system. It willprompt you for a Windows login password, and password hint.Type the activation key and Set the date and time.Select the appropriate network settings and create a group depending on the type of Network you havechosen.Upgrading Windows XP to Windows 7:Windows 7 does not provide direct in-place upgrade for Windows 7 from Windows XP that will retain user’sapplications programs, settings, customizations, personalization and data during the upgrade process. If youtry to upgrade to Windows 7 from a system which is using Windows XP, you will be shown this error reportwhich informs you that direct upgrade from Windows XP to Windows 7 is not available.You can perform an upgrade to Windows 7 from windows XP, by using Windows Easy Transfer wizard, thatallows you to save Selected User Accounts, Files and folders, Windows settings, Program data files and settingsfrom Windows XP computer and later on restore them on upgraded windows 7.Follow these steps to upgrade XP to Windows 7:1.2.3.4.5.6.On your Windows XP computer insert Windows 7 DVD.Navigate to Support folder and open migwiz (migration wizard) folder and run migwiz.exe. It opensWindows easy Transfer window which initiates the process of File transfer.It asks you for the media you wish to use to transfer your settings. Select the appropriate media fromthe options presented by the wizard.It ask whether this is the New computer (in which you wish to copy the settings) or the old computer(from you wish to copy the settings) select old computer. The wizard will now start scanning system foryour files.Once scanning is complete it shows the list of user profiles and you can select the files and settings ineach profile which needs to be transferred to Windows 7.It asks you to provide a password for the data file. Provide a password for data security. Then pressSave. Once the data is saved, Easy transfer tells you the location where the files are stored.251/6/2012Computer Systems Engineer
70-680 Study Guideto be used as an internal resource 3.24.Close the Easy Transfer and open the Windows 7 Setup by browsing to the root folder of the DVD, andthen double clicking setup.exe.Click Install now on the Install Windows screen begin the installation.By selecting Go online to get the latest updates for installation, you can get the latest updates to helpensure a successful installation, and to help protect your computer against security threats. Yourcomputer will need to be connected to the Internet during Windows 7 installation to get these updates.If you don’t want to check for updates during Setup, click Do not get the latest updates.On the Please read the license terms page, click I accept the license terms, and then click Next.On the Which type of installation do you want page, click Custom (advanced) to perform an upgrade toyour existing Windows.In the next step, select the partition where you want to install Windows 7. If you chose to installWindows 7 on a partition where your current Windows XP is installed, it will overwrite and if you havechosen to install on another drive, you can dual boot with XP.Setup copies the program files to your system. Toward the end of the installation process, your systemrestarts several times, and then Setup updates the registry settings.Windows prompts you to perform some post-installation tasks, like selecting the user name and thecomputer name.Set the system password for your user account and enter a hint for the password.Type the activation key. Set the date and time.Select the appropriate network settings and create a group depending on the type of Network you havechosen.Once your Windows 7 installation is complete, you can transfer the files that you copied from WindowsXP. Boot your new Windows 7. Insert the USB or the external hard disk where you saved the transferredfiles.Click Start, then click All Programs and then click Accessories.Click System Tools, and then click Windows Easy Transfer. Once Easy transfer opens up, click the nextbutton and select An external hard disk or USB flash drive from the options.Select This is my New computer.It asks you to browse the file which you created while copying data from old computer.Click Transfer to transfer all files and settings. Once you select the file and click open, Easy Transfer willagain scan for the user profiles available in the saved data. You can chose which files need to bemigrated for which all users you have saved. You can customize the migration using the customizebutton below each profile.When the transfer is complete click Close. Now all your files and settings which you saved from your XPinstallation will be available in Windows 7.70-680 Study Guide - Migrate User ProfilesAbout User Profiles:A Microsoft Windows user profile describes the Windows configuration for a specific user, including the user's261/6/2012Computer Systems Engineer
70-680 Study Guideto be used as an internal resource onlyenvironment and preference settings. The user profile contains the settings and configuration options specific tothe user, such as installed applications, desktop icons, and color options. The user profile contains: Desktop settings - screen colors, wallpaper, screen saver.Persistent network and printer connections.Mouse settings and cursor settings.Recently edited documents.Start-up programs, shortcuts, and personal groups.Settings for Windows applications - Notepad, Paint, Windows Explorer, Calculator, Clock, and more.Start menu settings - Programs that can be selected from the start menu.The user profile settings are saved on disk and are loaded when the user logs on. User profiles in MicrosoftWindows are of two types – Local and Roaming user profiles. Local profiles are only stored on the computer towhich you log in. Roaming profiles are profiles that have been placed on a central server. When the user logsonto the domain, the roaming profile is copied to the local computer the user logged on from. If the user makeschanges to the profile, they are saved to the local computer and the central server. When the user logs on fromanother computer the most recent of the local or server stored profile is used. Since Roaming profiles aredownloaded when a user logs on, and uploaded when the user logs off, large user profiles degrade systemperformance. Using local profiles, and limiting the profile size shortens the time required to log on and off andimprove system performance for all users.User State Migration Tool (USMT):The User State Migration Tool (USMT) 4.0, part of the Windows Automated Installation Kit (Windows AIK), is acommand line-scriptable tool for migrating user state from one computer or operating system to another. It isdesigned for large-scale migrations whereas Windows Easy Transfer is for small-scale and individualtransfers. USMT migrates files and settings between Microsoft Windows versions 2000, XP, Vista and Windows7, and is useful in migrating user settings and files during OS upgrades. Migrations from 32-bit to 64-bit aresupported, but from 64-bit to 32-bit are not supported by USMT. USMT can transfer: Selected User Accounts.Files and folders.E-mail messages, settings, and contacts.Photos, music, and videos.Windows settings.Program data files and settings.Internet settings.A migration can be side-by-side or wipe-and-load. Side-by-side, sometimes called PC Replacement, migratesdata from one computer to another via central storage such as a server. Wipe-and-load, sometimes referred toas PC Refresh, moves data to central storage and then back to the same PC.For more information, read Common Migration ScenariosUSMT uses ScanState command to collect the files and settings from the source computer and LoadState torestore the user state onto the destination computer.ScanState scans the source computer, collects the files and settings and creates a store. ScanState does not271/6/2012Computer Systems Engineer
70-680 Study Guideto be used as an internal resource onlymodify the source computer. By default, ScanState compresses the files and stores them as an image file(USMT3.MIG).LoadState migrates the files and settings from the store to the destination computer. LoadState migrates eachfile (one by one) from the store to a temporary location on the destination computer — the files aredecompressed (and decrypted if necessary) during this process. Next, LoadState transfers the file to the correctlocation, deletes the temporary copy, and begins migrating the next file.Migrating All User Accounts and User Settings Using USMT:1.2.3.Log on to the source computer as an administrator, and at a command prompt type:scanstate \\fileserver\migration\mystore /i:miguser.xml /i:migapp.xml /oLog on to the destination computer as an administrator.Enter either of the two strings at a command prompt depending on your requirements:If you are migrating domain accounts, type:loadstate \\fileserver\migration\mystore /i:miguser.xml /i:migapp.xmlIf you are migrating local accounts along with domain accounts, type:loadstate \\fileserver\migration\mystore /i:miguser.xml /i:migapp.xml /lac /laeMigrating 2 Domain Accounts (User1 and User2):1.2.3.Log on to the source computer as an administrator, and specify:scanstate \\fileserver\migration\mystore /ue:*\* /ui:domain1\user1 /ui:domain2\user2 /i:miguser.xml/i:migapp.xml /oLog on to the destination computer as an administrator.Specify the following:loadstate \\fileserver\migration\mystore /i:miguser.xml /i:migapp.xmlMigrating 2 domain accounts (User1 and User2) - Move User1 From the NewYork tothe Portland Domain:1.2.3.Log on to the source computer as an administrator, and type the following at the command-line prompt:scanstate \\fileserver\migration\mystore /ue:*\* /ui:NewYork\user1 /ui:NewYork\user2 /i:miguser.xml/i:migapp.xml /oLog on to the destination computer as an administrator.Specify the following:loadstate \\fileserver\migration\mystore /mu:NewYork\user1:Portland\user2 /i:miguser.xml/i:migapp.xmlScanState SyntaxLoadState SyntaxUSMT Hard-Link Migration:USMT 4.0 hard-link migration is a new feature that you can use to perform an in-place migration much faster281/6/2012Computer Systems Engineer
70-680 Study Guideto be used as an internal resource onlythan by using traditional file copy mechanisms. Hard-link migration in USMT scans the computer for user filesand settings and then creates a directory of hard links to those files. The hard links are remapped into theappropriate locations in the new operating system. The entire process typically takes a few minutes to run, doesnot duplicate files on the local disk, and can save several hours when upgrading to Windows 7. You can useUSMT hard-link migration both online and offline.Follow these steps to perform user profile migration:1.2.3.4.5.6.7.8.9.Boot in to Windows XP. Insert Windows 7 DVD and run the setup.Select Clean Installation. Once you come on the Hard drive selection screen select the partition on whichyou installed windows XP. (Let us assume that the partition on which you installed windows XP operatingsystem is C). Then select C: and click Next.On this screen you get a message that all files folders and settings of XP are moving to Windows.old andWindows will be installed on Windows folder. Click OK.Let the setup complete until it reaches the desktop of Windows 7.Install Windows AIK (Downloaded earlier) on your system.Click My Computer, then click C: Drive and then click Program Files.Click Windows AIK, then click Tools, and the click USMT.In this folder, two more folders are there - x86 and AMD64. Both folders contain USMT files for both thearchitectures.Now open a new Notepad file and copy the following text in it:If exist D:USMT*.* xcopy D:USMT*.* /e /v /y C:WindowsUSMTIf exist E:USMT*.* xcopy E:USMT*.* /e /v /y C:WindowsUSMTIf exist F:USMT*.* xcopy F:USMT*.* /e /v /y C:WindowsUSMTIf exist G:USMT*.* xcopy G:USMT*.* /e /v /y C:WindowsUSMTIf exist H:USMT*.* xcopy H:USMT*.* /e /v /y C:WindowsUSMTIf exist I:USMT*.* xcopy I:USMT*.* /e /v /y C:WindowsUSMTIf exist J:USMT*.* xcopy J:USMT*.* /e /v /y C:WindowsUSMTIf exist K:USMT*.* xcopy K:USMT*.* /e /v /y C:WindowsUSMTCd c:windowsusmtx86scanstate.exe c:store /v:13 /o /c /hardlink /nocompress /efs:hardlink /i:MigApp.xml oadstate.exe c:store /v:13 /c /lac /lae /i:migapp.xml /i:migdocs.xml /sf /hardlink /nocompress:EOF10. Save this file with .bat extension and copy it to the C:/Program Files/Windows AIK/Tools/USMT folder.11. Right-click the file and click Run as Administrator.12. After this, USMT will start transferring your files and folders and settings into Windows 7 from XP. Afterthe process is complete, you will notice that your desktop icons, your theme and all other settings havebeen restored to their original form.291/6/2012Computer Systems Engineer
70-680 Study Guideto be used as an internal resource onlyMigrating Profiles With Windows Easy Transfer:You can install Windows 7 as an upgrade to an existing installation of Windows Vista with Service Pack 1 orService Pack 2 using the Upgrade option during installation. To maintain settings when installing Windows 7 ona computer running Windows XP, you must migrate files and settings using a tool such as Windows 7 EasyTransfer and then reinstall your software programs. Additionally, if you are installing Windows 7 on a newcomputer, you can transfer settings and files from any other computer running Windows Vista or Windows XP byusing Windows Easy Transfer.The instructions below show how to tranfer a profile from a computer running Windows XP to a differentcomputer running Windows 7.1.2.3.Boot in to Windows XP and insert the Windows 7 DVD.Navigate to the support folder
70-680 Study Guide - Perform a Clean Installation Overview: Windows 7 is the latest release of the Windows series of operating systems by Microsoft. It can be used on a range of personal computers like desktops, laptops, and notebooks. This guide will help you to perform a custom install