Transcription
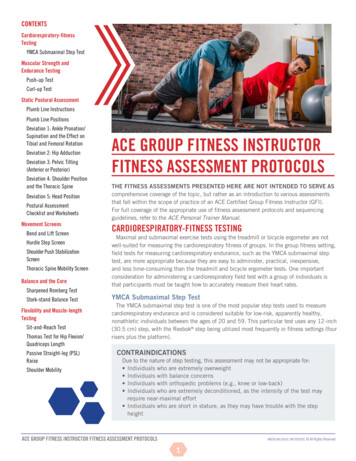
ContentsCardiorespiratory-fitnessTestingYMCA Submaximal Step TestMuscular Strength andEndurance TestingPush-up TestCurl-up TestStatic Postural AssessmentPlumb Line InstructionsPlumb Line PositionsDeviation 1: Ankle Pronation/Supination and the Effect onTibial and Femoral RotationDeviation 2: Hip AdductionDeviation 3: Pelvic Tilting(Anterior or Posterior)Deviation 4: Shoulder Positionand the Thoracic SpineDeviation 5: Head PositionPostural AssessmentChecklist and WorksheetsMovement ScreensBend and Lift ScreenHurdle Step ScreenShoulder Push StabilizationScreenThoracic Spine Mobility ScreenBalance and the CoreSharpened Romberg TestStork-stand Balance TestFlexibility and Muscle-lengthTestingSit-and-Reach TestThomas Test for Hip Flexion/Quadriceps LengthPassive Straight-leg (PSL)RaiseShoulder MobilityACE Group Fitness InstructorFitness Assessment ProtocolsThe fitness assessments presented here are not intended to serve ascomprehensive coverage of the topic, but rather as an introduction to various assessmentsthat fall within the scope of practice of an ACE Certified Group Fitness Instructor (GFI).For full coverage of the appropriate use of fitness assessment protocols and sequencingguidelines, refer to the ACE Personal Trainer Manual.Cardiorespiratory-fitness TestingMaximal and submaximal exercise tests using the treadmill or bicycle ergometer are notwell-suited for measuring the cardiorespiratory fitness of groups. In the group fitness setting,field tests for measuring cardiorespiratory endurance, such as the YMCA submaximal steptest, are more appropriate because they are easy to administer, practical, inexpensive,and less time-consuming than the treadmill and bicycle ergometer tests. One importantconsideration for administering a cardiorespiratory field test with a group of individuals isthat participants must be taught how to accurately measure their heart rates.YMCA Submaximal Step TestThe YMCA submaximal step test is one of the most popular step tests used to measurecardiorespiratory endurance and is considered suitable for low-risk, apparently healthy,nonathletic individuals between the ages of 20 and 59. This particular test uses any 12-inch(30.5 cm) step, with the Reebok step being utilized most frequently in fitness settings (fourrisers plus the platform).ContraindicationsDue to the nature of step testing, this assessment may not be appropriate for: Individuals who are extremely overweight Individuals with balance concerns Individuals with orthopedic problems (e.g., knee or low-back) Individuals who are extremely deconditioned, as the intensity of the test mayrequire near-maximal effort Individuals who are short in stature, as they may have trouble with the stepheightACE Group Fitness Instructor Fitness Assessment ProtocolsAmerican coucil on Exercise All Rights Reserved1
Figure 1Three-minute step test—stepping cycleEquipment: 12-inch (30.5 cm) step Stopwatch Metronome Stethoscope (optional)Pre-test procedure: After explaining the purpose of the YMCA submaximal step test, set themetronome to a cadence of 96 “clicks” per minute, which represents 24 stepscycles/minute (or 96 foot placements).ü Describe and demonstrate the four-part stepping motion (“up,” “up,”“down,” “down”).ü Either foot can lead the step sequence.ü Permit a short practice to allow participants to familiarize themselves withthe cadence. The goal of the test is to step up and down on a 12-inch riser for three minutes(Figure 1). Explain to the participant that heart rate will be measured throughpalpation (or auscultation) for one full minute upon completion ofthe test, counting the number of beats during that first minute ofrecovery. It is important for the participant to sit down immediatelyfollowing the test and remain quiet to allow the instructor toaccurately assess heart rate.Test protocol and administration: On the instructor’s cue, the participant begins stepping and thestopwatch is started. The instructor can coach the initial steps to make sure theparticipant is keeping pace with the metronome. Cue the timeremaining to allow the participant to stay on task. At the three-minute mark, the test is stopped and the participantimmediately sits down. Count the participant’s heart rate (HR) forone entire minute.ü The test score is based on the fact that the immediate postexercise HR will decrease throughout the minute cycle.ü It is important that the HR check begin within fiveseconds of test completion. (Placing a stethoscope to theparticipant’s chest enhances the tester’s ability to count theactual heartbeats. In some cases, the participant may beuncomfortable with this procedure, in which case a radial pulsecheck will also suffice.) The participant’s one-minute post-exercise HR is recorded. Encourage a three- to five-minute cool-down followed by stretching of thelower extremities. The participant may experience post-exercise dizziness orother signs of distress if no cool-down is performed (i.e., blood pooling in theextremities and accelerated HR). Classify the participant’s score using Table 1 or 2 and record the values. Continue to observe the participant, as negative symptoms can arisepost-exercise.For those who score “below average” to “very poor,” it will be necessary to beconservative in the initial exercise program. Keeping exercise duration and intensityto a minimum will be important. For those who score “above average” to “excellent,”it would be appropriate to focus on exercise duration as well as intensity.ACE Group Fitness Instructor Fitness Assessment ProtocolsAmerican coucil on Exercise All Rights Reserved2
Table 1Post-exercise Heart Rate Norms for YMCA Submaximal Step Test (Men)RatingExcellentGoodAbove averageAverageBelow averagePoorVery poor% 615466 36151Reprinted with permission from YMCA Fitness Testing and Assessment Manual, 4th ed. 2000 by YMCA of the USA. All rights reservedTable 2Post-exercise Heart Rate Norms for YMCA Submaximal Step Test (Women)RatingExcellentGoodAbove averageAverageBelow averagePoorVery poor% 119122126129134141171Age 7466 35145155Reprinted with permission from YMCA Fitness Testing and Assessment Manual, 4th ed. 2000 by YMCA of the USA. All rights reservedACE Group Fitness Instructor Fitness Assessment ProtocolsAmerican coucil on Exercise All Rights Reserved3
Muscular Strength and Endurance TestingGFIs can measure participants’ dynamic muscular fitness using calisthenic-type strength andendurance tests. These tests are based on specific exercises, such as the push-up and curlup, and require the participant to perform a maximum number of repetitions for each exerciseduring the assessment.Push-up TestThe push-up test measures upper-body endurance, specifically of the pectoralis muscles,triceps, and anterior deltoids. Due to common variations in upper-body strength between menand women, women should be assessed while performing a modified push-up. The push-up isnot only useful as an evaluation tool for measuring upper-body strength and endurance, but isalso a prime activity for developing and maintaining upper-body muscular fitness.Contraindications and ConsiderationsThis test may not be appropriate for participants with shoulder, elbow, or wristproblems. Alternate muscular-endurance tests or the Cooper 90-degree push-up test(where the elbows do not exceed a 90-degree angle) may be more appropriate. A majorproblem associated with tests that require performance to fatigue is that the pointof “exhaustion” or fatigue is highly influenced by an individual’s level of motivation.Novice exercisers may not push themselves to the maximal point of exertion.Figure 2Equipment: Mat (optional) Towel or foam blockPre-test procedure: After explaining the purpose of the push-up test, explain and demonstrate the correctpush-up version (standard or modified) (Figure 2). The hands should point forward and be positioned shoulder-width apart, directly underthe shoulders. The hips and shoulders should be aligned (i.e., rigid trunk) and thehead should remain in a neutral to slightly extended position. The goal of the test is to perform as many consecutive and complete push-ups aspossible before reaching a point of fatigue. The push-ups must be steady, without anyrest between repetitions. Explain that only correctly performed push-ups are counted. Encourage the participant to perform a few practice trials before the test begins.Push-up testStandard push-up positionModified bent-knee positionTest protocol and administration: The test starts in the “down” position and the participant can begin the test wheneverhe or she is ready. Count each complete push-up until the participant reaches fatigue. A completepush-up requires:ü Full elbow extension with a straight back and rigid torso in the “up” positionACE Group Fitness Instructor Fitness Assessment ProtocolsAmerican coucil on Exercise All Rights Reserved4
ü The chest touching the instructor’s fist, a rolled towel, or a foam block, without restingthe stomach or body on the mat in the “down” position The test is terminated when the participant is unable to complete a repetition or failsto maintain proper technique for two consecutive repetitions. Record the score. Classify the participant’s score using Table 3. For example, if a 46-year-old femaleparticipant completed a total of 23 modified push-ups, she would be classified as“very good,” which signifies that her upper-body muscular endurance scored very well.Table 3Fitness Categories for the Push-up by Age and SexAge SexMWMWMWMWMWExcellent36303027252421211814Very –72–4169117946141Needs improvementNote: M Men; W WomenReprinted with permission from Canadian Society for Exercise Physiology (2003). The Candian Physical Activity, Fitness, & Lifestyle Approach (CPAFLA): CSEP—Health &Fitness Program’s Health-Related Appraisal and Counseling Strategy (3rd ed.). Ottawa: Canadian Society for Exercise Physiology.Participants who are sedentary or unaccustomed to working the upper body are likely lackingin upper-body strength and endurance. If the muscles of the upper body are weak, this canlead to poor posture and a variety of musculoskeletal problems.There are a variety of strength-training activities that can be incorporated into group fitnessclasses that would help increase muscular fitness in the pectoralis, triceps, and deltoidmuscle groups, individually or collectively. The push-up itself is a great exercise for developingmuscular strength, endurance, and overall tone in the upper body. Push-ups do not requireany equipment and can be performed virtually anywhere.Curl-up TestThe curl-up test is used to measure abdominal strength and endurance. Like the push-uptest, this test requires the participant to perform to fatigue. The curl-up is preferred over thefull sit-up because it is a more reliable indicator of abdominal strength and endurance and ismuch safer for the exerciser. The full sit-up requires additional recruitment of the hip flexors,which places increased loads across the lumbar spine. Many participants are also inclined topull on the neck in an effort to generate momentum during a full sit-up, potentially increasingthe risk for injury in the cervical region. Most participants will be able to perform the curl-uptest unless they suffer from low-back problems. The curl-up test is an easy and inexpensivemethod of evaluating abdominal strength and endurance.ContraindicationsThe following issues should be considered prior to the performance of abdominalstrength assessments: Participants with low-back concerns should check with their physicians prior toattempting this test. Participants with cervical neck issues may find that this exercise exacerbates theirpain. All participants should be encouraged to relax the neck and rely on theirabdominal muscles to do the work.ACE Group Fitness Instructor Fitness Assessment ProtocolsAmerican coucil on Exercise All Rights Reserved5
Figure 3Curl-up testCurl-up test: Down position. Head support isoptional.Curl-up test: Up positionEquipment: MatPre-test procedure: After explaining the purpose of the curl-up test, explain and demonstrateproper body position and movement technique. The starting position requiresthe participant to be supine, with feet flat on the floor, both knees bent to a90-degree angle, and arms crossed at the chest (Figure 3). Cue the participant to perform a controlled curl-up to lift the shoulder bladesoff the mat (approximately 30 degrees of trunk flexion), and then to lowerthe torso back down to momentarily rest the shoulders completely on the mat(the head does not need to touch the mat). Instruct the participant to exhale on the way up and inhale on the way down. Encourage the participant to perform a few practice or warm-up repetitionsprior to the test.Test protocol and administration: The participant starts in the “down” position and begins on theinstructor’s cue. Count each complete curl-up until the participant reaches fatigue. Make sure the participant is not holding his or her breath during the test. The participant must not flex the cervical spine by curling the neck. Record the participant score as the maximum number of curl-ups completed. Classify the participant’s score using Table 4 or 5. For example, if a 27-yearold male participant completes a total of 36 curl-ups, he would be classifiedin the upper range of “below average,” signifying that his abdominalendurance needs improvement.Table 4Norms for Curl-up Test (Men)RatingExcellentGoodAbove averageAverageBelow averagePoorVery poor% ��25998377726661575452494643414037353329272314Age 6 66555044403835323130272624232221191512105Reprinted with permission from YMCA Fitness Testing and Assessment Manual, (4th ed.) 2000 by YMCA of the USA. All rights reservedACE Group Fitness Instructor Fitness Assessment ProtocolsAmerican coucil on Exercise All Rights Reserved6
Table 5Norms for Curl-up Test (Women)RatingExcellentGoodAbove averageAverageBelow averagePoorFigure 4Neutral spine alignment withslight anterior (lordotic) curvesat the neck and low back and aposterior (kyphotic) curve in thethoracic regionVery poor% ��25917668646158575451484441383734333228252411Age 56–6563554442383532302725242322201815121187166 544134333231292826252221201816131110980Reprinted with permission from YMCA Fitness Testing and Assessment Manual, 4th ed. 2000 by YMCA of the USA. All rights reservedStatic Postural AssessmentStatic posture represents the alignment of the body’s segments, or how the person holdshim- or herself “statically” or “isometrically” in space (Figure 4). Holding a proper posturalposition involves the actions of multiple postural muscles, which are generally the deepermuscles that contain greater concentrations of type I muscle fibers and function to holdstatic positions or low-grade isometric contractions for extended periods. Good posture orstructural integrity is defined as that state of musculoskeletal alignment and balance thatallows muscles, joints, and nerves to function efficiently (Kendall et al., 2005). However,if a participant exhibits deviations in his or her static position from good posture, this mayreflect muscle-endurance issues in the postural muscles and/or potential imbalance atthe joints (Tables 6 through 8 and Figure 5). Movement begins from a position of staticposture. Therefore, the presence of poor posture is a good indicator that movement may bedysfunctional. Although movement screens offer valuable information related to neuromuscularefficiency, a static postural assessment is considered very useful and serves as a starting pointfrom which a GFI can identify muscle imbalances and potential movement compensationsassociated with poor posture (Kendall et al., 2005; Sahrmann, 2002). A static postureassessment may offer valuable insight into: Muscle imbalance at a joint and the working relationships of muscles around a jointü Muscle imbalance often contributes to dysfunctional movement. Altered neural action of the muscles moving and controlling the jointü For example, tight or shortened muscles are often overactive and dominate movement atthe joint, potentially disrupting healthy joint mechanics.ACE Group Fitness Instructor Fitness Assessment ProtocolsAmerican coucil on Exercise All Rights Reserved7
Table 6 Muscle Imbalances AssociatedWith Kyphosis-lordosis PostureTable 7Muscle Imbalances AssociatedWith Flat-back PostureTable 8Muscle Imbalances AssociatedWith Sway-back PostureFacilitated/Hypertonic pertonic Inhibited(Shortened)(Lengthened)Hip flexorsHip extensorsRectus abdominisIliacus/psoas majorHamstringsIliacus/psoas majorLumbar extensorsExternal obliquesUpper-back extensorsInternal obliqueRectus femorisNeck extensorsLumbar extensorsUpper fibers ofposterior obliquesNeck flexorsLumbar extensorsUpper-back extensorsNeck extensorsNeck flexorsAnterior chest/shoulders Upper-back extensorsLatissimus dorsiNeck extensorsScapular stabilizersAnkle plantarflexorsNeck flexorsExternal obliqueFigure 5Postural deviationsa. Lordosis: increasedanterior lumbar curvefrom neutralb. Kyphosis: increasedposterior thoraciccurve from neutralc. Flat back:decreased anteriorlumbar curved. Sway back: decreasedanterior lumbar curve andincreased posterior thoracic curve from neutrale. Scoliosis: lateralspinal curvature oftenaccompanied by vertebral rotationMuscle imbalance and postural deviations can be attributed to many factors that are bothcorrectible and non-correctible, including the following: Correctible factors:ü Repetitive movements (muscular pattern overload)ü Awkward positions and movements (habitually poor posture)ü Side dominanceü Lack of joint stabilityü Lack of joint mobilityü Imbalanced strength-training programsACE Group Fitness Instructor Fitness Assessment ProtocolsAmerican coucil on Exercise All Rights Reserved8
Non-correctible factors:ü Congenital conditions (e.g., scoliosis)ü Some pathologies (e.g., rheumatoid arthritis)ü Structural deviations (e.g., tibial or femoral torsion, or femoral anteversion)ü Certain types of trauma (e.g., surgery, injury, or amputation)Proper postural alignment promotes optimal neural activity of the muscles controlling andmoving the joint. When joints are correctly aligned, the length-tension relationships and forcecoupling relationships function efficiently. This facilitates proper joint mechanics, allowing thebody to generate and accept forces throughout the kinetic chain, and promotes joint stability andmobility and movement efficiency. Figure 6 illustrates the importance of muscle balance and itscontribution to movement efficiency. Given how an individual’s static posture reflects potentialmuscle imbalance, it stands to reason that instructors should consider conducting a staticpostural assessment on their participants as an initial assessment.Figure 6Movement efficiency patternMuscle balanceNormal length-tension relationshipsProper joint mechanics(arthrokinematics)Normal force-coupling relationshipsEfficient force acceptanceand generationMovement efficiencyPromotes joint stabilityand mobilityGiven the propensity many individuals have toward poor posture, an initial focus of GFIsshould be to restore stability and mobility within the body and attempt to “straighten thebody before strengthening it.” The instructor can therefore start by looking at a participant’sstatic posture following the right-angle rule of the body (Kendall et al., 2005). This modeldemonstrates how the human body represents itself in vertical alignment across the majorjoints—the ankle (and subtalar joint), knee, hip, and shoulder, as well as the head. Thismodel allows the observer to look at the individual in all three planes to note specific “static”asymmetries at the joints (e.g., front to back and left to right). As illustrated in Figure 7,the right-angle model implies a state in the frontal plane wherein the two hemispheres areequally divided, and in the sagittal plane wherein the anterior and posterior surfaces appearin balance. The body is in good postural position when the body parts are symmetricallybalanced around the body’s line of gravity, which is the intersection of the mid-frontal andmid-sagittal planes and is represented by a plumb line hanging from a fixed point overhead.While this model helps GFIs identify postural compensations and potential muscleimbalances, it is important to recognize that limitations exist in using this model.Plumb Line InstructionsUsing a length of string and an inexpensive weight (e.g., a washer), GFIs can create aplumb line that suspends from a ceiling or fixed point to a height 0.5 to 1 inch (1.3 to 2.5cm) above the floor. It is important to select a location that offers a solid, plain backdrop ora grid pattern with vertical and horizontal lines that offer contrast against the participant.When conducting these assessments, the GFI should instruct the participant to wear formfitting athletic-style clothing to expose as many joints and bony landmarks as possible,and have the participant remove his or her shoes and socks. The use of adhesive dotsplaced upon the bony landmarks may assist instructors in identifying postural deviations.ACE Group Fitness Instructor Fitness Assessment ProtocolsAmerican coucil on Exercise All Rights Reserved9
Figure 7The right-angle rule(frontal and sagittalviews)MedialmalleolusLateralmalleolusa. Frontal view (anterior)b. Frontal view (posterior)c. Sagittal viewThe objective of this assessment is to observe the participant’s symmetry against the plumbline and the right angles that the weightbearing joints make relative to the line of gravity.Individuals will consciously or subconsciously attempt to correct posture when they are awarethey are being observed. GFIs should encourage participants to assume a normal, relaxedposture, and utilize distractions such as casual conversation to encourage this relaxed posture.It is important to remember that while postural assessments provide valuable information, theyare only one piece to the movement efficiency puzzle, and thus should not be overemphasized.GFIs should focus on the obvious, gross imbalances and avoid getting caught up in minorpostural asymmetries. Instructors should bear in mind that the body is rarely perfectlysymmetrical and that overanalyzing asymmetries is time-consuming, potentially intimidatingto participants, and may induce muscle fatigue in the participant that can alter his or herposture even further. Therefore, when looking for gross deviations, the instructor should selectan acceptable margin of asymmetry that he or she will allow and focus on larger, more obviousdiscrepancies. For example, start by focusing on gross deviations that differ by a quarter-inch(0.6 cm) or more between the compartments of the body.Plumb Line PositionsAnterior and Posterior ViewsSource: Kendall et al., 2005 For the anterior view, position the participant between the plumb line and a wall, facingthe plumb line with the feet equidistant from the suspended line (using the inside of theheels or medial malleoli as a reference) (see Figure 7a). With good posture, the plumb line will pass equidistant between the feet and ankles, andintersect the pubis, umbilicus, sternum, mandible (chin), maxilla (face), and frontal bone(forehead). For the posterior view, position the individual between the plumb line and a wall, facingaway from the plumb line with the insides of the heels equidistant from the suspendedline (see Figure 7b).ACE Group Fitness Instructor Fitness Assessment ProtocolsAmerican coucil on Exercise All Rights Reserved10
With good posture, the plumb line should ideally bisect the sacrum and overlap thespinous processes of the spine.Sagittal ViewSource: Kendall et al., 2005 Position the individual between the plumb line and the wall, facing sideways with the plumbline aligned immediately anterior to the lateral malleolus (anklebone) (see Figure 7c). With good posture, the plumb line should ideally pass through the anterior third of theknee, the greater trochanter of the femur, and the acromioclavicular (A-C) joint, andslightly anterior to the mastoid process of the temporal bone of the skull (in line with, orjust behind, the ear lobe) (see Figure 4).Transverse ViewSource: Kendall et al., 2005 All transverse views of the limbs and torso are performed from frontal- and sagittal-planepositions.GFIs must respect scope of practice when performing a postural assessment onparticipants, particularly in the presence of pain or injury. They must understand the needfor referral to more qualified healthcare professionals when pain or underlying pathologiesare present (e.g., scoliosis).When conducting assessments of posture and movement, the following key componentsshould be included (Figure 8). Participant history—written and verbalü Collect information on musculoskeletal issues, congenital issues (e.g., scoliosis),trauma, injuries, pain and discomfort, the site of pain or discomfort, and whataggravates and relieves pain or discomfort (e.g., with discomfort in the upper back, theparticipant may feel temporary relief by hunching forward and rounding the shoulders).ü Collect lifestyle information, including occupation, side-dominance, and habitualpatterns (information regarding these patterns may take time to gather). Visual and manual observationü Identify observable postural deviations.ü Verify muscle imbalance as determined by muscle-length testing.ü Determine the impact on movement ability or efficiency by performing movementscreens.ü Distinguish correctible from non-correctible compensationsWhile postural assessments can be performed in great detail, the following sectionsaddress five key postural deviations that occur frequently in individuals.Figure 8A chronological planfor conducting posturalassessments andmovement screensHealth history andlifestyle informationStatic postural analysisDocumentation anddetermination ofneed for referralto medicalprofessionalIdentification of correctiblepostural compensationsMuscle length testingActive and Passive RANGE OF MOTION*Administration of appropriatemovement screensPhase 1: Stability and mobilitytraining (restorative exercise)Phase 2: Movementtraining (movement patterns)Phases 3 & 4: Progression: Loadand performance training*if necessaryACE Group Fitness Instructor Fitness Assessment ProtocolsAmerican coucil on Exercise All Rights Reserved11
Deviation 1: Ankle Pronation/Supination and the Effect on Tibial and FemoralRotationBoth feet should face forward in parallel or with slight (8 to 10 degrees) external rotation(toes pointing outward from the midline, as the ankle joint lies in an oblique plane with themedial malleolus slightly anterior to the lateral malleolus) (see Figure 7). The toes shouldbe aligned in the same direction as the feet and any excessive pronation (arch flattening) orsupination (high arches) at the subtalar joint should be noted.Deviation 2: Hip AdductionFigure 9Normal hip positionversus right hipadduction (posterior view)Source: LifeART imagecopyright 2008 WoltersKluwer Health, Inc.,Lippincott Williams& Wilkins. All rightsreserved.In standing and in gait, hip adduction is a lateral tilt of the pelvic that elevates onehip higher than the other (also called “hip hiking”), which may be evident in individualswho have a limb-length discrepancy (Sahrmann, 2002). If a person raises the right hipas illustrated in Figure 9, the line of gravity following the spine tilts over toward the left,moving the right thigh closer to this line of gravity. Consequently, the right hip is identifiedas moving into adduction. This position progressively lengthens and weakens the right hipabductors, which are unable to hold the hip level (Table 9). Sleeping on one’s side canproduce a similar effect, as the hip abductors of the upper hip fail to hold the hip level.Table 9Hip AdductionObservationPositionPlumb LineAlignmentPlane of ViewRight hip adductionElevated(vs. left side)Hips usuallyshifted rightView from frontLeft hip adductionElevated(vs. right side)Hips usuallyshifted leftView from frontDeviation 3: Pelvic Tilting (Anterior or Posterior)Figure 10Anterior musculatureof the hip and knee,prime movers forhip flexion (iliacus,psoas major andminor) and kneeextensionPsoas minorPsoas majorIliacusTensorfasciaelataeRectusfemorisACE Group Fitness Instructor Fitness Assessment ProtocolsAnterior tilting of the pelvis frequently occurs inindividuals with tight hip flexors, which is ge
that fall within the scope of practice of an ACE Certified Group Fitness Instructor (GFI). For full coverage of the appropriate use of fitness assessment protocols and sequencing guidelines, refer to the ACE Personal Trainer Manual. Cardiorespiratory-fitness testing
