Transcription
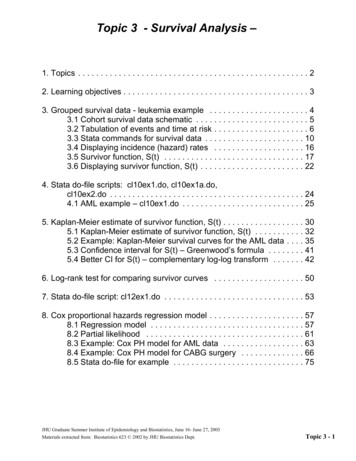
ARMY, MARINE CORPS, NAVY, AIR DURES FORSURVIVAL, EVASION, ANDRECOVERYFM 21-76-1MCRP 3-02HNWP 3-50.3AFTTP(I) 3-2.26JUNE 1999AIR LAND SEAAPPLICATIONCENTERDISTRIBUTION RESTRICTION:Approved for public release;distribution is unlimited.MULTISERVICE TACTICS, TECHNIQUES, AND PROCEDURES
QUICK REFERENCE CHECKLISTDecide to Survive!SURVIVAL-Size up the situation, surroundings, physical condition, equipment.Use all your sensesRemember where you are.Vanquish fear and panic.Improvise and improve.Value living.Act like the natives.Live by your wits.1. Immediate Actionsa. Assess immediate situation. THINK BEFORE YOU ACT!b. Take action to protect yourself from nuclear, biological, orchemical hazards (Chapter IX).c. Seek a concealed site.d. Assess medical condition; treat as necessary (Chapter V).e. Sanitize uniform of potentially compromising information.f. Sanitize area; hide equipment you are leaving.g. Apply personal camouflage.h. Move away from concealed site, zigzag pattern recommended.i. Use terrain to advantage, communication, and concealment.j. Find a hole-up site.2. Hole-Up-Site (Chapter I)a. Reassess situation; treat injuries, then inventory equipment.b. Review plan of action; establish priorities (Chapter VI).c. Determine current location.d. Improve camouflage.e. Focus thoughts on task(s) at hand.f. Execute plan of action. Stay flexible!Recommend inclusion of this manual in the aviator’s survival vest.i
3. Concealment (Chapter I)a. Select a place of concealment providing (1) Adequate concealment, ground and air.(2) Safe distance from enemy positions and lines ofcommunications (LOC).(3) Listening and observation points.(4) Multiple avenues of escape.(5) Protection from the environment.(6) Possible communications/signaling opportunities.b. Stay alert, maintain security.c. Drink water.4. Movement (Chapters I and II)a. Travel slowly and deliberately.b. DO NOT leave evidence of travel; use noise and lightdiscipline.c. Stay away from LOC.d. Stop, look, listen, and smell; take appropriate action(s).e. Move from one concealed area to another.f. Use evasion movement techniques (Chapter I).5. Communications and Signaling (Chapter III)a. Communicate as directed in applicable plans/orders,particularly when considering transmitting in the blind.b. Be prepared to use communications and signaling devices onshort notice.c. Use of communications and signaling devices maycompromise position.6. Recovery (Chapter IV)a. Select site(s) IAW criteria in theater recovery plans.b. Ensure site is free of hazards; secure personal gear.c. Select best area for communications and signaling devices.d. Observe site for proximity to enemy activity and LOC.e. Follow recovery force instructions.ii
FM 21-76-1MCRP 3-02HNWP 3-50.3AFTTP(I) 3-2.26FM 21-76-1U.S. Army Training and Doctrine CommandFort Monroe, VirginiaMarine Corps Combat Development CommandQuantico, VirginiaNavy Warfare Development CommandNewport, Rhode IslandHeadquarters Air Force Doctrine CenterMaxwell Air Force Base, AlabamaMCRP 3-02HNWP 3-50.3AFTTP(I) 3-2.2629 JUNE 1999Survival, Evasion, and RecoveryMultiservice Procedures forSurvival, Evasion, and RecoveryNote: This UNCLASSIFIED publication is designed to provideService members quick-reference survival, evasion, and recoveryinformation. See Appendix B for the scope, purpose, application,implementation plan, and user information.TABLE OF CONTENTSPageCHAPTER I1.2.3.4.Planning. I-1Camouflage . I-1Shelters . I-3Movement . I-3CHAPTER II1.2.3.4.5.6.7.8.EVASIONNAVIGATIONStay or Move Considerations . II-1Navigation and Position Determination . II-1Travel Considerations. II-10River Travel. II-10Ice and Snow Travel . II-11Mountain Hazards . II-12Summer Hazards . II-12Dry Climates. II-12iii
9. Tropical Climates . II-1310. Open Seas . II-13CHAPTER IIIRADIO COMMUNICATIONS AND SIGNALING1. Radio Communications (Voice and Data). III-12. Signaling . III-2CHAPTER IV1.2.3.4.RECOVERYResponsibilities. IV-1Site Selection. IV-1Site Preparation . IV-1Recovery Procedures . IV-1CHAPTER V1.2.3.4.6.MEDICALImmediate First Aid Actions . V-1Common Injuries and Illnesses. V-9Plant Medicine. V-15Health and Hygiene . V-18Rules for Avoiding Illness. V-18CHAPTER VI1.2.3.4.5.PERSONAL PROTECTIONPriorities . VI-1Care and Use of Clothing . VI-1Other Protective Equipment. VI-2Shelters . VI-3Fires . VI-8CHAPTER VIIWATER1. Water Requirements . VII-12. Water Procurement . VII-13. Water Preparation and Storage. VII-7CHAPTER VIII FOOD1. Food Procurement. VIII-12. Food Preparation . VIII-93. Food Preservation . VIII-11CHAPTER IXINDUCED CONDITIONS1. Nuclear Conditions . IX-12. Biological Conditions . IX-63. Chemical Conditions . IX-7APPENDIX AAPPENDIX BTHE WILL TO SURVIVE. A-1PUBLICATION INFORMATION . B-2ivIIIIIIIVVVIVIIVIIIIXAB
v
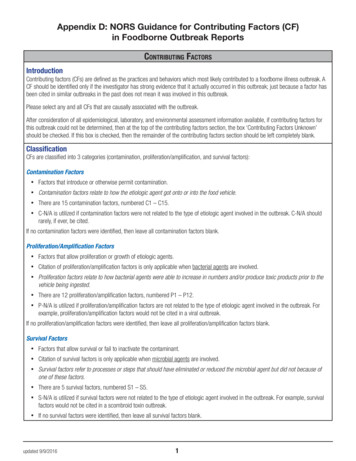
Chapter IEVASION1. Planninga. Review the quick reference checklist on the inside cover.b. Guidelines for successful evasion include (1) Keeping a positive attitude.(2) Using established procedures.(3) Following your evasion plan of action.(4) Being patient.(5) Drinking water (DO NOT eat food without water).(6) Conserving strength for critical periods.(7) Resting and sleeping as much as possible.(8) Staying out of sight.c. The following odors stand out and may give an evader away:(1) Scented soaps and shampoos.(2) Shaving cream, after-shave lotion, or other cosmetics.(3) Insect repellent (camouflage stick is least scented).(4) Gum and candy (smell is strong or sweet).(5) Tobacco (odor is unmistakable).d. Where to go (initiate evasion plan of action):(1) Near a suitable area for recovery.(2) Selected area for evasion.(3) Neutral or friendly country or area.(4) Designated area for recovery.2. Camouflagea. Basic principles:(1) Disturb the area as little as possible.(2) Avoid activity that reveals movement to the enemy.(3) Apply personal camouflage.b. Camouflage patterns (Figure I-1):(1) Blotch pattern.(a) Temperate deciduous (leaf shedding) areas.(b) Desert areas (barren).(c) Snow (barren).(2) Slash pattern.(a) Coniferous areas (broad slashes).I-1
(b) Jungle areas (broad slashes).(c) Grass (narrow slashes).(3) Combination. May use blotched and slash together.BLOTCHSLASHFigure I-1. Camouflage Patternsc. Personal camouflage application follows:(1) Face. Use dark colors on high spots and light colors onany remaining exposed areas. Use a hat, netting, or mask ifavailable.(2) Ears. The insides and the backs should have 2 colors tobreak up outlines.(3) Head, neck, hands, and the under chin. Use scarf, collar,vegetation, netting, or coloration methods.(4) Light colored hair. Give special attention to conceal witha scarf or mosquito head net.d. Position and movement camouflage follows:(1) Avoid unnecessary movement.(2) Take advantage of natural concealment:(a) Cut foliage fades and wilts, change regularly.(b) Change camouflage depending on the surroundings.(c) DO NOT select vegetation from same source.(d) Use stains from grasses, berries, dirt, and charcoal.(3) DO NOT over camouflage.(4) Remember when using shadows, they shift with the sun.I-2
pens).(5) Never expose shiny objects (like a watch, glasses, or(6)(7)(8)(9)Ensure watch alarms and hourly chimes are turned off.Remove unit patches, name tags, rank insignia, etc.Break up the outline of the body, “V” of crotch/armpits.Conduct observation from a prone and concealed position.3. Sheltersa. Use camouflage and concealment.b. Locate carefully easy to remember acronym: BLISS.B - BlendL - Low silhouetteI - Irregular shapeS - SmallS - Secluded location(1) Choose an area (a) Least likely to be searched (drainages, rough terrain,etc.) and blends with the environment.(b) With escape routes (DO NOT corner yourself).(c) With observable approaches.(2) Locate entrances and exits in brush and along ridges,ditches, and rocks to keep from forming paths to site.(3) Be wary of flash floods in ravines and canyons.(4) Conceal with minimal to no preparation.(5) Take the direction finding threat into account beforetransmitting from shelter.(6) Ensure overhead concealment.4. Movementa. A moving object is easy to spot. If travel is necessary (1) Mask with natural cover (Figure I-2).(2) Use the military crest.(3) Restrict to periods of low light, bad weather, wind, orreduced enemy activity.I-3
Figure I-2. Ground Movement(4) Avoid silhouetting (Figure I-3).(5) At irregular intervals (a) STOP at a point of concealment.(b) LOOK for signs of human or animal activity (smoke,tracks, roads, troops, vehicles, aircraft, wire, buildings, etc.). Watchfor trip wires or booby traps and avoid leaving evidence of travel.Peripheral vision is more effective for recognizing movement at nightand twilight.(c) LISTEN for vehicles, troops, aircraft, weapons,animals, etc.(d) SMELL for vehicles, troops, animals, fires, etc.I-4
Figure I-3. Avoid Silhouetting(6) Employ noise discipline; check clothing and equipmentfor items that could make noise during movement and secure them.b. Break up the human shape or recognizable lines.c. Route selection requires detailed planning and specialtechniques (irregular route/zigzag) to camouflage evidence of travel.d. Some techniques for concealing evidence of travel follows:(1) Avoid disturbing the vegetation above knee level.(2) DO NOT break branches, leaves, or grass.(3) Use a walking stick to part vegetation and push it back toits original position.(4) DO NOT grab small trees or brush. (This may scuff thebark or create movement that is easily spotted. In snow country, thiscreates a path of snowless vegetation revealing your route.)(5) Pick firm footing (carefully place the foot lightly butsquarely on the surface to avoid slipping). TRY NOT TO (a) Overturn ground cover, rocks, and sticks.(b) Scuff bark on logs and sticks.(c) Make noise by breaking sticks. (Cloth wrappedaround feet helps muffle this.)(d) Mangle grass and bushes that normally spring back.I-5
(6) Mask unavoidable tracks in soft footing by (a) Placing tracks in the shadows of vegetation, downedlogs, and snowdrifts.(b) Moving before and during precipitation allows tracksto fill in.(c) Traveling during windy periods.(d) Taking advantage of solid surfaces (logs, rocks, etc.)leaving less evidence of travel.(e) Patting out tracks lightly to speed their breakdownor make them look old.(7) Secure trash or loose equipment hide or bury discardeditems. (Trash or lost equipment identifies who lost it.)(8) Concentrate on defeating the handler if pursued by dogs.e. Penetrate obstacles as follows:(1) Enter deep ditches feet first to avoid injury.(2) Go around chain-link and wire fences. Go under fence ifunavoidable, crossing at damaged areas. DO NOT touch fence; lookfor electrical insulators or security devices.(3) Penetrate rail fences, passing under or between lowerrails. If impractical, go over the top, presenting as low a silhouetteas possible (Figure I-4).(4) Cross roads after observation from concealment todetermine enemy activity. Cross at points offering concealment suchas bushes, shadows, bend in road, etc. Cross in a manner leavingyour footprints parallel (cross step sideways) to the road. (FigureI-5)(5) Use same method of observation for railroad tracks thatwas used for roads. Next, align body parallel to tracks with facedown, cross tracks using a semi-pushup motion. Repeat for thesecond track. (Figure I-6).I-6
Figure I-4. Rail FencesFigure I-5. Road CrossingI-7
Figure I-6. Railroad TracksWARNING: If 3 rails exist, 1 may be electrified.I-8
Chapter IINAVIGATIONAssess the threat and apply appropriate evasion principles.1. Stay or Move Considerationsa. Stay with the vehicle/aircraft in a non-combat environment.b. Leave only when (1) Dictated by the threat.(2) Are certain of your location, have a known destination,and have the ability to get there.(3) Can reach water, food, shelter, and/or help.(4) Convinced rescue is not coming.c. Consider the following if you decide to travel:(1) Follow the briefed evasion plan.(2) Determine which direction to travel and why.(3) Decide what equipment to take, cache, or destroy.d. Leave information at your starting point (in a non-combatenvironment) that includes (1) Destination.(2) Route of travel.(3) Personal condition.(4) Supplies available.e. Consider the following for maps (in a combat environment):(1) DO NOT write on the map.(2) DO NOT soil the map by touching the destination.(3) DO NOT fold in a manner providing travel information.Note: These actions may compromise information if captured.2. Navigation and Position Determinationa. Determine your general location by (1) Developing a working knowledge of the operational area.(a) Geographic checkpoints.(b) Man-made checkpoints.(c) Previous knowledge of operational area.(2) Using the Rate x Time Distance formula.(3) Using information provided in the map legend.(4) Using prominent landmarks.II -1
(5) Visualizing map to determine position.b. Determine cardinal directions (north, south, east, and west)by (1) Using compass.CAUTION: The following methods are NOT highly accurate andgive only general cardinal direction.(2) Using stick and shadow method to determine a truenorth-south line (Figure II-1).Figure II-1. Stick and Shadow Method(3) Remembering the sunrise/moonrise is in the east andsunset/moonset is in the west.(4) Using a wristwatch to determine general cardinaldirection (Figure II-2).(a) Digital watches. Visualize a clock face on the watch.(b) Northern Hemisphere. Point hour hand at the sun.South is halfway between the hour hand and 12 o’clock position.(c) Southern Hemisphere. Point the 12 o’clock positionon your watch at the sun. North is halfway between the 12 o’clockposition and the hour hand.II -2
Using A Watch - To DetermineNorth/SouthNORTHERN HEMISPHERENORTHMID POINTSOUTHMID POINTHOUR HANDHOUR HANDSOUTHERN HEMISPHEREIf on daylight saving time subtractone hour from actual timeFigure II-2. Direction Using a Watch(5) Using a pocket navigator (Figure II-3) (a) Gather the following necessary materials: Flat writing material (such as an MRE box). 1-2 inch shadow tip device (a twig, nail, or match). Pen or pencil.(b) Start construction at sunup; end construction atsundown. Do the following: Attach shadow tip device in center of paper. Secure navigator on flat surface (DO NOT moveduring set up period). Mark tip of shadow every 30 minutes annotating thetime. Connect marks to form an arc. Indicate north with a drawn arrow.Note: The shortest line between base of shadow tip device andcurved line is a north-south line.(c) Do the following during travel: Hold navigator so the shadow aligns with mark ofpresent time (drawn arrow now points to true north).II -3
1 week.(d) Remember the navigator is current for approximatelyCAUTION: The Pocket Navigator is NOT recommended if evading.Figure II-3. Pocket Navigator(6) Using the stars (Figure II-4) the (a) North Star is used to locate true north-south line.(b) Southern Cross is used to locate true south-north line.Figure II-4. Starsc. Orient the map by (1) Using a true north-south line (Figure II-5) (a) Unfold map and place on a firm, flat, levelnonmetallic surface.II -4
(b) Align the compass on a true north-south line.(c) Rotate map and compass until stationary index linealigns with the magnetic variation indicated in marginal information. Easterly (subtract variation from 360 degrees). Westerly (add variation to 360 degrees).Floating needle compass and mapaligned to magnetic northNN22 1/2 Map is oriented to 22 1/2 easterlymagnetic variation with floatingneedle compass337 1/2 Map is oriented to 22 1/2 easterlymagnetic variation with floatingdial compassNFloating needle compass and mapaligned to magnetic north337 1/2 Map is oriented to 22 1/2 westerlymagnetic variation with floatingneedle compass22 1/2 Map is oriented to 22 1/2 westerlymagnetic variation with floatingdial compassFigure II-5. Orienting a Map Using a True North-South LineII -5
(2) Using a compass rose (Figure II-6) (a) Place edge of the lensatic compass on magnetic northline of the compass rose closest to your location.(b) Rotate map and compass until compass reads 360degrees.Star indicates magneticline on EVC Chart.180Figure II-6. Map Orientation with Compass RoseII -6
(3) If there is NO compass, orient map using cardinaldirection obtained by the stick and shadow method or the celestialaids (stars) method.d. Determine specific location.(1) Global Positioning System (GPS).(a) DO NOT use GPS for primary navigation.(b) Use GPS to confirm your position ONLY.(c) Select area providing maximum satellite reception.(d) Conserve GPS battery life.(2) Triangulation (resection) with a compass (Figure II-7).Figure II-7. Triangulation(a) Try to use 3 or more azimuths.(b) Positively identify a major land feature anddetermine a line of position (LOP).(c) Check map orientation each time compass is used.(d) Plot the LOP using a thin stick or blade of grass(combat) or pencil line (non-combat).(e) Repeat steps (b) through (d) for other LOPs.e. Use the compass for night navigation by (1) Setting up compass for night navigation (Figure II-8).(2) Aligning north-seeking arrow with luminous line andfollow front of compass.(3) Using point-to-point navigation.f. Route selection techniques follow:II -7
Setting the Compassfor Night TravelLuminous LineNorth SeekingArrowStationary Index64Bezel RingEach click of the Bezel Ringequals 3 degrees.EXAMPLESHeading between 0 and 180 degreesis divided by 3. Sum is number ofclicks to the left of stationary indexline. Heading between 180 and 360degrees, subtract heading from360 then divide sum by 3. New sumis the number of clicks to the rightfrom stationary index line.Heading of 027 degrees 9 clicks left.Heading of 300 degrees 20 clicks right.Figure II-8. Compass Night Navigation Setup(1) Circumnavigation.(a) Find a prominent landmark on the opposite side ofthe obstacle.(b) Contour around obstacle to landmark.(c) Resume your route of travel.(2) Dogleg and 90 degree offset (Figure II-9).(3) Straight-line heading as follows:(a) Maintain heading until reaching destination.(b) Measure distance by counting the number of paces ina given course and convert to map units.II -8
NWES1 8090 090 01800360 090originalheading0plus 45 to headingO bstacle9000originalheadingm inus 45 0 fromoriginal headingFigure II-9. Dogleg and 90 Degree Offset One pace is the distance covered each time the samefoot touches the ground. Distances measured by paces are approximate(example in open terrain, 900 paces per kilometer [average], orexample in rough terrain, 1200 paces per kilometer [average]).(c) Use pace count in conjunction with terrain evaluationand heading to determine location. An individual’s pace variesbecause of factors such as steep terrain, day/night travel, orinjured/uninjured condition. Adjust estimation of distance traveledagainst these factors to get relative accuracy when using a pacecount.(4) Deliberate offset is (a) Used when finding a point on a linear feature (thatis, road or river).(b) Intentionally navigated to left or right of target soyou know which way to turn at the linear feature.(5) Point-to-point is same as straight line.(a) Pick out landmarks on the heading and walk thetrail of least resistance to a point.(b) On reaching a point, establish another landmark andcontinue.II -9
3. Travel Considerationsa. Pick the easiest and safest route (non-combat).b. Maintain a realistic pace; take rest stops when needed.c. Avoid overdressing and overheating.d. Consider food and water requirements.e. Take special care of feet (change socks regularly).f. Pack equipment to prevent loss, damage, pack imbalance, andpersonal safety.g. Go around obstacles, not over or through them.h. Travel on trails whenever possible (non-combat).i. Travel in forested areas if possible.j. Avoid creek bottoms and ravines with NO escape in the eventof heavy rains.k. Consider the following for swamps, lakes, and unfordablerivers:(1) Circumnavigate swamps, lakes, and bogs if needed.(2) Travel downstream to find people and slower water.(3) Travel upstream to find narrower and shallow water.4. River TravelRiver travel may be faster and save energy when hypothermia isnot a factor. It may be a primary mode of travel and LOC in atropical environment (use with caution if evading).a. Use flotation device (raft, log, bamboo, etc.).b. Use a pole to move the raft in shallow water.c. Use an oar in deep water.d. Stay near inside edge of river bends (current speed is less).e. Keep near shore.f. Watch for the following DANGERS:(1) Snags.(2) Sweepers (overhanging limbs and trees).(3) Rapids (DO NOT attempt to shoot the rapids).(4) Waterfalls.(5) Hazardous animals.g. Consider using a flotation device when crossing rivers orlarge/deep streams.II -10
5. Ice and Snow TravelTravel should be limited to areas free of hazards.a. DO NOT travel in (1) Blizzards.(2) Bitterly cold winds.(3) Poor visibility.b. Obstacles to winter travel follow:(1) Reduced daylight hours (BE AWARE).(2) Deep soft snow (if movement is necessary, makesnowshoes [Figure II-10]). Travel is easier in early morning or lateafternoon near dusk when snow is frozen or crusted.Figure II-10. Improvised Snowshoes(3) Avalanche prone areas to avoid:(a) Slopes 30-45 degrees or greater.(b) Trees without uphill branches (identifies prioravalanches).(c) Heavy snow loading on ridge tops.(4) If caught in an avalanche, do the following:(a) Backstroke to decrease burial depth.II -11
(b) Move hand around face to create air pocket asmoving snow slows.(5) Frozen water crossings.(a) Weak ice should be expected where— Rivers are straight. Objects protrude through ice. Snow banks extend over the ice. Rivers or streams come together. Water vapor rising indicates open or warm areas.(b) Air pockets form when a frozen river loses volume.(c) When crossing frozen water, distribute your weightby laying flat, belly crawling, or using snowshoes.c. Glacier travel is hazardous and should be avoided.6. Mountain Hazardsa. Lightning. Avoid ridge tops during thunderstorms.b. Avalanche. Avoid areas prone to avalanches.c. Flash floods. Avoid low areas.7. Summer Hazards (see page II-10; paragraph 3, TravelConsiderations, items h through k.)(1) Dense brush.(a) Travel on trails when possible (non-combat).(b) Travel in forested areas if possible.(c) Avoid creek bottoms and ravines with no escape inthe event of heavy rains.(2) Swamps, lakes, and unfordable rivers.(a) Circumnavigate swamps, lakes, and bogs if needed.(b) Travel downstream to find people and slower water.(c) Travel upstream to find narrower and shallow water.8. Dry Climatesa. DO NOT travel unless certain of reaching the destinationusing the water supply available.b. Travel at dawn or dusk on hot days.c. Follow the easiest trail possible (non-combat), avoiding—(1) Deep sandy dune areas.(2) Rough terrain.d. In sand dune areas—(1) Follow hard valley floor between dunes.II -12
(2) Travel on the windward side of dune ridges.e. If a sandstorm occurs (1) Mark your direction of travel.(2) Sit or lie down in direction of travel.(3) Try to get to the downwind side of natural shelter.(4) Cover the mouth and nose with a piece of cloth.(5) Protect the eyes.(6) Remain stationary until the storm is over.9. Tropical Climatesa. Travel only when it is light.b. Avoid obstacles like thickets and swamps.c. Part the vegetation to pass through. Avoid grabbingvegetation; it may have spines or thorns (use gloves if possible).d. DO NOT climb over logs if you can go around them.e. Find trails—(1) Where 2 streams meet.(2) Where a low pass goes over a range of hills.f. While traveling trails (1) Watch for disturbed areas on game trails; they mayindicate a pitfall or trap.(2) Use a walking stick to probe for pitfalls or traps.(3) DO NOT sleep on the trail.(4) Exercise caution, the enemy uses the trails also.10. Open Seasa. Using currents (1) Deploy sea anchor (Figure II-11). Sea anchor may beadjusted to make use of existing currents.(2) Sit low in the raft.(3) Deflate the raft slightly so it rides lower in the water.b. Using winds (1) Pull in sea anchor.(2) Inflate raft so it rides higher.(3) Sit up in raft so body catches the wind.(4) Construct a shade cover/sail (Figure II-12). (Sail aids inmaking landfall.)II -13
Figure II-11. Sea Anchor DeploymentFigure II-12. Shade/Sail Constructionc. Making landfall. Indications of land are (1) Fixed cumulus clouds in a clear sky or in a cloudy skywhere all other clouds are moving.(2) Greenish tint in the sky (in the tropics).(3) Lighter colored reflection on clouds (open water causesdark gray reflections) (in the arctic).II -14
(4) Lighter colored water (indicates shallow water).(5) The odors and sounds.(a) Odors from swamps and smoke.(b) Roar of surf/bird cries coming from one direction.(6) Directional flights of birds at dawn and at dusk.d. Swimming ashore (1) Consider physical condition.(2) Use a flotation aid.(3) Secure all gear to body before reaching landfall.(4) Remain in raft as long as possible.(5) Use the sidestroke or breaststroke to conserve strength ifthrown from raft.(6) Wear footgear and at least 1 layer of clothing.(7) Try to make landfall during the lull between the sets ofwaves (waves are generally in sets of 7, from smallest to largest).(8) In moderate surf.(a) Swim forward on the back of a wave.(b) Make a shallow dive just before the wave breaks toend the ride.(9) In high surf.(a) Swim shoreward in the trough between waves.(b) When the seaward wave approaches, face it andsubmerge.(c) After it passes, work shoreward in the next trough.(10) If caught in the undertow of a large wave—(a) Remain calm and swim to the surface.(b) Lie as close to the surface as possible.(c) Parallel shoreline and attempt landfall at a pointfurther down shore.(11) Select a landing point.(a) Avoid places where waves explode upon rocks.(b) Find a place where waves smoothly rush onto therocks.(12) After selecting a landing site (a) Face shoreward.(b) Assume a sitting position with feet 2 or 3 feet lowerthan head to absorb the shock of hitting submerged objects.II -15
e. Rafting ashore (1) Select landing point carefully.(2) Use caution landing when the sun is low and straight infront of you causing poor visibility.(3) Land on the lee (downwind) side of islands or point ofland if possible.(4) Head for gaps in the surf line.(5) Penetrate surf by—(a) Taking down most shade/sails.(b) Using paddles to maintain control.(c) Deploying a sea anchor for stability.CAUTION: DO NOT deploy a sea anchor if traveling through coral.f. Making sea ice landings on large stable ice flows. Icebergs,small flows, and disintegrating flows are dangerous (ice can cut araft).(1) Use paddles to avoid sharp edges.(2) Store raft away from the ice edge.(3) Keep raft inflated and ready for use.(4) Weight down/secure raft so it does not blow away.II -16
Chapter IIIRADIO COMMUNICATIONS AND SIGNALINGInventory and review the operatingcommunications and signaling equipment.instructionsofall1. Radio Communications (Voice and Data)a. Non-combat.(1) Ensure locator beacon is operational.(2) Follow standing plans for on/off operations to conservebattery use.b. Combat.(1) Turn off locator beacon.(2) Keep it with you to
SURVIVAL, EVASION, AND RECOVERY FM 21-76-1 MCRP 3-02H NWP 3-50.3 AFTTP(I) 3-2.26 JUNE 1999 DISTRIBUTION RESTRICTION: Approved for public release; distribution is unlimited. ARMY, MARINE CORPS .File Size: 2MB