Transcription
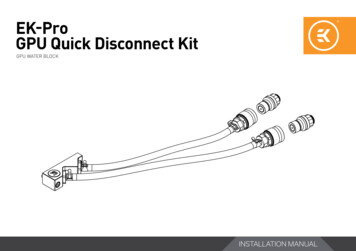
EK-ProGPU Quick Disconnect KitGPU WATER BLOCKINSTALLATION MANUAL
This product is compatible with all EK water blocks and manifolds. It isintended for installation by expert users only. Please consult witha qualified technician since improper installation may result in damageto the equipment. EK assumes no liability whatsoever, expressedor implied, for the use of these products, nor their installation. Thefollowing instructions are subject to change without notice. Please visitour website at www.ekwb.com for updates. Before the installation ofthis product, please read important notice, disclosure, and warrantyconditions printed on the back of the box.Before you start using this product, please follow these basic guidelines:Carefully read the manual before beginning with theinstallation process.Remove your graphics card from the computer for the safestmounting process and to prevent any possible damages to yourGPU or its circuit board (PCB).EK Fittings require only a small amount of force to screw themfirmly in place since the liquid seal is ensured with the rubberO-ring gaskets.The use of quality market-proven corrosion-inhibiting coolantsis always strongly recommended for any liquid cooling system.Do not use pure distilled water as a cooling liquid! For bestresults, EK recommends the use of EK-CryoFuel Coolants.-2-
TABLE OF CONTENTSPREPARING THE WATER BLOCK REMOVING THE TERMINAL MOUNTING THE NEW TERMINAL MOUNTING THE BARB FITTINGS MOUNTING THE ZMT TUBE MEASURING TUBES SUPPORT AND SERVICE SOCIAL MEDIA 44455688-3-
PREPARING THE WATER BLOCKSTEP 1REMOVING THE TERMINALRemove all encircled screws using the 2.5mm Allen key and cleanthe mounting surface of the water block with a nonabrasive cloth. EKrecommends you use a dry cloth only.STEP 1STEP 2MOUNTING THE NEW TERMINALAfter you have cleaned the sealing surface, assemble the terminal,as shown in the picture. Make sure that O-rings are correctly placedinto terminal channels. Once the terminal is in the right position onthe water block, insert and tighten the screws with a 2.5mm Allen keyand apply not more than 0.5 - 0.7 Nm of torque to avoid damagingthe water block. EK recommends this installation is done byexpert users only.OR 15x1EPDM50M4x10 DIN7984M4x28 DIN7984STEP 2-4-
STEP 3MOUNTING THE BARB FITTINGSOnce the terminal is in the position and adequately screwed-in,screw the barb fittings into the G1/4 threaded holes. For tightening,use a fork wrench 18 with torque adjustment set to 0.8 Nm.STEP 3STEP 4MOUNTING THE ZMT TUBEFor proper installation of ZMT tubes and clamps, EK recommendsthe use of adequate hose clamp pliers.STEP 4-5-
Once the ZMT tubes and clamps are mounted, make sure they arepositioned correctly (as shown in the picture).CORRECTSTEP 5MEASURING TUBESWhen measuring the tube length, make sure to avoid any sharptransitions of the tube to the barb fittings. Take a look at theillustration for better understanding.WRONGSTEP 5-6-
BOX CONTENTSCheck the box contents carefully. The O-rings might already be installedinside the terminal.TOP Acetal - FCTerminal M4 PreFilled1 pcO-Ring OR 15x1EPDM50 2 pcsM4x10 DIN7984Screw 2 pcsM4x28 DIN7984Screw 1pcsEK-Tube ZMT 6.5/9.5Matte Black 1,2 m2.5 mm Allen Key1 pcHose Clamp FSBMini 4 pcsEK-HFB Fitting 6mm2 pcsADDITIONAL NECESSARY TOOLSHose Clamp Pliers-7-QD2-MSG4 - MaleQDC 2 pcsQD2-FS06-P Female QDC 2 pcs
SUPPORT AND SERVICEIn case you need assistance, please contact:http://support.ekwb.com/EKWB d.o.o.Pod lipami 181218 KomendaSlovenia - EUSOCIAL fficialekwaterblocks
EK-Pro GPU Quick Disconnect Kit GPU WATER BLOCK - 2 - This product is compatible with all EK water blocks and manifolds. It is intended for installation by expert users only. . GPU or its circuit board (PCB). EK Fi