Transcription
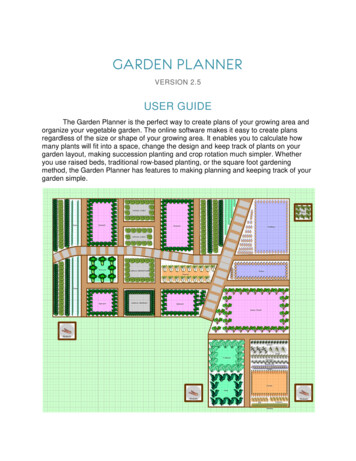
GARDEN PLANNERVERSION 2.5USER GUIDEThe Garden Planner is the perfect way to create plans of your growing area andorganize your vegetable garden. The online software makes it easy to create plansregardless of the size or shape of your growing area. It enables you to calculate howmany plants will fit into a space, change the design and keep track of plants on yourgarden layout, making succession planting and crop rotation much simpler. Whetheryou use raised beds, traditional row-based planting, or the square foot gardeningmethod, the Garden Planner has features to making planning and keeping track of yourgarden simple.
Page 2CONTENTSGetting Started . 4Create Your Account . 4Activate Your Account . 5Logging In . 6Account Settings . 7System Requirements . 8Launching the Garden Planner . 8Tutorial Videos . 8Getting Help . 11Garden Plans . 13Before you Create a Plan . 13Create Your First Garden Plan . 13Drawing Your Garden Plan . 16Toolbar and Plant Selection Bar . 16Adding Plants to Your Plan. 22Companion Planting . 26Adding Garden Objects To Your Plan . 26Layers . 30Toolbar Functions . 31Settings . 35Printing and Publishing Your Plan . 40Print Plan . 40Publish Plan to Web . 41Customizing Plants and the Plant List . 45Working with Plant Labels and Varieties . 45Using Square Foot Gardening Mode . 49
Page 3The Square Foot Gardening Method . 49The Plant List . 51Understanding the Plant List . 51Buying Seeds and Plants . 53The Parts List . 55Understanding the Parts List . 55Using the Succession Planting Option . 56Starting Next Year’s Plan and Crop Rotation. 58Follow-On Plan . 58Crop Rotation . 59Subscribing to the Garden Planner . 60Appendices . 61A. Keyboard Shortcuts . 61
Page 4GETTING STARTEDCREATE YOUR ACCOUNTCREATE AN ACCOUNT BUTTONThe Create an Account button can be found at the top right hand corner of your screen.The Garden Planner is free for the first 7 days, and no payment information is required. A subscriptiondoes not start automatically, and you can unsubscribe or opt-out of the twice-monthly newsletter emails atany time.If you have questions or wish to see pricing for the Garden Planner, click the FAQ & Prices link.ACCOUNT INFORMATIONEnter and retype a valid email address to ensure that it is entered correctly. A valid email address isrequired to send the planting reminders and account notification emails (e.g. end of free trial).Enter and retype your password to ensure that it is entered correctly. You will use this to log in to yourplans. Passwords must be at least 6 characters long and should not be obvious. It is best to choose apassword that contains letters and numbers and is not the same as part of your email address.
Page 5Select your country so that the Garden Planner loadsthe appropriate plant information and weather stationdata.Read and select your account options. In order tocreate your account, you will need to check the box toagree to the Terms and Conditions and PrivacyPolicy. Clicking on the Terms and Conditions andPrivacy Policy links will open them in a new browserwindow or tab.NOTE: We respectfully ask that you donot share your account with anyoneoutside of your household. If you feel thatyou require an exception, please contactus. We have special accounts availablefor educational institutions andorganizations that use the GardenPlanner for training purposes.Click OK to create your account.You will next be asked to activate your account and set your location. Read the information in the box andclick OK.ACTIVATE YOUR ACCOUNTCHECK EMAILIn order to activate your account, you will need the activation code, which is sent to you by email toconfirm that your email address works. This is sent immediately, so if you do not see it in your inbox, besure to check your junk mail folder. This is a sample of an activation email:ENTER ACTIVATION CODEEnter your activation code in Activate Your Account box.If this window is closed before the code is entered, you can reopen it by logging in using the emailaddress and password you set when you created your account. See Logging In.RESEND ACTIVATION CODEIf you did not receive your activation code, you can enter your email and password in the Log In box andclick the Resend Activation Email option (highlighted in the example below).
Page 6If you are still unable to activate your account, it could be because there is a problem with your emailaccount or your internet provider is incorrectly blocking the activation email. You can use the ResendActivation Email option to provide a different email address.Please Contact us if these options are unsuccessful, including both the email address you created youraccount with and an alternative email address if you have one.LOGGING INLOG IN TO THE GARDEN PLANNERClick on Login at the top right of your screen on the website.Enter your password in the Log In box.If you forget your password, click Forgotten Password? inthe Log In box, to have the system send you a temporarypassword by email (please note that the password is sent asplain text, so you should only use this option if you are happythat your email account is secure and private).TIP: You can also use yourusername that you received in youractivation email to log in if youprefer. This is often the same as thefirst part of your email address(before the @).Check Remember if you want the Garden Planner to store your email and password as a cookie on yourcomputer. Remember to never store your password on a publicly accessible computer, such as in aschool or library.Click Login.If you have not yet activated your account, you will be prompted to enter your activation code.If you have not yet set your frost dates, you will be prompted to do this.
Page 7If your free trial or subscription has expired, you will be prompted to go to our secure subscription page toadd a subscription to your account.ACCOUNT SETTINGSThe account settings option under the Your Account heading on the welcome screen once you’velogged in enables you to make changes to your account email address, country, password, emailsettings, and public plan availability.To change your email address, enter and retype it as instructed. When you click Save, you will be sent anew activation code, which you must enter in on your next login to verify that the email address is a validone.To change your country, click the arrow next to the dropdown list under the email text boxes and selectfrom the dropdown list.To change your password, enter and retype it as instructed.The Options settings allow you to decide whether or not you would like to receive sowing and plantingemail reminders twice a month at the bottom of the email newsletter, allow your plans to be viewed byothers as examples (an option for future versions of the Garden Planner), or receive emails with specialsubscription or other gardening offers.Click Save when you are finished making your changes.
Page 8SYSTEM REQUIREMENTS PC running Windows XP or above, Mac OS X 10.4 or above or Linux (e.g. Ubuntu 7.10 or later) One of the following browsers: Internet Explorer 6 or above, Firefox 2 or above, Safari 3 or above,Opera 7.11 or above, Google Chrome 2.0 or above (partial support since there have been issuesbetween Chrome and Adobe Flash) Adobe Flash Player version 9.0.124 or above At least 512 MB of RAM (more will be required for larger plans)For iPad and iPhone , app versions of the Garden Planner are available which synchronize with theweb version: Garden Plan Pro (from GrowVeg.com), Garden Planner (from The Old Farmer’s Almanac)and Grow Planner (from Mother Earth News). Android and Blackberry phones and tablets are notcurrently supported, although the Publish Plan to Web feature enables you to view any Plan or Plant Listcreated in the Garden Planner on those devices.LAUNCHING THE GARDEN PLANNERTo start the Garden Planner, first login at the top right of the website then click the Start Garden Plannerbutton. This will open the Garden Planner in a new browser window without all the usual browser toolbarsin order to maximize the screen space available for planning your garden. If you have a slow internetconnection (e.g. dial-up) the Garden Planner may take a few minutes to load.When you start the Garden Planner, you can choose to watch the short tutorial videos:TUTORIAL VIDEOSThe Garden Planner tutorials are 8 short videos (all under five minutes) under the Learn to Use headingthat give clear and concise explanations of the Garden Planner and its features. They are helpful becausethey allow you to see demonstrations of what is being described, making it quick and easy to learn how touse the main features of the Garden Planner which will save you time later on.The Garden Planner tutorial videos are: How to Plan a Vegetable Garden – Useful tips on planning your garden, as well as an indepth review of the Garden Planner’s main features.Quick Start Video – An overview of the Garden Planner and its featuresDrawing Your Garden Plan – Explains how to create your plan layout, including shapes,lines, text, and colorAdding Plants and Varieties – Explains how to add individual, rows and blocks of plants toyour plan and create customized varietiesPlanting Reminders and Frost Dates – Explains how to set your location and frost datesettings so that your plan and email plantingreminders will recommend the correct sow,NOTE: Tutorial videos may not beplant, and harvest times for your areaviewable on dial-up and other slowNext Year’s Plan and Crop Rotation –internet connections.Explains how to create a follow-on planbased on last year’s garden plan and how to
Page 9 use the crop rotation featureSuccession Planting – Explains how to set up your plan so that more than one crop can begrown in each space during the seasonSquare Foot Gardening (SFG)– Explains how to use SFG mode if you are growing in raisedbeds following the Square Foot Gardening methodPrinting and Sharing Your Plan – Explains how to print your plan and how to share it usingthe Publish Plan to Web tool.SET YOUR FROST DATESIf the Locate Your Garden box does not automatically appear, click Set Location and Frost Dates underYour Account on the Garden Planner login page.Enter your postal code or address and click Find My Gardento have the Garden Planner locate your garden on the map.You can repeat this with additional address details if it doesnot find an accurate location the first time.NOTE: You must have the correctcountry set for your account for thisto work. If you need to change it,please do so in your AccountSettings.If necessary, drag the map marker to make your locationmore accurate.Click Find my Frost Dates to have the Garden Planner locate your nearest weather station from ourdatabase of over 5,000 weather stations. The system will set your frost dates to match the average for the
P a g e 10nearest weather station, and these dates will be used to calculate the recommended planting andharvesting times for all the plants in our database so that they match your location.You can manually adjust your own dates by clicking on the calendars. This is useful if you live in amicroclimate that differs from information available from the nearest weather station, which can be thecase if you live a long way from the nearest weather station or your elevation is much higher or lower.We currently have weather station data for the following countries: USA Canada UK Ireland Australia New Zealand France GermanyOther locations may be added in the future. outh AfricaIf your country is not in the above list, you will need to manually set your frost dates as described above.Setting your frost dates is necessary in order for the system to calculate recommended planting times andplanting reminders for your area which are used on the Plant List and planting reminder emails.
P a g e 11OPTIONSSelect the My area does not experience frost box if applicable.Select the Split growing season into two box if your climate is too hot to grow certain plants during thesummer. (This splits the season into separate spring and fall plantings for ‘cool-season’ plants that need itbecause they do not grow well through hot summers e.g. lettuce.) This option will be automaticallychecked if you have a long growing season, although you can override the setting.Select Include perennial plants when sending email reminders of when to plant if desired. If this isunchecked, you will not receive reminders of when to plant perennials such as apple trees orstrawberries.If you need to change your location or look up the frost dates again, click Back to Set Location.When you are finished, click Save and Close to update the Garden Planner to use these dates.GETTING HELPClick the Contact Us button in the Support and Feedback box on the login page.If you are having problems starting the Garden Planner or it is not functioning properly, click the link to thetechnical help page in the Support Request or Customer Feedback to troubleshoot and send us moredetailed information regarding the issue.If the issue is not resolved or you need assistance, you can send a message using the form shown below.
P a g e 12SUPPORT REQUEST OR CUSTOMER FEEDBACK BOXAll sections are required to be completed.Enter and retype your email address so that we can be sure to respond to the correct address. If youdon’t receive a response within 24 hours, please send an alternative email address as we may have haddifficulty sending a reply through to your account.If your message is a request for support, please describethe problem, the steps you have already taken, what yousee on the screen, and what you expected to see. We aimto respond quickly to all requests, but this can sometimestake 24 hours or more during busy periods. Please notethat we cannot answer general gardening questions.However, there are plenty of resources on our website,Facebook pages, and internet forums to help you withthese.TIP: If you have not had a responseback after 48 hours please checkyour email address is working (sendyourself an email to be sure) andprovide us with an alternative emailaddress to contact you if you haveone.
P a g e 13GARDEN PLANSBEFORE YOU CREATE A PLAN MEASURE YOUR GARDENBefore creating your first plan in the Garden Planner it ishelpful to measure your garden area. Include the entire spaceincluding space for paths around your planting area as eachplan in the Garden Planner can contain multiple growingareas or vegetable beds.Recording accurate measurements at the start will be mucheasier than having to correct them later when you havealready added plants to your plan(s). Know the size and location of your beds and planting areas and the gaps between them.Know the size and location of any stationary objects such as ponds and compost bins.CREATE YOUR FIRST GARDEN PLANLog in.Click New Plan in the Start Using the Garden Plannerbox.TIP: You can create up to fiveplans per year, and each plan canaccommodate many vegetablebeds and growing areas. If yourgrowing area is large it’s a goodidea to split it up into severalplans. If you feel your growingspace requires more plans, pleasecontact us with details.TIP: If you are an experiencedgardener you may wish to createprevious years’ plans first andthen use the Follow-on planoption to copy the layout forsubsequent years. This givesyou the advantage of using thecrop rotation features for thecurrent year’s plan.
P a g e 14THE NEW PLAN BOXFirst, name your garden plan. Theyear will automatically be addedto the name, so it is best to justuse a descriptive name (e.g. –‘Backyard’ rather than ‘2012Backyard’)Select the year for which the planapplies by clicking the arrow nextto the year.TIP: It is very important that the year is correct as plantingreminders will be sent by email only for the current year.There is one exception to this rule: for the last two monthsof the growing year (November and December in theNorthern Hemisphere and May and June in the SouthernHemisphere), planting reminders are sent for plans for thenext growing year since most planting will then be for thenext season.If you live in the SouthernHemisphere, the years will be split (i.e. – 2011/12) and they will run from July one year to June of thenext.Enter the total size of your garden. A common mistake is to make a separate plan for each vegetablebed; this isn’t necessary and will lead you to hit the limit of 5plans per year quickly (one plan if you don’t have a currentTIP: If you need to change thesubscription). It is usually best to draw all of your beds ontonameor year of your garden plan,one plan. However, for larger plans you can also split theyou can do so later by using thegrowing area into more than one plan in order limit the amountSettings button on the toolbar.of scrolling around the screen that you will be doing. If you feelUnitscan be changed using thethat you need more than 5 plans per year to accommodatePlanSize & Grid button.your growing space, please contact us.Choose whether you would like to use metric measurementsor feet and inches.Click OK to create your new plan.
P a g e 15IF YOUR GARDEN AREA IS NOT RECTANGULARCreate a rectangular plan large enough to fit your garden within it.Draw the boundaries using the line tool (see Lines) or Fences (see Garden Objects).
P a g e 16DRAWING YOUR GARDEN PLANAfter you make any changes to your plan, save it by clicking the Save button on the toolbar (highlighted):It’s a good idea to save your plan at every stopping point and always before you close the plan. However,the system will auto-save every 10 minutes and when you change tabs by default unless you turn thisoption off using the Settings button.TOOLBAR AND PLANT SELECTION BARThe tools are grouped according to function:FORMAT OPTIONSThe Format Options adjust your plan size and grid, color/texture of objects and text, size of text, andwidth of lines.CHANGING THE PLAN SIZE OR UNITSClick the Plan Size & Grid button.Adjust the garden measurements under Plan Size ifnecessary.Switch to your preferred measuring method underUnits.Select whether or not to display the grey backgroundgrid under Options.The extra space will normally be added to/removedfrom the right hand side and bottom of your plan. Ifyou need extra space at the top or left of a plan, justselect Move All Objects on Plan. Type in the distanceyou wish to move all items on your plan horizontallyleft or right, and/or vertically up or down. Byenlarging the plan and shifting plants and objectsright or down, you can create space at the top or left.Click OK to save your changes.
P a g e 17SET THE DRAWING COLORClick the color button.Roll your mouse over the colors to view and choose.Click once to select.This applies to the shapes, text, and background fill you add.TIP: If you wish to specify adifferent color from thoseavailable you can enter the ‘hexvalue’ of the color in the box atthe top and then press enter.The color can be changed between objects.You can also select Solid Shape Fill Textures from the selection at the bottom. Roll your mouse over thetextures to view their names and see a preview at the top right. Click once to select.Fill Textures only apply to solid shapes – the solid rectangle, circle or triangle, not to the Background FillTool. The Background Fill Tool, the Line Tool and open rectangles, circles and triangles use the lastselected color if a texture is selected.
P a g e 18LINE WIDTH BUTTONClick the drop-down arrow to select possible line widths.This applies to the line width of your lines and open shapes.TEXT SIZE BUTTONClick the drop-down arrow next to select the text size fortext boxes you add to your plan.TIP: To change the size of plantlabels, use the Settings box.DRAW ING TOOLSThe Drawing Tools allow you to draw your garden layoutand customize your garden plan.Click a tool once to pick it up.Move the mouse pointer to where you would like to place iton your plan.Click and hold down the mouse as you drag out the shape.TIP: To keep a tool or plant selected(e.g. if you wanted to add a numberof lines one after the other withouthaving to return to the toolbar eachtime) hold down the Ctrl button onyour keyboard as you finishdragging out each shape.If you pick up a tool and decide not to use it, simply click thetool button again in the toolbar and it will release.The Drawing Tools are Line, Rectangle, Solid Rectangle, Circle, Solid Circle, Triangle, Solid Triangle,Text Area, Background Fill, and Delete Selected Objects.SELECT SHAPES, TEXT, OR PLANTSClicking a shape, text box, or plant on your plan will select it. You know you have selected an object whenthe handles appear. Click again to deselect the object.
P a g e 19Holding down Shift while clicking multiple objects will enable you to select more than one at a time.You can also use the Selection Tool to select several objects at once like a raised bed or vegetable box– See Selection Tool.You can then move or copy all of the selected objects at once, which is useful in duplicating orrearranging groups of objects or vegetable beds.MOVING SHAPESPlace the mouse pointer over the shape, hold the mouse button down, and drag your shape or group ofshapes to move it.Click again if you need to deselect it.DELETE A SHAPE, TEXT BOX OR PLANTSelect the object, then click the red X in the Drawing Tools onthe toolbar, use the Delete key on your keyboard, or hit Ctrl D.NOTE:You can also move or deletemultiple types of objects at thesame time. For example, you canhold the Shift key, select a text box,two shapes and several plants.ADJUSTING LINESDrag the end handles to resize the line or use the middle handle to create a curve. Almost any vegetablebed shape can be created by building it from lines. Holding down Shift as you drag the handles will forcethe line to be horizontal or vertical on the plan.KEEPING LINES STRAIGHTWhen dragging out a line, or when adjusting one, holding down the Shift key keeps the line horizontal orvertical.
P a g e 20ADJUSTING SHAPESUse the square corner handles to resize the shape byclicking one, holding the mouse button down, anddragging out the shape.Use the round center handles to rotate the shape byclicking one, holding the mouse button down, andmoving the mouse in the direction that you would liketo rotate the shape. Hold down the Shift key whiledoing this if you want the shape to snap to 45 degreeincrements.To set exact dimensions or change other propertiessuch as the color, double-click the shape (or pressCtrl W when it is selected) to bring up the edit boxwhere you can make changes.TEXT BOXESTo create a text box, first pick up the Text Box tool,move to where you want it on your plan and, holdingdown the mouse, drag out the text box.To change the text, double-click inside the box (orpress Ctrl W when the text box is selected) to bringup the edit box where you can make changes. Youcan also click the Properties heading at the bottom toset exact dimensions, change the text size or color.To move the text box, click the box to select it, holddown your mouse button, and drag it.
P a g e 21BACKGROUND FILL TOOLThe Background Fill Tool colors the background of a selected enclosed object or entire area.The color becomes a part of the background instead of a part of a shape, making it different than a solidshape. You can only fill areas using this tool with solid colors, not textures.It is only recommended to use the Background Fill Tool for a shape that is non-standard or will not bemoved as the background color cannot be dragged.If you are using the Background Fill Tool to add surrounding color to your garden (to make your plangreen, for example), it is recommended that you wait to add it until the plan is complete or almostcomplete before adding it.The Background Fill Tool can make your plan quite attractive, but keep in mind that it uses quite a bit ofink if you plan on printing it.ADDING AND REMOVING BACKGROUND FILLSSelect your color from the Format Options.Click the Background Fill Tool button in the Drawing Tools.Click the area that you would like to fill with that color.If you would like to erase your fill immediately after it has been added, click the Undo button (see EditOptions).When a fill is added to the plan, it stamps a faint copy of the current drawing objects on your plan to thebackground and then adds the fill. If you move shapes after you have added background fill, these faintcopies of the objects will remain in place on the background.To erase all of the background fills at a later stage, click the Settings button, then click the ClearBackground button (see Clear Background).
P a g e 22ADDING PLANTS TO YOUR PLANLOOKING THROUGH THE PLANT SELECTIONBrowse the selection by clicking the arrows at either end of the bar or find specific plants quickly by clicking the first letter of the plant name at the top of the bar.If a plant is not available you can add it as a variety of one of the generic icons – see Adding UnlistedPlants.TYPES OF PLANTSThe Garden Planner includes many plants that fall into the following categories:VegetablesHerbsFru
GARDEN PLANNER VERSION 2.5 USER GUIDE The Garden Planner is the perfect way to create plans of your growing area and organize your vegetable garden. The online software makes it easy to create plans regardless of the size or sh