Transcription
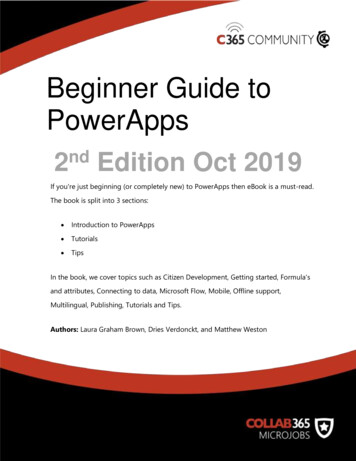
Beginner Guide toPowerAppsnd2Edition Oct 2019If you're just beginning (or completely new) to PowerApps then eBook is a must-read.The book is split into 3 sections: Introduction to PowerApps Tutorials TipsIn the book, we cover topics such as Citizen Development, Getting started, Formula'sand attributes, Connecting to data, Microsoft Flow, Mobile, Offline support,Multilingual, Publishing, Tutorials and Tips.Authors: Laura Graham Brown, Dries Verdonckt, and Matthew Weston
ContentsIntroduction . 4Citizen development, PowerApps, what is all the fuss about? . 4How do I start developing a PowerApp? . 6Start with a PowerApps Template . 7Branding and building for mobile devices . 8A tour of the PowerApps user interface . 11Formulas and Attributes . 13Top 10 Formulas. 14Connecting PowerApps to External Data . 15Connecting to on-premises data. 16Connecting to data in the Common Data Service . 17Do more in PowerApps with Microsoft Flow . 18PowerApps Mobile App . 19Going Offline with PowerApps . 20How to support multiple languages . 21How to return the language for the current user? . 21Change all of your hard-coded text to the current language . 21Publishing & Sharing your PowerApp . 22Licensing of PowerApps . 24Seeded Apps . 24Per User Licences . 251
Per App Licnences. 26Portal Licences . 27Authenticated External Users . 27Unauthenticated External Users . 27Internal Users . 28AI Builder Licenses . 28Transition Period to New Licence Model . 28What else? . 29Summary . 30Part 2: Tutorials . 31Tutorial #1 - How to search and filter data . 32Now let's try to improve the search (to filter on "repair") . 33Dealing with the warnings in the editor . 35What is Delegation? . 37Changing the default 500 row limit. . 38Tutorial #2 - How to do conditional formatting . 39Create an app from the SharePoint List . 39Colouring rows based on a condition. . 40Changing the picture based on a condition . . 43Hiding a value based on a condition . . 45Tutorial #3: Use scrolling Text in PowerApps . 46First, add a simple message to a new PowerApp . 462
Setting up the timer . 47Finishing touches . 49Tutorial #4: Creating Tabbed Forms. 50Create a collection . 50Build a Gallery . 51Groups Of Controls . 54Tutorial #5: Using a Google Map in PowerApps . 56Create your Google API Key. 56Adding a Static Google Map . 56My PowerApps Tips . 59Sometimes your app is just not suitable to be a PowerApp!. 59Don’t overcomplicate it! . 59Make use of Collections and Variables . 60Delegation, delegation, delegation . 60PowerApps are personal . 61Name everything! . 62Need help with PowerApps? . 63Why use MicroJobs to hire Microsoft Freelancers? . 63How does MicroJobs work and what about payment? . 643
IntroductionCitizen development, PowerApps, what is all the fuss about?Citizen development is the hottest term at the moment in the Gartner dictionary, butwhat does it mean and what is a citizen developer? Gartner describes a citizen developeras the following :“A citizen developer is a user who creates new business applications forconsumption by others using development and runtime environments sanctionedby corporate IT.”In short, this means that "citizen development" refers to non-developers who have theskills to create a business applications, tools or processes.Is citizen development a good thing?Yes. Who else other than the business owner himself, knows enough about therequirements to build the business app he/she wants to use best? No longer thinkingabout who I should hire to make my PowerApps, how much will it cost or whether thedeveloper will understand our needs.4
To help get us started, here's an example of an app in PowerApps:In the past business users who wanted to create an application to ease their daily tasksdidn’t have the tools and ended up creating complex Excel spreadsheets with macro’s,advanced formulas, and even sometimes some low-end code. These spreadsheets wereoften then passed on to the IT department to be maintained and supported goingforwards.Modern companies want to have a grip on the tools their employees use and are happythat citizen development is now a ‘thing’.5
Because of this reason, power users of PowerApps offer a much greater value to theircompany. PowerApps is part of Office 365 and allows power users to create businessapplications in as little as a couple of hours. Don’t waste any time and use this article tostart learning the basics of PowerApps.How do I start developing a PowerApp?PowerApps development can either be completed in PowerApps Studio, which is adownloadable client application, or directly inside your browser.Previously, PowerApps Studio had much more functionality, however, at the momentthe browser has caught up and has virtually the same features. The browser version hasalso become much faster to use than ever before.6
Start with a PowerApps Template My recommendation, if you're just starting, is to create your first PowerApp from one ofthe templates included in the product.There is no need to worry for hours about how your PowerApp is going to look. Justclick on the "create" button (on the PowerApps start screen) and pick a template to usein your business environment. Even if there is no need for you to use this businessapplication, it can be an excellent way to learn about what's possible and share ideaswith your team.7
Branding and building for mobile devicesYou will notice that some applications in the templates section have multiple designmodes. In the example of the Estimator Pro PowerApp, there are two design modes: thephone factor and tablet factor.A phone factor doesn’t mean your PowerApp cannot be displayed on a PC or tablet; itmeans it will work optimally for a phone (having a small rectangular design).It is up to the PowerApp creator to choose the design mode, the orientation of thePowerApp (landscape or portrait) and also consider whether the aspect ratio andorientation should be locked.8
I am sure you will agree, this is a great start! In just a few clicks it gives you, the creator,a working PowerApp. However, keep in mind that this is only the start of your PowerAppcreation. The branding and responsiveness factors are up to you.9
Next to the "orientation" option, the user can also choose the required "size" of thetarget device.When branding your PowerApps, I recommend that you have a consistent brand andcolour. Be sure to set your colour only once (for example on the top bar of the firstscreen). On the other screens, don’t copy this colour.10
You should copy the attribute ("fill") from the first screen’s top bar. Using one value foryour colour is how you maintain consistent branding throughout your PowerApp.In the screenshot above, I have set my fill to a colour, then referenced it as shown below:A tour of the PowerApps user interfaceThe PowerApps interface looks as follows, where each section has its purposes.The first section (top) is the simplest to describe because this is the most familiar one:the ribbon. Microsoft introduced it in Office 2007, and since then it has never left. Now it11
is also available in the PowerApps designer and allows you to achieve the samefunctionality that you are used to in Excel or Word. A few examples of what you can doare underlining text, aligning content and setting formulas on your objects (incomparison to formulas on cells in Excel).If you are used to Excel, there will be a mind-shift you will have to go through whencreating mobile applications instead of creating excel worksheets. The most significantdifference is that you will have to start thinking in "screens". These will be shown in thesecond section (bottom-left). The first screen in this section will be your start screen withsubsequent screens displayed in order below. To change the order of these screens,simply drag them up or down to your preferred location, think of it being similar to theslide sorter in PowerPoint.In the third section (bottom-middle), your PowerApp screens are displayed. You can usethis section to select your controls (and afterwards setting formulas on these) or tosimply drag objects to another location.In the fourth section (bottom-right), you can define the attributes for the selectedcontrol, like in the formula bar. You will see there is quite some overlap between thesetwo sections. Some attributes can only be selected in this section though, for exampleconnecting to your data and picking the correct data layout template.“When holding the alt key, your PowerApp is not in developer mode anymore, but in runmode. Allowing you to test the app without the need of pressing the play button at the topright.”PowerApps Tip12
Formulas and AttributesPowerApps contain many formulas and attributes. Formulas are always coupled to anattribute; attributes are dependent on the object you have selected. For example, ascreen will have attributes such as: BackgroundImage, Fill, ImagePosition,LoadingSpinner and LoadingSpinnerColor allowing you to set some design preference.It will also have some start handlers like: OnHidden, OnStart and OnVisible allowing youto execute some actions like refreshing data sources etc.Other objects will have different attributes like OnSelect where you can define whatshould happen when you click the object.Objects that allow you to show data will have the attribute Items where you can defineyour correct data source.13
Top 10 FormulasThere are around 150 formulas that you can use with PowerApps, details of which can allbe found on Microsoft's documentation site. I asked our PowerApps group onFacebook which ones they used most frequently and listed them below.FormulaDescriptionIfDetermines if an expression evaluates to true. If it is then aspecified value is used, otherwise a default value is returned.SortByColumnsAllows you to sort a table by one or more columns.SortSorts a table based on a given formula and sort order.SubmitFormSaves the contents for a form to the underlying data source.FilterAllows you to filter a set of records based on a given formula.SearchAllows you to search for a set of records based on a given searchquery.UpdateContextAllows you to store any useful value in a context variable. Scopedto the PowerApps Screen.SetSimilar to UpdateContext only this time the variables stored areglobally scoped.14
LookupFinds the first row in a table matching a specified formula. Returnsa single record.ClearCollectClears all records from a collection and then adds a different set ofrecords to the same collection.UpdateIfUpdate a value if a condition is true.Connecting PowerApps to External DataPowerApps has great support to connect to data from other systems. There are alreadymore than 180 connectors available. Examples of the most common ones are shown inthe screenshot below:15
Connecting to on-premises dataIt's also possible to leverage data that's stored in your on-premises data stores. This isachieved by using a gateway. To setup a gateway you will need to use a data sourcefrom this list: SQL Server SharePoint Oracle Informix Filesystem DB2The process for configuring and managing your gateway can be found in this article.16
Connecting to data in the Common Data ServiceMicrosoft PowerApps can utilise data via a service known as the Common DataService. In Microsoft's words - "The Common Data Service (CDS) for Apps lets yousecurely store and manage data that's used by business applications. Data within CDSfor Apps is stored within a set of entities. An entity is a set of records used to store data,similar to how a table stores data within a database. "The poster below gives an overview of which entities currently exist within thecommon data model.17
Do more in PowerApps with Microsoft FlowPowerApps allows you to create mobile applications easily and quickly. Along with yourmobile application, you will probably also need some automation to be done in thebackground, like for example, sending e-mails when a user clicks on a reservationbutton. Simple tasks like this can easily be done in PowerApps, however when moreadvanced logic is needed, Microsoft Flow offers more flexibility to handle this.PowerApps integrates very well with Flow, and they make their connection via thePowerApps and Flow buttons, each one allowing the other to be started. You can evenuse MS Flow to handle some PowerApps maintenance and governance.18
PowerApps Mobile AppTo run a PowerApp on your mobile device simply install the PowerApps application viathe Google Play Store (for Android devices) or Apple App Store (for Apple devices).The first time you start the PowerApps app, it will ask you to sign into yourorganizational account. When this is done, all your company apps will be displayed here(at least all the ones that are shared with you). If you have a couple of apps that you usefrequently you can add them to your home screen (pulling them out of the PowerAppapp) – however, this functionality only works on Android at this moment.The screenshots below are sourced on the Google Play store (provided by Microsoft)and give a great example of what a PowerApp looks like on a mobile device.If you don’t want to install another app, then don't worry, you can access them via yourbrowser.19
Going Offline with PowerAppsOne of the major use cases for PowerApps is to allow workers to use apps on the road.One common scenario for a remote worker (such as a travelling salesman) is that theymay not always be connected to the internet.You will be pleased to know that PowerApps does offer some support for working'offline'. To build support in our PowerApp to handle offline data can be achieved byutilising a few useful expressions as llows us to test if our PowerApp is connected to thedatasource. If it's isn't then we need to save and query thedata from the local storage (on the mobile device).ClearThis will remove records from your collection.CollectAllows you to store records in the local cache, if we have noconnection.LoadDataAllows you to load data into a collection locally.SaveDataAllows you to save data to a collection locally.PatchUpdates/creates a record in the data source. Ideal if youhave a connection.20
As you can see, offline support can be quite a complex subject if you're not a developerby trade, however, once you've grasped the concepts it's quite straightforward.How to support multiple languagesIt is entirely possible to create a PowerApp that renders text in the language of thelogged-on user. Note: If you think your PowerApp may need to be multi-lingual in thefuture then it's wise to provide support from day 1. Delaying it will result in you have torefactor every label, text, tool tip and message which can be a painful job.How to return the language for the current user?Before we do anything, we need to retrieve the users language. The language can bedetermined by calling the "language" function. "Language()" returns the "language","script" and "region" for the current user as a tag, e.g. "en-GB" would return forsomeone living in Great Britain.Change all of your hard-coded text to the current languageThe golden rule when adding support for multiple languages in your PowerApp is not tohard code text. Instead, you should use a function that looks up the language from alocal dataset that stores the key name and string.21
Your dataset can be imported from something like Excel and would be in this format.LanguageKeyStringNameenSaveTooltipSave the customerptSaveTooltipSalve o clientefrSaveTooltipSauver le clientNow that we know which language the user needs and have a language dictionary, allwe need to do is perform a lookup like this (note, you will more often than not store theusers language somewhere locally):LookUp(LanguageDict, Key "SaveTooltip" And Language "en")Publishing & Sharing your PowerAppWhen your PowerApp is ready, give it a good name, icon and description and thenpublish it. After publishing don’t forget to share it with the correct users so they canaccess it from their PowerApps app on their mobile device.22
PowerApps also has versioning enabled, which means users will only be able to view andaccess published versions. This means you can make changes to your app in thebackground without affecting their use of the tool. For example, you could work yourway up from version 1.0 to version 1.7 before publishing this to version 2.0. Users wouldcontinue to use version 1.0 of the app until version 2.0 was made available to them.23
Licensing of PowerAppsThe Licensing model for Microsoft PowerApps changed from 1st October 2019, thischange was intended to simplify pricing, however when first announced it, it did seem tobe very confusing and complex. Hopefully this section can help you understand themodel.The license models for PowerApps are effectively broken down into five key areas: Seeded Apps Per User Licenses Per App Licenses Portal Licenses AI Builder LicensesThe easiest place to start is Seeded Apps.Seeded AppsWhat was this before 1st October? This was previously referred to as PowerApps forOffice 365 or Dynamics 365, where a user could create an app with the intention ofextending the functionality of Office 365. It had a number of connectors available to itinteracting primarily with other Office 365 services and was all paid for as part of yourstandard subscriptionWhat is it after 1st October? Following the changes, not much really changes with this.It is still part of your Office 365 or Dynamics 365 licensing, it still allows you to createapps to extend your exploitation of Office 365, and it still has a number of standardconnectors which allow you to interact with other services.24
The key differences are that some of the Pre-Change connectors such as Azure SQL,Azure DevOps, Azure Automation (NOOOOOOOOOOO!!!!!) are going to becomepremium connectors. Likewise, some of the Dynamics 365 connectors will also move topremium.Per User LicencesWhat was this before 1st October? This was previously split into two levels, known asPlan 1 and Plan 2. Plan 1 gave you access to the Premium Connectors, the Data Gatewayand the ability to create Custom Connectors. Plan 2 gave you the Common Data Serviceand access to the suite of management tools. Regardless of plan, if an app was createdusing premium functionality, then both the creator and the user of the app would needthe relevant license.What is it after 1st October? The simplest way to look at this is that the Per User planis Plan 1 and Plan 2 consolidated into a single plan. A user with this license assigned tothem has the full capability of PowerApps at their fingertips: all of the connectors, themanagement tools, CDS, everything!25
But given that the Per User Plan will cost 40 per user, per month, this can quicklybecome quite expensive for smaller organisations. So, for this reason, Per App Licenseshave been introduced.Per App LicencesWhat was this before 1st October? This did not exist previously.What is it after 1st October? Per app licenses allow us to apply licenses to individualapps rather than to users. Even with the Per App plan, you still pay per user, however,because you’re limiting the number of apps that you are building with this SKU, it is aquarter of the price. But you still get the full capabilities of PowerApps to use withinyour apps. You are looking at 10 per user, per app, per month.One key change from the original announcement is that there is no longera minimum number of purchases required.The key consideration for this license option is to understand what constitutes an “App”.An App is comprised of 2 PowerApps and a Portal. This could be a combination of 2canvas apps, 2 model-driven apps, or 1 of each.So, if you’re only looking at deploying a small number of apps, this option may becomea more cost-effective approach to paying for the full-blown licenses for each user.As part of the app license, you get a Portal, however, they can also be licensedindividually.26
Portal LicencesWhat was this before 1st October? PowerApps Portals are effectively the successor toDynamics 365 Portals.What is it after 1st October? PowerApps Portals differ slightly from Dynamics Portalsin that they are no longer paid for upfront, they are paid for on a usage basis instead.The usage costs break down into three types: Authenticated External User Unauthenticated External User Internal UserAuthenticated External UsersAuthenticated users are charged on a per-login, per day basis. If a user logs in and thenlogs in again later in the day, or on another device within the same 24-hour period, thenit will only count as one log in. The cost per login will depend on the tier which youpurchase for your portal: 100 logins 200 1000 logins 1000 5000 logins 3500As well as having the ability to have authenticated users using your PowerApps Portal,you can also have unauthenticated users.Unauthenticated External UsersUnauthenticated users are those who are simply viewing a page and don’t need to login. These users have their own licensing model which is purely based on page views.27
This is simply 100,000 page views, for 100 per month.Internal UsersInternal users need to be licensed in order to be users of the PowerApps Portal. This isnot covered by the Office 365 and Dynamics 365 standard licensing, it needs to haveone of the paid plans associated with the user, whether that is a Per User, Per App or aDynamics 365 EnterpriseAI Builder LicensesThe final aspect just to have a look at is with regards to the AI Build Licensing. Whilstthis in preview, the service is available to use, however, once it goes GA it will be subjectto monthly charges which will buy a tenant wide license. So, whereas the other licenseshave all been user or app specific this one is tenancy specific.For 500 per month, you will have 1 million service credits which can be used forprocesses using the Azure AI services. It’s not quite as simple as being 1 credit pertransaction. Instead, it will depend on the load that is pushed through the Azure servicese.g. a 5-page document being processed will consume less of the credits compared to a50-page document.Transition Period to New Licence ModelOne thing that should be pointed out is that there is a period of transition, so thingsaren’t just going to stop working on the 1st October 2019. These are the two scenarios:Scenario 1: I already have a PowerApp which uses a connector being moved to thepremium28
In this scenario, you have quite a long grandfather rights period in which to either reengineer your PowerApp to use an alternative technology or put in the correct level oflicensing. You have until the 1st October 2024, to achieve this (by which point we’ll havehad several more changes to the licensing!).Scenario 2: I have a Plan 1 or Plan 2 which extends beyond the 1st October 2019If you find yourself in this scenario, then any PowerApps that you have created prior tothe 1st October will fall into what was described in Scenario 1.Any PowerApps that are created AFTER the 1st October with the listed connectors willstill work, however, you will have until either the 1st October 2020 or until your Plan 1 or2 is due for renewal, in order to transition to a new solution or new plan.What else?The final thing to be aware of is that there will be limits on the number of API calls madein a 24 hour period. This, in my opinion, is something which is more visible within Flowas we used to talk about the number of Flow runs, but it’s worth calling out the limitsthat will apply to PowerApps: Users on See
If you're just beginning (or completely new) to PowerApps then eBook is a must-read. The book is split into 3 sections: Introduction to PowerApps Tutorials Tips In the book, we cover topics such as Citizen Development, Getting started, Formula's and attributes, Connecting to data, Microsoft Flow, Mobile, Offline support,