Transcription
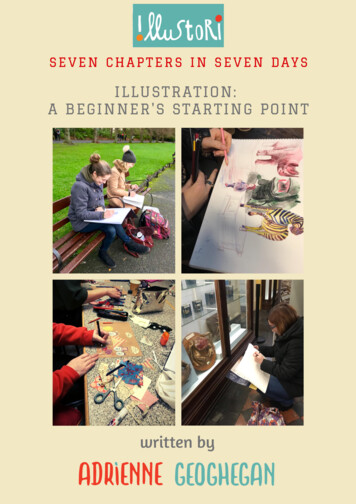
SEVEN CHAPTERS IN SEVEN DAYSILLUSTRATION:A BEGINNER'S STARTING POINTwritten by
Illustration: A Beginner’s Starting Point by Adrienne GeogheganTable of ContentWelcome!2CHAPTER ONE: Top Art Supplies You Can't Do WithoutCHAPTER TWO: Bothersome Illustration Drawing Problems and How to FixThem.7CHAPTER THREE: Where And How To Draw On Location9CHAPTER FOUR: Picture book art, storyboarding and planning.15CHAPTER FIVE: Sketchbooks, practice and motivation19CHAPTER SIX: Where and how to find inspiration and visual referencing.24CHAPTER SEVEN: Stay connected, how to avoid artist’s isolation28Thank You34
Illustration: A Beginner’s Starting Point by Adrienne GeogheganWelcome!Welcome to the Free Illustration Course exclusive to Illustori subscribers. It'sgreat to have you on board.I am delighted to share with you, in seven chapters, the knowledge, tips andadvice I have acquired over the years. In today’s colourful and varied climate,illustration still thrives across the many forms of communication. The role ofthe illustrator is ever evolving. Through a series of ‘chapters’, you will get toexplore with me all the basics tools and aspects of the business. It mightinspire you to start a sketchbook, get out and draw in the great outdoors,discover a new medium or an exciting blog. You will gain a unique opportunityand discover new possibilities, which will take you on the next step of the‘illustrated road’ to discovery.
Illustration: A Beginner’s Starting Point by Adrienne GeogheganCHAPTER ONE: Top Art Supplies You Can't Do WithoutIn this chapter, I will share with you the top supplies that I personally could notbe without. I did not add brands because I will be adding links to a newresources page on my website so you will find all my recommended suppliesvery handily. I have joined a few select affiliate programmes, where I get asmall commission on sales, but I only ever recommend art supplies that Ipersonally LOVE to use and have brought me both joy and top quality results.Top 7 Art Supplies for Illustrators Starting Out:Art supplies are costly, no doubt about that. It is so easy to go into an art store,and become overwhelmed, and yet seduced by the choice. Those shiny newart supplies, gadgets and tubes of new paint beckon ‘buy me’, they say, ‘I willcome in handy’.Then you part with your hard earned cash on stuff that you might try once anddecide it doesn’t suit your needs. Whether you paint in watercolours or acrylic,draw with graphite or charcoal, are a beginner or a pro, here are sevenessential you don’t want to be without.1. Some Pens and PencilsMost artists/illustrators own a 2B graphite pencil. I love Tombow andBlackwing pencils but to be honest a good old 2B Noris School Pencil will dothe trick.2B is good for general sketching and shading, a 6B is good for dark areas andshadows, and an H for lighter shading.2. A Kneadable EraserYes, you need a white eraser for rubbing out mistakes, especially if you wantto start the sketch over. But you want a kneaded eraser too. These soft, pliable,putty-like blobs can be shaped in different ways so you can erase small details
Illustration: A Beginner’s Starting Point by Adrienne Geogheganor create subtle shading. Plus they also don't leave any annoying "crumbs"behind.3. A Selection of Drawing PaperAnything goes, from A4 printer paper for quick rough ideas to a cartridge padin A4 or A3. Tracing paper comes in handy too. 4. Paper Pads for PaintingHeavy paper stock is essential for painting. However, it depends on the type ofpaint you plan on using.a. For watercolours, gouache or ink there is the option to use apre-stretched pad. Otherwise, you'll have to stretch your own heavypaper by soaking each sheet in water and then taping it with butcherstape to a board until it dries flat. This stops the paper from buckling andthus preventing the paint from pooling.b. For acrylics, you have a few good choices: heavyweight mixed mediapaper, (my personal preference), acrylic paper (slightly textured) orillustration board. Also, look at experimenting with painting on wood.5. PalettesA Stay Wet Palette: for acrylic or gouache paint. This paint dries very quicklyand is therefore very wasteful if you plan on working for a few days, nextmorning you paint will harden to plastic. So you can either buy one or makeone using an airtight container with a tight-fitting lid.You will also need: Greaseproof Paper, Paper Towels and WaterFold the paper towels and place into the bottom of the container. Add somewater. Drain out excess. Cut greaseproof paper to size and place onto of the
Illustration: A Beginner’s Starting Point by Adrienne Geoghegansoaking wet paper towels. Your paint with stay wet for a few days if you keepthe lid tightly on the container when you are not using the paints.Watercolours are fine to use on any palette or an old dinner plate.6. BrushesIf you're painting in acrylics, these are your ‘best bet’ trio: A filbert for general painting and smoothing out details (a size 6 isperfect for medium size paintings). A flat wash brush (1 inch), mostly for painting backgrounds. A small liner brush for fine details.For watercolours, your go-to brushes are: A medium or large sized flat brush, mostly for washes.A round brush (size 8, 10 or 14), for general painting.A liner brush (size 6), for smaller detail.Tiny brushes 2,3 or 4 for even finer detail.7. Add ColourWindsor and Newton designer gouache is popular with illustrators. Top artistquality paints are Golden fluid acrylics, QOR watercolours, Caran D’Ache ArtistQuality Coloured Pencils or Polychomos Coloured Pencils With paints, youdon't need a ton of colours especially if you're a beginner. All you really needis at least one tube each of blue, red, brown and yellow. You can mix them tocreate new hues.For example, you might just need: Phthalo blue
Illustration: A Beginner’s Starting Point by Adrienne Geoghegan Phthalo green Cadmium yellow Cadmium red Alizarin crimson Burnt umber Titanium Buff WhiteTitanium white is an opaque, bright white with a strong tinting power.Some manufacturers also sell a "mixing white", formulated to blend wellwith other colours.GreenGreens can be tricky to mix with consistency. You need to be meticulousenough to note the colours and proportions you use and with time it getseasier, promise
Illustration: A Beginner’s Starting Point by Adrienne GeogheganCHAPTER TWO: Bothersome Illustration Drawing Problemsand How to Fix Them.If I knew how to ‘fix’ all these issues with a magic wand I would try!However, forewarned is forearmed. In today’s chapter, I have added a list of commonproblems that I have come to recognise in my course participants work over (as well as myown in the early days!) of the past 20 plus years of teaching.Poor Drawing Skills .This includes figures with awkward proportions. In books that require continuity, forexample, picture books, characters that are inconsistently drawn or painted, from page topage, is a BIG one!Poor perspective is a problem for those who wish to draw in a realistic rather than stylisedstyle.Solution: There is really no substitute for learning to draw well. Spend an intensive yearputting in the time to really get your skills rock-solid. And keep them fresh by drawingfrom life if possible. For a particular drawing that you have problems with, turn it upsidedown, or hold it up to the mirror to see if you can see what’s wrong with it. Keepsketchbooks and draw from observation MORE than you draw from your imagination. Aftera while, you will notice that your imaginative drawing will also improve.Garish Colours .With beginners, colours may be too garish, too weak and diluted, or not diluted enough asin watercolours. The use of black is often problematic. Artists mix black from multiplecolours rather than using a tube of black paint. This creates a harsh, dead area. Instead,learn to mix a few good blacks from the three primaries: equal parts of red, yellow, and bluepaint mixed together on a palette. You can also mix complementary colours like yellow andpurple, blue and orange, red and green. Mixing blue and brown can also result in awonderfully deep black.Solution : Get a workbook, on colour theory. Learn to use complementary colours fordarkening and shading (green shadows on a red sweater, etc.). Study illustrators whom youadmire, and make your own colour combinations. Keep a colour swatch notebooks for yourown reference. Create combinations that you think will work together. Look at fashion
Illustration: A Beginner’s Starting Point by Adrienne Geoghegandesigners, interiors, nature, gift wrap – anything where colour inspires you and make note ofthe combinations.Incorrect Use of Medium .Sometimes the medium controls the artist rather than the other way around!Solution: Practice with a new medium until you’re confident and fluid with using it. Studyother illustrators who use this medium skilfully.Or, switch from your usual medium to find one that’s better for your approach. Practice isthe ONLY way.Hesitant Faltering Hand .Some artists create very delicate work with great authority. Others look like they just aren’tsure what they’re doing.Solution: Do the drawing multiple times until it feels familiar to you and you can reproduceit with confidence. Use tracing paper to do drafts over and over until you can really say whatyou mean. This is especially true with character studies and consistency in body movementand expression.Static, Stiff Drawings .In some cases, even though you may have drawn figures quite accurately, there is nomovement in the piece at all. Characters look like wax dummies! This is often a result of arigid observance to photo references.Solution: Move away from depending so heavily on photos and Google images. Sketch thesubject or setting from life where possible. Then and only then stylise to your style. If youhave to use a photo or a Google image, sketch it first. Then do the illustration from yoursketch , not from the photo.
Illustration: A Beginner’s Starting Point by Adrienne GeogheganCHAPTER THREE: Where And How To Draw On LocationHere we are almost halfway through at chapter three. Over the past twentyyears of teaching at DIT, guest lecturing, Visual Art Boot Camps, as well as mynewly formed iLLUSTORi Academy, I have found the BEST places in Dublin todraw. I Apologies to those outside of the BIG SMOKE, but all my courses are inDublin (for now!)1.2.3.4.5.6.7.The Natural History Museum, Merrion Square:The Museum of Decorative Arts and HistoryThe National Print MuseumThe Botanical GardensSt. Stephens GreenHeuston StationBewley's Grafton StreetHere are some tips on drawing at these places and what you will need in yourArt bag. Having the right tools can enhance the experience and make it evenmore enjoyable. Urban Sketching is drawing or painting on location, indoors orout, capturing what is seen from direct observation. It’s important to select theright type of paper for the right types of mediums. Initially, don’t get overlybogged down on this as it may lead to procrastination!Over time you can build up a better ‘kit’ and I promise it will make a hugedifference in the outcome and quality of your work. For example, if you usewatercolour on a sketch paper, the sheet will buckle and curl and won't holdthe colour properly since the paper isn't manufactured to handle that type ofmedia. Sketch paper is generally too lightweight for watercolour and doesn'thave the proper surface strength to hold lots of water. If you start matching theright papers with the mediums you're using, you're already going to be onestep ahead with your art.
Illustration: A Beginner’s Starting Point by Adrienne Geoghegan1. Sketch PadsSketch pads are great for capturing a scene quickly with dry media anddrawing pens. They come with lots of sheets so you can practice, over andover, and make lots of sketches in one affordable pad.2. Mixed Media PaperIf you like to make ink lines then add watercolour, this is the paper for you. Itcombines the characteristics of watercolour paper with the finish of a drawingsheet, creating the ultimate paper for combined mediums.I use 300 Series Mixed Media PadsIt contains a 90lb (190gsm) medium weight paper that is great for sketching. Itcomes in a wire bound sketchbook format with lots of sheets, making it idealfor urban sketching.3. Toned Sketch PaperStarting your artwork using mid-range paper allows for unique sketching &drawing possibilities by providing the middle value that would otherwise need
Illustration: A Beginner’s Starting Point by Adrienne Geogheganto be rendered by the artist. A wider range of values from light to dark can beused, and the middle tone makes it easier for the artist to deliberately placeshadows and highlights.Keeping the value of the paper as one of the values in the drawing not onlysaves time but allows the artist to use graphite or other dark media to pushdarker values and white pencils or other light media to add highlights, makingsketches and drawings pop.Strathmore makes a range of toned papers that are suitable for UrbanSketching:400 Series Toned Sketch Pads in Tan & GrayThis 80lb (118gsm) sketch paper in mid-tone tan and grey is perfect for penand ink, coloured pencil, or dry media urban sketching.400 Series Toned Sketch Art JournalsIf you'd prefer a book format versus a wire bound pad format, we also carrythe Toned Gray and Toned Tan paper in hardbound and softcover books. Thesmyth-sewn binding allows them to open wide and lay flatter.Toned Mixed Media Paper
Illustration: A Beginner’s Starting Point by Adrienne GeogheganThis paper is in the same as the Toned Sketch, but comes in a heavier weightand is also designed to handle wet media. It comes in mid-tone grey, tan andblue, and has a vellum drawing surface. The 400 Series Toned Mixed MediaPadsThe Toned Mixed Media paper is 184lb (300gsm) and is available in multiplepad sizes, including a handy 6"x8" size.4. Landscape Watercolor Art JournalsI recommend 400 Series Watercolor Hardbound Art JournalWeight: 140 lb. (22" x 30" x 500 sheets) 300 g/m 2 Surface: Cold pressMedia Applications: Watercolor, gouache and acrylicThis watercolour paper has a strong surface that is ideal for watercolour,gouache and acrylic. The natural white colour and traditional cold presssurface allow for fine and even washes, as well as lifting and scrapingapplications. Acid-free.OTHER MUST HAVE SUPPLIES:Mechanical Pencils, Pencils, Coloured Pencilsand ErasersSome people prefer mechanical pencils as theydon't need to be sharpened. The sharpener isone less thing to pack and you'll always have afine point without messy pencil shavings. If youprefer wood-cased pencils then aHere are a few samples of graphite pencils thatartists use in sketching. Top to bottom:Permanent Ink PensYou can make very fine details with small tip sizes and bolder, thicker lineswith a larger tip. A good rule of thumb is to bring 3 pen sizes: fine, medium andthick. Sakura Microns are a top favourite of mine they give the crisp clean lines.
Illustration: A Beginner’s Starting Point by Adrienne GeogheganWatercolour can be added over the top or you can start with watercolour andadd ink lines once it's dry.Travel-size Watercolour SetThese are portable watercolour sets that come with a pan of watercolourpaints, a refillable water brush, and a small mixing pan. They are small andsleek and can easily fit into travel bags.Binder ClipsBinder clips come really in handy. They keep your pages from flying in thebreeze and can also be used to clip your pens and pencils to your pad foreasier storage.StoolDepending on the type of travel, a stool is an excellent accessory to bring ifpossible. It can be super handy for setting up your sketching station andprevent you from having to sit on the ground for hours.BASIC STOOL
Illustration: A Beginner’s Starting Point by Adrienne GeogheganFANCY CHAIRTIP:it's important to remember sunscreen, a hat, lots of drinking water, andpotentially bug repellent if the weather is hot!
Illustration: A Beginner’s Starting Point by Adrienne GeogheganCHAPTER FOUR: Picture book art, storyboarding andplanning.This subject is arguably the most popular subject, but not one to take ‘lightly’.In other words, what looks like a ‘walk in the park’’ has proved to be asmind-bendingly gratifying as it is head-wreckingly challenging! Here we walkyou through the first steps of where to start. It is by no means a comprehensiveguide, but rather a starting point in a world of ‘information saturation.’ Once youknow the basics you can go from there.So, this is a typical layout for a 32-page picture book.Page 32 and page 1 are in fact the back and the front cover.Page 2 and 3, 310m and 31 are what are called endpapers (patterned themedpaper designs) front and back of the book. Page 4 is usually the half-title pagefor copyright information etc and page 5 is usually the Title Page: Book titleand may be illustrated in some way. This gives you 12 DOUBLE pages or 24single pages or more usual, a mix of both to work with
Illustration: A Beginner’s Starting Point by Adrienne GeogheganA SIMPLE FORMULA A good picture book story almost always has a character with a conflict. Heresolves the conflict(on his or her own) and in so doing changes or grows in some way, and learns alesson.However, the lesson must be subtle and not told in a didactic or patronisingway. Most picture books are made up of approx 12 double page spreads. A"spread" is both pages of an open book. A picture book shouldhave about 2-3 characters and one main strong character. Allowyour settings the scope to give the illustrator good opportunities and create amood. There are usually two endings to a picture book: physical andemotional.1. What did the characters go through?
Illustration: A Beginner’s Starting Point by Adrienne Geoghegan2. What is their response?The ‘physical resolution’ means the solution to the puzzle, and so the plot isresolved. The ‘emotional resolution’ means:1. How did the characters feel as they went through this experience?2. How has the experience changed them? E.g. At the beginning they mighthave felt worried; at the end, relieved or happy.SO TO BEGIN. Have a focus! You need to ask yourself: What is my book about?” Stateyour idea in one sentence. If you cannot explain your book in onesentence, it’s too complex and unfocused. What is the situation at the beginning of your story? Put it into onesentence. What is your character’s problem? Stick to one problem for a picturebook. What will be resolved by the end of the story? Don’t preach! Are you trying to teach a lesson? If so, reconsider. Is the central theme of your story childlike, or does an adult solve thecharacter’s problem? If so, reconsider.IF YOU GET STUCK use this successful formula, it applies to the majority ofpicture books written today:1. Create your character with a fault, problem or dilemma that makeshim/her likeable orappealing. A character that evokes warmth, compassion, humour.2. Put lots of obstacles in the way. E.g. he/she has to do somethingextremely hard, scary, or even something he/she normally dislikes, butsomething that he/she really WANTS or NEEDS to do. Or he/she really
Illustration: A Beginner’s Starting Point by Adrienne Geogheganwants something more than anything else in the world.how will she getit?3. Set him/her on the right path to do it, but with more and moreobstacles (funny, silly, brave, etc) in his way.4. Finally let him/her achieve it, BUT in the most spectacular way!For your PICTURE BOOK submission pack to an agent of a publisher you needthe following:1. A sketchbook showing progress and development of your work as achildren’s book illustrator, and including your project ’s evolution.2. A PDF picture book dummy, ready for submission to include FINISHEDpencil drawings, fully worked out pages and double page spreads plusplacement of type. This will amount to approx 12 spreads (24 pages) plusendpaper designs and mock-up cover if possible.3. Two fully realised double page spreads or a mix of double spreads andsingle page illustrations. These will be in full colour in a medium of yourchoice.4. Manuscript and cover letter.Best of Luck!
Illustration: A Beginner’s Starting Point by Adrienne GeogheganCHAPTER FIVE: Sketchbooks, practice and motivationWhen I was a kid, I use to draw things upside down, intentionally from the ageof three to five. I know this because I lived with my family at my grandmother'shouse until I was five. She kept old newspapers under the couch. I drew onevery spare column and advertisement that had blank bits to draw on. At timesI cut up her old newspapers and magazines with her kitchen scissors andmade ‘pictures’ with them. I didn’t know I was making collages. The upsidedown pictures were created to challenge her, my favourite was a pram. Mysister was born when I was four so this was my favourite new thing todraw.upside down: ‘What’s this Nana? I’d say. I remember her saying ‘Oh gosh,I have nooooo idea, is it a banana? Or perhaps an elephant?’ I knew she wasfeigning bewilderment, but I indulged her as it made us both giggle.I needed nothing but my imagination, my limited material resources onlyserved to increase my inventful mind. I would ask, "What shall I draw today?" Amonster she would say, or a bear with a sore head. Then I would giggle at thethought of it and would draw a bear with a sore head. Easy peesy right?So, how do we go from that confidence and joy of creating to fear? Fear ofrejection, fear of not making anything good enough to ‘share’, fear of messingup a new, expensive sketchbook gift? Fear of finding out we suck at drawing,fear of discovering we are good at drawing (then what!?) fear fear fear.I hold up my hands I have had the ‘fear’ bug too. On and off for years.So I created a self-project, to hold myself accountable, and start a sketchbooknot to share but just for ME. When I feel ready I might start to share, butinitially, it is best to just start with a cheap sketchbook of medium weightcartridge paper1. Pick an Area of Interest:
Illustration: A Beginner’s Starting Point by Adrienne Geoghegana. A Bone of Contention (we all have one!)b. A Field of Inquiry (something to take apart visually and discover moreand more about it.)c. A Family Photograph (as a starting point to discover more, either real orimagined) i.e. that picture of you aged two sitting in a biscuit tin, yourcousin smiling to the camera wearing only one shoe, your mother in heryouth on holiday. Each moment in time tells us a tale or allows us thefreedom to elaborate and make it up as we go along.You may come up with your own versions of the above but, allow the kind ofpossibilities that push you past the easy, low-hanging fruit. Keep going.YOUare the director of your project. When you feel excited, then go a bit further,then stop. When you stick with the same subject for long enough, you areforced to explore ALL options.2. Keep a ScheduleThe key to success is to keep at it, all the way to the end. Use a big wallcalendar, and each day that you works on your sketchbook, put a big red Xover that day in the calendar. The act of X-ing out each day is not onlyrewarding, but it creates a visual line of unbroken red X's. Creating real orimagined deadlines can be a strong motivator. Do it every day for 21 days.itapparently takes 21 days to form a habit.are YOU ready?3. Share Your Work When You Are ReadyBeyond getting noticed, sharing your work is a way to find a community ofother like-minded artists, a way of feeling connected to others because if youare not in art college or on a course, you probably spend a lot of your timedrawing in isolation. Even if you are in further education, build up confidencethrough practice and open an Instagram account. If time is an issue, post oncea week.
Illustration: A Beginner’s Starting Point by Adrienne Geoghegan4. Don't Overthink ItA self-project does not have to be a daunting notion at all, on the contrary.Start with a pencil and a sketchbook and let your imagination take you back tothat place, where fear was running out of space to draw, or a wasted purplemarker!So why not Pick an Area of Interest then set some deadlines for yourself andstart posting!5. Further Thoughts to Consider:Keeping a sketchbook is a great way of keeping track of creative ideas andgetting in the habit of regular drawing. Most artists keep sketchbooks in whichthey experiment with ideas and collect drawings of their environment.Sketchbooks are like visual diaries for artists. Artists often use them forplanning and developing their work. Remember that not every drawing you doneeds to be a work of art. Fill yours with doodles, words, writing, photographs,found images, experiments with colour etc.Before you sit down to draw, decide what your intention is for the session.While trying something challenging is usually worthwhile, in the beginning,simple subjects can often be rewarding. Try to find something that reflectsyour own interests and taste.6. A Look at The Past: The most famous artist’s sketchbooks are those of Leonardo da Vinci.They are filled with drawings, diagrams and written notes of things hesaw and ideas he came up with. Picasso produced 178 sketchbooks in his lifetime. He often used hissketchbooks to explore themes and make compositional studies until hefound the right idea and subject for a larger painting on canvas.
Illustration: A Beginner’s Starting Point by Adrienne Geoghegan Henry Moore, a British sculptor, filled one of his sketchbooks withdrawings of sheep that often wandered by the window outside his studio.7. Sketchbooks Are Your Friend:Carry your sketchbook around with you whenever you can. Look for things torecord in it. Remember that as an artist/illustrator, you have to look closely atthings. If you are researching for a book, you may have to do some locationdrawing. You may find it difficult at first to stand still and draw somethingoutside, especially if there are people around. Don't mind them or anycomments they might make. And don't worry if some of your drawings don'tturn out like you want them to. You can make mistakes in your sketchbook andyou'll get better with practice. Drawing requires courage!Try to fill one page of your sketchbook every day. Getting started is alwaysdifficult, especially when you have a new, empty book. If you don't knowwhere to start, try one of the following ideas. Once you've completed your firstsketchbook, others will be easier to do. Many artists choose a theme to follow in their sketchbooks. For example,you might draw scenes around your neighbourhood or you might decideto focus on portraits of family and friends in your first sketchbook. Or, youmight draw views you see when looking out windows (something thatHenri Matisse, a French artist, liked to do). Some people have collections of things. A collection can make a goodtheme for a sketchbook. If you have a collection of old toys or cameras(whatever) draw pictures of them in your sketchbook. (Did you knowAndy Warhol liked to draw pictures of toys?) You can also draw picturesof shoes, old hats, tools, kitchen utensils, or other items found aroundyour house. Your sketchbook can be a place to invent new characters
Illustration: A Beginner’s Starting Point by Adrienne Geoghegan If you have a dog or cat as a pet, try drawing pictures of it in yoursketchbook. Don't worry if your pet moves before you finish yourdrawing. As you get to know your pet better by drawing it, you'll probablybe able to go back and finish any uncompleted drawings of it later on. Drawing things from unusual points of view is good practice for an artist.For example, try drawing trees while sitting directly underneath them. If you go on a family trip or holiday, take your sketchbook along to draw.It can become a record of your journey and the things you saw. You don't have to draw things you see in your sketchbook. It can be aplace to make designs and experiment with different types of lines andshapes.
Illustration: A Beginner’s Starting Point by Adrienne GeogheganCHAPTER SIX: Where and how to find inspiration and visualreferencing.‘Inspiration’ is such an elusive word. In this chapter, I will attempt to answer: ‘Where do you find it?’ I am often asked this question by my students. And Idon’t blame them. It is as if ‘inspiration’ lives in an enchanted forest, (I wish) andthat you could take the 47A bus there, or better still, travel to it on a magiccarpet. Of course, once you got there you gathered your ‘inspiration’ in awicker basket and skipped off, delighted with your magic ‘compound’ ready tosprinkle like fairy dust onto your blank sketchbook or canvas.Of course, I jest. But inspiration is a reference point that jump-starts thecreative process. It is a starting point for producing captivating, and hopefullythought-provoking solutions in response to either a given brief, a commission,a self-assigned project or developmental work.To be honest, it is often a mystery, so don’t sweat; hence the ‘magiccompound’ reference! It can be a rare moment of joy, a sporadic thought, afleeting spontaneous feeling, irregular as gold dust and then BOOM!! and aftera ‘dry spell,’ several ‘five star’ ideas arrive simultaneously, all fighting for yourattention. Familiar?I’ll almost certainly spend the first half of the day lost for good ideas. A voicewill say things like ‘boring’.or ‘that’s total crap’ or ‘so hackneyed!’
Illustration: A Beginner’s Starting Point by Adrienne GeogheganNo, I’m not someone who wakes up feeling inspired by the world each day— I w ish I was. The reality sometimes looks like this:OK, Adrienne, you have a book illustration to start. (starting is the worst) Thefirst one you did was was good, can you surpass it? Then my voice mightcontinue. ‘but was the first one good?’ Should I redo it? Or maybe do thesecond pie
In books that require continuity, for . With beginners, colours may be too garish, too weak and diluted, or not diluted enough as in watercolours. . Create combinations that you think will work together. Look at fashion Illustration: A Beg