Transcription
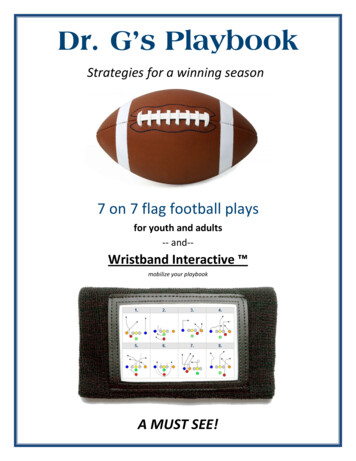
Dr. G’s PlaybookStrategies for a winning season7 on 7 flag football playsfor youth and adults‐‐ and‐‐Wristband Interactive mobilize your playbookA MUST SEE!
Table of ContentsAdditional ToolsUnderstanding the Playbook ‐ LegendPlayer Acronyms and Line ‐upsFull Color PlaysPracticeDrills‐ Offensive Drills‐ Passing Drills‐ Catching Drills‐ Route Running Drills‐ Ball Carrying Drills‐ QB Mobility Drills‐ Defensive Drills‐ Interception Drills‐ Coverage Drills‐ Pursuit Drills‐ Blitzing DrillsOffense – Player Descriptions/Responsibilities‐ Center‐ Quarterback‐ Running back‐ Fullback‐ Wide ReceiverOffense – Skills and Fundamentals‐ “Blocking”‐ Running the ball‐ Catching the ball‐ Throwing the ball‐ Route Running (Route Tree)Effective Play Calling‐ Use of misdirection‐ Bootleg‐ Play action‐ Setting up the defense2
‐ Final NotesDefense – Player Descriptions/Responsibilities‐ Safety‐ Cornerback‐ Linebacker‐ Defensive endDefense ‐ skills and fundamentals‐ Flag Pulling‐ Back Peddling‐ BlitzingSelecting a Defense‐ Man‐on‐Man‐ ZoneTips to run Successful DefenseUsing Wristband InteractiveUsing FlipbooksTop 10 tips for successful season3
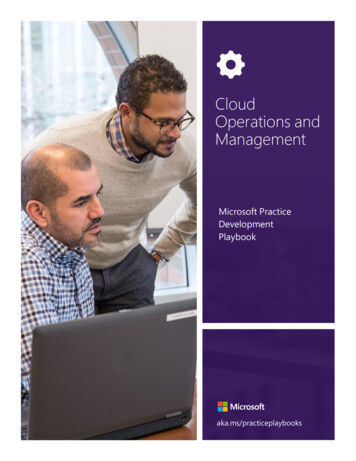
7 Man PlaybookStrategies for a successful seasonPlayers and Coaches: Welcome to the world’s largest flag football resource on Earth. Our playbooks andinteractive coaching tools provide everything you need to improve your team’s performance on the footballfield. In addition to this full color playbook, we also offer:Additional Tools1. Wristband Interactive – Wristband Interactive is an online tool that allows you to mobilize your playbook.Streamline communication and add your playbook to every player’s wrist! Approximately 65% of a footballgame is spent in the huddle or in transition from play to play. Wristband Interactive will speed up your huddle andincreases playing time substantially. This is a great communication tool and will dramatically improve yourteam’s performance.Every player should have a wristband, not just the quarterback. With a wristband on every player, you simplycall the play (1 thru 8) and everyone instantly knows their assignment. Imagine a playbook that every playerhas on their wrist at all times. This is the perfect tool, regardless of experience level or sophistication, todevelop a simplistic and efficient game plan that everyone can easily understand.Wristband Interactive mobilize your playbookImprove communication with teammatesSelect from hundreds of playsReduce explanations in the huddlePrint for your entire teamClearly illustrate each player’s assignmentFits any size wristbandAudible from the line of scrimmageRun the hurry up, no huddle offenseIncrease actual playing timeWin the close games!The concept of using wristbands became real to me when my team was down 28‐0 at the half against the bestteam defense in the league. By avoiding huddles and calling plays from the line, we managed a majorcomeback and won 29‐28, in the playoffs. If you are behind, and can’t afford to huddle, you will love this tool.Wristband Interactive is not only for a hurry up offense, however. It also helps you to stay organized, reducechatter in the huddle, catch the opposing defense off‐guard and easily illustrate everyone’s exact assignment.Effective communication, in any team sport, is a critical component for success. Let us show you whyWristband Interactive wins games!All of the features and benefits of Wristband Interactive are designed with one ultimate goal in mind ‐ simplifythe game and make it easier to communicate!4
Wristband Interactive mobilize your playbookVisit our web site and try Wristband Interactive!” www.FlagFootballStrategies.comPick your play!5
2. FlipbooksFlipbooks are 8.5 x 11, high resolution print outs designed to illustratea play to a large group. These are great for huddles since the playsare large, color‐coded, and easy to read. While flipbooks are great forall ages, including adults, they are very effective for the younger kidsthat need a large, simplistic view of the play. The plays fit perfectly ina 3 ring binder. Flipbook upgrades are inexpensive and by logging intoour site and clicking “upgrade to Flipbook.”TIP: Create tabs or sections in your flipbook and organize a section for your run plays, pass plays, trick plays,and 2 point conversions. This will speed up your play calling and allow you to stay organized in the heat of thebattle!3. Downloadable Youth Coaching Guide – SIMPLIFY your game plan, improve communication andGUARANTEE a great experience for your KIDS! The guide includes strategies, tips, drills and great practiceideas that are easy to implement.Need Wristbands? We offer great prices on high quality Under Armour “Playmaker” Wristbands. We carryYouth, PRO and Double PRO and can have them shipped to your door FAST.This playbook has hundreds of color‐coded plays for both offense and defense. Note that the defensive plays are at the end of theplaybook.Understanding the PlaybookOffensive Tips1. Each player is assigned a specific color. The avoid confusion, each playersshould remain the same color throughout the game (or for at least an entiredrive)2. A small notch at the end of a players route means block (if it’s allowed inyour league).3. A small notch during a player’s route means block/delay, then run your route.4. A small football indicates who is carrying the ball. If the ball changes hands,you may see more than one ball.5. Small notch from the QB’s line is a FAKE handoff.6. A black dotted line means a player is in motion or “jet motion”. Black dottedlines are also used to indicate a primary receiver or pitch play.7. A red dotted line means a pass behind the line of scrimmage or double pass.8. If the QB is rolling out, you will typically see a little ball at the end of his line. If you see no ball with the QB,6
they are standing in the pocket and passing.9. A dotted line between the QB and the center indicates a shotgun formation. If the Q is attached to thecenter, it’s a standard “under center” snap.10. If there is no route for your player, stay home and block. A small “notch” at the beginning your routemeans that there is a slight delay/block, prior to running the route. Assign a color to each player for the entiregame. If there is a substitution, the new player gets the color of the player leaving the field.11. Note: Some offensive plays show the two linemen as grey players. As the program developed, we beganmaking each of the players different colors, one grey, one light blue. This is because many leagues haveeligible linemen.Defensive Tips:1. Each player is assigned a specific color.2. Big grey bubbles indicate defensive zones.3. If a player leaves his “bubble” (zone), he is no longer responsible forthat area. If a player is in, or attached to, a zone, he is responsible for thatarea throughout the play.3. Arrows at the end of the route indicate blitz.4. An “X” at the end of a route indicates man‐to‐man coverage.5. A notch at the end of a route indicates a “bump‐n‐run” (if it is legal in yourleague).* Note that defensive plays are at the end of the offensive plays in this Ebook.7
Typical players and associated acronyms ‐ Note: Some players may be absent, depending your league type.8
9
10
11
12
13
14
15
16
17
18
19
20
21
22
23
24
25
26
27
28
29
30
31
PracticeMost teams are only able to put in a couple hours of practice each week, if that. Cover as many things as youcan in practice without skipping the fundamentals. You should plan out your practices, just as you do a game.Prior to practice, make a list of items that you want to address.What you teach will vary from week to week based on what your team struggled with in their last game orwhat the players need to be prepared for the next week. The list can range from catching balls to flag pulling.If your team struggled with coverage, then teach every aspect of coverage, from back peddling to interceptingthe ball.Practice should be fun and engaging for your players, never dull or boring. Fill your practices with games anddrills that not only sharpen skills, but also keep them interested and focused on the task at hand.Repetition is a key component to becoming good at anything in life. It is no different in flag football. Focus onfundamentals and practice catching, throwing, flag pulling, coverage, route running, blitzing, and hand‐offsregularly. The players will get a kick out of it! Practice plenty of “in‐game situations” like extra points, 4th andlongs, and two minute offenses.Offensive DrillsPassing DrillsDrill 1 ‐ This is the easiest and most common passing drill.Line your QB up with a line of receivers on the left or right side of the QB. Have the receivers run routes at thesame time and the QB throw to one of them. You can add a DB into the mix to make it interesting.Drill 2 ‐ This drill helps with accuracy and decision making.Have two receivers line up 5 yards apart and 10 yards away from the QB. Place one defender in between thereceivers. Have your QB “thread the needle” and keep the ball out of the defenders reach.Catching DrillsDrill 1 ‐ This drill helps receivers catch unexpected or errant throws.Have the WR line up 10 yards away from the QB with the WR's back to the QB. As soon as you say go, the QBwill throw the ball at the WR and the WR should turn around and catch the ball. The WR will have no ideawhere the ball is going to be until the last second. The WR should react quickly and snag the ball out of theair.Drill 2 ‐ This helps the receiver make quick decisions and improve catching dramatically.Two QBs should stand next to each other, each holding two balls and facing the WR. The WR should stand 5yards back facing the two QBs. When you give the signal, the first QB should throw the ball. As soon as theball touches the WR’s hand, the other QB should throw the ball. Repeat until all the balls are thrown.Route Running DrillsThe best way to improve route running is to practice, practice, practice. At first, break it down and go halfspeed, focusing in on the receiver's breaks. Do not throw any balls until the routes are run properly. Once the32
player’s routes are “crisp”, start throwing balls to them. Have a contest to see which player runs the bestroutes and they will all compete and strive for perfection! The best receiver of all‐time, Jerry Rice, was not thefastest, tallest, or the best jumper in the game. He did, however, run crisp discipline routes that set him apartfrom all the others.Ball Carrying DrillsDrill 1 ‐ This drill helps the ball carrier get better at cutting and juking.Set up an obstacle course with cones. Tell your ball carrier to run and juke when they reach each cone. Youcan also use spins or back steps in place of jukes.Drill 2 ‐ This drill helps the ball carrier beat defenders in open space.Set up a 5 x 7 yard square with cones. Place a defender in the middle. Have your ball carrier go one‐on‐onewith a defender. See if the runner can make it to the other end without getting caught.QB Mobility DrillsDrill 1 ‐ This drill teaches QB mobility from an accelerated blitz.Have the QB line up in shotgun behind the C. The C should snap the ball and run a 7 step hook. Have adefender blitz the QB, starting 3 yards closer than the usual blitz location. The QB should avoid the blitz asbest as possible before hitting the C as the C turns and looks for the ball.Drill 2 ‐ This drill shows the QB why vision is important.Have the QB line up in shotgun behind the C. Have a defender blitz the QB from the usual DB position fromdifferent angles. The QB should “elude” the defenders for 5 seconds before they throw the ball.Defensive DrillsFlag Pulling DrillsDrill 1 ‐ This is a good flag pulling and vision drill.Set up a 10 x10 yard square. Put all your players in the middle of the square. When you give the signal, eachplayer must pull the other players flags while dodging others trying to pull their own flag. Last player standingwins. This is FUN!Drill 2 ‐ This is a great drill for taking angles and pulling flags.Set up a 15 x 15 yard triangle with cones. Have two sets of lines, one on each bottom corner. One side is theball carrier, the other the flag puller. When you give the signal, the ball carrier should sprint towards the pointof the triangle while the flag puller cuts the ball carrier off before they reach either top cone.Interception DrillsDrill 1 ‐ This drill helps the DB “make a play” off a tipped ball.Have a defender line up 5 yards from the QB. Have another defender line up 3 yards behind the firstdefender. Have the QB throw a high ball to the first defender. The first defender should then "tip" the ballbackwards. The second defender then makes an attempt to intercept the ball.33
Drill 2 ‐ This drill helps teach receivers how to "jump" routes and steal the ball.Have a WR line up 10 yards away from the QB. The defender should line up two yards behind the WR and 1yard offset left or right. On your signal, the QB should throw the ball and the defender should then "jump" theball, cutting the receiver off and intercepting the ball in stride.Coverage DrillsDrill 1 ‐ This drill helps teach reaction and foot work.A WR and a defender should face each other, standing 1 yard apart. The WR should then shuffle left, right,forwards, and backwards. The defender should stick with the WR, matching their every move. It is alsoimportant that the barrier of 1 yard stays the same throughout the whole drill.Drill 2 ‐ This drill teaches how to make up speed and catch players from behind.A WR faces down field. The defender lines up directly behind the WR so they are back to back. On yoursignal, the receiver will run straight forward. The defender then has to turn around and catch up to the WRbefore the ball is thrown by the QB.Pursuit DrillsDrill 1 ‐ This drill helps teach your team proper angles of pursuit.Have your defense line up in their base defense. Your faster players should line up as close to the sideline asthey can before going out of bounds. On your command, have a RB take a hand off and run across the LOStowards the end zone, giving him a slight head start. Once he has crossed 5 yards beyond the line ofscrimmage, the defense can begin to chase him. Every defensive player needs to pursue the offense playeraggressively. This teaches pursuit skill and team flag pulling concepts.Drill 2 ‐ This drill helps teach defenders how to "sniff" out a play.Line up a center, a QB in shotgun, and two RBs in wishbone. Line up one defender 7 yards back. Once thecenter snaps the ball, the two RBs should run towards their nearest side line. The QB should then purposelystare down the RB he wants to hit. The defender should be watching the QB and then shuffle parallel with theLOS towards the RB the QB is eyeing. The QB should then throw the pass and the defender should bursttoward the RB as he is receiving the ball. The defender should then cut the RB off and pull the flag before theRB can gain positive yards. Repeat this over and over. Each time, the QB should make it less obvious whichRB he is targeting.Blitzing Drills (Blitzer BZ)Drill 1 ‐ This drill helps reduce the time it takes to sack the QB.Have the BZ attack the QB like they would in a regular game but add 3 more yards on to the designatedblitzing location. Have the BZ blitz from this new spot on your command. Count to five and if the QB is notsacked, then the QB wins. But if the BZ gets the sack, then the BZ wins. With this added yardage and timepressure, your BZ should have more urgency and focus when blitzing.Drill 2 ‐ This drill helps simulate WRs crossing through the BZ path to the QB.34
The BZ should line up in their normal location. Strategically place cones in the BZ path. On your whistle, havethe BZ attack the QB without knocking over any cones. The BZ should dodge the cones and still be able to getto the QB in a 5 second window.Offense ‐ Player Descriptions/ResponsibilitiesCenter (C)The C lines up over the ball. The C’s main responsibility is to give clean snaps to the QB. Also, the C is basicallya receiver and can catch balls. Most of the time, Cs are over‐looked by the defense and can be used as adangerous weapon. The C can be very successful in short yardage and red zone situations. The C should try tokeep a low profile during games and then expose the defense when it matters the most. Note: An “eligiblecenter” is the most dangerous receiver on the field.Quarter back (QB)The QB lines up directly behind the center, facing the opposing team's end zone. The QB can line up in twodifferent spots, either under center (directly behind the center) or in shotgun (3‐5 yards behind the center).The QB is the offensive captain and the leader of the offense. There are three major things that your QBshould be able to do:1. Protect the ball. Turnovers (interceptions) are detrimental to an offense.2. Throw accurately. Accuracy is more important than arm strength.3. Have mobility. QB should have the ability to scramble and elude the BZs.It's fine if your QB doesn't have all three of these qualities, but two out of three would be helpful. You shouldwarm up with the QB before they begin throwing in the game. Remind your QB that if the receivers aren'topen, to throw the ball away. A wasted down is much better than a turn over.Running Back (RB)The running back can line up in multiple locations but almost always lines up in the back field. Here are someformations your RB can set up in:1. The "I" formation‐ 1 yard behind the QB.2. Wishbone‐ 1 yard behind the QB but offset 2 yards from the ball3. Spread‐ lined up like a WR.The RB's main responsibilities are: making positive yards when running the ball, helping set up the pass, andcatching out of the back field. Your RB should never be afraid of defenders and should always run forward,never moving laterally or backwards. The RB needs to show quickness and vision. "Power” running is notreally an option with the no blocking rules so your RB should behave like a jack rabbit, not a rhino. Also, theRB needs to be able to dodge defenders in open space with virtually no contact. Lowering the shoulder, stiffarming, and hurdling are not appropriate ways to "shed" defenders. Jukes, spin moves, and back steps are thebest options.Full Back (FB)The FB is basically the same as a RB except that the FB lines up between the QB and RB. The FB has noblocking duties and should be considered as another RB.35
Wide Receiver (WR)WRs can line up anywhere on the LOS. The WR's primary responsibility is to catch the ball for positiveyardage. Ideally, the WR should catch the ball in stride, but should also be able to catch a large array ofimperfect passes including high passes, low passes, and passes behind the WR. The WR should also be quickenough to beat coverage and get open. If your WR's aren't particularly fast, you can work around this with“crisp” route running techniques that will allow them to elude the DBs and get open.Offense ‐ Basic Skills and FundamentalsBefore you teach your players anything else, start with the basic fundamentals. Work on snapping the ball,performing clean handoffs, fake hand‐offs, play action, pitches, short passes and basic route running. Give atleast 40% of your practice and pre‐game warm ups to “fundamental” routines. Otherwise, you will behaunted with mis‐handoffs, bad snaps, and RBs crashing into each other in the back field. Here are a few flagfootball fundamentals:“Blocking”Blocking (or “screening”) rules vary from league to league. In most youth flag football leagues, the rules forblocking are pretty sensitive. To keep it clean, have your players run up to the defender, STOP, then place hishands behind his back. You shouldn’t actually “block” or touch the defender (unless your league allows it), butcreating a little separation for one or two seconds is usually ok with the referee. Be careful not to shadowblock. Shadow blocking is when a teammate/blocker runs down the field parallel with the runner, preventingthe defense access to the runner’s flags. This is a penalty in some leagues.Running the BallThere are three simple steps to running the ball:1. The ball carrier should keep their body low to the ground. Flags low to the ground are harder to pull.2. The ball carrier should keep their arms up. They should never swing or slap away defender's hands. Thiswill result in a “flag guarding”, a universal penalty in flag football.3. The ball carrier should run fast and be elusive. Encourage your plays to juke, cut, spin, back step, and duckpast defenders. Remind them to never go backwards or make contact with defenders.Catching the BallThere are just a few steps in becoming a great receiver.1. The player should always keep their “eye on the ball” and watch it into their hands. Concentration is key.Do NOT be scared of the ball. A receiver who is nervous or flinches is more likely to get hurt than a player whokeeps his eye on the ball. Don’t run until you catch the ball!2. The receiver should always catch with their hands away from their body. Teach your players to not "T‐Rex"and avoid keeping their arms tucked in too tight. Extend the arms towards the ball and catch it with yourhands, not your body.3. Hand placement ‐ when the ball is thrown at the chest or higher, the player should spread their fingersoutwards with their palms facing the ball and the two thumbs touching one another. When the ball is thrownlow, the receiver should place their hands with their palms facing the sky and their pinkies touching.4. The receiver should never attack the ball but absorb it. Catching should look natural and smooth.36
Throwing the BallPlacing the ball exactly where you want it can take years of practice. Even PROs make bad throws. Here are afew techniques and throwing mechanics players should know before playing QB.1. The player's body should be parallel with the side line, never facing up field.2. The passer must make sure that their feet aren't too close or too far apart. Their feet should be slightlywider than their hips.3. The passer should grip the ball towards the end or the nose of the ball. They should never grip it in themiddle. The QB’s pinkie, ring, and middle fingers should rest on the grips while the thumb and pointer fingersgrip the actual nose.4. The passer should grip the ball at their chest, never below the sternum or above the chin. The arms shouldbe bent with their elbows facing the ground. This allows for a faster release.5. The passer should never drop their throwing arm before passing. The motion should look like a sling shot,not a windmill.6. The first motion. When the passer finds an open receiver and decides to throw, they will perform the firstpassing motion. The passer should raise their elbow, making it parallel to the ground.7. The passer should now load the ball, pulling it from the chest and placing it behind their head quickly. Thisshould be done in a quick wiping motion, like a windshield wiper going full speed. Also, the passer's other armshould be bent and parallel to the ground with their non‐passing hand pointing toward the side line.Simultaneously, the passer should shift his weight backwards, leaning on his back foot.8. Now that the ball is loaded, the QB can fire. To do this, the passer rolls the elbow, bringing the ball over hisshoulder passing his ear, and flings the ball forward to the receiver. While the ball is moving forward, thepasser's weight should be too. While the passer’s arm is coming forward, their other arm should drop to theirside.9. The passer should release the ball before their arm is completely straight. When releasing the ball, theyshould flick their wrist, giving the ball a spiral along with added velocity. The passer should now be leaningforward with all their weight on their front foot while their back leg lifts slightly off the ground at the point ofrelease. The ball should roll smoothly off the finger tips, creating the required touch for a spiral.10. The passer must follow through their pass. To do this, they should swing their arm toward their oppositehip. Passing the ball and swinging the arm should be done in one motion. The passer should always followthrough.The motions of a pass should be done in less than two seconds, from raising the elbow to swinging the arm.Route RunningRoute running is a great skill for all players to learn. It is also a great neutralizer for players that aren’t veryfast. The goal of route running is to separate a WR from a DB so the WR can get open for a pass.There are a few keys to becoming a great route runner:37
1. Foot work ‐ Receivers need clean foot work coming out of breaks.2. Great vision ‐ The receiver should always look for a way to break free.3. Deception ‐ The receiver should always be deceptive to their defender. This includes masking their truespeed, being able to trick a defender into jumping routes when the ball isn't there, and making their defenderbelieve they're going one way then break the other way.4. Discipline ‐ Receiver should run “crisp” routes exactly as they were drawn up. Cut hard at each turn and donot take short cuts. For example, on a 5‐n‐in, the runner should run up 5 yards and cut in 90 degrees.Precision route running will allow the WR to separate from the LB and allow the QB to make a safe pass.Below, is a route tree that your entire team should memorize. It’s a great tool for running warm routes inpractice, but it’s also nice for calling individual “hot routes” from the line scrimmage. Notice that oddnumbers go towards the center of the field and even numbers go towards the sidelines. The same rules applyno matter what side of the field you are running from. For example: A “4” route run from the left side of theQB would be a “10 yard out” also, but to the left sideline not the right. A “3” route run from the right side ofthe quarterback would be a quick slant, running from the right to left, towards the center of the field.38
MisdirectionMisdirection is the single most effective way to beat a defense. Misdirection is the art of making a defensethink a play is going one way, when it is actually going the other. The key to successful misdirection is freezingthe defense for one or two seconds and then attacking the opposite side they think you are attacking. Pullthem one way and go the other.BootlegA bootleg is a form of play action that allows the quarterback to fake a handoff and then scramble outside ofthe pocket. The bootleg opens up the secondary and allows the quarterback to locate his receiver whilescrambling out of the pocket. Generally the quarterback should scramble to the side that favors his throwingarm.Play actionPlay action is a fake handoff designed to make the defense think the play is a run. It will generally pull thedefense up to the line of scrimmage, creating vulnerabilities in the secondary or the flats. Play action is agreat option for throwing the longer passes and creating confusion within a defense. The fake handoff alsotakes a few seconds to mature and it allows the receivers to get further down the field by the time the ball isthrown.Setting up the defenseLets assume you have a playbook filled with easy, yet effective plays and a good system for naming your plays.Now you need to know which plays to use and call in different situations. You can start off the game threeways:1. Using the run to set up the pass.2. Using the pass to set up the run.3. Going "west coast" and using the short pass to setup the long ball and the run at the same time.You should feel the defense out: What scheme do they use? Are they a good passing defense, runningdefense, or both? Do they have a fast BZ? You can usually answer these questions in the first two plays. Try arunning play then a passing play or vice‐versa. That leaves you with two more downs to attack their weakspots. If they have exceptional coverage skills and keep your QB from completing a pass, run the ball. If theirCBs are great flag pullers, run right up the middle. Suck the defense in, then strike deep with a play actionpass.Use height as an advantage. If one of your WRs is considerably taller than their defender, throw a jump ballright over the defender's head. Try to find the holes in the defense. Find a spot where no one covers andattack it. Find bad habits and techniques from defenders and exploit them. If a CB has poor speed, send yourWR on a streak. If the defense takes poor angles, run a sweep and burn it up the side line.Final Notes:1. Protect the ball ‐ At any level of football, including the PROS, turnovers almost always determine the finaloutcome of a game.Consider this scenario. Team A plays Team B and the match up is perfect. All athletes and coaches have thesame skill level:39
Team A: Gets 7 drives (attempts to score)Team B: Gets 3 drives (attempts to score)Who will typically win this game? Team A, right?Well this is what happens if Team B throws 2 interceptions. They have two less drives and Team A gets twomore drives – a “swing” of 4 drives.If you want to win tough games, you MUST win the turnover ratio!Since there are no fumbles in flag football, turnovers (interceptions) will almost always come from your QB.Pull your QB aside and train him that an incompletion or a sack is much better than throwing an interception.Have him practice throwing the ball away if coverage is tight. Never be careless with the ball! Protecting itshould be your main priority.2. Extra points – making your extra points are the second most important aspect of running a successfuloffense. Have a specific plan in place for your extra points. Many coaches/players blow this off asunimportant, but I have found that 40% of flag football games are determined by 4 points or less. This isusually because one team made their extra points and the other team didn’t. For example, both teams mayscore three touchdowns, but the difference is the extra point tries (22
receivers. Have your QB “thread the needle” and keep the ball out of the defenders reach. Catching Drills Drill 1 ‐ This drill helps receivers catch unexpected or errant throws. Have the WR line up 10 yards away from the QB wi