Transcription
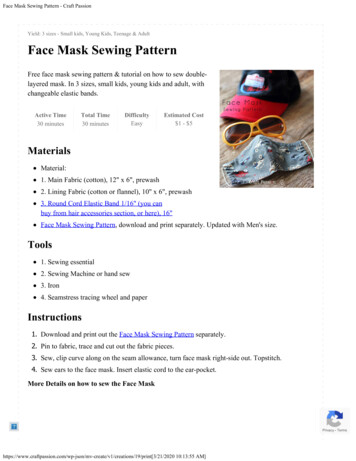
Elephant MaskDesigned by Steve WintercroftThis mask can be built by simply taping the edges togetheror by using the tabs to glue the edges together.ChooseUntabbed ConstructionTabbed ConstructionChoose this construction techniqueif you are short of time, or arelooking for a quick and easy project.Building this mask without tabsis much quicker and althoughthe finished mask will still lookawesome it will not be as neat.Choose this construction technique ifyou have plenty of time, are lookingfor a more substantial project andwant to achieve the best possiblefinish. Building this mask using tabswill take longer but the finished maskis stronger and will look neater.Build time approx: 45 minutesBuilding time approx: 1 hourPAGE 1 - 9ELEPHANT MASK v3.0 2016 STEVE WINTERCROFT – WWW.WINTERCROFT.COM
Materials RequiredPrinting Advice Access to a printer and 9 sheetsof A4 paper or US Letter paper. Thin card, the type used in cerealboxes is ideal. Thicker card, such ascorrugated card, does not work wellas it will not bend to the detailed folds.The approximate area required is around2 sheets of flat A3 card.The templates are 1:1 scale and areintended to be printed at ACTUAL SIZEon either A4 paper (210mm X 297mm)or US Letter paper (8½” X 11”). In yourprinter setting please select the type ofpaper that you are printing on but DONOT SCALE THE TEMPLATES TO FIT THEPAPER. I have included a Scale Guideline onthe first page of the templates sothat you can check the scale. The lineshould measure 150mm after printingbut plus or minus 2mm is acceptable.There is more information on printingthe templates in our FAQ section of thewebsite. Please check that your print outcontains all of the fold lines thatare shown on the PDF. If not pleaseupdate your PDF reader to the latestversion of Adobe Reader (free) andreprint. This will correct the problem. Spray mount, Pritt Stick, PVA or similarproduct that will stick paper to card. Scissors and a craft knife. Elastic length approx. 350mm.For Untabbed Construction Straight forward sticky tape, you canuse basic cheap tape but I’ve foundthat Scotch Magic invisible tape gives aneater finish.For Tabbed Construction A fast setting adhesive for gluing thetabs and assembling the mask. You wantto use a glue with a fast curing time sothat you don’t have to wait for parts todry before continuing. PVA glue worksok but I use a glue stick (Pritt Stick) asthis is quick, clean and convenient.A high quality double sided tape isalso a good alternative. As you will beputting the mask on your head don’t usea solvent based glue that could give offharmful fumes.A4/US LetterActual SizePAGE 2 - 9ELEPHANT MASK v3.0 2016 STEVE WINTERCROFT – WWW.WINTERCROFT.COM
1.Having printed the templateson paper, trim them roughlyto the approximate size,they don’t have to be neat.Trimming off the excess papermakes it easier to arrange thetemplates on the card.2.If you are working with reclaimed card unfold yourboxes so that you have flat sheets to work with,then glue the templates to the card. When youassemble your mask, your templates will be on theinside faces of the mask. A good quality glue stickis cheap and works well for this. Make sure thatthe templates are well bonded to the card.3. Cutting4.Untabbed CuttingTabbed CuttingCut around the outside or each part.As you will be taping the edgestogether, you will not need the greytabs so they can be cut off at thispoint. The direction of the fold lineon the tabs are not important asthese are the edges that you will betaping together.As you will be using the greytabs to assemble the mask makesure to only cut along the solidoutlines.The fold lines on the templatesare marked as either a dashed linerepresenting a valley fold or dasheswith dots to represent a mountain fold.This is with the templates on the insideof the mask.Dashed line representsa valley foldPAGE 3 - 9ELEPHANT MASK v3.05.Score all of the folds marked ontemplates with something blunt like anold ball point pen. Scoring weakens thecard along the fold lines and helps tokeep your folds neat. Score and fold allof your parts.Dashed line with dots representsa mountain fold 2016 STEVE WINTERCROFT – WWW.WINTERCROFT.COM
6.Starting with the parts labelled (A) and(B) find two edges with correspondingnumbers.For example edge number 14 joins to edgenumber 14. The numbers do not need to becompleted sequentially. Then follow either thetabbed or untabbed instructions below.7. Assembly14Tabbed Construction141414Untabbed ConstructionPAGE 4 - 9ELEPHANT MASK v3.02121Tape one edge at a time, test fittingeach part before applying the tape.I’ve labelled the first few parts toget you started, from there continuematching the corresponding numbersto complete the mask.2121Having found two edges withmatching numbers, hold the edgestogether and apply tape along thejoin. Taping on the outside makesthings easier for most parts but ifyou come to a part that is difficultto tape outside, try taping inside themask. If a join feels like it is understress, tape it inside and out toreinforce it.In each pair of numbered edges onepart will have a gluing tab and onewill not. The gluing tab will alwaysgo on the inside of the mask.Test fit the part before you applyglue to the tab. I recommend using aglue stick or double sided tape. Onceyou are happy with how the partsfit together, apply glue to the outersurface of the tab and bring the twoedges together remembering that thetab goes inside the mask.Apply pressure to the join until theglue has set enough to hold on itsown. Glue one tab at a time, testfitting each part before applyingthe glue. I’ve labelled the first fewparts to get you started, from therecontinue matching the correspondingnumbers to complete the mask. 2016 STEVE WINTERCROFT – WWW.WINTERCROFT.COM
After you have built your mask pierce two holes in each side ofthe mask where indicated by the circles. Thread a piece of elasticor ribbon through the first hole from the inside of the mask to theoutside, then feed the elastic back through the second hole fromthe outside to the inside and secure the loose end to the rest ofthe elastic by gluing, stitching or tying.Then thread the other end of the elastic in the same way, adjustthe elastic to the correct length to hold the mask in place and fixthe loose end.You can paint or decorate your mask in any way that you like.Have a look at our website or Facebook page for inspiration.Tag your photos with the hashtag #wintercroftto share them with our community.If you run in to any problems or have any questions please check the frequently asked questions on:www.wintercroft.comIf you still can’t find the answer to your questions, then pleasesend me a message to the address in the contacts below.Please NoteContact UsThese designs are protected bycopyright law and are intended for yourown personal use only. Please use thisfile to make as many masks as you likefor yourself but please don’t share orsteal the templates, there was a lot ofwork involved in creating them. If youwant to use them for any other reasonthen please get in touch. Selling itemsmade from our templates is prohibited.I would love to see your finishedcreations, please share them onour Facebook page:THESE MASKS ARE A PERSONALCRAFT PROJECT, PLEASE DO NOTUSE THEM FOR PROFIT.StevePAGE 5 - 9ELEPHANT MASK v3.0www.facebook.com/wintercroftmasksor use the hashtag #wintercroftor Instagram handle @wintercroftMany thanksand have fun,info@wintercroft.com 2016 STEVE WINTERCROFT – WWW.WINTERCROFT.COM
Scale Guideline1514To check the scale is correct, the line below should be 150mm from end to end.6101 2016 STEVE WINTERCROFTWWW.WINTERCROFT.COM217165A1112138PAGE 6 - 9ELEPHANT MASK v3.0 2016 STEVE WINTERCROFT – WWW.WINTERCROFT.COM
1021121516142017B111312C1819PAGE 7 - 9ELEPHANT MASK v3.0 2016 STEVE WINTERCROFT – WWW.WINTERCROFT.COM
974D35648397PAGE 8 - 9ELEPHANT MASK v3.0 2016 STEVE WINTERCROFT – WWW.WINTERCROFT.COM
212018E19FPAGE 9 - 9ELEPHANT MASK v3.0 2016 STEVE WINTERCROFT – WWW.WINTERCROFT.COM
PAGE 3 - 9 ELEPHANT MAS v. 216 STEE WINTERCROFT WWW.WINTERCROFT.COM 1. Having printed the templates on paper, trim them roughly to the approximate size, they don’t have to be neat. Trimming off the excess paper makes it easier to arrange the templates on the card. 2. If you are working with reclaimed card unfold your