Transcription
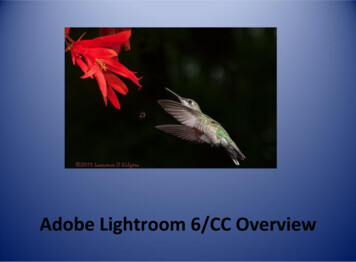
Adobe Lightroom 6/CC Overview
IntroductionAdobe Lightroom is an image editing and management program designed specifically forphotographers. It is considered a subset of Adobe Photoshop and shares many of its photographic toolsand filters, but Photoshop is a broad platform for all kinds of artists. Photoshop is much more powerful since many artists use it. For example, you cansimulate brushes, pencils, pens, and different kinds of art paper. It will also provide realworld art effects such as the flow and absorption of water colors on certain simulatedpaper. It also supports tablets and other advanced artistic techniques. Lightroom is specific to digital photography and condenses its tools and focuses theworkflow of a photographer towards reviewing, editing, and organizing their images. Lightroom also supports GPS Mapping and pinning photos to a location. It can helplayout a book of your images for publication. You can also use it for presentation in thedigital slide show module, the print window for organizing prints, and the Webinterface for Internet publications.
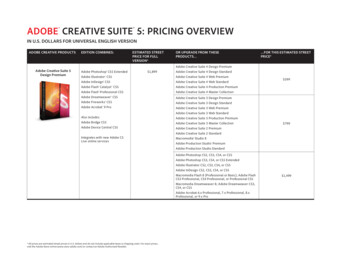
InstallationThere are two ways to obtain Lightroom. Choose the version for PC or Mac.Subscription 10 per monthPerpetual License 149Free upgrades 79 upgrade for new releasesIncludes Lightroom & PhotoshopLightroom onlyIncludes LR Mobile Sync SpaceLR Mobile Sync not availableDownload onlyDownload/boxed (updates are downloads)Some parts (Develop, Map, Mobile Sync)Continues working indefinitelystop working when you stop payingNew features in dot releasesBug fixes and new camera/lens support onlyThis means Lightroom is one of the few products still available without a subscription.When Adobe subscriptions first started, there were widespread complaints fromphotographers which certainly helped keep Lightroom perpetual.
Subscription versus PerpetualWith subscription you get everything Perpetual provides plus the latest Photoshop. Youalso get all the new bells and whistles that are added between major releases. In additionyou get a permanent monthly bill from Adobe. If you let you’re your subscriptions expire,Lightroom becomes crippled and you lose the ability to enhance your images. If you’re aserious photographer and need the latest enhancements, subscription may be for you.With perpetual you can use it forever, but must pay for future releases. You also get bugfixes and new hardware support. If you’re on a budget and don’t care about all the newbells and whistles the instant they come out, and you’d prefer to choose to pay lessfrequently, choosing when to upgrade, perpetual may be the better choice. At least you’llalways be able to run a version of Lightroom that supports all your work.There is a Trial Version available that works for a limited time. It lets you check out yourhardware to make sure it works and gives you a feel for the software.
Advantages of Lightroom Lightroom provides an almost complete set of tools for manipulating and editing yourimages yet it leaves your original image files untouched. Lightroom will organize your images into a Catalog where it keeps track of imageediting history, but also provides a powerful search engine to locate and analyze yourlibrary. Lightroom supports RAW image files directly without the need to convert them toanother form. Lightroom supports only images you add under its control. Some image editing andorganization packages will search and control all images on your computer. You cancontrol what Lightroom supervises. Lightroom can also store your image editing History in a file by the same name as eachimage in the same directory (called an XMP file). This keeps the history intact even ifyou move the images to another computer or version of Lightroom, or if yourLightroom database were to become corrupted. This feature is highly recommended.
Disadvantages of Lightroom Lightroom can be very slow. Be sure to put it on your fastest computer. If you don’t use XMP files to track your changes, or don’t preserve them on yourcomputer, and your Lightroom database is lost or corrupted, you will lose the history ofall changes made to images. The images will still be intact, but your tweaking could bepermanently lost. Lightroom doesn’t do everything that Photoshop does so you still may need it to domore advanced changes to your images. For example, creating composite images, orapplying custom masks can only be done in Photoshop.
Metadata and XMP FilesSince your original image files are unchanged, everything you do to an image when inLightroom is recorded in both the Lightroom Database and (optionally) in an XMP file storedwith each image. If you look at an XMP file, you’ll discover XML instructions for modifyingeach image as if starting from the moment you load it into Lightroom. Do not edit this file.This is just to show what it looks like. x:xmpmeta xmlns:x "adobe:ns:meta/" x:xmptk "Adobe XMP Core 5.6-c011 79.156380, 2014/05/21-23:38:37 rdf:RDF xmlns:rdf "http://www.w3.org/1999/02/22-rdf-syntax-ns#" rdf:Description rdf:about ""xmlns:tiff "http://ns.adobe.com/tiff/1.0/"xmlns:exif "http://ns.adobe.com/exif/1.0/"xmlns:xmp "http://ns.adobe.com/xap/1.0/"xmlns:aux "http://ns.adobe.com/exif/1.0/aux/"xmlns:photoshop "http://ns.adobe.com/photoshop/1.0/"xmlns:xmpMM "http://ns.adobe.com/xap/1.0/mm/"xmlns:stEvt xmlns:dc "http://purl.org/dc/elements/1.1/"xmlns:crs :Make "NIKON CORPORATION"tiff:Model "NIKON D700"tiff:Orientation "1"tiff:ImageWidth "4256"tiff:ImageLength "2832"exif:ExifVersion "0221"exif:ExposureTime "1/100"exif:ShutterSpeedValue "6643856/1000000"[MANY MORE LINES OMITTED]Figure – Sample of the Inside of an XMP File"
Why XMP Metafiles are ImportantIt is HIGHLY RECOMMENDED to write your edit changes to Metadata XMP files. This is anextra precaution in case your database is corrupted. The database is backed up periodically,but if your computer crashes and you lose the backups, you are in big trouble. XMP files donot appear in Lightroom to clutter up your list of images, but it does use them behind thescenes to record your edits.In the next section it recommends you store all images on a fast external drive that is clonedto multiple copies. If your computer crashes and is unrecoverable, your images and yourLightroom changes (in the XMP files) can be restored onto a new computer.
Forcing Metadata into XMP FilesTo force XMP files to be created, choose EDIT CATALOG SETTINGS then select theMETADATA Tab, and check the box marked AUTOMATICALLY WRITE CHANGES INTO XMPFigure – Forcing the creation of XMP Files
The Lightroom InterfaceHere’s what the default view of Lightroom looks like after its installed and images load.
Lightroom Interface Walk-through Standard Pull-down Menus appear at the top and a film strip of images at the bottom. The 7 interface modules are selected in the upper right. When one is selected, themain window and left and right controls change based on the module. The 7 modules are: LIBRARY, DEVELOP, MAP, BOOK, SLIDESHOW, PRINT, and WEB. The default on starting is the LIBRARY. On the left you will find a series off collapsiblemenu items:o NAVIGATOR – shows a thumbnail of your current image and it’s zoom factoro CATALOG – shows statistics and counts of your imageso FOLDERS – shows a tree structure of your image folderso COLLECTIONS – shows filters and the results of smart collection queries When selecting the LIBRARY module, the controls on the right appear for checking theexposure of your images and also, to do mass corrections in WHITE BALANCE and TONECONTROL. I generally just skip to the DEVELOP Module. When in the LIBRARY module, you can also mass apply keywords to images, or edit orview the EXIT and ITPC Metadata of images. That’s nice if you’d like to mark an entireset of new images with the name of the location or a vacation title.
LIBRARY Interface PreparationsBefore using Lightroom, I recommend: 3 Dedicated External Hard Drives for all Images – I keep all my images on an externaldrive that’s also fast and removable. I then clone* that drive to 2 other identical drives,and always keep one in a Safety Deposit Box. Single IMAGES Folder – I keep all images in a single folder called IMAGES (clever eh?).Then below images, I’ve created a subfolder labeled for each camera model. A singleimages folder lets you clone or do incremental backups more easily. Import Directory – My current camera Model is a D700, so that’s my most active folder.Each my camera model folder, I have a folder called NEW where I import all newimages. I use the symbol so it’s alphabetically at the top. Standard Topic Subfolders – Alongside NEW, I have subfolders which are common toall camera models; for example BIRDS or CRITTERS. Below them will be specie folders.* I use three 4-TB Western Digital “Green” drives (for extended reliability). I access themusing a StarTech ESATA dual drive bay which also clones one drive to another without acomputer. It also supports USB if you don’t have an ESATA port on your computer.
LIBRARY Folder ExampleHere’s what my Lightroom folder structure looks like. I have MANY other image folders, butthese are the only ones I want Lightroom to manage.
LIBRARY Module ImportBecause I work with two D700 cameras at the same time, I don’t want to mix my initialimage imports into a common NEW folder, so I created a D700 and a D701 folder, andkeep them separate at first,. My camera prefixes D70x on all images. I then review in thosefolders. When I’ve deleted unwanted images, I drag the rest into category subfolders.
Rename Files before ImportingI unload my camera by moving images from my camera folder to one of the D700 or D701folders. I then run a Windows program I wrote to mass rename my image files. I find theDSCNxxx camera names to be worthless later so I like to add permanent value to my imagefile names. Also, with two D700 cameras it helps to keep them straight, so I rename allimages based on a naming standard. It gets date/time from the image file so this must bedone before making any modifications. Here’s the naming standard:XXXX – YYYY-MM-DD – HHMMSS – NNNNNN.NEFXXXXYYYYMMDDHHMMSSNNNNNNCamera Model, for me D700 or D701The year the image was takenMonth the image was takenDay the image was takenTime the image was takenCamera given image number from the file name (e.g. end of DSCN0675)Examples:D700 - 2015-12-14 - 141114 – 3882.NEFD700 - 2015-12-16 - 152326 – 3897.NEFD700 - 2015-12-16 - 152414 – 3908.NEF
Import Images in the D70x Folder via SYNCHORONIZE1. Locate the folder in Lightroom containing my new images.2. I right click on that location and choose SYNCHRONIZE from the pop-up menu.3. If new images are located, they will be imported but will appear under the CATALOGlocation above your FOLDERS in a tab called PREVIOUS IMPORT.4. At this point, you can mass process or review images, and discard any you don’t want.5. To assist in preprocessing your images, you can use a list of tools at the bottom of maincenter screen. A Grid of images in the main screen (you can click an image or use the film strip) A single image is shown in the main screen as you click the film strip X / Y view. If you pick 2 images, it will place them side-by-side for comparison Rate images 1 through 5 stars by clicking 1 through 5 on your keyboard. Right click an image and flag it (for keeping) or assign it a color value flag6. Once you have made a pass on the new images, you can delete what you won’t need. Ilike to rate the images 1 or 3 at this point and delete all the 1 rated images. I savehigher rating for after I edit and process. 2 is reserved for images I don’t review, suchas JPGs I send by email, or Photoclub related screens or workshop material.
Moving to the Develop ModuleAs indicated previously, if you click to a different module, the top pull-down menus, andbottom film strip remain the same but the menus and options on the left and right change.
Develop Module Workflow Once in the Develop Module, the left will change to 5 expandable menu items calledNAVIGATOR, PRESETS, SNAPSHOTS, HISTORY, and COLLECTIONS. When developingyour images for presentation and improvement, select PRESETS. On the right in the Develop Module, you are presented with HISTOGRAM, a TOOL BAR,BASIC Develop Settings, TONE CURVE, HSL/COLOR/B&W, SPLIT TONING, DETAIL, LENSCORRECTION, EFFECTS, and CAMERA CALLIBRATION.Workflow Technique TipTo “Develop” your images into masterpieces, work your way down each tool, observing itseffect on your final image. As you work your way down through the Develop tools, useyour mouse to make adjustments and keep your finger on the “undo” keys: CTRL-Z (PC) orCMD-Z (Mac). Don’t be afraid to try something to see what it does to your image. As soonas you make an adjustment, you can simply hit the “undo” key to change it back.Also, on any slider control, if you double click on the slider knob itself, it will return to itsdefault position before you moved it.
Develop Module HISTOGRAM1. Start with HISTOGRAM. With a normal daylight image, your Histogram is generally like abell curve. It can be more complex, but: What you are looking for are parts of the curve that are off center, or stacked up on theleft or the right. This can indicate under or over exposure.At the top left/right of the Histogram you will find up arrow characters.o Clicking on the left one reveals in your image areas that are underexposed.o Clicking on the right one reveals in your image, areas that are overexposed.o If only a single color is poorly exposed, the arrow will be that color.You can click any troubling area of the histogram (left, right, or center) and hold themouse and drag that area to attempt a mass correction.If you see a lightning bolt near the bottom of the Histogram means there is a newversion of Lightroom that you can upgrade that image too. Otherwise it preserves theLightroom develop settings and tools for when the image was firstimported/synchronized.If you do nothing else in HISTOGRAM at least start to get a feel for what parts of yourimages may have issues in lighting and exposure.
The Adjustments ToolbarThe Adjustments Toolbar is positioned between the Histogram and the Basic DevelopModule for a reason. You should stop there and make adjustments before proceeding withthe rest of the tools.The tools which will be present in order are as follows: The Crop Overlay ToolThe Spot Removal ToolThe Red Eye Correction ToolThe Graduated Filter ToolThe Radial Filter ToolThe Adjustment Brush
The Crop Overlay ToolBefore proceeding with other adjustments, crop your image if needed. The Crop OverlayTool allows for excellent control over cropping. It allows freeform cropping,Can lock the aspect ratio to preserve its dimensions,Will quickly turn an image to align a horizon,Allows unlocking of the aspect ratio to refine your crop to specific imagesProvides gridlines for various industry recognized cropping perspectives, such as therule of thirds (once CROP is selected toggle Crop modes with the “O” key):
Spot Removal ToolThis really speeds up removing dirt or sensor spots from images. Select the tool, and asample will appear in the upper right of the image. Adjust the size to slightly greater thanthe average diameter of the spots you need to remove, then simply click on every spot, orchoose a band of spots and brush them all with the tool.When the Spot Removal Tool is selected, on the bottom left border of the image, a checkbox will appear that allows you to “Visualize Spots”. Once selected, the image goes awayinto a dark background and spots similar to the ones you’ve been removing are much moreobvious. Continue to remove from that view, then uncheck “Visualize Spots” to removethat mask.Red Eye Adjustment ToolChoose this tool, start in the center of an eye, the stretch it to circumscribe the subjectswhole eyeball. Once you let go, it removes red eye for the selected area.
Graduated Filter ToolSelect the tool, and then drag starting from an edge of the image parallel to where a swathof the image is darker than the rest, drag until you reach the opposite edit of the image,adjusting the angle to best select the area to enhance. Let go of the mouse, then selectEFFECT, choose an EFFECT value, then increase or decrease its AMOUNT until satisfactory.Typically you choose exposure to adjust but Lightroom provides MANY values to adjust.Adjustment Brush ToolThis tool allows you to literally brush more exposure, color or any number of attributesdirectly onto your image with a variable size brush. If you have a small underexposed area,this can be adjusted. You have control over brush SIZE, FEATHERing (how much it blendswith the surroundings), FLOW (how much adjustment brush “paint” flows on the area to behealed), and Density (100 creates an opaque effect, but less allows “transparency”).You can also check or uncheck AUTOMASK. AUTOMASK enhances your brush by using colorand contrast to detect the edges within your image. As you paint, it searches for similartones to what the center of your cursor is on, and only applies adjustments to areas that aresimilar.
Develop Module - BASICExpand the BASIC tab on the right of the Develop Module and again, work your way downeach control. White Balance – Use this only if you know of a problem. It should default to “as shot”indicating its using what the camera settings where. You can change that to AUTO tolet Lightroom try to improve your White Balance (CTRL/CMD Z to Undo). With JPG youcan also manually adjust the light temperature or Tint. With Raw files such as NEF, youhave a much larger list of adjustments available (such as DAYLIGHT, TUNGSTEN, FLASH,etc.). In fact, you are able to fully control errors in White Balance with RAW files inLightroom outside the camera. This is not true for JPG and some other formats. Tone Controls – This is where you get the most out of Lightroom when your imagesneed tweaking. Again, strike the UNDO keys to back out the last change, or keep hittingit to continue undoing changes.o AUTO – It’s often a good idea to try the AUTO button initially. This is Lightroom’sbest guess at a tweak of the current image. It gives you an idea of what it mightlook like and make defects more obvious. Undo if you don’t like it or start fromthere.o EXPOSURE – This is used to adjust over or under exposure. It works closely withthe HIGHLIGHTS slider. Adjust those two first.
o CONTRAST – Avoid using this too heavily unless you have a major defect or resultyou are trying to get. It can destroy subtle detail when used wrong.o HIGHLIGHT – Works hand in hand with EXPOSURE to tune the lighter oroverexposed areas of an image. Use to bring a glow to all highlights or reduceoverblown bright areas. Also by decreasing EXPOSURE and increasing HIGHLIGHTyou can get certain areas to “Pop”.o SHADOWS – Reduces or Increases only shadows. Powerful in high contrast images.o WHITES – Brightens or darkens only the white areas of an image. It can be used tobring out a glow in some images or reduce glare.o BLACKS – Does the same thing as WHITES, but for all the black areas of the image. Presence Controls – This is a set of intelligent controls that affect groups of commoncomponents while leaving others alone.o CLARITY – I like to refer to this as a clean “sharpen”. It directly changes thecontrast in only the mid-tones giving the image an overall sharpness withoutpixelization. Most images can use 10 Clarity.o VIBRANCE – This raises the saturation of only the lower saturated areas of theimage, without affecting the already saturated areas. Most images can use a 5 to 10 Vibrance increase. Don’t use too much.o SATURATION – This raises or lowers the saturation of all colors in the image. AvoidSaturation unless you are correcting an obvious problem. Tone Curve – Lets you smoothly tweak tones in a continuous manner. Don’t use thisunless you know what you are doing. This exceeds the scope of this workshop.
Develop Module - HSL/COLOR/B&WLet’s you adjust Individual colors in Luminance, Saturation, and Hue. HSL/COLOR – The same thing but HSL lets you focus on changing just one (Luminance,Saturation, or Hue) across all colors, or COLOR lets you adjust each for every color froma single control. B&W – Converts your image to Black and White, but then lets you adjust the Black andWhite color mixes as they affect the B&W Shading. This is powerful and is akin to usingcolor filters. It lets you make “Ansel Adams Like” adjustments. Just try it and UNDO ifyou don’t like the results.Develop Module - SPLIT TONINGWhen you can’t correct a hue or false color by adjustments in White Balance, try SPLITTONING. For example, if you took an image under TUNGSTEN light and it came out orange,but White Balance starts to affect the overall image, go to split toning and try to adjust asingle hue at a time. HIGHLIGHTS – This is used to correct unwanted color balance in the highlight areas ofyour images. Pick a Hue from the slider, and then adjust its balance. SHADOWS – This is used to correct lost or overly saturated areas in shadows. Pick aHue from the slider, and then adjust its saturation.
Develop Module - DETAILThe Detail section allows you to adjust sharpness and also reduce noise.SHARPENING - This allows the sharpening of an image using essentially the same controls asfound in the UNSHARP MASK within Adobe Photoshop. AMOUNT – slide the control to increase the effects of the sliders below. RADIUS – this adjusts the radius of sharpening around edges. 1 increases sharpness by1 pixel and higher values sharpens more and more of the edge. Keep it under 1.5 DETAIL - adjusts from 0 (the largest edges in the image) upward to the smallest edges.Keep it under 50. Detail can increase background noise. MASKING – handy control to mask out (avoid sharpening) of areas that shouldn’t besharpened. For example, a blue sky does not need to be sharpened or it will get fuzzyand end up with noise. Masking smooths out those areas.
TWO TYPES OF NOISE REDUCTION, COLOR and LUMINANCE - This allows the smoothing ofan image that either has noise or it reduces noise introduced by the Sharpening tool. First,determine if you have luminance or Color noise. If you’re not sure, change one or the otherto see which has an effect. COLOR NOISE will appear as noise within common colors LUMINANCE NOISE is noise between different colorsSee Examples on Next Page
NOISE REDUCTION - LUMINANCE – this is noise between color tone boundaries. Choosethe LUMINANCE slider to change the amount of adjustment. Too much and your imagemelts together. DETAIL – next choose DETAIL to increase the LUMINANCE noise threshold. Highervalues retain detail, but increase noise. CONTRAST – based on LUMINANCE AND DETAIL, lowering contrast will reduce thenoise they introduce. The slider controls the difference between different color groups.Figure – Example of Luminance Noise
NOISE REDUCTION - COLOR – this is noise associated within a color group. DETAIL – next choose DETAIL to increase the COLOR noise threshold. Higher valuesretain detail, but increase noise. SMOOTHNESS – increasing smoothness of smooths out areas of common colors.Figure – Example of Color Noise
EXPORTOnce I’ve got an image the way I want, I export it to a JPG file in a folder I call SEND. Thatstarted from me sending images by email, but I use it for Facebook, or for submitting imagesin Competitions. Right click the image and choose EXPORT.
LENS CORRECTIONLightroom contains a number of profiles for most lenses. Aberrations in lenses are wellknown and can be modeled in the profiles. Simply expand LENS CORRECTION and clickENABLE PROFILE CORRECTIONS while watching your image. Lightroom should alreadyknow what lens you are using when working in RAW formats. If you like the results, keepthe CORRECTION active.EFFECTSI generally use the built in Presets to vignette images but you can perform fine control overvignetting via the POST CROP VIGNETTING tool. AMOUNT – Slide left to increase black vignettes and right to increase white vignettes. MIDPOINT – Limits the vignette’s entry towards the center and starts to backup at thispoint thus increasing the amount lost in the vignette area. ROUNDNESS – Adjusts the roundness of the vignette from oval to almost squared offborders of vignetting. FEATHER – This introduces an increased or decreases line of demarcation between theimage and the vignette.
CAMERA CALIBRATIONThis allows you to revert or promote camera specific Lightroom profiles based on releasesof Lightroom and camera RAW levels. I always use the latest.MAP, BOOK, SLIDESHOW, and WEBThese modules will not be covered in this workshop. MAP is for locating images on mapswith GPS coordinates, BOOK helps laying out a book with images or layout planningpurposes, SLIDESHOW assists in running a full screen slideshow of images on a screen orprojector, with music, and WEB allows you to build a web interface of your images.
PrintI’ve found this useful for creating sets of images onto roll paper I use to print. It figures outhow many images I can get based on my width and lets me create multiples of batches ofimages to print in masse.
Adobe Lightroom is an image editing and management program designed specifically for photographers. It is considered a subset of Adobe Photoshop and shares many of its photographic tools and filters, but Photoshop is a broad platform for all kinds of artists. Photoshop is much more powerful since many artists use it. For example, you can

![Adobe Photoshop Lightroom 5.3 Final (64 Bit) [ChingLiu] !NEW! Keygen](/img/46/pedcal.jpg)

