Transcription
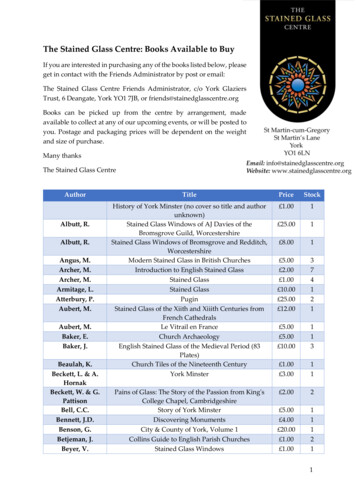
GreatSTAINED GLASSPROJECTSMichael JohnstonI N C L U D E S F U L L - S I Z E PAT T E R N S
ContentsAcknowledgmentsviIntroductionvii1Equipment and Materials12Special Skills43Finishing Your Project144The First Project165Bevel r Art8210Picture Frames10011Angels11212Light It Up12213And More . . .134Resources163v
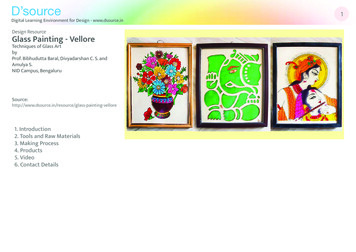
CHAPTER 4The First ProjectPROJECT 1Prairie-Inspired PanelMATERIALS LISTClear seedy glass (less than1/2 square foot)Amber streaky glass (less than1/2 square foot)18 mm square jewels (12)50 mm square jewel (1)1/4-inch U-lead (4 feet)In this project we have incorporateda large glass jewel and severalsmaller ones. The glass cutting iseasy since the piece features only rectangles and squares; this also makesthe soldering easier. We are includingall the steps to complete this projectin detail; you can refer to this as youset up and work through the rest ofthe projects.Patterns on insert 1PRO TIP: To prepare the glass forfoiling, wash all pieces with acleaner (we use Simple Green).Pay particular attention to theoutside edges, removing all thegrinding dust.Preparing the Pieces1. Foil all the pieces with 3/16-inchblack-back copper foil ( 3/16-inch foil isfairly narrow and we chose it becausewe wanted narrow solder lines. Wechose black-back foil because wewere using all transparent glass andwe planned to use a black patina).16
PRAIRIE-INSPIRED PANEL 17Assembling the PanelApply flux to all the copper seams.2. On a sheet of homasote board(plywood or ceiling tiles are suitablealternatives), attach layout strips tothe right and bottom edges of thepattern.If any pieces move during the fluxingstage, reposition them.Connect all the pieces by tacksoldering them where three or morepieces meet.Attach layout strips to the top andright edges.Position all the foiled pieces in theirrespective places on the pattern sheet.
18 THE FIRST PROJECT3. Remove the layout strips andbead solder all seams on both sides.If you’re new to soldering, try flatsoldering the panel first, and followwith the beading coat.Use lead cutters to cut off the extralead.5. Attach hooks to the back corners.Small metal rings are fine for a project this size.Solder the corners and all other locations where the interior solder linesmeet the outside leads.Attaching Lead Channel4. For most copper foil panels wefinish the outside edges with leadcame (channel). For this project wechose 1/4-inch U-lead. A plywoodworkboard with strips that forma 90-degree angle is used.Cut two pieces of lead that areabout 1 inch longer than the paneland another two pieces that will fitbetween the longer pieces. Hold theleads in place with nails.6. Finish the project using the 6-stepprocess outlined in chapter 3.
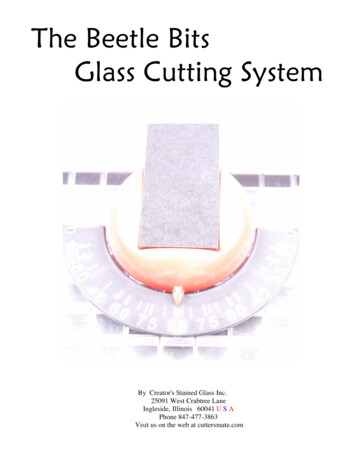
CHAPTER 8BoxesPROJECT 16Alternative Hinge BoxMATERIALS LISTGlass for box—Spectrum 88437(1 square foot)Scrap glass for flower—Wissmach 27Brass tube hinge setFelt padsThis box uses a hinge device thatis different from those in theother boxes in this book and doesnot require a safety chain. You cansubstitute other flower designs orone of the critters from project 23 inthe lid; to do this trace the perimeterof the lid and lay it over a new design. Draw any necessary breaklines. If it looks good, then try it.Patterns on pages 171 and 17263
64 BOXES1. Using layout strips, solder the lidtogether. Edge bead the outside.3. Center the bottom piece and tacksolder at two places on all four sides.Bead solder all seams, inside and out,and edge bead the top edge.2. Using a boxer or other supportingmethod, tack solder a short and longside (B and C) together. Remember:inside edges should be touching.Place the larger hinge tube evenwith the vertical box seam and markit at the same point at the oppositeside. Cut the hinge as detailed inchapter 2.Cut the smaller tube about 2 incheslonger than the larger tube. Insert thesmaller tube through the larger tube,extending it out about 1 inch. Bendthe small tube to a 90-degree angle.Installing the LidAdd the remaining two sides.4. With the lid face down, place thebox unit so it is centered from side toside and about 1/2 inch from the backat both corners.Repeat for the opposite end, makingsure that the second bend allows thehinge to lie evenly on the table.
ALTERNATIVE HINGE BOX 655. Place the hinge set on the lid asshown, hold it into place, and pushthe box away to avoid attaching solder to it.Solder the hinge at both left andright seams and at the one towardthe middle.6. Position the lid on the box andhold the unit at an angle so that thesolder will not run back into the box.Tack both ends of the inner tubeto the vertical seams of the box.Smooth out the solder on the innertube ends.7. Clean and finish according to theprocedures detailed in chapter 3.
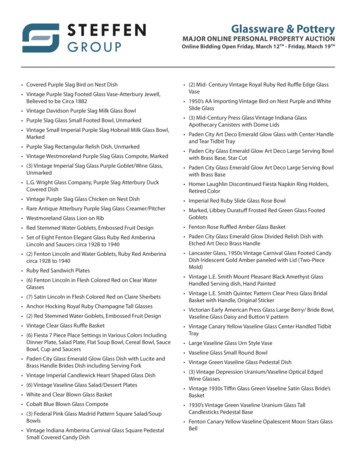
DOUBLE HINGED PHOTO FRAME 105PROJECT 25Double Hinged Photo FrameMATERIALS LISTApopular item in our studio overthe years has been a double picture frame displaying a photo of amarried couple on their wedding dayand a copy of their wedding invitation. This frame can be taken apartfor mailing or storage. It can also beembellished by adding an overlayitem such as a flower.We are framing the edges in1/8-inch channel and employing adifferent method of cutting from theone shown in the previous project.Chapter 2 shows this method in detail. Since we are planning to finishthis project in copper, we chose copper channeling.Patterns on insert 21. Solder the frames.Glass—Spectrum 31702 (11/2square feet), Spectrum 3172(1/2 square foot), Spectrum100 seedy (1 square foot)3/32-inch brass tube1/16-inch brass rod1/8-inch copper U-channel(12 feet)2. Take a 3-foot piece of channel. Cutone end at a 45-degree angle.
106 PICTURE FRAMES3. Bend the channel, place it ontothe frame, and notch the next twocorners.4. On the back, solder the copperto the glass frame at three placeson each side.Place the copper over a side of oneof the frames. Mark where it needsto be notched at the opposite end.Attaching the RearChannels5. Because the interior corners arerounded, we will use three separatecopper channels to support the photos. Cut them about 1/4 inch longerthan the straight edge of the clearglass. This will allow you to tack solder onto the seams at the corners ofthe yellow glass.Cut a 45-degree angle on both the leftand right sides (top and bottom).Measure the last length of channeland cut it so it meets the end of thechannel where you started at a 45degree angle. Solder at this point.
DOUBLE HINGED PHOTO FRAME 107Put the copper framing and photosupports on the other frame.At about the 1/2-inch point of eachrod, bend it into a tight loop withneedle-nose pliers.After fluxing, hold the left side ofthe bottom hinge and solder downthe right side. This is the side with thebent rod. Solder the top hinge in thesame way.Attaching the Hinges6. The smaller brass tube that isused for box hinging would notwork here because it cannot bebent into a U shape without breaking. Instead, cut two 11/2-inch piecesof 1/16-inch brass rod.Pro Tip: Exercise care so thatsolder does not get betweenthe two frames or onto the otherside of the hinge. Using a narrowtip on your iron will help.Cut two lengths of the larger boxtube ( 3/32-inch) approximately 1 inchlong. Insert these over the shorterlegs of the small rods.Pro Tip: Our frames accommodatevertical pictures. You can makea picture frame that works withhorizontal pictures by attachingthe hinges on the short sides.Solder the tube side of each hinge,again keeping the iron away fromthe opposite side of the hinge.Stand the frames up and see howeasily they separate.7. Lay the two frames side by sidewith a layout strip at the bottom.Check to make sure that the rearchannels on the frames are linedup the same.8. Decide how you want to finishthe project and follow the steps inchapter 3.
CRAFTS/Stained Glass)3". STACKPOLEBOOKSwww.stackpolebooks.com 24.95 U.S.Higher in CanadaPrinted in U.S.A.
to the glass frame at three places on each side. Attaching the Rear Channels 5. Because the interior corners are rounded, we will use three separate copper channels to support the pho-tos. Cut them about 1/4 inch longer than the straight edge of the clear glass. This will allow you to tack sol-der onto the seams at the corners of the yellow glass.