Transcription
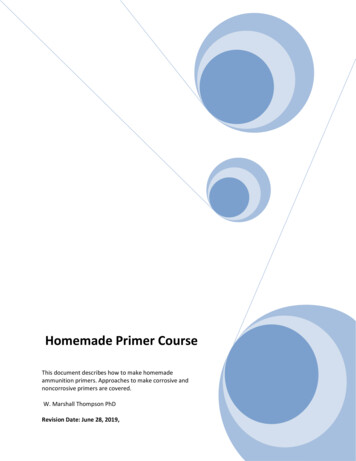
INTRODUCTIONLike the java chip Frappuccino, my first cake pop experience came courtesy of Starbucks. Ibit into their salted caramel cake pop, and I was hooked. Moist, yummy cake mixed withfrosting and coated in chocolate? What wasn’t to love? A bona fide cake addict, I wasenamored with its small portion size which left me a little more guilt-free when I ate one (okay, two),and I loved that it was served easy-to-eat and virtually mess-free on a stick.Finally, a cake I could eat without being hampered by plates, forks, and napkins. A cake that, unlikea cupcake, left my fingers frosting free and my lap crumbless. A cake I could tear into while drivinghome, right after leaving the Starbucks’ drive-through (hey, some days are just like that).However, as with my caffeine fix, I had to find a more budget-friendly way to support my habit. To mydelight, I found that cake pop recipes abound. As I researched the cake pop, I found that there are quitea few debates as to the best method of crafting one. Box cakes versus from cakes from scratch. Cannedfrosting versus homemade. Blending cake and frosting together by hand versus by mixer. And, therewere numerous decorating discussions. Best ways to dip the cake pop. Best chocolates to dip the cakepop in. Best sprinkles to add to the chocolate coated cake pop.In the spirit of cooking invention, I decided to experiment with three different cake pops. First, Iwould bake and decorate a traditional cake-and-frosting mixed cake pop. Then, I would try using adoughnut hole as the heart of my cake pop. Finally, though I was unable to find any record of its usageas a cake pop, I would use an ebelskiver as a cake pop center. I thought these little chocolate-filledCake Pops Three Ways1Really Amazing Women 2014
Danish pancakes would be a perfect cake popso though I would decorate each cake popcandidate. At the end of my baking experiments,a little differently, I would use the sameI would hold a taste test to find out which ofchocolate coating on each. I didn’t wantthese three contenders was the best. Of course,different brands of chocolate affecting theall three would be coated in chocolate, so really,final tasting, so I used only Baker’s premiumhow could there be any losers?white and semi-sweet chocolates to dip thecake pops.All contests need rules, so I decided that:3. Not only would I taste the different cake pops,1. All recipes would be made from scratch,but, to ensure fairness, I would also employfrom frosting to doughnut holes, with nothe services of an unbiased cake pop taster.store-bought premade items. This way, theThe taster would be compensated for theirfinished products would be completely thetime and effort with homemade treats.result of my baking skills, and Duncan Hinesor Krispy Kreme couldn’t be said to influenceI decided I would start by making the traditionalthe outcome.cake pop. So, without any further ado, let thegames, and more importantly the tastings, begin!2. All good experimenters limit their variables,Cake Pops Three Ways2Really Amazing Women 2014
CONTENDER ONE:THE TRADITIONAL CAKE POPT ¾ cup cocoa powder 2 teaspoons baking sodapop with the moist, rich cake-and-frosting filled 1 teaspoon baking powdercenter. The gist of the process is this: you bake a 1 teaspoon saltwith frosting. Then, you form the mixture into 1 cup buttermilkcake pop-sized balls that are refrigerated until ½ cup vegetable oil 2 large eggs 1 teaspoon vanilla 1 cup freshly brewed hot coffee (yum!)his is the recipe you’ll follow if you wanta cake pop consummate to what you’llfind at Starbucks or in a bakery, the cakecake, crumb the cake, and mix the crumbed cakethey’re set. Once the balls are set up, they can bestuck on a stick, dipped in melted chocolate, anddecorated. And, voila! You have cake pops.BAKING THE CAKETo begin, I used one of my all-time favorite cakeDirectionsrecipes from The Barefoot Contessa: Beatty’s1. Preheat your oven to 350 . Then, grease andChocolate Cake. This cake is incredibly moist,flour a 13”x9” baking pan. The cake willperfect for a cake pop. And, the cup of coffeehave to be removed from the baking dishthe recipe calls for gives the cake a really richto make the cake pops, and greasing andtaste. The recipe is actually designed for twoflouring the pan will help you get the cake8-inch round cakes, so I adjusted it slightly for aout of the pan without leaving half of the13”x9” pan.cake behind.Ingredients 1¾ cup flour 2 cups sugarCake Pops Three WaysI’m kind of an old school cake baker, so I justrub Crisco into the pan, and then sprinklea spoonful of flour into the dish. To spread3Really Amazing Women 2014
the flour, I rotate the pan and gently tap thesides until the pan is evenly coated.“stir” speed about 20-30 seconds.3. Combine the buttermilk, oil, eggs, and vanillain a separate bowl. Since I’ll be pouring theseingredients into the dry mixture, I like to useSome people prefer to use butter instead ofa large liquid measuring cup as it makes forshortening, or they just sidestep the wholean easier transfer.flouring process by lining their pans withparchment paper. Use whatever methodappeals to you. They all work equally well.2. Sift your dry ingredients (the flour, sugar,cocoa powder, baking soda, baking powder,and salt) into the bowl of an electric mixer.I’m all about saving time and have a goodsized sifter, so I sift all the dry ingredientstogether at once. Using the paddleattachment, mix the ingredients on low or4. With the mixer on low or “stir” speed, slowlypour the wet ingredients into the dry. After30 seconds, I stopped the mixer and scrapedthe sides of the bowl with a rubber spatula.Then, I continued mixing the batter onmedium speed for 2 minutes.Cake Pops Three Ways4Really Amazing Women 2014
6. Pour the batter into your floured or linedpans. Bake for 40-45 minutes or until a toothpick inserted into the middle of the cakecomes out clean. This batter has a lot ofliquid, so be prepared for the 9”x13” cake todip a bit in the middle. Not really a big dealsince it doesn’t affect the cake’s taste, andthe cake will be deconstructed to make cakepops, so it’s not an issue for frosting anddecorating either.5. Turning the mixer back to low, add the coffeeand stir just to combine. The batter willbe very wet and runny.all the easier forpouring into the cake pan. Scrape the bottomof the mixer bowl with a rubber spatula toensure the batter is well mixed.Cake Pops Three Ways5Really Amazing Women 2014
The cake has to be cooled completely before itI just don’t think a cake is truly a cake withoutcan be used to make cake pops. I set mine upcream cheese frosting, and I figured the sameon a wire rack to hasten the cooling process.rule applies for cake pops. I used Betty Crocker’sAfter the cake cools, it will be crumbed andcream cheese frosting recipe. But, since I made amixed with frosting to create the cake popchocolate cake, and I wanted my cake pop to lookcenter. But, the cake won’t crumb propertyuniform, I added 2 squares of melted chocolatewhile it’s still warm, so you’ll have a little bitto the cream cheese mixture to create a chocolateof time on your hands.cream cheese frosting.Ingredients 1-8 oz package of cream cheese, softened ¼ cup butter, softened 2 teaspoons milk 1 teaspoon vanilla 2 oz unsweetened baking chocolate, meltedand cooled While you wait for your cake to cool, you candrink the leftover coffee, or you can make the4 cups powdered sugarDirectionsfrosting. Or, like me, you can do both.1. Beat together the cream cheese, butter, milk,MAKING THE FROSTINGvanilla, and chocolate in a large bowl. Themixture will be thick!Of all the cake pop debates I read, the debateover frosting was probably the biggest. Manypeople advocated using premade canned frostingover homemade, saying that canned blendedbetter with the crumbed cake. But, I had alreadypromised to make my cake pops completely fromscratch, so I decided to take my chances withhomemade frosting. Plus, I was curious to see ifit made that big of a difference (it didn’t, as far asI could tell).Cake Pops Three Ways6Really Amazing Women 2014
2. Beat in the powdered sugar, one cup at a time.This recipe does make a large batch of frosting. IThe frosting is very thick and can be a littledid have some leftover after I made the cake pops,tricky to beat. To avoid throwing powderedbut just know, cream cheese frosting is delicioussugar everywhere, start the mixer on a veryas a filling for homemade sandwich cookies.low speed, but increase the mixer speed asthe sugar blends in to avoid overworkingMIXING THE CAKE AND FROSTINGyour mixer’s motor.Just like the debate over frosting, when itcomes to cake pops, there’s a lot of discussionover the best way to mix the cake and frostingtogether. Some people crumb their cake byhand; others use a blender or a food processor.Some bakers mix the cake and frosting witha mixer. Others say you have to mix the cakeand frosting with your hands to get a goodfeel for the right texture. Still other bakersclaim they have success just mixing the cakeand frosting together in a bowl with a woodenspoon; I was not one of them.3. Refrigerate the frosting until it’s ready to be used.I divided my cake into four sections. I wantedto try a few different mixing methods. Plus,it was easier to work with smaller sections ofthe cake rather than trying to crumb the entirecake at once.Cake Pops Three Ways7Really Amazing Women 2014
I tried mixing the cake and frosting threerefrigerated it for 15 minutes before forming thedifferent ways to find out which method workedcake balls. Once the dough had set a little, it wasbest. The fourth section, I frosted and served asmuch easier to work with. The cake balls I madethat night’s dessert. My husband was sniffingfrom the hand-mixture didn’t hold their shape asaround for treats having smelled the cake baking,well as Method Three’s. They sagged a bit duringand I had to distract him lest he eat the M&M’sthe refrigeration process, but before I dippedand other candies I’d stockpiled for decoratingthem in chocolate the next day, I reformed themmy cake pops the next day.into perfect circles, and they stayed that way.METHOD ONE: CRUMBINGCAKE BY HAND AND MIXINGWITH A WOODEN SPOON.They just needed a little extra refrigerator time.METHOD THREE: CRUMBINGAND MIXING IN A FOODPROCESSOR.I don’t recommend this method. While I wasable to crumble the cake into fine crumbs byThis is the method I will always use when I makehand, spoon mixing it with the frosting didn’tcake pops. The cake crumbed perfectly, andwork well. It took a long time to get the mixturethe frosting mixed right in. I could work withto combine, and even then, I felt like I had cakethe dough right away, and it kept a perfect cakelaced with frosting rather than a consistent mix.ball shape during its overnight refrigeration. II used a mashing-and-stirring motion, pressingsuspect using a hand mixer or blender wouldthe cake and frosting against the sides andgive you the same good result.bottom of the bowl with the spoon. Eventually, IDirectionswas able to get a mix I thought would work, but I1. Place one quarter of your cake in the foodwas concerned that I could still see specks of cakein the mixture. I ultimately abandoned this cakeprocessor. I broke the cake quarter in half,pop batch in favor of the other two.so it would easily fit into the bowl. Pulse thefood processor 10-15 times until the cake isMETHOD TWO: CRUMBINGCAKE BY HAND AND MIXINGWITH HANDS.chopped into fine crumbs.This method worked better, but it was messy.The cake and frosting mixed together quicklyto form a thick cookie-batter consistency. And,I agree with the hand-mixing proponents thatthis method gives you the best feel for the rightcake pop texture. This mix was a little sticky, so ICake Pops Three Ways8Really Amazing Women 2014
2. Add the frosting to the crumbs and process3. Form the mix into cake pop-sized balls. Iuntil the cake and frosting are well blended.used a small ice cream scoop, so all my cakeI used about a third of a cup of frosting. Theballs would be roughly the same size.amount of frosting you use is going to varyPlace the cake balls on a parchment-linedbased on the moisture content of your cakebaking sheet, cover with plastic, andand the amount of cake you’ve crumbed.refrigerate until firm. The cake balls shouldYou want enough frosting that the cake holdsbe ready within 2-3 hours. For faster settogether, so you can form the cake pops,up, place the cake balls in the freezer for 30but you don’t want too much frosting, asminutes. I refrigerated mine overnight forthe mix will be too sticky and hard to workdecorating the next day.with. If in doubt, start with a small dollop offrosting and gradually add more until yourcake mixture reaches the right consistency.Remember that old adage: it’s far easier toadd an ingredient to the pot than it is to takeit out after it’s been blended in.Cake Pops Three Ways9Really Amazing Women 2014
Whichever cake-and-frosting mixing method youleaves cake pops looking pretty and professional,decide to your use, remember:a sure way to wow your officemates or the other baby shower invitees.Make sure the cake is completely and finelyDirectionscrumbed. You don’t want any large piecesof cake floating around in your cake pops, or1. Melt your dipping chocolate in a doubleyour pops will be lumpy and unpalatable. boiler, if you’re wise, or in the micro-Less is more when it comes to adding thewave, if you’re brave. I’m brave, so I usedfrosting. You want just enough that your cakethe microwave. Just be sure to set yourpop will hold together and not crumble. Toomicrowave to half power and melt themuch frosting and the cake pop will be stickychocolate in 30 second bursts, stirring afterand hard to work with.each 30 second increment.Fully mix your cake and frosting. You don’tYou don’t want to overheat your chocolate.want to be able to see dry crumbs of cake.Too much heat makes the chocolate thick anddifficult to use for dipping. Your chocolateIf you’re using the freezer to set your cakesquares may still look like they’re holdingballs, don’t let them freeze completely. Youwant them firm but not frozen. Don’t leavethem in the freezer for longer than an hour(30 minutes would be even better). If you accidentally went a little heavy on thefrosting, you can refrigerate the mix for 15-30minutes before you form your cake pops tomake it easier to work with. Or, keep a cleanbowl of water nearby and keep your handsmoistened as you form the cake pops.DECORATING THE CAKE POPI’ll be honest: I’m not the most proficient of cakedecorators. Fondant drives me crazy, and I’mone of those stick-figure Pictionary players, sointricately frosting-piped cartoon characters arebeyond me. But, chocolate dipping and sprinklesI can handle. Another reason to love cake pops?Even the most basic of decorating techniquesCake Pops Three Ways10Really Amazing Women 2014
their shape even though they’ve been meltedenough. After the chocolate has beenmicrowaved for a minute, give it a really goodstir to see if there’s enough heat in the bowl tofully melt the chocolate.After the chocolate is melted, consider stirringin a little shortening to thin the chocolate abit more. It will give the chocolate a betterconsistency for dipping. Never use water tothe center of your cake pop. I dipped onethin chocolate! Like water and oil, water andcake pop at a time and left the other cakechocolate don’t mix.balls in the refrigerator until I was ready toIf you’re going to add color to your chocolate,work with them.do it now. But, don’t use the regular food3. And, now, the moment we’ve all been waitingcoloring you use to color frosting. You’ll needfor .dip your cake ball into the chocolate!to use candy coloring. Regular water-basedLike mixing the cake and frosting, everyfood coloring won’t mix with chocolate. Youbaker seems to have their own method forknow why.coating their cake pop in chocolate. Some dip2. Dip the end of the cake pop stick in chocolate.and twirl the cake pop in the bowl. Some useThis will help the stick stay firmly stuck ina bowl deep enough that they can completelyyour cake pop. Twirl the stick to remove anysubmerge the cake pop in the chocolate.excess chocolate. Then, push the stick intoOthers spoon chocolate over the cake pop.Cake Pops Three Ways11Really Amazing Women 2014
I tried all of these methods at some pointduring my decorating process. They allworked fine. But, be sure to twirl the cakepop after it’s been dipped until all the excesschocolate is removed.After the excess chocolate has dripped off,add your sprinkles. You want to get yoursprinkles in place while the chocolate is stillwet, so they’ll adhere. But, if you’re addinga second layer of chocolate or a chocolatedon’t want your cake pop to have a flat back,drizzle, wait until the first layer of chocolateyou can use a Styrofoam block punchedhas set. I added my sprinkles while holdingwith cake pop stick-sized holes. Then, youthe cake pop over a bowl to catch any thatcan dry your cake pops as they sit upright,didn’t quite stick lest I have little nonpareilsleaving them nice and round. I lined myinadvertently decorating my kitchen counterStyrofoam block with aluminum foil to catchand floor.any excess chocolate drips. That way, I couldkeep my block clean and use it for my next4. Set your dipped and decorated cake pop on abatch of pops.parchment-lined baking sheet to dry. If youCake Pops Three Ways12Really Amazing Women 2014
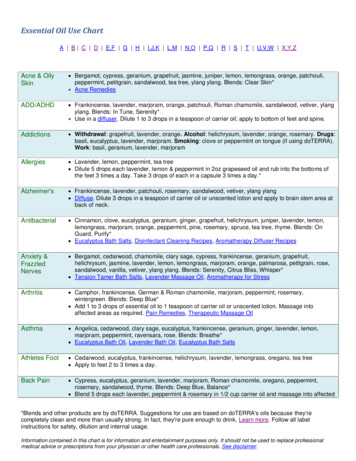
CONTENDER TWO:THE DOUGHNUT HOLE CAKE POPWhen I first heard about cake pops, Ithey were fried, and I made them a bit biggerassumed the inside would be morethan the recipe called for since I wanted acake-like, more like a cupcake onmeatier cake pop.a stick than a brownie. This recipe providedIngredientsa cake pop more like my original assumption.If you’re not a huge fan of frosting and want acake pop with a true cakey center, this is therecipe for you.MAKING THE DOUGHNUT HOLESIf you’ve never made homemade doughnut holesbefore, beware! They’re incredibly addicting.I was only able to save four for my cake popexperiment. The rest mysteriously disappeared.And, if you have a fear of using yeast, cake-styledoughnut holes don’t require it. The only trickis keeping the oil at a consistent temperature, soyou’re doughnut holes cook evenly rather thanburning on the outside while remaining raw inthe middle. Use a thermometer and adjust your 1½ cups flour ½ cup sugar 2 teaspoons baking powder ½ teaspoon salt ¼ teaspoon cinnamon ¼ teaspoon nutmeg ½ cup milk 2 tablespoons oil ½ teaspoon vanilla 1 eggheat source accordingly.DirectionsI used a doughnut hole recipe from Pillsbury1. In a large bowl, stir the dry ingredientsthat promised to be quick and easy, and it was.together (flour, sugar, baking powder, salt,Since I was using the doughnut holes for cakecinnamon and nutmeg).pops, I didn’t roll them in cinnamon sugar afterCake Pops Three Ways13Really Amazing Women 2014
3. Heat 2-3 inches of oil in a large saucepan.You want the oil temperature to be 375 . Oilheats quickly and keeps getting hotter, sokeep a close eye on your thermometer andkeep lowering the heat source to keep the oiltemperature constant.If you don’t have a thermometer, watchyour doughnut holes. If they’re browningtoo quickly, turn the heat down and wait aminute or two before you start the next batch.2. Lightly beat your egg and add it to the dryingredients along with the milk, oil, andvanilla. Stir together until the dry ingredientsare just moistened. Don’t overmix!4. Though you can drop rounded spoonfuls ofdough into the hot oil to cook, I formed mineinto a ball shape that would work best for aCake Pops Three Ways14Really Amazing Women 2014
cake pop. Shaping the dough also made theJust like your cake, the doughnut holesdoughnut a little denser, so it stayed on theneed to cool completely before you canstick better for chocolate dipping later. Theproceed with making your cake pops.dough is sticky, but if you keep your handsLest your doughnut holes disappear likemoistened, you can work with it (kind of likemine, I recommend you hide them wella matzo ball, though I didn’t refrigerate thewhile they cool.batter before frying). The dough will expandUnlike the traditional cake pop, you canwhile cooking, so plan accordingly.skip the refrigeration step. Your cake ball is5. Fry the doughnut holes in small batches; Ialready fully formed and set! So, if you’re indid three at a time. Cook the doughnut holesa bit of a rush to get your cake pops ready, theuntil golden, about 1 – 1½ minutes on eachdoughnut hole cake pop is a quicker option.side. Place the doughnuts on a paper towel-Once the doughnut holes cool, they can belined plate to cool.immediately decorated.DECORATING THE DOUGHNUTHOLE CAKE POPSI used the same method to decorate the doughnutholes as I did the traditional cake pop: dippedin chocolate with a few decorative touches.Since the doughnut holes were a little less densethan the traditional cake pops, they could be alittle unstable on the cake pop stick. For thosedoughnut holes that had an air pocket in theircenter (due to the frying and puffing of thedough), I dipped them in chocolate first, allowedthe chocolate to set, and then, inserted the cakepop stick. That gave me a more stable cake pop.Directions1. I decided to decorate these cake pops withchocolate shavings. To create my shavings, Igrated a Hershey chocolate bar with a cheeseshredder. I refrigerated the shavings forfifteen minutes before decorating the cakepop to keep the chocolate sprinkles fromCake Pops Three Ways15Really Amazing Women 2014
melting together in my hot kitchen before Icould use them.to submerge the doughnut hole in the chocolate. Or, you can spoon your dipping chocolate onto the doughnut hole cake pop ratherthan dipping it.4. Dip the doughnut hole in chocolate and swirl thecake pop to remove the excess chocolate. Sprinkle the chocolate shavings onto the cake pop.Lay the cake pops on a parchment-linedbaking sheet or set them upright in aStyrofoam block until the chocolate ishardened. To hasten this process, you can putyour cake pops in the freezer or refrigerator.Just don’t let them freeze completely!2. Melt your dipping chocolate in a double boiler or microwave just as you would for a traditional cake pop. Remember not to overheatyour chocolate. Thin the chocolate with alittle shortening for smoother chocolate andeasier dipping.3. Dip the end of the cake pop stick in thedipping chocolate and insert the stick into thedoughnut hole. Like before, the chocolateOnce your chocolate sets, you have doughnutwill help keep the doughnut hole on the stick.hole-style cake pops! The doughnut holes wereIf the doughnut hole is a bit too light in theeven more popular in my house after they hadmiddle and loose on the cake pop stick,been dipped in chocolate and cake popped.consider dipping the doughnut hole first,These four survivors from the initial doughnutallowing the chocolate to set, and then in-hole assault didn’t last long. Luckily, I kept oneserting the stick later. For easy dipping andhidden for the final taste test. Speaking of which,excess chocolate removal, use a slotted spoonCake Pops Three Wayswe have one more contender to go 16Really Amazing Women 2014
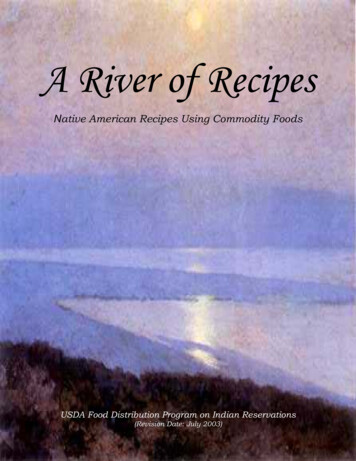
CONTENDER THREE:THE EBELSKIVER CAKE POPAt this point, you may be wonderingdessert recipe from Williams-Sonoma and addedwhat in the world an ebelskiver is. Ia chocolate filling. The resultant cake pop tastedonly heard about them a year or solike an éclair on a stick, so much so that the nextago. They’re a small, round Danish pancake.time I make them, I’ll use a vanilla custard filling.They’re cooked in a special pan with a halfIf you like decadent French treats individuallydozen circular wells. Depending on the recipeused, ebelskivers can either be made sweet, andsized, this is the cake pop for you.served as a dessert, or savory, and served as anIngredientsappetizer or entrée.MAKING THE EBELSKIVERSThough a little more flat and football-like than1 cup flour 1½ teaspoons sugar ½ teaspoon baking powder ¼ teaspoon salt 2 large eggs, separated 1 cup milk 2 tablespoons butter, melted ½ teaspoon vanillaDirectionscircular, I thought the ebelskiver size and shape1. In a large bowl, stir together the dry ingredientswould work well as a cake pop center. I used aCake Pops Three Ways (flour, sugar, baking powder, and salt).17Really Amazing Women 2014
3. Pour the wet ingredients into the dry onesand mix together with a wooden spoon. Thebatter will be a little lumpy.2. In a separate bowl, lightly beat the eggyolks. Then, whisk in the milk, butter,and vanilla. Again, for easy pouring intothe dry ingredients, I used a large liquidmeasuring cup.4. In a clean bowl (sorry, this recipe creates a lotCake Pops Three Ways18Really Amazing Women 2014
Then, increase the mixer speed. Egg whitesare sufficiently beaten when you removethe beaters and the egg whites form a peak.The tip of the peak will droop slightly at thetop. You can also test your egg whites bytilting your bowl. The eggs whites shouldn’tslide around5. Using a rubber spatula, in a slicing motion,fold one-third of the egg whites into the batterof dishes!), beat the egg whites until stiff (notuntil combined.dry) peaks form. This won’t work if you’vegotten any egg yolk into your egg whites. Forbetter results, use a glass bowl and makesure your egg whites are room temperature.I know many recipes call for eggs to be roomtemp, and like many cooks, I totally ignore itand pull my eggs straight out of the fridge.But, this is an instance where setting youreggs out thirty minutes before using themactually makes a difference.6. Fold the remaining egg whites into the mixUse an electric mixer and start beating theuntil no white streaks remain. Don’t stir theegg whites on low speed until they’re foamy.egg whites, or they’ll lose their volume.Cake Pops Three Ways19Really Amazing Women 2014
9. Once the batter starts to bubble in the center(after 2-3 minutes), flip the ebelskiver over, soit can cook on the other side. Using a woodenskewer or chopstick, slide the skewer aroundthe edges of the ebelskiver, gently lift, and flip.10. Cook on the opposite side for another 2-3minutes until the pancakes are a nice goldenbrown and remove them from pan.7. Preheat your ebelskiver pan over mediumlow heat. Don’t pour the batter into a coldpan! Brush the wells with melted butter.Think “cooking a pancake,” which is exactlywhat you’re doing.8. Fill the heated wells about ¾ full of batter.If you’re going to add chocolate or anyCongratulations! You have now madeother filling, do it now before you turn theebelskivers. I’m sure you know the drill byebelskivers.now, but the ebelskivers have to cool completelybefore they can be decorated as cake pops.Luckily, the ebelskivers are small, and they coolquickly, so you’ll soon be indulging in chocolatefilled cake pops.DECORATING THE EBELSKIVERSThough I normally frown on double dipping, Idid want to get two different colors of chocolateon a cake pop. To keep it simple, I used darkchocolate and white chocolate to create a blackand-white cookie-style cake pop.Melt your dipping chocolates as you use themto avoid having one clump on you. Remember,before you can dip your cake pop in the secondchocolate, the first chocolate has to harden. Waituntil this occurs before melting your seconddipping chocolate.Cake Pops Three Ways20Really Amazing Women 2014
Directions1. Just like before, melt your first dippingchocolate. Then, dip the cake pop stick in thechocolate and insert it into the ebelskiver.Dip the ebelskiver in chocolate, twirling it toremove any excess chocolate drips.2. Place the dipped ebelskivers on aparchment lined baking sheet or uprightin your Styrofoam block to dry. I did usemy Styrofoam block, but the ebelskiversare bit more flat and football shaped thandoughnut holes or traditional cake pops,Now you have a striped, albeit double-dipped,so having a flat back on these pops reallycake pop! Of course, this is a time when doublewon’t be that noticeable.dipping is encouraged rather than frowned upon.Though I enjoyed all aspects of the cake popmaking process, I had the most fun decoratingthem. Before I announce the winner the CakePop Challenge (I know, the suspense is killingyou, right?), here are a few more decorating tipsand ideas.3. Once the first chocolate layer hardens, meltyour second dipping chocolate. Dip half ofyour cake pop in the melted chocolate andallow the second layer of the chocolate to set.Cake Pops Three Ways21Really Amazing Women 2014
DECORATINGIDEAS:A FEW EXTRATRICKS & TIPSLike I mentioned before, I’m no steadyhand at cake decorating, but cakepops are incredibly forgiving. Withjust a few simple decorating tricks, you cancreate expert looking cake pops. Here are afew of my favorites: Use a fork to drizzle a second layer ofchocolate swirls or patterns on the cakepop. But, remember to let your first layer ofchocolate harden before adding the second.I just twirled my cake pop and let the whitechocolate drip naturally from the fork tinesonto the dark chocolate layer. I liked theeffect so much, I tried dark chocolate drizzleson my blue-tinted white chocolate. Cake Pops Three Ways22Color white chocolate to give the cake pop aReally Amazing Women 2014
little extra panache. Just remember to usecandy coloring not food coloring. You canalso use candy melts which come in a varietyof colors and allow you to skip the chocolatetinting process. Try pairing your coloredchocolate with similarly colored sugarcrystals or complimenting nonpareils. Experiment with a lot of different candycoatings. I tried mini M&M’s, nuts, coconut,from the end of a chop stick smiley face, andchocolate shavings, and multiple chocolatecoconut hair. Don’t be afraid to try somethinglayers in addition to traditional bakingnew. If it doesn’t work out, you can easily eatsprinkle
recipes from The Barefoot Contessa: Beatty's Chocolate Cake. This cake is incredibly moist, perfect for a cake pop. And, the cup of coffee the recipe calls for gives the cake a really rich taste. The recipe is actually designed for two 8-inch round cakes, so I adjusted it slightly for a 13"x9" pan. Ingredients 1¾ cup flour 2 cups .