Transcription
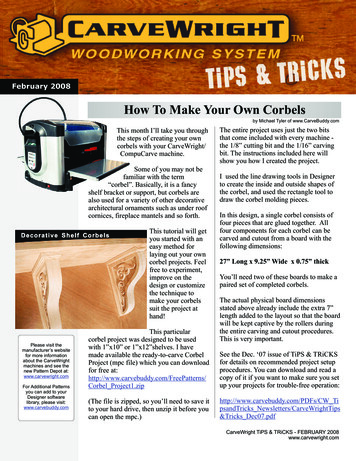
February 2008How To Make Your Own Corbelsby Michael Tyler of www.CarveBuddy.comThis month I’ll take you throughthe steps of creating your owncorbels with your CarveWright/CompuCarve machine.Some of you may not befamiliar with the term“corbel”. Basically, it is a fancyshelf bracket or support, but corbels arealso used for a variety of other decorativearchitectural ornaments such as under roofcornices, fireplace mantels and so forth.Decorative Shelf CorbelsPlease visit themanufacturer’s websitefor more informationabout the CarveWrightmachines and see thenew Pattern Depot at:www.carvewright.comFor Additional Patternsyou can add to yourDesigner softwarelibrary, please visit:www.carvebuddy.comThis tutorial will getyou started with aneasy method forlaying out your owncorbel projects. Feelfree to experiment,improve on thedesign or customizethe technique tomake your corbelssuit the project athand!The entire project uses just the two bitsthat come included with every machine the 1/8” cutting bit and the 1/16” carvingbit. The instructions included here willshow you how I created the project.I used the line drawing tools in Designerto create the inside and outside shapes ofthe corbel, and used the rectangle tool todraw the corbel molding pieces.In this design, a single corbel consists offour pieces that are glued together. Allfour components for each corbel can becarved and cutout from a board with thefollowing dimensions:27” Long x 9.25” Wide x 0.75” thickYou’ll need two of these boards to make apaired set of completed corbels.The actual physical board dimensionsstated above already include the extra 7”length added to the layout so that the boardwill be kept captive by the rollers duringthe entire carving and cutout procedures.This is very important.This particularcorbel project was designed to be usedwith 1”x10” or 1”x12”shelves. I havemade available the ready-to-carve CorbelProject (mpc file) which you can downloadfor free at:http://www.carvebuddy.com/FreePatterns/Corbel Project1.zipSee the Dec. ‘07 issue of TiPS & TRiCKSfor details on recommended project setupprocedures. You can download and read acopy of it if you want to make sure you setup your projects for trouble-free operation:(The file is zipped, so you’ll need to save itto your hard drive, then unzip it before youcan open the mpc.)http://www.carvebuddy.com/PDFs/CW TipsandTricks Newsletters/CarveWrightTips&Tricks Dec07.pdfCarveWright TiPS & TRiCKS - FEBRUARY 2008www.carvewright.com
How To Make Your Own Corbels (cont.)STEP 1Start the Designer software and create a new “virtual”project board with these dimensions: 20” x 9.25” x0.75” thick. or change the dimensions/thicknessaccording to the stock you use (remember -you makeyour “virtual board” 7 inches SHORTER than whatyour actual “real carving board” will be!).STEP 2To create the inside shape, copy the outline profile youjust made and paste it onto the board. Reposition thestraight lines (with “snap” still on) and manipulate thecurved line (turn off “snap”) to fit inside the outershape to create a border of approximately ½” width allaround as shown in Fig. 2.Now, use the “Line Segment Tool” to draw a 7”x9”right angle near the top left-hand side of the board,with a ½” Grid and “Snap to Grid” turned on. Then,while the right angle is still selected, choose the“Spline Tool” to draw a curve profile. Start byconnecting the curve at the lower left point of the rightangle and continue drawing the curve towards the topright, but do not connect the last point of the curve tothe right angle (press the “Esc” key on your computerkeypad to stop drawing the curve about ½”short of theupper right line end as shown in Fig. 1a).fig. 2STEP 3Turn off the grid, select the inside shape and make it aCarve Region set at .25” depth (Fig. 3).fig. 1aCarve Region .25” DepthNow, re-select the “Line Segment Tool” and draw ashort line to connect the curve and right angle endstogether at the upper right-hand corner (Fig. 1b).fig. 1bPage 2fig. 3CarveWright TiPS & TRiCKS - FEBRUARY 2008www.carvewright.com
The CorbelsCare and(cont.)FeedingHow To Make Your Ownof yourDrawthree rectangles with the following dimensions:CarveWright/CompuCarve!STEP 4The filigrees in this design are a couple “stockpatterns” that are included with your Designersoftware. However, you can use whatever patterns youwish. Drag Filagree 01 and Filagree 04 onto the board,remove the feather on each, then rotate and resize thepatterns to fit in a pleasing manner within the carveregion (see Fig. 4). Both patterns have a depth settingof .25” to match the depth of the carve region.Rectangle 1: 8.125” x 2.25”Rectangle 2: 7.5” x 2.00”Rectangle 3: 7.25” x 1.75”Make Rectangle 1 a Carve Region/Depth .25”.Make Rectangle 2 a Carve Region/Depth .125”.Make Rectangle 3 a Carve Region/Depth .00”.Move Rectangle 1 to fit comfortably between thecorbel shapes. Move Rectangle 2 to the horizontalcenter of Rectangle 1, and position it ½”away from theleft edge of Rectangle 1.Move Rectangle 3 to the center of Rectangle 2. Thiscompletes the first molding component.Draw three more rectangles in the remaining blank areaof your board with the following dimensions:fig. 4STEP 5Now select everything, right-click (or ctrl-click on theMac) and choose Mirror/Mirror Horizontally from thecontextual menu.You will now have an exact mirroredcopy of the design (see Fig. 5)Rectangle 4: 9.625” x 2.25”Rectangle 5: 9.375” x 2.00”Rectangle 6: 9.125” x 1.75”Make Rectangle 4 a Carve Region/Depth .25”.Make Rectangle 5 a Carve Region/Depth .125”.Make Rectangle 6 a Carve Region/Depth .00”.Center rectangles 4, 5 and 6 both horizontally andvertically to each other. This completes the secondmolding component.Turn off the Grid Lines, and your board should nowlook like this (see Fig. 6).fig. 5STEP 6To create the molding pieces, you will draw sixrectangles using the “Rectangle Tool”. Go to theLayout Menu, select “View Grid”, set the grid SnapInterval to 0.125” and select “Snap to Grid”. Click“OK”. Select all the original corbel components andmove it to 5/8” from the top of the board (the mirroredversion will move along with it).Page 3fig. 6CarveWright TiPS & TRiCKS - FEBRUARY 2008www.carvewright.com
How To Make Your Own Corbels (cont.)STEP 7Select the outermost outline of each corbel shape andmake a Cut Path. You may need to “Flip Cut” to makesure that each corbel will be cut out on the outside ofthe lines.Now select the outline of Rectangle 1 and Rectangle 4and make a Cut Path for each. You may need to “FlipCut” to make sure that the cutout is performed on theoutside of the lines. This is important! Your board willnow look like this (see Fig. 7).Turn on your machine and proceed with the standardproject setup as follows:You will see “Project Menu” on your LCD display.Press “1” or the green ENTER button then scrollthrough the list (if any) to select your corbel project. Stay Under Rollers - press 1) YES How to place on Length - press 1) Center OnLength Cut Board to Size? - press 2) NO Load Bit:1/8” Cutting - load your cutting bit thenpress the green ENTER button. The machine will gothrough a series of homing steps automatically.fig. 7Step 8Save your project, then upload it to your memory card.NOTE: During upload, you will get a false errormessage, warning you about possible interference withthe aux roller and asking if you want to Manual Jig orAuto-Jig or Ignore. You should click “Ignore” and DONOT select Manual nor Auto-Jig. A minimum 1/2"clearance on the top of the board is the only area youneed clearance on for a cutpath. You do NOT need anycutpath clearance at the bottom or sides of the board atall. The bit cannot hit anything at those edges whenperforming a cutout, so you are perfectly safe. Thisassumes your actual board will have the extra 7" lengthand that you select “center on length” when you do theproject setup at the machine. Here’s what the “falseerror” message looks like. Select Carving Bit - press the green ENTER button.The machine will move the bit holder to the center ofthe machine in preparation for the bit exchange. Load Bit:1/16” Carving - take out the cutting bit,then load your 1/16 carving bit, then press the greenENTER button. The machine will go through a seriesof homing steps automatically. The machine will now proceed with the carvingprocess for the entire board. After it is done carving,you will be prompted to load your 1/8” cutting bit. Take out the 1/16" carving bit, then load your 1/8"cutting bit, then press the green ENTER button. The machine will now proceed to cut out each part, inseveral passes as it moves around the outlines of everycomponent. It leaves little tabs to hold each part in theboard.When the machine is finished, remove yourboard (see Fig. 9a)Now separate the pieces free from the board using autility knife or razor blade. You can sand or Dremel offthe little “tab-nodes” left on the edges of each cutoutpart. Glue the corbel sides together to form the 1.5”thick corbel. When cured, sand everything to a smoothfinish on all sides. Glue the molding components to thecorbel shape to complete the corbel unit.(see Fig. 9b and Fig. 9c)fig. 8Page 4CarveWright TiPS & TRiCKS - FEBRUARY 2008www.carvewright.com
How To Make Your Own Corbels (cont.)IN CONCLUSIONApply your final finish (stain, paint, gold-leaf, etc.) tosuit your personal preference.fig. 9aI think you’ll enjoy this project and I hope you’ll beinspired to create your own custom corbels! Makeyour corbels thicker by cutting out profile blanks and“sandwich” them between the outer carved profiles.You could even make the inside “sandwich” piece(s)slightly recessed to create a grooved line(s) on thecorbel’s front edge. There are numerous designvariations to have fun with (such as making towelracks with a dowel between the corbels)!This particular design was created entirely within theDesigner software with just two patterns alreadyincluded with every machine. No “outside” softwarewas used to create this corbel project.fig. 9bSpecial thanks to Michael Tyler ofwww.CarveBuddy.comfor providingthe content for this issue ofCarveWright TiPS and TRiCKS.fig. 9cPage 5CarveWright TiPS & TRiCKS - FEBRUARY 2008www.carvewright.com
“corbel”. Basically, it is a fancy shelf bracket or support, but corbels are also used for a variety of other decorative architectural ornaments such as under roof cornices, fireplace mantels and so forth. This tutorial will get you started with an easy method for laying out your own corbel projects. Feel free to experiment, improve on the design or customize the technique to make your .File Size: 932KBPage Count: 5

