Transcription
RJ Saltwater Chlorination System - Installation and Operation GuideModels: RJ16 RJ20 RJ30 RJ45 RJ60 RJ PLUS Series Salt SystemsAdvanced SwimmingPool Sanitation1
TABLE OF CONTENTSSAFETY INSTRUCTIONS3INTRODUCTION4GETTING STARTED4SYSTEM OVERVIEW5WATER CHEMISTRY & SALT LEVELS6Preparing the Pool Water6Ideal Salt Level & Pool Size6Adding Salt7Ideal Water Chemistry Levels8OPERATION9How it Works9Initial Start Up9General Operation9Using the Control Module10LED Indicator Lights11MAINTENANCE12Expected Maintenance12Cleaning the Electrolytic Cell12General Maintenance13INSTALLATION14Overview14Installing the Electrolytic Cell and Flow Switch15Installing the Control Module16Wiring16VOLTAGE CONVERSION18INSTALLATION CHECKLIST19HELPFUL HINTS20TROUBLESHOOTING21WARRANTY232
SAFETY INSTRUCTIONSIMPORTANT SAFETY INSTRUCTIONS. Read and follow all instructions. Ensure all owners / operators of thisequipment have access to these instructions. Save all instructions. When installing and using this electricalequipment, basic safety precautions should always be followed, including the following. WARNING: Follow all aspects of local and National Electrical Code(s) when installing the CircuPool RJ Series.Disconnect all electrical power during installation & service. WARNING: To reduce the risk of injury, do not permit children to operate this device. Service should only beattempted by a qualified professional.WARNING: Heavy pool (and/or spa) usage and higher temperatures may require higher chlorine output tomaintain proper free available chlorine residuals. The actual amount of chlorination required by your pool canchange, and varies according to factors not limited to bather load, rain, temperature, dirt, debris, and chemicalbalance.WARNING: Safe operation of the electrolytic Cell requires a minimum water flow rate of 20 gpm. Never operatethe unit when the flow of water is restricted. Always turn unit off when operating any plumbing control valvessuch as for backwashing, water exhaust, or during operation of spa or water features. If operation restricts waterflow to the Cell, a build-up of flammable gases will result in hazardous conditions.WARNING: We strongly recommend against the use of isolation valves. If full pump pressure is applied to anisolated component, it may be prone to rupture. Turn off all pumps before changing valve positions. Preventwater pressure spikes at Electrolytic Cell. Before installation, ensure that materials and equipment used in and around the pool are compatible with theuse of chlorinated water and salt. Avoid high chlorine and high salt levels (above the recommended range); it ispossible that certain materials and pool (and/or spa) equipment may be susceptible to damage. Ensure that the chlorinator operates only when the circulation pump is operating. When installed with a poolequipment timer or control system, wire the Control Module (wall unit) to the load side of the timer clock orcontrol relay. If additional chlorine is required (due to heavy bather loads, for example), use Sodium Hypochlorite to maintainan appropriate chlorine residual in the water. DO NOT add acid or other concentrated chemicals directly to the skimmer. This may damage the Cell. Check the expiration date of any test kits as test results may be inaccurate if used after that date. When replacing the Cell, only use replacement Cells having a label that clearly states that it is the replacementfor this RJ Series model. Proper pool chemistry must be maintained at all times. For outdoor pools, chlorine residuals can be protectedfrom destruction by sunlight by addition of stabilizer (cyanuric acid). The use of dry acid may damage the salt Cell and is not recommended. When using liquid acid, always add acidto water, never water to acid. For proper sanitation, spas must be completely drained periodically. The number of days between COMPLETESPA DRAINAGE is equal to the volume of the spa water in gallons, divided by 10 times the maximum number ofdaily spa users. Refill spa with water and repeat initial startup instructions on pages 6-8 of this manual. Ensure that the RJ Series installation does not constitute a cross connection with the local potable water supply.Consult local plumbing codes. Note: Some local codes may require external grounding source. Check your local ordinances. To reduce the risk of electric shock, the ground wire (green wire) on the power cord must be connected to thegrounding means provided in the electric supply service panel. One bonding lug for US models is provided on the external surface. To reduce the risk of electric shock, connectthe local common bonding grid in the area of the swimming pool, spa, or hot tub to these terminals with aninsulated or bare copper conductor not smaller than 8 AWG US.3
RJ Series Owner's ManualINTRODUCTIONCongratulations on your recent purchase of a CircuPool RJ Series Electronic Chlorine Generator. CircuPool’s highperformance systems offer escape from the routine of manual pool chlorination and sanitization. The RJ Series usesa very low level of salt in the pool water to continuously create free chlorine, killing bacteria and algae in the waterand thereby helping to maintain a sparkling clean pool. Please take a moment to read through the entire manualbefore installing your new unit. Your generator must be installed and operated as specified.GETTING STARTEDREAD ENTIRE MANUAL FIRST - To ensure consistent & reliable operation, the pool and equipment must be used andmaintained as specified. Most issues are easily avoidable with correct maintenance.Before installation or operation, please take the time to read this entire manual, compare package contents with theparts list, and gather tools required. Improper installation may void the warranty and create unnecessary hazards.This manual contains step-by-step instructions to help ensure that your installation meets the recommendedstandards. Spending the time to understand your system and its functions will assure successful, trouble-freeoperation.As with any electrical device, it is very important that the installation and service of this equipment be performed bya qualified person with the skills and experience required to do it safely and correctly. Improper installation orservice can result in severe electrical shock to the installer or user of the equipment or pool. Please choose yourinstaller with great care! Be sure to familiarize yourself with the pool chemistry requirements and maintenanceprocedures.Please visit www. circupool.com/help for more information, tips, and troubleshooting assistance.4
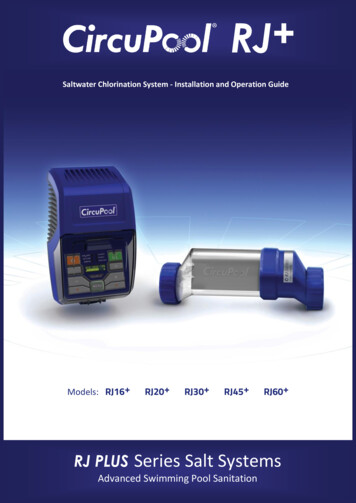
RJ SERIES SYSTEM OVERVIEWThe 3rd Generation RJ-Series system utilizes three main components for operation:Control ModuleElectrolytic CellFlow SwitchControl Module:This component supplies power to the Cell and allows you to customize the system'soperation in order to meet your pool's unique needs.Electrolytic Cell:This component creates chlorine as the water inside passes through and returns to thepool. The Electrolytic Cell ("Cell") contains a bipolar set of titanium plates that use a lowlevel of DC electrical power to generate chlorine from salt in the water.Flow Switch:This component ensures that there is adequate water flow for the Cell to activate.Additional Items Required (Not Included)PVC Cement, PVC Primer, Hacksaw or Pipe Cutters, Screwdrivers, Permanent Marker5
WATER CHEMISTRY & SALT LEVELSPreparing the Pool WaterIt is important that the pool's water chemistry is balanced before the RJ-Series is powered on and used. Inorder for the system to be able to work, there must be a minimum level of salt in the pool water, see “SaltLevels” below. In order to achieve normal pool operation, water chemistry needs to be balanced accordingto the national standards listed under "Ideal Chemistry Levels" on page 6.DO NOT add chemicals or salt directly to the skimmer. This may damage the Cell. If the system hasalready been installed, it should not be turned on before adding salt. Additionally, leave the salt chlorinatoroff any time there is a chance of recently added chemicals going through the salt Cell in a concentratedform.For New Pools / Remodels: wait 30 days or longer if specified by your builder for plaster to cure beforeadding salt.For Biguanide (Non-Chlorine) Pools: ensure any Biguanide-based chemicals have been removed prior tostartup.Ideal Salt Levels & Pool SizeThe ideal salt level for operation is about 3500 ppm (parts per million), and it is suggested to keep thesalinity between 3000-4000 ppm . To achieve this level of salinity, use the chart on page 7, which will helpyou add approximately 30 lbs of salt for every 1000 gallons of water (or 3.6 Kilograms of salt for every 1000Liters). If you are unsure of the number of gallons in your pool, double-check with the following equations.Calculating Gallons (Dimensions in Feet)Rectangular PoolPool Width x Pool Length x Average Depth x 7.5 Pool GallonsRound PoolPool Diameter x Pool Diameter x Average Depth x 5.9 Pool GallonsOval PoolPool Width x Pool Length x Average Depth x 6.7 Pool GallonsExample – 15’ x 30’ Rectangular Pool with 3’ shallow end and 6’ deep end.15’ wide x 30’ long x 4.5’ Average Depth x 7.5 15187 Gallons6
Adding SaltIMPORTANT: Before adding salt at any time, ALWAYS perform an independent water test to measure pre-existing salt levels.If your pool holds this many gallons If the salt level (PPM) in your pool is currently er measuring for any existing salt content in the pool, add salt according to the chart above. The chart allows youto cross-reference your existing salt level and your pool size to estimate the number of pounds of salt required toachieve 3500 ppm. Without the right amount of salt, the result will be reduced efficiency and a low level of chlorineproduction. In addition, operation at low salt levels will reduce the longevity of the Cell.When adding the salt to the pool, it is best to empty the required salt into the shallow end of the pool and run thefilter and pump simultaneously in order to circulate the water and dissolve the salt (the RJ-Series is to remain offduring this time period). Do not throw the salt bag into the water as chemicals and inks on the bag can interfere withwater balance. Salt may take 24 - 48 hours to dissolve in summer, and longer in winter. Finer granules of salt willdissolve faster than compressed pellets.The salt in your pool is constantly recycled and does not normally need to be replenished frequently. The loss of saltthroughout the swimming season should be small, and is due primarily to the addition of extra water to replacewater lost from splashing, backwashing, and draining. Salt is not lost due to evaporation.Use only evaporated, granulated, non-iodized salt (Sodium Chloride). The more pure the salt (at least 99%), thebetter the life and performance of the Electrolytic Cell. Water Softener salt (also known as Water Conditioningpellets) is an economical way to buy large quantities of salt. However, only salt that is at least 99% pure NaCl can beused. Pellets are compressed forms of evaporated salt that may take longer to dissolve. Avoid using salt with anticaking agents (Sodium Ferrocyanide, also known as YPS or Yellow Prussiate of Soda) that could cause discoloration offittings and surface finishes in pool. Do not use Calcium Chloride as a source of salt. Do not use Rock Salt; insolubleimpurities mixed with the rock salt can shorten the life of the unit.TIP: When adding large quantities of salt, independently test existing salt level and add in portions, retesting at each stage.7
Ideal Water Chemistry LevelsIt is important to maintain these chemistry levels in order to ensure that the pool can be enjoyed safely, to minimizethe amount of effort required to sanitize the water, and to prevent corrosion or scaling. The only uniquerequirement for a pool with a chlorine generator is the low level of salt (salinity) to be maintained in the water. Itmay be helpful to provide this manual to any pool professional that you may have performing chemical testing orservice, as requirements may vary from brand to brand.Free Available ChlorineSalinitypHTotal AlkalinityCalcium HardnessStabilizer (Cyanuric Acid)Saturation Index (LSI)Phosphates & NitratesMetalsTDSSwimming Pools1.0 - 3.0 ppm3000 - 4000 ppm7.2 - 7.880 - 120 ppm200 - 400 ppm30 - 50 ppm-0.2 to 0.2 (0 Best)None (0 Best)None 1200Spas3.0 - 5.0 ppm3000-4000 ppm7.2 - 7.880 - 120 ppm150 - 450 ppm30 - 50 ppm-0.2 to 0.2NoneNone 1200CHEMISTRY TIPS:Chlorine Stabilizer (Cyanuric Acid)Stabilizer is needed to maintain proper levels of chlorine; the sun’s UV radiation can destroy unstabilized chlorine in as quickly as2 hours. Stabilizer should not typically be kept above 50 ppm, as excessive amounts can also reduce chlorine effectiveness.Nitrates and PhosphatesThese chemicals are very common and can cause extremely high chlorine demands and can easily deplete your freechlorine levels to zero. Your local pool professional can test for Nitrates and Phosphates, levels should be at zero.Saturation Index (LSI)A calculated number used to predict the calcium carbonate stability of water. If the index is higher than 0.2, it cancause quick and excessive calcium scaling on the salt Cell. If the index is lower than -0.2, it can cause the water to becorrosive and damaging to metals and minerals in the water, such as the titanium inside the Cell.MetalsMetals can cause the loss of chlorine. Also, metals can stain your pool and tint your water. Have your localprofessional test and recommend methods of removal. Be sure to use a phosphate-free metal remover.Chloramines / Combined ChlorineChloramines should not be present in pool water. When organic materials are not fully oxidized by Free Chlorine,Chloramines are formed. This ties up the Free Chlorine in your pool, and does not allow the chlorine in your pool todisinfect. Chloramines also cloud pool water and burn the eyes. Super Chlorinate (shock) to remove Chloramines at theinitial startup of the pool.pH LevelspH produced by the Electrolytic Cell is close to neutral pH. However, other factors usually cause the pH of the poolwater to rise. Therefore the pH in a saltwater pool tends to stabilize at approximately 7.8. This is within nationalstandards. pH levels above 7.8 drastically reduce the effectiveness of the chlorine, and can also contribute toexcessive mineral scaling. If high, have a pool professional test to see if other factors such as high Calcium Hardnessor Total Alkalinity are the cause, and then balance accordingly.Total Dissolved Solids (TDS)Adding salt to pool water will raise the TDS level. While this does not adversely affect the pool water chemistry orclarity, the pool professional testing for TDS must be made aware that salt has been added. The individual performingthe TDS test will then subtract the salinity level to arrive at the correct TDS level.8
OPERATIONHow it worksThink of the RJ-Series as a chlorine generator; set it to create a steady supply of chlorine for the pool, instead ofbuying and adding chlorine by hand.How it works: Using electrolysis, it creates chlorine from the salt molecules (NaCL) in your water in order to sanitizeyour pool. A small electric charge is applied across a set of titanium plates inside the Electrolytic Cell. This producesSodium Hypochlorite (NaOCl). In water, Sodium Hypochlorite dissociates into sodium (NA ) and hypochlorite (OCl-)ions. It is the hypochlorite ions that form with the hydrogen (H ) ions (from the water) to form hypochlorous acid(HOCl), which is the active agent that destroys bacteria and algae, and oxidizes organic matter. This form of chlorineworks quickly in the pipe, leaving only a mild residual in the pool. In addition, the Electrolytic Cell continuously“shocks” the incoming water- burning off any oils, organic matter, or other particles that need to be oxidized. Best ofall, the process continuously recycles the salt: after cleaning the pool, the original molecules reform and the wholeprocess begins again. The salt doesn't get used up!Initial Start UpBefore starting the system for the first time, verify that the pool water is chemically balanced (see page 8) andthat all installation items are completed (see page 19)Apply power to the pool pump switch (or timer controls). This should activate the RJ-Series system, and withinmoments the green LED lights for "Power" and "Generating" should be illuminated. During this time, you may alsosee the "No-Flow" light flash for up to 60 seconds as your pump begins its operation. During this time, the systemwill also check that the Cell is connected, and may display a message on screen if it is not.Once powered on, you’ll want to set its power level (Chlorine Output). To find the optimum Chlorine Output setting,start at a setting of 75% and adjust as needed over the initial start up period. Measure your available chlorine in thepool after two to three days, and adjust the Chlorine Output level accordingly. If the available chlorine is too high,lower the Output level; if the available chlorine is too low, raise the Output level. It will take a few adjustments tofind the ideal setting for your pool. Once set for the pool’s current needs, it should only take minor adjustments ofthe system’s power level and/or pump run times throughout the season.General OperationBy familiarizing yourself with the operation of the RJ-Series, you can achieve the maximum performance for your pool.There are three main factors that you can control which directly impact the resulting free chlorine level in the pool:1) The chosen percentage of Chlorine Output on the Control Module2) Hours of pump run-time each day3) Water chemistry balance- Including the amount of salt in the pool and chemicals that affect chlorine demand, such as chlorinestabilizer, phosphates, nitrates, and more. See "Ideal Chemistry Levels" on page 8 for more importantinformation.After making the initial adjustments to your chosen Chlorine Output level, additional adjustments are typically onlynecessary due to changing seasonal temperatures, or changes in pool use and bather load. Like any pool, ensure that yourpump runs long enough for all the pool water to pass through the filter 1.5x to 2x a day (usually at least 8 hours). This isamount of time is typically more than sufficient for chlorination of the pool, but if the pool has high chlorine demand,running the pool pump longer allows for more chlorination. Measure your water chemistry and chlorine level on a regularbasis.As you use the system throughout the season, make sure that you clean the Cell as frequently as needed (see page12). Once the system detects that the Cell needs to be cleaned, it will display a “Cell Maint.” warning light, and thenwill not be able to create more chlorine until all mineral scaling has been removed from the Cell.9
Using the Control ModuleCONTROL BUTTONS:1) ON/OFF: Use this button to manually activate / deactivate the system on or off.2) Chlorine Output: Use the minus/plus buttons to lower the system's power setting (the rate of chlorineproduction), in order to customize operation for your pool's needs.3) Super CL: Temporarily boosts Chlorine Output to 100% Maximum Power for 24 hours, or until power is removedfrom the system.4) Salinity: Displays the average reading of the most recent salinity levels in the pool water. The average isconstantly being updated by real-time salinity readings.TIP: When first installed, this reading may display the last salinity readings taken at the factory. This averagewill begin to update with your pool's operation over the first 24 hours.TIP: As mineral scaling builds up in the Cell after regular use, the system may temporarily display an artificiallylow salinity level. After fully cleaning your Cell, it will begin to detect salinity normally again.5) Winter Mode: Reduces the chosen Chlorine Output setting by half, for periods of low chlorine demand duringcool weather.6) Arrows: The left/right arrows cycle options for Pool Temperature, Instant Salinity, and Cell Version in the Menu.7) Menu: Press sequentially to cycle through the following information:1. Pool Temperature (xx degrees Fahrenheit or Celsius)2. Cell Voltage (often 21.0 to 27.0 volts when chlorine is being generated, otherwise 16-31V)3. Cell Current (often 2.50 to 7.80 amps when chlorine is being generated, otherwise 0 amps during normalrest cycles.)4. Real-Time Salinity reading ( xxxx PPM or x.x grams/Liter.)5. System ID6. Software revision level7. Cell Version.NOTE: You may see a negative sign in front of some diagnostic numbers during normal operation. This isnormal and indicates the system is on one of its two Reverse Polarity cycles.10
Controls (continued)LED INDICATOR LIGHTS:TIP: All LED indicators get reset when system is powered off. After restoring power, the system will run normally for1-5 minutes while running diagnostics before displaying any warning lights. Be sure to check system after this point,especially if you were seeing any warning lights prior to turning the system off. Power: Located on the Power Button, this LED indicates that the Control Module is receiving input power whenilluminated.SAFETY TIP: Using the Power Button to turn the system off DOES NOT remove power from the controlbox. Always disconnect power at the circuit breaker prior to attempting any service procedure. Generate: This LED is illuminated intermittently during normal operation, and indicates that the system iscurrently generating chlorine. IMPORTANT: this light will be off during normal rest periods of the system's dutycycle (see “Duty Cycle” below). When flashing, the pool water is either too hot or too cold for chlorine generation. Super CL: Located on the Super CL Button, this LED is illuminated when the Super CL mode has been activated. Winter Mode: Located on the Winter Mode Button (snow flake icon), this LED is illuminated when the wintermode has been activated. Salinity: Located on the Salinity button, this LED is illuminated when the button has been pressed to display thesalt level reading. Remote: This LED indicates that the unit is controlled by a remote control system. No Flow: This LED is illuminated when the Flow Switch has detected no flow. This causes the Cell to stopgenerating chlorine. A flashing LED indicates that the flow is restored, but there will be up to a 60 second delaybefore generation is reestablished. Cell Maint.: This LED is illuminated when Cell efficiency is greatly reduced and the Cell has stopped generating.--Important: This will eventually happen with normal operation and indicates the Cell must be cleaned (seepage 12). Read and follow all cleaning instructions closely. This light takes priority over any salinity readingsor indicator lights, as salinity readings may temporarily be displayed as artificially low during such conditions.If illuminated after thorough cleanings and after verifying system parameters, Cell replacement may benecessary. This light may also turn on due to improper salinity, insufficient water in cell, or having the wrongcell version set in the Menu. Lo Salt: When this LED is illuminated, the salt level is near to its minimum threshold, and the Cell has shut down.The salt level must be raised before operation is restored. See also "Cell Maint." above. See page 4 for informationabout adding salt. Hi Salt: When this LED is illuminated, the salt level is too high, and the Cell has shut down. The pool water must bediluted with fresh water before operation is restored. See also "Cell Maint." above.Chlorine Generation Duty CycleAt times you will see the “Generate” LED light turned off during normal operation – this simply indicates the systemis in the resting portion of its duty cycle. No action is required on your part. The RJ Series uses an algorithm thatdetermines when it is actively generating chlorine. The lower the chosen chlorine output power level, the lessfrequently the “Generate” LED will be lit, and vice versa. This feature helps maximize the lifespan of your Cell.11
MAINTENANCE.Expected MaintenanceMonitor your pool’s salinity level as frequently as you check your other water chemistry levels.After the system has run for a time, your Cell will eventually need to be cleaned due to natural mineral scaling. The systemwill notify you of this by turning on the “Cell Maint.” light. When illuminated, follow the cleaning instructions below.IMPORTANT: The frequency of cleaning depends on your water chemistry and the Saturation Index of the water. Formost people, cleaning is only necessary a handful of times per season. More rapid mineral build up is sure sign of achronically high Saturation Index; it is possible for imbalanced chemistry to cause scaling to occur quite rapidly. Consulta pool professional for additional help.Cleaning the Electrolytic CellOnce substantial deposits have built up on the titanium plates in the Cell, the “Cell Maint” LED will illuminate, and themineral scaling must be removed. The Cell may require cleaning even if debris or build-up is not immediately visibleto the eye. If the “Cell Maint” LED is on, it typically means the Cell must be cleaned.CAUTION: When cleaning the Cell always wear adequate protection, such as rubber gloves and eye protection.Always add acid to water, do not add water to acid. Always work in a well-ventilated area. Splashing or spillingacid can cause severe personal injury and/or property damage.WARNING: Do not insert anything or use metal or other hard objects to clean the cell, this will void the warranty.IMPORTANT: If mineral build-up is severe, more than one cleaning may be necessary to dissolve remaining solids.Inspect Cell plates closely with a bright light after cleaning. If you can see any remaining scaling, debris, or physicalblockages through Cell, repeat the cleaning process as needed. If “Cell Maint.” comes back on soon after cleaning(check a few minutes after restoring power): 1) verify salinity is in range; 2) ensure Cell is completely full of waterduring operation; 3) verify system’s cell version setting; and then 4) clean Cell again.Before removing the Cell for cleaning or replacement:1)2)3)4)Turn off all power to all pool equipment, close supply line valves if applicable.Unplug the Cell cable connecting the Cell to the Control Module.Disconnect the Cell by unscrewing the Threaded Collars around the unions where the Cell attaches to the plumbing.Remove entire Cell from between the unions. DO NOT pull or hold the Cell by its cable.To clean the Cell of mineral buildup:1) Attach Cleaning Cap or Cleaning Stand (sold separately, available at www.circupool.com) and orient the Cellvertically. Place on the ground and stabilize so as to remain upright and prevent spilling.2) In a separate bucket, mix one part muriatic acid into four parts water. Pour this weak acid solution directly intoCell. Ensure that the cleaning solution COMPLETELY covers the components the inside of the Cell.3) Wait for foaming to stop. Allow solution to soak for no more than fifteen minutes.4) Properly dispose of acid solution, and use a hose to generously flush any remaining debris out of the Cell.5) Look inside the cell to check that no debris or scaling remains. Repeat steps 2-4 if necessary.6) Reinstall Cell into PVC return line.Note: if you don’t currently have a Cleaning Cap or Cleaning Stand, you can completely immerse the cell body in afive-gallon bucket. For instructions, see guides listed under www.circupool.com/help12
General MaintenanceWinterizingVery little chlorine is necessary at low temperatures. The RJ-Series will not produce chlorine at very coldtemperatures, especially below 65 F. This feature extends the lifespan of the Cell. Additionally, winter Bypass Cellsare available, which allow you to continue to run water through the plumbing without the Electrolytic Cell in place.(sold separately, available at www.circupool.com)If you “close” your pool for the winter, you can continue to follow all standard procedures for your local area.The Electrolytic Cell will be damaged by freezing water just as your pool plumbing would. In areas which experiencesevere or extended periods of freezing temperatures, be sure to drain all water from the pump, filter, supply andreturn lines before any freezing conditions occur. The Control Module is capable of withstanding any winter weatherand does not need to be removed.Spring Start-upWhen opening the pool after a period of inactivity, do not power on and use the chlorine generator until the pool'swater chemistry has been balanced and brought to ideal levels. Salt must be added if water has been drained overthe winter.Replacing the CellWhen the titanium blades inside the Electrolytic Cell have reached the end of their lifespan, replacements are readilyavailable so that the whole system does not have to be replaced. Replacements are easily switched out. To ensurequality and value, only genuine CircuPool replacement parts may be used.13
INSTALLATIONIMPORTANT: If you haven’t already done so, it is necessary to balance the pool's water chemistry before the RJ-Series ispowered on and used. See pages 6 - 8 for more informa
pool. The Electrolytic Cell ("Cell") contains a bipolar set of titanium plates that use a low level of DC electrical power to generate chlorine from salt in the water. Flow Switch: This component ensures that there is adequate water flow for the Cell to activate. Additional Items Required (Not Included) Control Module Electrolytic Cell Flow Switch

