Transcription
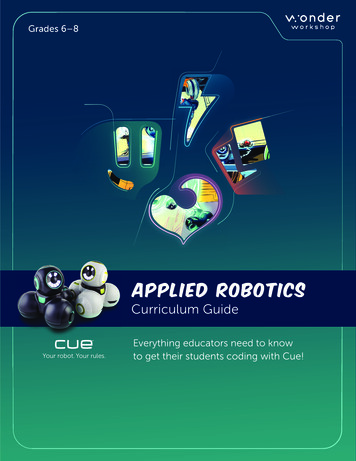
Grades 6–8Applied RoboticsCurriculum GuideYour robot. Your rules.Everything educators need to knowto get their students coding with Cue!
Applied Robotics Curriculum GuideUnit 1: Creative WritingUnit 2: Game DesignUnit 3: InnovationGrades 6–8
Credits & AcknowledgementsProducer: Charlotte Cheng, June LinEditors: Charlotte Cheng, April CraneCurriculum Authors: Fady Andraws, Charlotte Cheng, Matt Hesby, Mina ShenoudaLesson Authors: Fady Andraws, Matt Hesby, Mina ShenoudaIllustration: Tim Reardon, Dag HaileDesign: Chris Cast, Desiree Jue, Katlin LiEducation Team at Wonder Workshop: Mike Lorion, Arnab Basu, Charlotte Cheng, April Crane,Naomi Harm, Katrina Keene, Jeff Mao, Bryan Miller, Dylan Portelance, Hetav Sanghavi, DarriStephens, Timothy Tomaso, Amy WilsonWonder Workshop, Inc.1500 Fashion Island Blvd., #200San Mateo, CA 94404, omCopyright @ 2018 Wonder Workshop, Inc.All Rights Reserved. Wonder Workshop, Inc. reserves the right to amend or improve theproduct design, application software, and/or user guide without any restriction or obligationto notify users.JAVASCRIPT is a registered trademark of Oracle and/or its affiliates. Other names may betrademarks of their respective owners. Wonder Workshop, Inc. is not associated with Oracleand Oracle does not sponsor or endorse Wonder Workshop, Inc., its products or services.Designed in California. Made in China. Imported and distributed by Wonder Workshop, Inc.
Welcome to the world of coding and robotics with Wonder Workshop!We’re excited that you’ve chosen our robot, Cue, for your classroom. When used with ourapp, Cue can bring coding and STEAM to life in a collaborative, interactive, and intuitive way!In this guide, you will learn about the Applied Robotics Curriculum for Cue, includinghow to use our robots and curriculum content, implementation approaches, project-basedassessment strategies, and cross-curricular extensions.1
Teaching Coding with RoboticsWhy Coding?Learning to code helps students develop essential 21st-century skills!Through coding, students learn to see the world through the lens of computationalthinking. Computational thinking enables students to decompose problems, recognizepatterns, and understand abstract concepts. Students can apply these skills to theireveryday lives.Coding is also a new type of literacy that prepares students for the careers of tomorrow.Whether it’s a career in graphic arts or financial consulting, more and more occupationsrequire employees to have at least a fundamental understanding of reading and writingcode. Coding also prepares students for success in high-demand careers in STEAM(Science, Technology, Engineering, Art, and Mathematics).2
Why Robotics?Robots are an integral part of students’ everyday lives. From a robo-vacuum that doeschores to the vending machine where they buy snacks, robots are everywhere around them.A robot is a machine that can gather information about its environment and use thatinformation and any pre-programmed instructions to complete tasks. Robots are controlledby code to perform these instructions. These could be very simple and specific, likecompleting a set of movements that would cut a piece of wood to a certain length, orextremely complex, like teaching the robot how to respond in new situations.Robotics brings coding and STEAM to life. It provides great opportunities for students todevelop and apply their coding skills through hands-on experiences. Using our robot, Cue,provides students with instant feedback and engages their spatial awareness. With complexsensors, sounds, movements, and even the ability to program in JavaScript, Cue helpsstudents see how they can solve problems and express ideas through the power of code!Meet Cue the RobotCue is the newest member of Wonder Workshop’s robot family. Like Dash and Dot, Cue is arobot that comes alive with animations, sounds, and lights to engage students’ creativity.Cue is a level up from Dash and Dot in both robotic and programming capabilities. It comesequipped with more advanced sensors, motors, and processing power. Furthermore,students can program Cue to perform multiple commands at once and even program Cueusing JavaScript!3
Here are a few more similarities and differences between Cue, Dash, and Dot:vRecommended Age Range11 6 6 CustomizableUnique for DashUnique for DotVoice Recording & Playback Detects Voice Direction Robot Control Drives, Turns, & Moves Head Detects Objects (Front & Behind) Volume Control Light Brightness Control Accelerometer Several HoursSeveral HoursSeveral HoursWonder AppWonder App Go, Path, XyloGoRobot CapabilitiesPersonalityGyroscopePlay Time (battery fully charged) Coding/User ExperiencesFast Sensor Data ResponseState Machine Programming Wonder (in the Cue App)Parallel Programming(performs more than one action at a time) Reactive Behaviors Block-Based Coding JavaScript Coding Pre-reader AppsAccessoriesSketch Kit LauncherXyloBuilding Brick ConnectorsCreativity Pack 4
The Cue AppThe Cue app is full of voice and choice! Students can choose to code with either Block &JavaScript or Wonder.The Code with Block & JavaScript section is where students can transition back and forthfrom block-based programming—similar to what’s used in the Blockly app for Dash andDot—to text-based programming using JavaScript. Students get to decide when to try moreadvanced robot capabilities with text-based programming.Similar to the Wonder app for Dash, the Code with Wonder section provides arevolutionary, flow-based programming language where students can arrange their codeinto patterns that are similar to flowcharts or de cision trees. With this type of programming,students can create state machines like what robotics engineers use in their work. Statemachines are a series of robot states and conditions that help the robot process informationand make decisions.There are also four different avatar personalities for students to select in the app. Eachpersonality has unique sounds and animations that can infuse students’ programs withhumor and inspire their storytelling. Students can also make their own personalizedrecordings with the robot, turning the app into a true tool of expression.5
Setting Up Your ClassroomRobots, Apps, and TabletsFor our Applied Robotics Curriculum, we recommend assigning two students per robot.In pairs, students can share their ideas, take turns, and work together to complete activitiesand projects with Cue.Before introducing Cue to the classroom, be sure to:Download the Cue app onto each tablet or device.Connect each robot to the Cue app and give each robot a name in the app.Use masking tape and/or a marker to label the robots with their names.Fully charge each robot.Fully charge and label each tablet or compatible device (e.g., Tablet #1, Tablet #2).Set up student accounts for each group that they can use to log into the Cue app.Create floor space for each group’s robot and materials. For our activities and projects,we recommend providing at least a 4 x 4 sq. ft. space for each robot.To help student groups keep track of their work, make sure each group uses their assignedusername and password to log in to the Cue app.You can find setup, care, and maintenance tutorials for our robots elopment.6
Additional MaterialsSome of our activities and projects require students to use additional materials.To complete the challenges, we recommend that you have the following materials availablein the classroom: Design Process Notebooks (1 per student) Sketch Kit marker attachments (1 per group) Sketch Kit dry erase markers (1 set per group) Wonder Whiteboard Mat (1 per 2–3 groups) painter’s or masking tape (1 roll per group) cardboard, construction paper, and/or other recycled materials to create props and setsFor additional robots, accessories, Whiteboard Mats, and Notebooks, you can shop at ouronline store: https://store.makewonder.com.Making It WorkWe recognize that classrooms have different limitations and encourage you to be creativewith the resources you have!If you are missing some of the materials listed, provide alternative resources. For example,instead of using the Sketch Kit, students can create their own drawing accessory usingLEGO bricks and our Building Block Connectors. As an alternative to using the WonderWhiteboard Mat for their robots’ drawings, students can use butcher paper.7
Curriculum Design PhilosophiesOlder and more advanced students are ready to be more independent with their learning.They look for more agency in their activities. They also value exploring concepts that aretied to real-world applications.That is why the Applied Robotics Curriculum is built upon the foundations of project-basedlearning and design thinking. These two philosophies help students take control of theirown learning while collaboratively applying concepts to projects and problems that theycare about.Project-Based LearningProject-based learning is a teaching philosophy in which students work on projects thatmatter to them. While defined around an educational purpose, students still have choice inthe content of their project. They are invested in their project’s results and can apply whatthey’ve learned to something that is exciting and engaging to them.The Design Thinking ProcessThe Design Thinking Process is a problem-solving and design method that many industriesuse to develop their ideas. From authors to architects and engineers to game designers,industry professionals understand that iteration and revision is crucial to creating acompelling product. The Design Thinking Process helps people design, develop, and iterateon their ideas in an efficient and effective way.First, designers must understand the audience they are serving. Then, they define the focusof their project by selecting the specific problem they’re trying to solve or message theywant to communicate to their audience. Next, designers ideate by brainstorming manysolutions or ideas with that defined focus in mind. Finally, they plan and build a prototypebased on one of their ideas and test it with their audience. Designers then repeat these stepsagain and again to refine their idea until it is ready to be shared with the world.By having students experience the Design Thinking Process as they work on projects withCue, they gain real-world problem-solving and design skills that can be used in any industryor profession they choose. Students also learn the value of developing and refining an ideathat they’re invested in.8
1. UNDERSTANDWho is your audience? Spend time interviewingand researching your audience to understandtheir needs and interests.6. TEST2. DEFINETest your prototype.Define the problem you want to solveor the message you want to share.Get feedback from usersto improve your design.What have others done to try to solvethat problem or share a similar message?THE DESIGNTHINKING PROCESS5. BUILD3. IDEATEBuild a prototype of your designthat represents your ideas.Brainstorm solutions and ideas.Think outside the box!4. PLANSelect a few ideas and develop designs.Decide what materials you’ll need.9
Applied Robotics Curriculum for CueIn our Applied Robotics Curriculum for Cue, we outline a recommended action plan forimplementing robotics and coding through the power of design thinking and project-basedlearning.This plan offers a variety of teaching tools that include lesson plans, in-app content,student-facing notebooks, a solution guide, and authentic assessments.This curriculum is designed for students who have had some exposure to block-basedcoding languages, like those found in Scratch or Blockly. These students are ready toexplore coding concepts and robot capabilities in more depth.Our Applied Robotics Curriculum is organized into units. Each unit introduces newrobot capabilities that are tied to fundamental coding concepts. Students explore thesecapabilities in depth, using different programming paradigms. They then apply thesecapabilities to their long-term project for that unit.The themes of the Applied Robotics Curriculum are as follows: Unit 1: Creative Writing,Unit 2: Game Design, and Unit 3, Innovation. The curriculum also covers the followingrobot capabilities and coding concepts:Our Scope and SequenceOur Scope & Sequence progresses students through these fundamental coding concepts:Unit 1Unit 2Unit 3Creative WritingGame DesignInnovation6th Grade7th Grade8th GradeDesign Thinking Process Block-Based Programming State-Machine Based Programming JavaScript Programming Computing Systems ThemeRecommended Grade LevelData & AnalysisSequences Events & Sensors Loops Functions Variables Conditionals ArraysBooleans 10
The curriculum also covers the following cross-curricular concepts:Unit 1Unit 2Unit 3Creative WritingGame DesignInnovation6th Grade7th Grade8th GradeReading Writing Speaking & Listening Ratios & Proportions Algebra Statistics & Probability ThemeRecommended Grade LevelLanguage ArtsMathGeometryLesson PlansEach unit is paired with free lessons that are available online liedroboticsThese lesson plans include the following elements: Warm Up: Connect to students’ prior coding and robotics knowledge with introductoryexercises and discussion questions. Direct Instruction: Introduce new coding and robotics concepts through modeling anddemonstrations. Guided Practice: Guide students through a group activity involving in-app content and/or unplugged exercises. Independent Practice: Have students complete in-app challenges and work with theirDesign Process Notebooks to practice coding concepts and apply them to their longterm project. Wrap Up: Close the lesson with student presentations and/or wrap-up discussions.These lessons incorporate connections to Code.org’s CS Discoveries course and aredesigned to meet Computer Science Teacher Association (CSTA) and International Societyfor Technology in Education (ISTE) standards. More information about these standardcorrelations can be found within each lesson plan.We recognize that each classroom’s schedules and needs differ. Thus, we recommend thatyou view these lesson plans as a resource from which you can pick and choose the contentthat works best for your students.11
Design Process NotebookThe Design Process Notebook guides students through activities as they learn about Cue’srobotic and coding capabilities. They then apply what they’ve learned to create a long-termproject of their choice using the Design Thinking Process.Activity MenusAfter students are introduced to new coding concepts and robot capabilities throughour in-app challenges, they choose one of four different open-ended challenges froman Activity Menu. The activities in each of these menus are focused on a specific codingconcept and robot capability.For example, after students learn how to program Cue to move, show lights, and playsounds, they select a challenge from Activity Menu: Move and Show in their DesignProcess Notebook.ACTIVITY MENU:Activity Nameand DescriptionMOVE AND SHOWDifficulty Meter1. Secret MessageUse custom sounds to record a secret message withyour robot. Then have your robot deliver the messageto someone across the room.Optional BonusExtension ActivityBonus: Have your robot change colors to showwhen the message has been delivered.2. ChoreographyProgram your robot to teach a dance. Use lights,sounds, and movements to give directions anddemonstrate each dance step.Bonus: Research a dance style (for example, salsa or hip hop)and have your robot imitate moves from that dance style.112
Each Activity Menu is followed by graph pages with prompts to help students plan out, test,record, and reflect on the programs they develop to complete each activity.TEST & RECORDed?t happened? What workrecord your results. WhaRun your program andyour program?oveimpryoudcoulWhat didn’t work? HowVITY DIDHICH ACTIW/DATEYOU PICK?/geSecret MessahyChoreograpSketch It!REFLECTWhat did you learn today? What suyour programrprised you?(s)? Get feeHow coulddback fromyou improvothers anderecord theirsuggestions.Maze BotILDPLAN & BUds,ds of sounve? What kinmoyour robot? How willur robot doyou use?llWhat will yowisonor animatilights, and/436For each activity in the Activity Menu, you will find hints and suggested solutions in thisguide (pages 30–70). These can help you support and coach students as they work onthe activities.13
Project PathwaysAfter getting more comfortable with new coding concepts and robot capabilities, studentsapply them to one of three Project Pathways, which guide students through the developmentof a long-term project with the robot. Each of the Project Pathways is broken down into aseries of project phases.Phases 1 and 2 of Project Pathways, for example, involve selecting a project path and thenexploring how to use the robot’s movements, lights, and sounds as part of their project.P R O JE CTS:PATHWAYATHP IC K A P lop a creative writingdeveginProcess tothways to ben Thinkinge project pae the Desigone of thesYou will usrobot. Pickuryothwiproject.the journeypicTeach a Toideorial, or guss.mentary, tutto your claate a docuch a topicYou will creteallwitbour roin which yoic VideoPhase 1Phase 1? Makebot to teachu wantlike your roout. Do yowould youssionate abpaWhat topicetry?u’runyos thatal? A copicimtoanofoftelisaa typhers aboutto teach ot?social issueA hobby? AProduce aMake a MusYou will make a musicvideo thatwill write anstars yoorcommunica iginal song for your mu ur robot! Youtes a messasic video thge or ideaatthat you care about.What is themessage that yosong? Makea list of topic u want to showcasein yourWill it be abs that yourout a curresong couldnt issue, aDoes it encorelationship, be about.urage positor a feeling?ive change?IN THE AVATARSBRAINSTORM ’SESSION,A NARRATIVECHOICEIS MADE.ShowGREAT IDEA,PEP! LOVETHAT ONE.you’reshow thatng actor in ab or televisiois the leadintweboarobeurYocould. This showproducingy.plaavie, orseries, a moPhase 1es, settings,P R OMalist of themJEkeCaTin spaceout?take placeow be abshowurPshyoAurllyoW ATHll theWhat wiow. DoesY Sur: e? Whatshwifor your shan adventorow?ryesteand topicsd of thIs it a myener?thatebyrwor undebot) learncter (your romain charaMOVE AN7 DSHOWTHANKS,EVERYONE!Teach a To8 picWhat aspectyour robo s of your topic coult? How cod be demonstrateduld the roand sounbot’s movbyds help teemach othersabout your ents, lights,topic?MakeWOOHOO!NICE.a MusicVideoHowwcould ill your robyillustr ou use its ot performalithese te the me ghts, sou your musicssnfeatures as age in you ds, and m video? Hoovrwinspiration song? Yo ements tou willwhenlateryou wuserite youPhaser song.2Plananfor yo d then prouMake r robot. E gram at leach mast thsureyrethe poerform ou use so ve should e differenundsanceSelect atand li include a t dance m!least thretghtse ideas orThen progto ad least fou ovesfactsrard mofacts usin m your robot to de related to your to WITH PEP’Sre piz steps.piAS THg movemzazzEIR ST FAVORITEent, lights, monstrate these id EXPEc.tocreate cuORY, TH MISSIONRIeas/ MEN W E AVATARanstom sounITH COSds to help d sounds. You coul PROTODHER’S BEHAT VId UCoON ORS FODIR NG EACHexplain yo.THEur ideas or alsTIfacts.AFTERPhase 2Producea ShowWhat is the personality of theshow? Homain charwacter in yousing mov will your robot pourrtrement, lights, and so ay that characterunds?BUS FU YOU SAVETHESCREAM LL OFIES,PROGRAM YO WE’LLSMILU TOEKNOW SO THEY’LLTHEY’RE SAFE.YEAH!WHAT THAT’SI SAID!SCREAMSCARED IES? YOUSTUDEN – BUT AW MEANESOMTS.E–Phase 2Write at least three linin your shes of dialoow. Recogue for thrde main chprogramyour robo the dialogue usin1gar4t to play thcustom so acterthe charace recordinunds. Thenter’s emotgsions withlights and while expressingmovement.YUP, THEY DOLOVETHE NOD!ADD AHEAD HEROICNOEFFECT D FOR.1314
Each phase in the Project Pathways encourages students to use the Design ThinkingProcess to ideate and iterate on their project. Each phase also includes graph pages withprompts to help students plan out, test, record, and reflect on the phases of their project.DATEU PICK?/YOOJECT DIDWHICH PR/DECIDEpicTeach a ToShowProduce aReview yourlist of ideasand chooseillustrate ththe best one idea in moe. Describere detail heGive specifiand/orre. Why didc reasons inyou pick thyour explais idea?nation.sic VideoMake a Mure about?IDEATEdo you caout? Whatoject be abx!will your prtside the boWhat topicouinkThas here.List your ide9REFLECTRESEARCHWhatdid yResearchou lesurpriyour topiarn?sing?c by explDid ythat topic.oring bookHowou finWrite dowcoulds,videos, ann your obanythyou in d 10d/orservationswebsitesing pcorpo.aboutrate th articularly inteese idrestineas ing orto your project?121115
Notebook Tips & TricksHere are several tips and tricks that you can share with your students as they work in theirDesign Process Notebooks:Determine team roles: Swap roles with your teammates for each challenge. Team rolesinclude lead programmer, robot wrangler, and documentarian.Plan your path: Use the graph pages in your Notebook to draw out the path ormovements you want your robot to make. Use those drawings to help you plan out theprogram you will create in the Cue app. You can also test possible solutions by getting upand walking the path or imitating the movements you want Cue to make.Mark your key spots: Use masking or painter’s tape to mark your robot’s starting spot andthe location of any obstacles/objects that are part of your activity, challenge, or project(in case they move).Go back to start: Always put your robot back at the starting spot before playing aprogram again.Going backwards: If you want Cue to move backwards, use negative numbers whenprogramming Cue’s movements.Think in centimeters: Your robot moves in centimeters. Use the ruler on the back of yourNotebook to measure out distances. You can also refer to the References & Resourcessection to findouthowtoconvertinchestocentimeters.Check off the steps: Use the blank paper in your notebook to list of each step you wantthe robot do as part of your program. You can then check off each item on the list onceyour robot completes that task.Help your robots hear you: If the classroom is noisy, use the when clap heard event insteadof the when voice heard event. You can also ask the teacher for permission to try out yourprogram with Cue outside or in the hallway.Up the challenge: When you’ve finished an activity from the Activity Menu, challengeyourself by adding more to your program or trying out another activity.16
Programming ParadigmsThe Cue app allows students to program Cue using two different paradigms:Code with Block & JavaScriptIn the Code with Block & JavaScript section, students begin with block-basedprogramming, similar to what is used in the Blockly app for Dash and Dot or Code.org’sCS Fundamentals course. With these programs, the Cue robot executes commands startingfrom the top and then moving down.With the touch of a button, students can then toggle to translate their program intoJavaScript. JavaScript programs are also executed by starting from the top and thenmoving down. They enable students to unlock additional capabilities for the robot, suchas inputting specific RGB colors for the robot’s lights or creating more complex functionswith parameters.Blocks to Text Toggle17
Whether they use blocks or JavaScript, students can access a menu of different commands.BLOCK & JAVASCRIPT MENUActionsVariablesThis menu lets you programthe robot to:This menu lets you programthe robot to: Make variables Set or change the value ofvariablesMoveTilt or turn its headChange its light colorsChange its face patternsPlay soundsFunctionsEventsThis menu lets you programthe robot to:This menu lets you programthe robot to: Make functions Call functions MathRespond to obstaclesRespond to button pressesRespond to soundsRespond to being picked upControlThis menu lets you programthe robot to: Wait Perform loops Check for conditionsThis menu lets you programthe robot to: Calculate values Choose random valuesAccessoriesThis menu lets you programthe robot to: Use different accessoriesThis menu can greatly help students when they begin programming in JavaScript. Studentscan use the menu to add a snippet of JavaScript code to their program and then adjust theparameters without worrying about syntax. Syntax issues, such as typos or not having thecorrect number of parentheses, are one of biggest stumbling blocks for students when theybegin programming using text-based languages.18
Code with WonderThe Code with Wonder section provides a different programming paradigm for studentsto explore in the Cue app. Similar to the Wonder app for Dash and Dot, Wonder provides arevolutionary, flow-based programming language where students can arrange their codeinto patterns that are similar to flowcharts or decision trees.Students first begin by creating groups. Each group can contain multiple actions that therobot can perform at once. For example, in the program above, when the robot goes to thefirst group, it moves forward, changes colors, and plays a sound—all at the same time! Thistype of programming is known as parallel computing, since the robot can execute multiplecommands at once.Students can connect the groups they create by using transitions, or events, for the robot.These events can include whether the robot’s button is pushed or whether it senses anobstacle. When the program starts, the robot moves from one group of actions to anotherbased on whether or not these event conditions are met. In the program above, if the19
robot’s button is pressed, its lights will change to orange. If the robot detects an obstacle, itwill move forward. This method of programming is a great way to teach conditionals, as thedecision tree illustrates how conditions help the robot make decisions on what to do next!Choosing ParadigmsFor many occupations, it is essential for people to be able to assess a problem or challengeand then select a strategy that will best help them meet their objectives.For example, engineers who build apps must make similar decisions. There are a widevariety of programming languages available (e.g., CSS, JavaScript, Python), and thus,engineers must choose which language will best help them achieve their objectives basedon what they are trying to accomplish in the app.In the Design Process Notebook, all activities and projects can be completed using eitherBlock, JavaScript, or Wonder-based coding in the Cue app. However, some activities areeasier to complete with Block & JavaScript, and some with Wonder. We encourage you tolet students choose which programming paradigm they prefer to use for each activity andproject. By providing students with a choice, you help them develop the ability to assesswhich paradigms work best for completing specific activities and projects.The example above shows programs for the same activity completed in both Block- andWonder-based coding. The activity requires students to program a dance for Cue. It iseasier to program a dance with Wonder because the robot can perform multiple actions atonce, whereas the robot can only perform one action at a time in using blocks.Student groups can compare and contrast their experiences completing the same activityusing Block, JavaScript, or Wonder. Encourage them to answer questions such as: Which activities are easier to complete with Wonder, and why? Which activities are easier to complete with Block & JavaScript, and why?20
Assessment StrategiesWonder PortfoliosWe recommend providing an authentic assessment by having students create a WonderPortfolio. In their portfolio, students can include programs they’ve created for differentprojects and activities. They can also include planning and reflection entries from theirDesign Process Notebooks and videos or documentation of their Project Pathwaypresentations.CSTA, ISTE, NGSS, and Common Core standards all stress the importance of having studentsreflect on their learning process. When students reflect on their work, they’re able to: Identify their strengths and weaknesses. Assess and learn from their mistakes. Improve their work through iterative design thinking. Identify any resources, guidance, or support they need. Create an informed plan for their next projects.With these portfolios, students can also share the programs they’ve created and demonstratewhat they’ve learned to their friends and family!Wonder Portfolios can include:Design Process Notebook EntriesStudents can use their Design Process Notebooks to document their planning, results, andreflection while completing activities, challenges, and projects.ProgramsAfter students complete each activity or project phase, have them take a screenshot of theircode. If needed, demonstrate for your class how to take screenshots with your classroom’stablets or devices. For activities selected from the Activity Menus, you can compare yourstudents’ programs to the suggested solutions we’ve provided in this guide.VideosStudents can also take videos of Cue while running their programs. In this way, they canshowcase any custom sounds or light patterns they’ve created. Additionally, the videoswill allow you to assess whether their programs completely meet activity or project phaseobjectives.21
After completing all of the phases, students will share their project with the class andhighlight their Design Thinking Process in their Project Pathway presentation. Students canalso include video and/or documentation of these presentations in their Wonder Portfolios.Digital Portfolio PlatformsDigital portfolio platforms can help students assemble the different elements of theirWonder Portfolios. With these platforms they can: Share screenshots of their code. Take videos of their robots in action. Record results
Cue is the newest member of Wonder Workshop's robot family. Like Dash and Dot, Cue is a robot that comes alive with animations, sounds, and lights to engage students' creativity. Cue is a level up from Dash and Dot in both robotic and programming capabilities. It comes
