Transcription
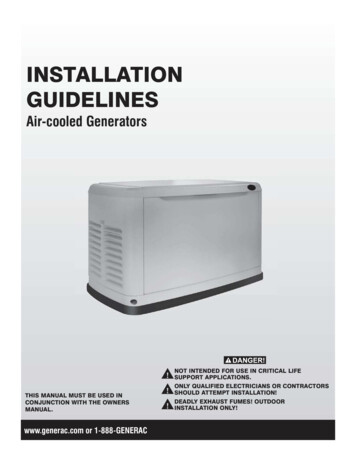
INSTALLATIONGUIDELINESAir-cooled GeneratorsNOT INTENDED FOR USE IN CRITICAL LIFESUPPORT APPLICATIONS.THIS MANUAL MUST BE USED INCONJUNCTION WITH THE OWNERSMANUAL.www.generac.com or 1-888-GENERACONLY QUALIFIED ELECTRICIANS OR CONTRACTORSSHOULD ATTEMPT INSTALLATION!DEADLY EXHAUST FUMES! OUTDOORINSTALLATION ONLY!
Table of ContentsIntroduction . Inside Front CoverRead this Manual Thoroughly .IFCContents .1Operation and Maintenance .1How to Obtain Service.1Safety Rules.1Standards Index .2Unpacking/Inspection .3NEC Requirements .3Before You Begin .3Site Preparation and Generator Placement .4Coverting to LP Vapor .5Installing & Connecting Gas Lines .6External Electrical Connections .7Generator Activation .8Activation Chart .9Generator Connections - EZ Switch .8Appendix A - EZ Switch Installation & Operational Testing.10Battery Installation.12Operational Testing .13Appendix B - RTSX and RTSD Transfer SwitchInstallation & Operational Testing .15Selected Circuit Coverage.16Whole-house Circuit Coverage .16Electrical Connections .17Operational Testing .17Appendix C - Digital Load Managment (DLM) .20Appendix D - Digital Load Managment (DLM) Modules .20Connecting Load Shed Module (LSM) Connections.20Functional Tests and Adjustments .22Appendix E - Setting the Automatic Exercise Function .22Electrical Data .23Notes .35Thank you for purchasing this compact, high performance, air-cooled,engine-driven generator. It is designed to automatically supply electricalpower to operate critical loads during a utility power failure.This unit is factory installed in an all-weather, metal enclosure that isintended exclusively for outdoor installation. This generator will operateusing either vapor withdrawn liquid propane (LP) or natural gas (NG).NOTE:This generator is suitable for supplying typical residential loadssuch as Induction Motors (sump pumps, refrigerators, air conditioners, furnaces, etc.), Electronic Components (computer,monitor, TV, etc.), Lighting Loads and Microwaves.If any portion of this manual is not understood, contact the nearest Dealerfor starting, operating and servicing procedures.Throughout this publication, and on tags and decals affixed to thegenerator, DANGER, WARNING, CAUTION and NOTE blocks are used toalert personnel to special instructions about a particular operation thatmay be hazardous if performed incorrectly or carelessly. Observe themcarefully. Their definitions are as follows:INDICATES A HAZARDOUS SITUATION OR ACTION WHICH, IFNOT AVOIDED, WILL RESULT IN DEATH OR SERIOUS INJURY.Indicates a hazardous situation or action which, if notavoided, could result in death or serious injury.Indicates a hazardous situation or action which, if notavoided, could result in minor or moderate injury.NOTE:Notes contain additional information important to a procedure and willbe found within the regular text body of this manual.These safety warnings cannot eliminate the hazards that they indicate.Common sense and strict compliance with the special instructions whileperforming the action or service are essential to preventing accidents.Four commonly used safety symbols accompany the DANGER,WARNING and CAUTION blocks. The type of information each indicatesis as follows:This symbol points out important safety information that,if not followed, could endanger personal safety and/orproperty of others.This symbol points out potential explosion hazard.This symbol points out potential fire hazard.This symbol points out potential electrical shock hazard.
Safety RulesThe operator is responsible for proper and safe use of theequipment. The manufacturer strongly recommends that theoperator read this Owner s Manual and thoroughly understand allinstructions before using this equipment. The manufacturer alsostrongly recommends instructing other users to properly start andoperate the unit. This prepares them if they need to operate theequipment in an emergency.This manual contains pertinent owner’s information for thesemodels: 7 kW NG, 8 kW LP, single-cylinder GH-410 Engine 9 kW NG, 10 kW LP, V-twin GT-530 Engine 13 kW NG, 13 kW LP, V-twin GT-990 Engine 13 kW NG, 14 kW LP, V-twin GT-990 Engine 16 kW NG, 16 kW LP, V-twin GT-990 Engine 16 kW NG, 17 kW LP, V-twin GT-990 Engine 18 kW NG, 20 kW LP, V-twin GT-999 EngineIt is the operator’s responsibility to perform all safety checks, tomake sure that all maintenance for safe operation is performedpromptly, and to have the equipment checked periodically by aDealer. Normal maintenance service and replacement of partsare the responsibility of the owner/operator and, as such, are notconsidered defects in materials or workmanship within the termsof the warranty. Individual operating habits and usage contribute tothe need for maintenance service.Proper maintenance and care of the generator ensures a minimumnumber of problems and keep operating expenses at a minimum.See a Dealer for service aids and accessories.When the generator requires servicing or repairs, contact a Dealerfor assistance. Service technicians are factory-trained and arecapable of handling all service needs. For assistance locating adealer, call 1-888-436-3722.When contacting a Dealer about parts and service, always supplythe complete model number and serial number of the unit as givenon its data decal, which is located on the generator. See section“The Generator” for decal location.Model No. Serial No.CALIFORNIA PROPOSITION 65 WARNINGEngine exhaust and some of its constituents are knownto the State of California to cause cancer, birth defectsand other reproductive harm.Save These Instructions The manufacturersuggests that these rules for safe operationbe copied and posted near the unit s installation site. Safety should be stressed to alloperators and potential operators of thisequipment.Study these SAFETY RULES carefully before installing, operatingor servicing this equipment. Become familiar with this Owner sManual and with the unit. The generator can operate safely,efficiently and reliably only if it is properly installed, operated andmaintained. Many accidents are caused by failing to follow simpleand fundamental rules or precautions.The manufacturer cannot anticipate every possible circumstancethat might involve a hazard. The warnings in this manual, and ontags and decals affixed to the unit are, therefore, not all-inclusive.If using a procedure, work method or operating technique themanufacturer does not specifically recommend, ensure that it issafe for others. Also make sure the procedure, work method oroperating technique utilized does not render the generator unsafe.Despite the safe design of this generator,operating this equipment imprudently,neglecting its maintenance or being carelesscan cause possible injury or death. Permitonly responsible and capable persons toinstall, operate and maintain this equipment.Potentially lethal voltages are generated bythese machines. Ensure all steps are taken torender the machine safe before attempting towork on the generator.Parts of the generator are rotating and/or hotduring operation. Exercise care near runninggenerators.Installation must always comply with applicable codes, standards, laws and regulations.A running generator gives off carbon monoxide, and odorless, colorless poison gas.Breathing in carbon monoxide can causeheadaches, fatigue, diziness, nausea, vomitting, confusion, fainting, siezures or death.CALIFORNIA PROPOSITION 65 WARNINGThis product contains or emits chemicals known to theState of California to cause cancer, birth defects andother reproductive harm.1
Safety RulesGENERAL HAZARDS The engine exhaust fumes contain carbon monoxide, which can beDEADLY. This dangerous gas, if breathed in sufficient concentrations,can cause unconsciousness or even death. Do NOT alter or add to theexhaust system or do anything that might render the system unsafe orin noncompliance with applicable codes and standards. Install a battery operated carbon monoxide alarm indoors, according tomanufacturer’s instructions/recommendations. Adequate, unobstructed flow of cooling and ventilating air is critical tocorrect generator operation. Do not alter the installation or permit evenpartial blockage of ventilation provisions, as this can seriously affectsafe operation of the generator. The generator MUST be installed andoperated outdoors only. Keep hands, feet, clothing, etc., away from drive belts, fans, and othermoving or hot parts. Never remove any drive belt or fan guard whilethe unit is operating. When working on this equipment, remain alert at all times. Never workon the equipment when physically or mentally fatigued. Inspect the generator regularly, and contact the nearest Dealer forparts needing repair or replacement. Before performing any maintenance on the generator, disconnect itsbattery cables to prevent accidental start up. Disconnect the cablefrom the battery post indicated by a NEGATIVE, NEG or (–) first, thenremove the POSITIVE, POS or ( ) cable. When reconnecting thecables, connect the POSITIVE cable first, the NEGATIVE cable last. Never use the generator or any of its parts as a step. Stepping on theunit can stress and break parts, and may result in dangerous operatingconditions from leaking exhaust gases, fuel leakage, oil leakage, etc.ELECTRICAL HAZARDS All generators covered by this manual produce dangerous electricalvoltages and can cause fatal electrical shock. Utility power deliversextremely high and dangerous voltages to the transfer switch as doesthe standby generator when it is in operation. Avoid contact with barewires, terminals, connections, etc., while the unit is running. Ensureall appropriate covers, guards and barriers are in place, secured and/or locked before operating the generator. If work must be done aroundan operating unit, stand on an insulated, dry surface to reduce shockhazard. Do not handle any kind of electrical device while standing in water,while barefoot, or while hands or feet are wet. DANGEROUSELECTRICAL SHOCK MAY RESULT. The National Electrical Code (NEC) requires the frame and externalelectrically conductive parts of the generator to be connected to anapproved earth ground. Local electrical codes also may require propergrounding of the generator electrical system. After installing this home standby electrical system, the generator maycrank and start at any time without warning. When this occurs, loadcircuits are transferred to the STANDBY (generator) power source. Toprevent possible injury if such a start and transfer occur, always setthe generator’s AUTO/OFF/MANUAL switch to its OFF position beforeworking on equipment and remove the 7.5A fuse from the generatorcontrol panel.2 In case of accident caused by electric shock, immediately shut downthe source of electrical power. If this is not possible, attempt to freethe victim from the live conductor. AVOID DIRECT CONTACT WITH THEVICTIM. Use a nonconducting implement, such as a dry rope or board,to free the victim from the live conductor. If the victim is unconscious,apply first aid and get immediate medical help. Never wear jewelry when working on this equipment. Jewelry canconduct electricity resulting in electric shock, or may get caught inmoving components causing injury.FIRE HAZARDS For fire safety, the generator must be installed and maintainedproperly. Installation must always comply with applicable codes,standards, laws and regulations. Adhere strictly to local, stateand national electrical and building codes. Comply with regulationsthe Occupational Safety and Health Administration (OSHA) hasestablished. Also, ensure that the generator is installed in accordancewith the manufacturer’s instructions and recommendations. Followingproper installation, do nothing that might alter a safe installation andrender the unit in noncompliance with the aforementioned codes,standards, laws and regulations. Keep a fire extinguisher near the generator at all times. Extinguishersrated “ABC” by the National Fire Protection Association are appropriatefor use on the standby electric system. Keep the extinguisher properlycharged and be familiar with its use. Consult the local fire departmentwith any questions pertaining to fire extinguishers.EXPLOSION HAZARDS Do not smoke around the generator. Wipe up any fuel or oil spillsimmediately. Ensure that no combustible materials are left in thegenerator compartment, or on or near the generator, as FIRE orEXPLOSION may result. Keep the area surrounding the generator cleanand free from debris. Gaseous fluids such as natural gas and liquid propane (LP) gas areextremely EXPLOSIVE. Install the fuel supply system according toapplicable fuel-gas codes. Before placing the home standby electricsystem into service, fuel system lines must be properly purged andleak tested according to applicable code. After installation, inspect thefuel system periodically for leaks. No leakage is permitted.In the absence of pertinent standards, codes, regulations and laws, thepublished information listed below may be used as installation guide forthis equipment.1. NFPA No. 37, STATIONARY COMBUSTION ENGINES AND GASTURBINES, available from the National Fire Protection Association,470 Atlantic Avenue, Boston, MA 02210.2. NFPA No. 76A, ESSENTIAL ELECTRICAL SYSTEMS FOR HEALTHCARE FACILITIES, available same as Item 1.3. NFPA No. 54, NATIONAL FUEL GAS CODE, available same as Item 1.4. NFPA No. 58, AMERICAN NATIONAL STANDARD FOR STORAGEAND HANDLING OF LIQUEFIED PETROLEUM GAS, available same asItem 1.5. NFPA No. 70, NFPA HANDBOOK OF NATIONAL ELECTRIC CODE,available same as Item 1.6. Article X, NATIONAL BUILDING CODE, available from the AmericanInsurance Association, 85 John Street, New York, N.Y. 10038.
General Information7. AGRICULTURAL WIRING HANDBOOK, available from the Food andEnergy Council, 909 University Avenue, Columbia, MO 65201.8. ASAE EP-3634, INSTALLATION AND MAINTENANCE OF FARMSTANDBY ELECTRICAL SYSTEMS, available from the AmericanSociety of Agricultural Engineers, 2950 Niles Road, St. Joseph, MI49085.9. NFPA No. 30, FLAMMABLE AND COMBUSTIBLE LIQUIDS CODE,available same as Item 1.Only qualified electricians or contractorsshould attempt such installations, which mustcomply strictly with applicable codes, standards and regulations.After unpacking, carefully inspect the contents for damage. This standby generator set is ready for installation with a factorysupplied and pre-mounted base pad and has a weather protectiveenclosure that is intended for outdoor installation only. This UL listed standby generator set may be packaged with anautomatic transfer switch with built in load center. The combinationtransfer switch and load center is pre-wired with a two foot and 30foot conduit. Circuit breakers for emergency circuit connections areincluded (if equipped). This UL listed, 2-pole switch is rated at 100 or 200 AC amperes at250 volts maximum. The 100 Amp transfer switch is for indoor useonly. The 200 Amp transfer switch is for indoor/outdoor use (ifequipped).Local code enforcement may require that AFCI’s be incorporatedinto the transfer switch distribution panel. The Transfer Switchprovided with this generator has a distribution panel that willaccept AFCI’s.Siemens Part No. Q115AF - 15A or Q120AF - 20A can beobtained from a local electrical wholesaler and will simply replaceany of the single pole circuit breakers supplied in the TransferSwitch distribution panel.Contact the local inspector or City Hall to be aware of all federal,state and local codes that could impact the installation. Secure allrequired permits before starting the job.Carefully read and follow all of the procedures and safetyprecautions detailed in the installation guide. If any portion of theinstallation manual, technical manual or other factory-supplieddocuments is not completely understood, contact a dealer forassistance.Fully comply with all relevant NEC, NFPA and OSHA standardsas well as all federal, state and local building and electric codes.As with any generator, this unit must be installed in accordancewith current NFPA 37 and NFPA 70 standards as well as any otherfederal, state, and local codes for minimum distances from otherstructures.If this generator is used to power electrical loadcircuits normally powered by a utility powersource, it is required by code to install a transfer switch. The transfer switch must effectivelyisolate the electrical system from the utility distribution system when the generator is operating (NEC 700, 701 & 702). Failure to isolate anelectrical system by such means will result indamage to the generator and also may result ininjury or death to utility power workers due tobackfeed of electrical energy.If any loss or damage is noted at time of delivery, have the person(s)making the delivery note all damage on the freight bill or affix theirsignature under the consignor’s memo of loss or damage.If a loss or damage is noted after delivery, separate the damagedmaterials and contact the carrier for claim procedures.“Concealed damage” is understood to mean damage to the contents of apackage that is not in evidence at the time of delivery, but is discoveredlater.To properly open the roof, press down on the center top lip and releasethe latch. If pressure is not applied from the top, the roof may appearstuck. Always verify that the side lock is unlocked before attempting to liftthe roof.3
General Information3. Inspect the generator for shipping damage and if necessary,file a claim with the shipper.Remove the bands holding the generator to the wooden pallet.1. Locate the mounting area as close as possible to the transferswitch and fuel supply.Leave adequate room around the area for service access(check local code), and place high enough to keep risingwater from reaching the generator.Choose an open space that will provide adequate andunobstructed airflow (see the “Location” section in theOwner’s Manual).4. Make sure the lifting equipment to be used has sufficientcapacity to safely handle the weight of the generator.Use nylon lifting straps and connect them to the lifting eyeson each corner of the base frame to avoid damaging theenclosure.5. Set the generator onto the pad so that the gravel bed extendsseveral inches beyond the generator on all sides.Make sure the generator is level within ½ inch.2. Place the unit so air vents won’t become clogged with leaves,grass, snow or debris. Make sure exhaust fumes will not enterthe building through eaves, windows, ventilation fans or otherair intakes.Dig a rectangular area approximately five inches deep andabout six inches longer and wider than the footprint of thegenerator. Cover with polyurethane film and fill with pea gravelor crushed stone. Compact and level the stone. A concretepad can be poured if desired.6. Connect an approved ground strap to the grounding lug on thebase frame and to an approved earth ground or grounding rodas specified by local regulations.4
General Information7. Check the engine oil and, if necessary, add enough of therecommended oil to bring the level up to the FULL mark onthe dipstick. Be careful not to overfill the crankcase.3. On 10 kW units, open the roof, loosen the forward clampon the air inlet hose, and slide the hose away from the hosefitting.1. The generator was configured for natural gas operation at thefactory. Switching over to LP Vapor is a simple procedure.On models with a single cylinder engine, begin bydisconnecting and removing the battery if installed.2. Take the plastic T-handle fuel selector in the poly bag suppliedwith the generator and locate the selector tab on the air boxcover. Insert the pin end into the hole in the selector taband pull outward to overcome spring pressure. Then twistclockwise 90 degrees and allow the selector to return in oncealigned with the LP position.4. Slide the fuel selector pin on the carburetor out towards theback of the enclosure.5. Replace the inlet hose and tighten the clamp securely.6. On all other models, simply remove the air cleaner cover andslide the fuel selector pin outward from the natural gas to theLP position.5
General Information3. When connecting the gas line to the generator, use theprovided section of UL Listed or AGA-approved flexible fuelline in accordance with local regulations. The purpose of theflexible fuel line is to ensure that vibration from the generatordoes not cause a gas leak at one of the connection points, soit’s important that the line be installed with as few bends aspossible. Installing a sediment trap is also recommended.1. Both natural gas and LP Vapor are highly volatile substances,so strict adherence to all safety procedures, codes, standardsand regulations is essential.Gas line connections should be made by a certified plumberfamiliar with local codes. Always use AGA-approved gas pipeand a quality pipe sealant or joint compound.Verify the capacity of the natural gas meter or the LP tank inregards to providing sufficient fuel for both the generator andother operating appliances.2. Most applications will require an external manual shutoff valveon the fuel line.64. Never bend the flexible fuel line to avoid using an elbow.Bending the flexible line decreases its ability to absorbvibrations and defeats its purpose as well as constricts theactual fuel flow.5. After checking for leaks, check the gas pressure at theREGULATOR to make sure there’s enough gas pressure forgenerator operation. See Owner’s Manual for fuel pressurespecifications. If not within these limits, contact your local gassupplier.
General Information6. When finished checking the gas pressure, close the manualshutoff valve.4. Replace the protective cover plate and retaining screw, andlock the connection box.2. Remove the knockout in the back of the connection box, feedthe wires through the back of the box and secure the conduitwith the lock nut.Seal the hole with silicone caulk. Don’t forget to caulk the holeinside the house as well.5. For 10-20 kW models, locate the metal hasp that is packagedin the owner’s manual bag. Insert the hasp in the slot locatedon the left side of the external circuit breaker box. Be sure thatthe clip of the hasp is facing toward the front of the generator.If desired, lock the external box.7
General InformationWhen battery power is applied to the generator during theinstallation process, the controller will light up. However, thegenerator still needs to be activated before it will automatically runin the event of a power outage.3. Remove the two screws securing the connection area cover,and remove the cover.Activating the generator is a simple one time process that isguided by the controller screen prompts. Once the product isactivated, the controller screen will not prompt you again, even ifyou disconnect the generator battery.After obtaining your activation code, please complete the followingsteps at the generator’s control panel in the Activation Chart(shown on the following page).4. Feed the wires through the back of the generator and securethe conduit with the lock nut.5. Run the power leads through the strain relief provided.1. If the generator comes with an external connection box and5’ seal-tite whip pre-wired and connected to the generator, noadditional connections are necessary at the generator. Skipthe following section and proceed with Appendix A, EZ SwitchInstallation & Operational Testing.6. The circuit breaker is attached to the exterior access panel.7. Remove the plastic plugs inside the main breaker access areato allow connection of the power leads to the circuit breaker.2. If the EZ Switch was purchased separately from the generator,the 5’ seal-tite whip will need to be connected to thegenerator. To complete the wiring, run the ¾” conduit for thepower leads and control wires from the external connectionbox to the generator.8
General InformationCHOOSE LANGUAGETROUBLESHOOTINGDisplay Reads:EscapeUse ARROW keys to scroll to desiredlanguage. Press ENTER to select.EnterDisplay Reads:EscapeIf the wrong language is chosen, it can bechanged later using the “edit” menu.EnterDisplay Reads:Press ENTER to begin the activation process. If ESCAPE is pressed instead of ENTER,your generator will only run in manual mode(for test purposes) and NOT ACTIVATED willbe displayed. You will need to remove thegenerator control panel fuse AND disconnectthe T1, N1 and N2 connector in the externalconnection box (if equipped); or disconnectutility input (main breaker) to the transferswitch for 3-5 seconds and reconnect, thenbegin with Step 1.If you do not have your activation code,go to www.activategen.com or call1-888-9ACTIVATE (922-8482).If you already have your activation code, wait3-5 seconds for the next display.EscapeEnterENTER ACTIVATION CODE (Passcode)Display Reads:TROUBLESHOOTINGUse ARROW keys to scroll and find the firstnumber of your Activation Code.Press ENTER to select.Repeat this step until all digits have beenentered.EscapeEnterDisplay Reads:EscapeUse ESCAPE to correct previous digits.Activation is complete when all digits areentered above and your screen shows thisdisplay.EnterFollow the controller prompts to continuesetting the time function. Refer to yourOwner’s Manual with questions.What happens if “Wrong Passcode TryAgain” appears?Reenter the activation code. If a secondattempt is unsuccessful, check the numberagainst the code given on activategen.com. Ifit is correct and the generator will not acceptit, contact 1-888-9ACTIVATE (922-8482).9
Appendix ANOTE:In order to maintain separation of circuits, the DC control wiresmust be separated from the AC control wires. A piece of fiberglass sleeving has been provided in the manual kit to achievethis. Slide the sleeving over the AC wires OR the DC wires, butnot both, from the wire landing area to the outside of the generator. Use the cable tie locations to hold the sleeving in place.12. An improperly connected control wire can damage thegenerator control board.8. Now connect the red and black power leads to the circuitbreaker. Since this is a single-phase application, it doesn’tmatter which wire is connected to which lug.9. Connect the green equipment ground wire to the ground busbar and torque to 35 inch lbs. The torque values are: 10-14 AWG 35 in/lbs 8 AWG 40 in/lbs 4-6 AWG 45 in/lbsNeutral1. Before beginning any installation, make sure power is shutOFF to the main distribution panel and carefully read theOwner’s Manual that came with the transfer switch.The distributed load center switch must be mounted closeenough to the main distribution panel to accommodate thetwo-foot, pre-wired conduit. Make sure no water or corrosivesubstances can drip onto the transfer switch enclosure.GroundCable Tie Location10. Connect the white neutral wire to the neutral bus bar andtorque to 35 inch lbs. The torque values are: 10-14 AWG 35 in/lbs 8 AWG 40 in/lbs 4-6 AWG 45 in/lbs11. Connect the control wires to the correct terminals. Theterminals are clearly marked N1 and N2 for utility sensing; 23and 194 for transfer relay control; and T1 and 0 for batterycharge. On pre-wired switches, the 0 (zero) wire will not bepresent/required.102. Always inspect the switch for shipping damage. Never mounta transfer switch that shows any evidence of damage.
Appendix A3. Protect against impact and mount the switch vertically toa rigid support structure. Make sure the switch is level andplumb.The transfer switch is an open transition switch. Opentransition switches prevent electrical feedback between thegenerator and the utility by only allowing load circuits to beconnected to one power supply at a time.4. Each wire in the pre-wired transfer switch is color-coded toeasily match circuits in the main panel to their new breakersin the transfer switch.5. When three-conductor wiring is used, two 120 volt circuitswill often share the same neutral wire. To avoid overloadingthe neutral, either move BOTH of the circuits that share theneutral or don’t move either of them.6. When moving two circuits with a shared neutral, they shouldbe connected to adjacent positions (one above the other) inthe transfer switch. That will assure that the two hot wiresare on separate phases and will maintain their relationship toneutral.7. Choose a circuit to be
installation guidelines air-cooled generators www.generac.com or 1-888-generac not intended for use in critical life support applications. only qualified electricians or contractors should attempt installation! deadly exhaust fumes! outdoor installation only! this manual must be used in conjunction with the owners manual.
