Transcription
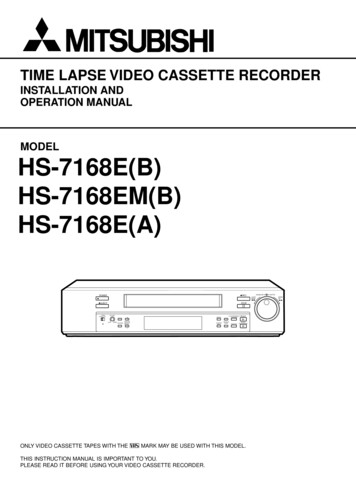
TIME LAPSE VIDEO CASSETTE RECORDERINSTALLATION ANDOPERATION SITION/TRACKING VERTICALADJUSTCOUNTERRESETCOUNTER MEMORY/SKIP/INDEXREC/PLAYMODETIMER RECPLAYPAUSE/SHUTTLE HOLDONLY VIDEO CASSETTE TAPES WITH THE V MARK MAY BE USED WITH THIS MODEL.THIS INSTRUCTION MANUAL IS IMPORTANT TO YOU.PLEASE READ IT BEFORE USING YOUR VIDEO CASSETTE RECORDER.JOG/ADJUSTSHUTTLECLEAR/ENTER/REWFF
CAUTION AND CARECONDENSATION IS THE ENEMY OF VIDEO RECORDERS2 WHAT IS CONDENSATION?1. When a very cold drink is poured into a glass, the water droplets which form on the outer surface of the glass are an example ofcondensation.2. If the VCR is exposed to a rapid increase in temperature (such as warming a cold room or after transporting it from a cold locationto a warm one) condensation may form on the tape transport mechanism inside the VCR. To prevent damage to the VCR or tapes,plug the VCR into the mains outlet and turn the power on for about 2 hours. Do not use the VCR for playback or record during thistime.2 CONDENSATION IS LIKELY TO OCCUR WHEN:1. The VCR is moved inside from outdoors, or from a cold room to a warm one.2. A cold room is heated quickly.3. Humidity is high.N Avoid using the VCR where cold air (e.g., from an air conditioner) will blow directly on it. Never place anything containing water on top of the VCR, e.g., vases, cups, etc.HEAVY OBJECTS SHOULD NEVER BE PLACED ON THE VCR (E.G., TV)UNPLUGGING THE MAINS LEADWhenever unplugging the mains leads, be sure to switch off themains outlet first. Then unplug the lead by gripping the plug (notthe lead) and carefully remove the plug from the mains outlet.CABINET CARENever use petroleum-based cleaners. Clean with a soft clothmoistened with soap and water and wipe dry. PVC cables orleads should not be left in contact with the cabinet surface forlong periods.NEVER TOUCH OR INSERT ANY OBJECT INSIDE THE VCRTouching the inside of the cabinet or inserting foreign objects ofany kind not only creates a safety hazard but can also causeextensive damage.INSTALLATION LOCATIONFor optimum performance and reliability, install the VCR in alocation that is:1. Well ventilated, out of direct sunlight and away from directheat.2. A solid vibration-free surface.3. Free from high humidity, excessive dust and away from magnetic fields.PROTECT THE MAINS LEADDamage to the mains lead may cause fire or shock hazard.UNPLUG THE MAINS LEAD DURING A LONG ABSENCEDuring a long absence, turn off the power and switch off themains outlet before unplugging the mains lead.N Never move the VCR without first removing the tape.MAINTAIN GOOD VENTILATIONDo not obstruct the many ventilation holes on the VCR. Formaximum ventilation, place the unit on a hard level surface only,and ensure it is not covered during use. Heavy objects shouldnever be placed on the VCR.CARE OF VIDEO CASSETTE TAPES Avoid violent vibration or shock. Do not place near a strong magnetic field (e.g., a motor, transformer or magnet). Never place or store in direct sunlight. Avoid dusty places. Place the cassette in its case and store vertically.WHEN NOT IN USEWhen you finish operating the VCR always unload the cassetteand turn OFF the VCR POWER.WARNING: TO PREVENT FIRE OR SHOCK HAZARD, DONOT EXPOSE THIS APPARATUS TO RAIN OR MOISTURE.For HS-7168E(B) and HS-7168EM(B)2 MAINS LEAD CONNECTIONThe mains lead on this VCR is fitted with a non-rewireablemains plug, incorporating a 5A fuse. If you need to replacethe fuse, use a 5A fuse approved by BSI or ASTA to BS 1362,ensuring you refit the fuse cover. If the mains plug is notsuitable for the sockets in your home, and you require toremove the plug, remove the fuse, cut off the plug then dispose of the plug immediately, to avoid a possible electricshock hazard. To refit a new plug, follow these instructions;Green-and-yellow: Earth,Blue: Neutral,Brown: LiveAs the colours in the mains lead of this VCR may not correspond with the coloured markings identifying the terminalsin your plug, proceed as follows. The wire which is coloured green-and-yellow must be connected to the terminal in the plug which is marked by theletter E or by the safety earth symbol » or coloured greenor green-and-yellow. The wire which is coloured blue must be connected to theterminal which is marked with the letter N or coloured black. The wire which is coloured brown must be connected to theterminal which is marked with the letter L or coloured red.WARNING:THIS APPARATUS MUST BE EARTHED.This Time Lapse Video Cassette Recorder complies with therequirements of the EC Directive 89/336/EEC, “EMC Directive”and 73/23/EEC, “Low Voltage Directive”, as amended by Directive 93/68/EEC. The requirements for the susceptibility according to EN 50082-1 and the requirements for interference according to EN 55022 are observed for the operation on residentialareas, business, light industrial premises and in small scale enterprises, inside as well as outside of the building. All places ofoperation are characterised by their connection to the public lowvoltage power supply system.This unit is manufactured in accordance with EN60065.1
CONTENTSPagesElapsed time display . 17TIMER RECORDING . 18, 19ALARM RECORDING . 20, 21, 22Alarm recording connection . 20External time clock adjustment . 20Setting for alarm recording . 21Emergency recording . 21Alarm record time display . 22Locating the start of alarm recordings . 22PLAYBACK . 23Audio playback . 23SPECIAL EFFECTS PLAYBACK . 24ADJUSTMENT DURING PLAYBACKTracking adjustment . 25Picture quality adjustment . 25Vertical adjustment . 25WARNING DISPLAY . 26BEFORE CALLING FOR SERVICE . 27CONTROL INPUT/OUTPUT SIGNALS AND CIRCUITS . 28, 29SPECIFICATIONS . 30PagesFEATURES AND FUNCTIONSFront view . 3Fluorescent display . 4Rear view . 5CONNECTING WITH OTHER EQUIPMENT . 6SETTING THE MENUS . 7, 8, 9, 10SETTING THE PRESENT TIME . 11, 12LOADING AND UNLOADING THE CASSETTE TAPE . 13MANUAL RECORDING . 14, 15, 16Audio recording . 14Repeat recording . 15Series recording . 15One shot/Interval recording . 16Synchronous recording . 16ADDITIONAL FEATURESCounter memory . 17Tape counter . 17Counter reset . 17Memory back-up in case of power failure . 17Recording after a power failure . 17Power failure time display . 17FEATURESUp to 168 hours of recording: an ideal video system for automated security and surveillance systems.This time lapse VCR is designed especially for industrial, educational and security recording. In addition to ordinary 3-hour and 6-hourrecording modes, it has time lapse modes that allow recording of 18, 24, 48, 72, 96, 120 or 168 hours. Also, the recording time can beextended up to 54,000 hours (for E-180 tape) if you choose one-shot recording with 3 minutes interval time. Frame-by-frame playbackand high-speed playback of longer recordings are also available. This adds up to a powerful surveillance system for banks, buildings,traffic and parking lots, as well as a convenient scientific tool for observation of plant growth, animal behaviour and other time-intensiveprocesses.Audio recordingWhen recording in 3H, 6H, L(linear)18H, or L24H mode, audio isplayed back only during their respective modes.Resolution and image qualityThis VCR has a high quality circuit, which makes it possible toattain more than 330 lines in B/W mode, and more than 240 linesin colour mode(SP mode).High density recording - H D LP High Density recording records 2x more fields than Normal Density(SP). It reduces the time interval between pictures, providing morepictures for smoother time lapse recording.Tape remaining indicatorA bar indicator shows how much tape is left and/or that the tapehas approximately three minutes (in 3H mode) left.Automatic head cleaningFor continuous smooth operation, the VCR automatically removesforeign matter from the heads when a cassette is inserted.Easy setting using a monitorThe on-screen menus simplify setting-up procedures. Thesemenus can be selected even without the input of a video signal.Easy cueing with alarm recordingIndex signals are added automatically at the beginning of “alarmrecording” for easy cueing. You can confirm the Alarm startingtime in the playback video on the monitor with the Alarm list usingthe Maintenance menu.Time date search systemInput the day and time you want to view and the VCR will searchand display it automatically.External time clock adjustmentThe on-screen time clock can be reset to the nearest hour byapplying a signal to the RST(RESET) IN terminal at the rear of theVCR.Record checkCorrect recording can be confirmed by pressing the PLAY buttonduring recording.Automatic azimuth head selectionThis VCR can automatically select playback heads for normal VHScompatible Time Lapse recordings, or older Time Lapse recordingsmade using two Same Azimuth video heads. Same Azimuth TimeLapse recordings use VHS cassettes but cannot be played normallyby VHS compatible VCRs.Full lock modeLocking prevents the VCR from being operated by an unauthorisedthird party.Special playback featuresThese include still images, speed search, reverse playback, frameby-frame viewing in both directions, slow motion and high speedviewing.JOG dial/SHUTTLE ringUse to search for the desired image. You can adjust the playbackspeed with the SHUTTLE ring and search for an image frame byframe with the JOG dial.Recording optionsThis versatile system offers a variety of recording options, includingdaily and weekly timer recording, repeat and alarm recording.Protection against power failuresRecording data including date, time and timer set-up, are storedin backup memory, so the system can resume recording after apower failure. The time of the failure is displayed on the monitor.Digital ELAPSED TIME displayThe Elapsed Time of recording and playback is stored in a nonvolatile memory IC. The elapsed time display should be used as aguide as to when periodic maintenance should be carried out.Tape use counterDisplays how many times you have repeatedly recorded on a tape.This is helpful for deciding when it is necessary to replace a tape.Daylight saving time settingDaylight saving time setting is available. The clock can be putforward by one hour by setting the menu.2
FEATURES AND FUNCTIONSFRONT VIEW2 SHARPPOSITION/TRACKING VERTICALADJUSTIJ HG F64 5COUNTERRESETFluorescent displayCOUNTER MEMORY/SKIP/INDEXREC/PLAYMODETIMER TTLE HOLDADE CB 9871 POWER button (Press for on; press again for off)The POWER indicator illuminates when the VCR isswitched on.B TIMER REC buttonThis button is pressed when a timer recording is to bemade.2 EJECT buttonPress to remove the cassette.4 STOP buttonPress to discontinue all tape related functions.C REC/PLAY MODE buttonsSet to 3H, L24H, 48H - 168H or 0H mode to selectrecording speed in SP mode. Set to 3H, L24H, 24H, 48H- 168H or 0H mode to select playback speed duringplayback recorded in SP mode. Set to 6H, L18H, 48H 168H or 0H mode to select recording speed in LP mode.Set to 6H, L18H, 48H - 168H or 0H mode to selectplayback speed during playback recorded in LP mode.5 REC (RECORD) buttonPress to begin recording.D COUNTER RESET buttonPress to reset the counter to “00000”.6 JOG dialUse to forward the tape frame-by-frame and to set themenus.E DISPLAY buttonPress to display the MAIN MENU.Press again to show the present time display.7 SHUTTLE ringUse to adjust the playback speed or to set the menus.Turn this ring to the right to forward a tape or to forwardsearch. Turn this ring to the left to rewind a tape or toreverse search. Also, use to reset the alarm list, powerloss list and timer recording and to initialize the menusettings.F POSITION/VERTICAL ADJUST buttons When ( ) button is pressed, the day and present timedisplay will move to the right. When the (-) button ispressed, the day and present time will move down thescreen. Cannot be adjusted if a warning is displayed. Press these buttons to adjust for vertical vibrations whenin still mode or during fast playback. Refer to pages 6and 25 for more details.3 Cassette loading slotCassette tape is inserted in this slot for loading.8 PLAY buttonPress to playback a previously recorded tape.G TRACKING buttons ( /-)Press these buttons if noise is present during playback,reverse playback or slow playback.9 PAUSE/SHUTTLE HOLD buttonWhen pressed during recording, tape movement stopstemporarily. Press again to continue the recording.When pressed during playback, tape movement stopsand a still field is displayed. Press again to restore normalplayback. Pressing and holding this button after turningthe SHUTTLE ring allows continuous high speed playbackeven if the SHUTTLE ring is released.H PICTURE controlThe picture quality can be adjusted between soft andsharp.I LOCK buttonWhen pressed with a ball-point pen or a pencil, the unitwill be locked into the current mode and the operationbuttons will not operate. Release the lock by pressingthe lock button again.A COUNTER MEMORY/SKIP/INDEX buttonUse to switch between COUNTER MEMORY(P.17), SKIPSEARCH or INDEX SEARCH(P.22).J VIDEO switchUse to select color or black and white recording andplayback.3
FLUORESCENT DISPLAY1 2345M PLALARMINDEXMODE6897ASP LPSSKIPEMGCYH LOCK PLAYGF1 M (COUNTER MEMORY) indicatorIlluminates during rewind for counter memory mode.EDBERECC8 Repeat indicatorIlluminates when “TAPE END” in the “FIRST TIME SETUP” menu is set to “REPEAT” or “ALARM PROT”.2 PL (POWER LOSS) indicatorIlluminates when there is a power failure during recording.9 Cassette status indicatorIlluminates when tape is inserted. The light advances,stops or flashes corresponding to the movement of thetape.3 ALARM indicatorFlashes during alarm recording and stays on when thealarm recording is finished.A Timer recording indicatorIlluminates when the TIMER REC button is set to ON.4 INDEX indicatorFlashes during recording of date/hour index signal at thechange of the hour, and during recording of the alarmindex signal. Lights during index search.B Tape remaining indicatorIndicates the approximate tape position. S Start,E End.5 MODE displayDisplays the selected recording or playback mode. Duringindex search, displays the index number. It will alsoindicate the playback head selection, “SH” or “AH”, 3seconds after the playback starts or if the playback modeis changed. In the “FIRST TIME SET UP” menu, if the“PB HEAD” selection is set to “L/L” or “R/R” then “SH” willilluminate. If set to “AUTO”, then “AH” will illuminate.N “SH” or “AH” lights during playback in SP mode ONLY.C REC indicatorIlluminates during recording.D PLAY indicatorIlluminates during playback.E EMGCY (EMERGENCY REC) indicatorIlluminates when “EMERGENCY REC” of the“RECORDING SET UP” menu is set to “ON”.6 SKIP indicatorIlluminates during skip search.F LOCK indicatorLights when the Lock mode is set.7 Record mode indicatorLP illuminates to indicate recording in LP mode or playingback a tape recorded in LP mode. SP illuminates toindicate recording in SP mode or playing back a taperecorded in SP mode.G COUNTER displayIndicates the relative position on the tape.4
FEATURES AND FUNCTIONSREAR VIEW12 4 69 A3 5 7 8SETÉMICRSTININREC GND ALM MODERESETOUTAUDIOThe VCR illustrations appearing in this manualare of the HS-7168E(B).CLK CALLOUTGF EINDVIDEOOUTCREMOTEBN Ensure the power cord is not plugged into the mains outlet before connecting to any rear terminals.1 AC power socketThis socket connects to the power cord. Insert the cordfirmly.8 CLK (CLOCK) OUT terminalOutput terminal to control an external camera switcher.9 CALL OUT terminalOutput terminal to indicate when tape has finishedrecording or if there has been a problem during recording.2 SET IN terminalInput terminal for alarm recording. The alarm sensor isconnected here.A RESET buttonWhen pressed, the present time, alarm recording list, powerloss list and the number of tape use will be erased. Whilethe button is pressed, the power is cut off from the VCR. Ifthere is a tape in the VCR and the button is released, thepower indicator will light and the tape will fast forward for afew seconds. The VCR will then switch off.3 RST (RESET) IN terminalInput terminal to stop alarm recording when “ALARM RECDURATION” of the “RECORDING SET UP” menu is setto “MAN1”. The alarm reset switch is connected here.This terminal can also be used to set the on-screen clockwhen set to any mode other than “MAN1”.4 REC IN terminalInput terminal to start/stop recording. Also, use thisterminal for series recording (P.15) or synchronousrecording (P.16).B REMOTE jackRemote control is possible by connecting the optionalremote control unit (R-7100) here. Refer to page 29.C VIDEO OUT connectorOutput connector for video signal (BNC connector). Ifthe power switch is turned OFF, the signal from the VIDEOIN connector is looped out to this connector.5 GND (GROUND) terminalWhen a lead connected to other terminals requires aground, connect the ground lead here.D VIDEO IN connectorInput connector for video signal (BNC connector).6 ALM (ALARM) OUT terminalOutput terminal to indicate alarm recording to an externalalarm.E AUDIO OUT connectorAudio output connector (RCA pin).7 MODE OUT terminalOutput terminal to indicate the VCR’s mode of operation.Selected by setting “MODE OUT” on the “REARTERMINAL” menu.F AUDIO IN connectorAudio input connector (RCA pin).G MIC IN jackInput jack for a microphone with 600 ohms impedance.5
CONNECTING WITH OTHER EQUIPMENTCCTVCAMERAVIDEOOUTSET INVIDEOINSENSORSETÉMICRSTININREC GND ALM MODECLK CALLOUTRESETOUTAUDIOMIC ININVIDEOAUDIOOUTOUTREMOTEVIDEOOUTVIDEO INMICAUDIO INMONITORVERTICAL ADJUSTMENT (Correcting picture vibration at the top and bottom)The picture vibration can be reduced or eliminated by the following steps.1 If the vibration occurs in still, slow motion, fast playback (x2) or normal playback in 24H - 168H or 0H mode, playbacka tape which is recorded in 3H or 6H mode with this VCR and press the PAUSE button.If the vibration occurs during normal playback in L18H or L24H mode, playback a tape in each playback mode.2 Press the VERTICAL ADJUST( ) or (-) button to reduce or eliminate the picture vibration.MONITOR TO BE CONNECTED Connection with a CCTV monitor (for surveillance) is recommended.Connecting with some monitors may cause picture vibration and/or picture distortion at the top or bottom of the imageduring still or normal playback.A domestic Television Monitor may be unable to provide a stable picture without vibration and distortion.6
SETTING THE MENUSThe operating parameters of this VCR are set through various on-screen menus.Set the menus as follows:OPERATION1 Press the DISPLAY button. The “MAIN MENU” is displayed.2 Turn the JOG dial to select the desired item. When the JOG dial is turned to the right, the cursor moves downward. When the JOG dial is turned to the left, the cursor moves upward.3 Turn the SHUTTLE ring to the right.The desired item is selected and the menu will appear.4 Turn the JOG dial to select item.5 Turn the SHUTTLE ring to the right and the setting item will flash.6 Turn the JOG dial to change the setting. DISPLAY 7 Turn the SHUTTLE ring to the right to set.1DISPLAY MODESMALLTIME DATE SIZE8 Press the DISPLAY button.Ex. MODE 1 The present time display will appear.11 – 11 – 98 09 : 21 : 01present timedisplay TIME DATE SEARCH 15:00TIME23DATEFORWARDDIRECTION POWER LOSS LIST 01 03 - 01 - 98 01 : 000203Use JOG to adjust,and ENTER. TIMER PROGRAM DW START ENDHRSPL 08 : 40 17 : 10 L18LP2 SAT 08 : 40 12 : 20 L18LP3 WED 22 : 00 22 : 543SP4 --- --:-- --:-- --5 --- --:-- --:-- --6 --- --:-- --:-- --7 --- --:-- --:-- --8 --- --:-- --:-- --SPECIAL DWMON–FRI11 – 11 – 98 09 : 21 : 01 MAIN MENU DISPLAYTIME DATE SEARCHTIMER PROGRAMRECORDING SET UPREAR TERMINALMAINTENANCEFIRST TIME SET UPUse JOG to select,and ENTER.Press DISPLAY to exit. RECORDING SET UP 3HALARM REC MODE1MALARM REC DURATIONOFFEMERGENCY RECNORMAL SP REC MODE1ONESHOT FIELDSHOTONESHOT INTERVAL ALARM LIST 000105 - 01 - 98 01 : 00000207 - 01 - 98 21 : 10000310 - 01 - 98 09 : 15ALL MENU INITIALIZETurn the SHUTTLE RING then all MENU will beinitialized.POWER LOSS LIST CLEAR REAR TERMINAL WRNG TAPE ENDCALL OUTREC- 1CLOCK OUTRECMODE OUTSERIESREC INTurn the SHUTTLE RING then POWER LOSS LISTwill be cleared.ALARM LIST CLEAR MAINTENANCE POWER LOSS LISTALARM LISTALL MENU INITIALIZEPOWER LOSS LIST CLEARALARM LIST CLEAR REPEAT REC TIMES ELAPSED TIME Turn the SHUTTLE RING then ALARM LIST will becleared.00H FIRST TIME SET UP STOPTAPE ENDONQUASI V-SYNCE-180TAPE LENGTHNORMALPB HEAD SELECTWRNGBUZZERTIME DATE ADJUST7 TIME DATE ADJUST DAYLIGHT SAVINGSOFFMONTH11DATE11YEAR98TIME09 :21 : 01
MAIN MENU1234567 MAIN MENU DISPLAYTIME DATE SEARCHTIMER PROGRAMRECORDING SET UPREAR TERMINALMAINTENANCEFIRST TIME SET UPUse JOG to select,and ENTER.Press DISPLAY to exit.DISPLAYSets the display format of the date and present time on the monitor.TIME DATE SEARCHSets the date, time and direction to search for the desired part of a tape.TIMER PROGRAMSets the timer recording.RECORDING SET UPSets the alarm recording mode, alarm recording duration, emergency recording, recording mode and one-shot recording.REAR TERMINALSets the frequency division ratio of CLOCK OUT, output signal of the CALL OUT terminal and the MODE OUT terminal, etc.MAINTENANCEDisplays the power loss list and alarm loss list, etc. and initialises all menu settings. Clears the power loss list and alarm list.FIRST TIME SET UPSet up for when the end of the tape is reached, quasi v-sync, tape length, playback head selection, buzzer setting, present time.DISPLAY DISPLAY 11DISPLAY MODESETTING THE DISPLAY MODE (DISPLAY MODE)SMALLTIME DATE SIZEDISPLAY MODE 1:Displays date and present time. (Refer to page 11.)Ex. MODE 1 DISPLAY MODE 2:Displays date, day of the week, present time and recording mode. (Refer to11 – 11 – 98 09 : 21 : 01page 11.)DISPLAY MODE 3:Displays nothing; until an alarm recording starts, then date, alarm recordingnumber, etc. is displayed.DISPLAY MODE 4:Displays nothing; even in the case of alarm recording, nothing is displayedon the monitor. During an alarm recording, alarm recording number is displayed if the “DISPLAY MODE” is set from 1 to 3.2SETTING THE SIZE OF THE LETTERS OF DAY AND PRESENT TIME DISPLAY (TIME DATE SIZE)SMALL: The size of the letters becomes small.LARGE: The size of the letters becomes large.TIME DATE SEARCHSets the date, time and direction to search for the desired location on a tape. TIME DATE SEARCH 15:00TIME23DATEFORWARDDIRECTION123SETTING THE TIMETurn the JOG dial to set the hour and minute to search for.Use JOG to adjust,and ENTER.SETTING THE DATETurn the JOG dial to set the day of the month to search for.SETTING THE DIRECTIONTurn the JOG dial to select the starting direction for search.FORWARD:Search in the forward direction.REVERSE:Search in the reverse direction. If the desired part of a tape is not found in one direction, the VCR automatically searches in the opposite direction.After the setting, turn the SHUTTLE ring to the right to start searching.N An hour index mark is written on the tape on the hour and is used as a reference in the search function. Because of this, arecorded tape must pass a time clock hour mark before this function can work. The TIME DATE SEARCH function begins afterthe first hour index mark.Example 1: VCR is set to record from 8:30 to 17:30 - Times from 9:00 to 17:30 can be found.Example 2: VCR is set to record in one speed from 7:00 to 14:30, then in another speed until 18:00 - Times from 7:00 to 14:30and 15:00 to 18:00 are accurately located. Time date search function is not available for a tape recorded by any other VCR than this model. If recording quality is poor, the VCR may fail to locate the desired part of the tape during time date search.TIMER PROGRAMRefer to page 18 “TIMER RECORDING” for details.RECORDING SET UP1SETTING THE ALARM REC MODE (ALARM REC MODE)Sets the alarm recording time mode. When the JOG dial is turned, the display will be switched in theorder of 3H } 6H } L18H } L24H } 3H } .2SETTING THE ALARM REC DURATION (ALARM REC DURATION)Sets the duration of the alarm recording period. When the JOG dial is turned, the display will beswitched in the order of 1M(minute) } 2M } 5M } 10M } MAN1 } MAN2 } 15S(second) } 30S} 45S } 1M } . Refer to “ALARM RECORDING” on page 20.3SETTING THE EMERGENCY REC (EMERGENCY REC)Sets the emergency recording mode.OFF: Starts alarm recording when the alarm signal is received during recording.ON: Starts alarm recording when the alarm signal is received not only during recording but also when the power is OFF orwhen the tape is stopped.8 RECORDING SET UP 3HALARM REC MODE1MALARM REC DURATIONOFFEMERGENCY RECNORMAL SP REC MODE1ONESHOT FIELDSHOTONESHOT INTERVAL
SETTING THE MENUS4RECORDING MODE (REC MODE)Sets the recording mode.NORMAL SP : Choose when higher picture quality is preferred. With this setting, the recording time mode is switched in the order of3H } L24H } 48H } 72H } 96H } 120H } 168H } 0H } 3H .H D LP :Select a LP setting to perform High Density recording. This provides 2x more fields than Normal Density(SP). Itreduces the time interval between pictures, providing more pictures for smoother time lapse recording. With thissetting, the recording time mode is switched in the order of 6H } L18H } 48H } 72H } 96H } 120H } 168H }0H } 6H .5SETTING THE NUMBER OF FIELDS IN ONE-SHOT RECORDING (ONE SHOT FIELD)Sets the number of recorded fields in the one-shot recording mode. When the JOG dial is turned to the right, the display will beswitched in the order of 1 } 2 } 3 } 4 } 5 } 10 } 20 } 30 } 1 }.6SETTING THE INTERVAL TIME IN THE ONE-SHOT RECORDING MODE (ONE SHOT INTERVAL)Sets the interval time in the one-shot recording mode. When the JOG dial is turned to the right, the display will be switched in theorder of SHOT } 10S (second) } 15S } 30S } 45S } 1M } 2M } 3M } SHOT }. REAR TERMINAL WRNG TAPE ENDCALL OUTREC- 1CLOCK OUTRECMODE OUTSERIESREC INREAR TERMINAL1SETTING THE CALL SIGNAL OUTPUT AT THE END OF THE TAPE (CALL OUT)Enables or disables the signal that is output from the CALL terminal when the end of the tape isreached during recording. If any abnormalities occur during recording, a CALL signal is output fromthe CALL terminal on the rear panel regardless of CALL OUT setting.WRNG TAPE END:A signal is output at the end of the tape or when a malfunction occurs.WRNG REMAIN:The signal is output when a malfunction occurs in this VCR or when the tapehas approximately 3 minutes left in 3H mode.WRNG:When a malfunction occurs in the VCR during recording, a CALL signal is output.This is used in conjunction with TAPE END (FIRST TIME SET UP) to determine when the CALL signal is output as shown below.CALL OUTTAPE ENDsettingsettingWRNG TAPE ENDSTOPOutputs a call signal atthe end of the tapeREWINDOutputs a call signal at the endof the tape for 2 secondsWRNG REMAINOutputs 3 minutes beforethe tape endWRNGWhen a malfunction occurs in the VCRduring recording, a call signal is output.REPEATALARM PROTWhen there are noalarm recordingsduring recordingWhen there are alarm Outputs a call signal at therecordings duringend of the taperecording2SETTING THE FREQUENCY DIVISION RATIO (CLOCK OUT)Sets the frequency division ratio of the CLOCK OUT terminal.First, set the recording mode for the “CLOCK OUT” pulse output in the “REAR TERMINAL” menu.REC:When recording in any mode.T/L-REC:When recording in time lapse mode (L18H, L24H, 48H, 72H, 96H, 120H, 168H or 0H).Second, select the frequency division ratio setting by turning the SHUTTLE ring. When the JOG dial is turned, the display will beswitched in the order of 1 } 2 } 3 } 4 } 5 } 10 } 15 } 20 } 25 } 30 } 50 } 60 } F (field) } 1 } . The numbers from 1 to60 indicate the number of frames in 3H or 6H recording mode or the number of fields in time lapse recording mode. (One frameconsists of two fields.) One field
HEAVY OBJECTS SHOULD NEVER BE PLACED ON THE VCR (E.G., TV) For HS-7168E(B) and HS-7168EM(B) 2 MAINS LEAD CONNECTION The mains lead on this VCR is fitted with a non-rewireable mains plug, incorporating a 5A fuse. If you need to replace the fuse, use a 5A fuse approved by BSI or ASTA to BS 1362, ensuring you refit the fuse cover. If the mains .
