Transcription
MIP Fund AccountingInstallation Guide
This is a publication of Community Brands HoldCo, LLC.Version 2021.x 2021 Community Brands HoldCo, LLC. and its affiliated entities. All rights reserved.MIP , the MIP logos, and the MIP product and service names mentioned herein are registered trademarks ortrademarks of Community Brands HoldCo, LLC. or its affiliated entities. All other trademarks are the property of theirrespective owners.MIP Fund AccountingInstallation Guideii
ContentsChapter 1: Getting Started1System Requirements2Before You Begin2Chapter 2: New User - Server Install5Server Install Overview5Local Server Configuration6Directory Structure Overview7Data Files and Directory Structure7MIP Share Directory8SQL Server (Express Download)SQL Server Express (Can be downloaded by following a link)99MIP Fund Accounting Server Install10Granting Access to the MIP Share Directory15Chapter 3: New User - Workstation Install17Ensuring Access to “All Users” Folder17Data Files and Directory Structure18MIP Directory18MIP Fund Accounting Workstation Install18Chapter 4: Existing User - Upgrading23Upgrading from a Previous Version23Changing Your Database Engine24Updating Your Organization Database to Version 2021.x24Activating Your License25MIP Fund AccountingInstallation Guideiv
ContentsAdding a Module to an Organization25Setting Up Security26Chapter 5: Existing User - Server Install27Server Install Overview27Directory Structure Overview28Data Files and Directory Structure28MIP Share Directory28SQL Server InstallSQL Server (Express Downloaded)2930MIP Fund Accounting Server Install31Chapter 6: Existing User - Workstation Install36Ensuring Access to “All Users” Folder36Data Files and Directory Structure36MIP Directory37MIP Fund Accounting Workstation Install37Chapter 7: Alerts IIS Install43Download MIP Fund Accounting43Begin Installation Process44MIP Fund Accounting Alerts Server Install45Setting Up Alerts48Chapter 8: Uninstalling MIP Fund Accounting51Uninstalling Steps51Chapter 9: Help Documentation53MIP Fund AccountingInstallation Guidev
ContentsAccessing Documentation53Chapter 10: Supplemental Maintenance54Backing Up Organization Database54Restoring Organization Database54Compressing Organization Database55MIP Fund AccountingInstallation Guidevi
Chapter 1: Getting StartedThis guide includes combined instructions for both New and Upgrade installations of MIP FundAccounting.New Installation ScenariosYou are installing a one-user version of MIP (programs and database) on a single computer. Thecomputer may or may not be part of a network, but the programs and database reside on the local harddrive of this computer. In this scenario, there are no network files involved, and no other computershave access to the system/database. Optional, IIS Web Server running on the single computer* orseparately if connected to your network.You have a network comprised of a server machine with one or more local computers attached, andyou want to install the database on the server machine so that other users can access it from their localcomputers (either one at a time or simultaneously depending on your license). Optional, IIS WebServer running on separate server on your network.You have a network comprised of two or more local computers that can access each other's shareddrives, and you want to install the database on one computer's shared drive so that other users canaccess it from their local computers (either one at a time or simultaneously depending on your license).Optional, IIS Web Server running on separate server on your network.You have a network and want to install the database on a server machine for backup and securitypurposes, even though only one user accesses it from a single local computer. Optional, IIS WebServer running on separate server on your network.You are installing the MIP programs and database in a virtual environment. You must use a virtualservice client, such as VMWare's Infrastructure Client Console, instead of a Remote DesktopConnection. Optional, IIS Web Server running on a separate server within the virtual environment.Upgrade Installation ScenariosYou are upgrading an existing Stand Alone or Network installation. Your installation will upgrade if youhave a previous version installed.You are upgrading the MIP programs and database in a virtual environment. You must use a virtualservice client, such as VMWare's Infrastructure Client Console, instead of a Remote DesktopConnection.MIP Fund AccountingInstallation Guide1
Chapter 1: Getting StartedFor specific information regarding existing users, see "Existing User - Upgrading" (page 23), "ExistingUser - Server Install" (page 27), and "Existing User - Workstation Install" (page 36).Optional Alerts IIS Server Installation ScenariosThe Alerts installation will work with any of the above scenarios for Stand Alone or Networkinstallation. It is a common practice to have a separate IIS Web server as a part of your network sothat your SQL Server will not experience additional performance delays when processing transactionsor running reports.If the IIS Web Server is installed on the same computer along with the MIP programs and database,you could experience connection limitations and possible performance delays when processingtransactions and running reports.If IIS Web Server is on a machine using a Windows 8.1, or 10 Operating System, the system has a 10concurrent connection limitation. This is a known Microsoft restriction when using Windows 8.1, or 10as the Alerts Server. It is recommended that you use a separate server on your network as your IISWeb Server. Ideally, it could have an older server version Operating System running, such asWindows Server 2008 R2. Note that having a local machine with Windows 8.1, or 10 as a MIPworkstation will not cause any problems.System RequirementsYou should meet or exceed the MIP Fund Accounting system requirements before you install theapplication.Important! Our System Requirements have changed; Microsoft .NET Framework 4.8.0, Full Profilemust be installed on the server and each workstation prior to installing MIP v2021.xBefore You BeginFor optimum results, perform the following tasks on the workstation and server before running theinstallation program:1. Verify that your current environment meets the new system requirements.Important! Our System Requirements have changed; Microsoft .NET Framework 4.8.0, FullProfile must be installed on the server and each workstation prior to installing MIP v2021.xMIP Fund AccountingInstallation Guide2
Before You BeginImportant! Before installing or upgrading to the current software version, verify that you are a userwith Administrator rights on the SQL Server or have access to the SQL Server System Admin (SA)password. Upon upgrade, the MIP software will be uninstalled. If you are not an Administrator on theSQL Server nor have the SA password, you will not be able to install any version of the software.2. Shut down all applications that are currently running, and restart the computer.3. After Windows has restarted, shut down any applications that have opened at start-up and turn off theUser Account Controls. Additionally, you may need to disable some applications, such as NortonAntiVirus .Press CTRL-ALT-DELETE to open the Windows Security form. Click the Task Manager button toopen the Windows Task Manager form. On the Applications tab, select each program listed in theform, and click End Task.Note: The above processes only shut down the applications for the purposes of the installation. Thenext time the computer is rebooted, the programs and all Windows services are restored.4. If the Windows Firewall is turned on, you must configure exceptions in the firewall for SQL Server orthe client computer(s) will not be able to connect. For specific instructions on setting up the exceptions,see article 5156 in the Knowledgebase.5. Delete all files in the local TEMP directory, such as C:\Documents and Settings\ Current User \LocalSettings\Temp. Since the computer has just rebooted and any unnecessary applications are closed,there should be few files in the Temp directory. Nevertheless, delete any files or folders that remainthere.6. If you are running MIP on a laptop, set your hibernation settings to Never (Start Settings ControlPanel Power Options Power Schemes tab). Otherwise, when the computer times out, your seat willbecome inactive.7. Before you begin the server install:The user logged on to the server machine must be a member of the Local Administrators group anda user with Administrator rights on the SQL Server or have access to the SQL Server SystemAdmin (SA) password.You must have Microsoft .NET Framework 4.8.0, Full Profile installed. You can verify your .NETversion using Control Panel Programs and Features. For specific instructions on installing thisversion of Microsoft.NET Framework, see article 7416 in the Knowledgebase.MIP Fund AccountingInstallation Guide3
Chapter 1: Getting StartedImportant! If the .NET framework is not installed, the MIP Fund Accounting installation wizardcannot continue. You must exit the wizard and restart it after you install the .NET frameworkversion 4.8.0, Full Profile.To install or upgrade MIP on a virtual environment, you must use a virtual service client, such asVMWare's Infrastructure Client Console, instead of a Remote Desktop Connection.For specific instructions for SQL Server 2012 Standard Edition configuration, see article 3156 inthe Knowledgebase. It details how to check an existing instance of SQL Server 2012 StandardEdition to ensure proper functionality before installing MIP.SQL Server 2014, SQL Server 2012, and Windows 10 Users: Be sure to start the SQL ServerBrowser and consider setting the Start Mode to Automatic to ensure that the workstation canaccess the MIP system database.Access the email sent to you by MIP which contains the link and download the MIP software to thecomputer functioning as the MIP Fund Accounting Server.8. Before you begin the workstation install, you must ensure the following:The user logged on to the server machine must be a member of the Local Administrators group.Each workstation has at the very least read-write access to the “ProgramData” folder-- local driveletter: \ProgramData. Also verify that each user that uses Aatrix (for 1099s, W-2s, 990s, 1095s,etc.) has rights.MIP cannot install successfully without these folders and rights.9. Before you begin the Alerts Setup install, verify that the following are installed:Internet Information Server (IIS) 7.5 must be installed on the web server. The MIP FundAccounting Alerts installation will attempt to install IIS if it is not already installed.10. Close any open windows.After performing these steps, you are ready to run the Installation program.The Getting Started guide assists in setting up the chart of accounts once the system is successfullyinstalled, and Help is always available at the click of a button in the context-sensitive online help system.MIP Fund AccountingInstallation Guide4
Chapter 2: New User - Server InstallThis chapter describes the installation process for a stand-alone, virtual, or network server. You mustselect a database engine prior to installing the MIP Fund Accounting Server. Once you have completedthese steps, follow the instructions in New User - Workstation Install to install the workstation.This chapter explains the following:"Server Install Overview" (page 27)"Local Server Configuration" (page 6)"Directory Structure Overview" (page 28)"SQL Server (Express Download)" (page 9)"MIP Fund Accounting Server Install" (page 10)"Granting Access to the MIP Share Directory" (page 15)Server Install OverviewThe Server install is comprised of the following:SQL Server Express- Download Microsoft SQL Server 2014 Express with Advanced Services fromthe SQL Server Express Installation link on the Setup tab of the MIP Fund Accounting Install on theMIP Fund Accounting AutoRun.exe or use an already installed version of Microsoft SQL Server 2012(Full Version), SQL Server 2014 (Full Version), SQL Server 2016 (Full Version), or SQL Server 2017.MIP Fund Accounting Server - The MIP Fund Accounting Server installation creates the MIP Sharedirectory. We recommend accepting the default path when installing the server component.The necessary files related to the MIP Fund Accounting Server Install are copied to the SQL server. Todownload the Microsoft SQL Server 2014 Express Edition with Advanced Services from the Microsoftwebsite, click the SQL Server Express Installation link that displays on the Setup tab of the MIP FundAccounting Install on the MIP Fund Accounting AutoRun.exe.Important! Our System Requirements have changed; Microsoft .NET Framework 4.8.0, Full Profilemust be installed on the server and each workstation prior to installing MIP v2021.xMIP Fund AccountingInstallation Guide5
Chapter 2: New User - Server InstallImportant! Before installing the software, verify that you are a user with Administrator rights on theSQL Server or have access to the SQL Server System Admin (SA) password. Otherwise, you will notbe able to install the software.Local Server ConfigurationIn order to successfully install and run MIP on a stand-alone machine, verify that the File and PrinterSharing Service is installed, the TCP/IP protocol is installed, and the Server Service is enabled. Then,you need to complete the instructions in this chapter to ensure that the MIP Fund Accounting Server isinstalled correctly. Once you have completed these steps, follow the instructions in New User Workstation Install to install the workstation.Note: If you do not have a network adapter driver installed, you cannot continue the MIP install. Youneed to install the Microsoft Loopback Adapter first (follow the instructions below).To Activate File and Printer Sharing Service:1. Right-click Network and then select Properties. The Network and Sharing Center displays.2. Under Sharing and Discovery, verify that File Sharing and Printer sharing are listed as On.3. If Off displays, expand the down arrow and select the Turn on option.To Enable the Server Service:1. Go to Start Settings Control Panel Administrative Tools Services.2. Double-click the Server Manager.3. Expand Configuration, and click Services.4. Make sure that the Startup type is Automatic and the Server Status is Started. If those settings arenot in place, implement them, and then click OK.To Install TCP/IP:1. Right-click Network and then select Properties.2. Click View Status for Local Area Connection and then click Properties.3. If Internet Protocol Version 4 or 6 (TCP/IPv4/v6) is not selected in the list, check the box and click theInstall button. If it is listed, click OK and skip to step 6.4. Select Protocol, and then click Add.MIP Fund AccountingInstallation Guide6
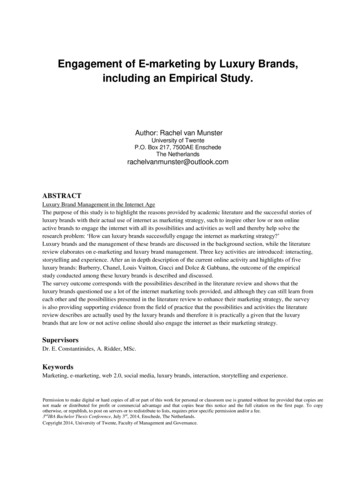
Directory Structure Overview5. Select Internet Protocol (TCP/IP), and then click OK.6. Click Close to close the Local Area Connection Status window.Note: If you are actually using TCP/IP to connect to your network, make sure that it is configuredproperly.Directory Structure OverviewThe MIP Fund Accounting Server executable (SETUP.EXE) creates the MIP Share directory. Werecommend accepting the default path when installing the server component.Data Files and Directory StructureWhen installing the MIP Fund Accounting Server, the data files and workstation share files are stored onthe machine that is functioning as the server. The workstation installation stores the MIP system andprogram files on each client machine.After the server installation, the following directory structure exists on the drive and in the directory thatwas specified during installation.MIP Fund AccountingInstallation Guide7
Chapter 2: New User - Server InstallMIP Share DirectoryNote: Do not Password Protect the MIP Share Directory.This directory contains the following folders:AATRIX contains the drafts and historical forms created by Aatrix, for each federal tax ID in theCompanies folder.CONSOLIDATION FILES contains CONTEMP.TXT, which will be altered when consolidating data.DATA contains a copy of the NPSSQLSYS.NPS and NTO.NPS files. These are the system andsample database files that come with the system.DDEPOSIT contains ACH.TXT, which will be altered when using the Direct Deposit module.EPAYAP contains ACHAP.TXT, which will be altered when using the Electronic Funds Transfer forA/P module.FORMATS contain the files needed to print custom forms in the system. This is where you shouldstore custom formats created by the Forms Designer module.GRANTADMIN contains scanned images of sample grant documentation for the Grant Administrationmodule.IMPORT includes sample DEF and data files that can be used with the Data Import/Export module.LOG contains ABILALOGACCT.LOG, ABILALOGADMIN.LOG, and ABILALOGPAYROLL.LOG filesthat document when an error occurs related to the Alerts module, such as, failure to connect to theAlert Server.MIP DOCUMENTATION includes the product guides available in PDF format.{ORGANIZATION DATABASE NAME} contains all folders for attachments. This folder is not actuallycreated until the attachments feature is activated in the system (Organization Attachments Set UpLocations).REPORT PDF FILES contains *.PDF files saved while using the Print to PDF feature.SETUP contains the files necessary to run the MIP Fund Accounting Workstation installation. Each ofthe client machines will need to access this folder in order to install the Workstation component. TheSETUP.EXE file launches the MIP Fund Accounting Workstation installation.MIP Fund AccountingInstallation Guide8
SQL Server (Express Download)SQLSCRIPTS contains SQL scripts necessary for the system to function properly.SUPPORT contains support related folders.SQL Server (Express Download)Select one of the following that best describes your current setup, and then follow the instructions belowfor installation:SQL Server Express (can be downloaded by following a link) - Microsoft SQL Server 2014 ExpressEdition with Advanced Services can be downloaded from the SQL Server Express Installation link onyour MIP Fund Accounting Version 2021.x Setup tab.SQL 2014, SQL 2012, or SQL Express (Already installed) - Either the Microsoft SQL Server or SQLExpress has already been installed as your server using the Microsoft website at www.microsoft.com.Or SQL Server 2012, or 2014 has already been installed as your server.The SQL installation creates the \Program Files\Microsoft SQL Server directory. By default, this directoryis located on the local drive in which your operating system is installed. Use the browser to change thisdestination during the installation.All users have the option to install their own instance of SQL Express or SQL Server. This gives you theability to administer it according to your practices.SQL Server Express (Can be downloaded by following a link)This section describes the installation process for the Microsoft SQL Server 2016 Express Edition withAdvanced Services from the MIP Fund Accounting Version 2021.x Setup Tab. Please carefully read eachpanel of the wizard during installation.Important! Before you begin, verify that Microsoft .NET Framework 4.8.0 Full Profile or higher isinstalled before you try to Install MIP Fund Accounting Server. Go to Start Settings ControlPanel Programs and Features.1. Download the MIP software to the computer functioning as the MIP Fund Accounting Server. To getthe latest download, see the Knowledgebase.Once complete, the system automatically launches autorun.exe and the Abila MIP Fund AccountingSetup window displays.MIP Fund AccountingInstallation Guide9
Chapter 2: New User - Server Install2. Select SQL Server Express Installation and follow the steps to download SQL Server Express fromthe Microsoft website. Upon completion, be sure to install the SQL Server's latest service packupdates before continuing the installation process.Note: Click the Here link to open a browser to access instructions for installing the SQL Server2016 Express on the Knowledgebase.MIP Fund Accounting Server InstallWhen installing the MIP Fund Accounting Server, a directory is created by default— Server Name :\MIPSHARE. The MIP Fund Accounting Server must be installed before proceeding to the "MIP FundAccounting Workstation Install" (page 18).Note: To install or upgrade in a virtual environment, you must use a virtual service client, such asVMWare's Infrastructure Client Console, instead of a Remote Desktop Connection.Please carefully read each panel of the wizard during installation.MIP Fund AccountingInstallation Guide10
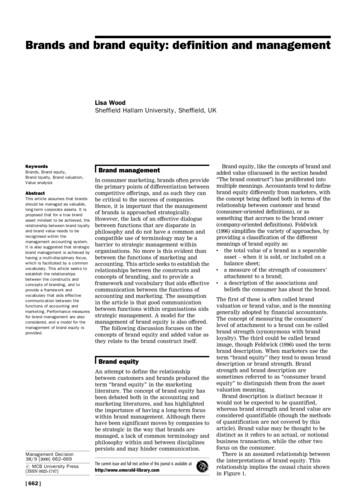
MIP Fund Accounting Server Install1. Be sure you are logged in as a user who has local administrator rights to perform the install. Also,verify that you are a user with Administrator rights on the SQL Server or have access to the SQLServer System Admin (SA) password. (If you are not an Administrator on the SQL Server nor have theSA password, you will not be able to install the software.)2. If you have not already done so, download the MIP software to the computer functioning as the MIPFund Accounting Server.The system automatically launches autorun.exe and the Abila MIP Fund Accounting Setup windowdisplays.3. After reviewing the provided documentation, select the Begin Installation Process option. The systembegins extracting the setup.exe file.4. The Abila MIP Fund Accounting Server InstallShield Wizard prepares to install. The Welcome paneldisplays. Click Next.MIP Fund AccountingInstallation Guide11
Chapter 2: New User - Server Install5. The End User License Agreement displays. Select the “I accept the terms in the license agreement”option to continue with the Server Installation.6. Click Next. The system displays the Product Registration panel. Enter the Serial Number andActivation Code.The activation code is case sensitive, so it must be entered exactly as it appears on the notificationincluded with the system. (Store the activation code in a safe place in case your system needs tobe reinstalled.)MIP Fund AccountingInstallation Guide12
MIP Fund Accounting Server InstallActivationThe activation code is determined by the system’s license. The system uses theCodesactivation code to determine which modules you own, how many additionaldatabases you have purchased, and how many concurrent users you will haveavailable. Later, if you decide to add a module or increase your users or databases,you need to enter a new activation code. To enter a new license, with Administrativeuser rights open the System Activate License form. To add a module to an existingdatabase, use the Organization Add A Module form.7. Click Next. Accept the default MIP Share destination folder (recommended), or use the Change buttonto navigate to a different location.MIP Fund AccountingInstallation Guide13
Chapter 2: New User - Server Install8. Click Next. Select the database server that you are installing to by using the drop-down arrow, orBrowse to the database location.Then, select how you want to connect to this server. If Server authentication is chosen, enter theLogin ID and Password.9. Click Next. You are now ready to Install MIP Fund Accounting.10. Click Install to begin, or use the Back button to make changes.11. Proceed through the MIP Server setup. This process may take several minutes.12. When the installation is complete, the InstallShield Wizard Completed panel displays.MIP Fund AccountingInstallation Guide14
Granting Access to the MIP Share DirectoryThis is the final panel of the server installation. It verifies that the MIP Fund Accounting Server installedsuccessfully.Select the “Install Abila MIP Workstation” check box, and then click Finish to continue through theinstallation program by launching the MIP Fund Accounting Workstation Installation wizard. Forinstructions, proceed to New User - Workstation Install.Alternatively, if you do not select the check box, you can install later from the MIP Share directory.For more information, see "Granting Access to the MIP Share Directory" (page 15).Optional, install Alerts on your IIS Web Server. For more information, see "Alerts IIS Install" (page43)13. Click Finish to complete the install.14. If applicable, click the Exit button on the MIP Fund Accounting Installation Startup form.15. Navigate to the MIP Share directory on the Server and set it to share with Full control permissions toEveryone.Granting Access to the MIP Share DirectoryThe MIP Share directory (which the Server installation created) contains the files necessary to installMIP's program files at each workstation. First, the MIP Share directory must be shared so that theworkstations will have access to it.1. Right-click the MIP Share directory at the server and select Share. . . If you do not see Shared, youwill need to log on as a user account that is a member of the Local Administrators or Power UsersMIP Fund AccountingInstallation Guide15
Chapter 2: New User - Server Installgroup.2. On the Sharing tab, click Advanced Sharing. And then select the Share this folder check box.3. Click the Permissions button.4. Add the desired users/groups.Note: If you share to specific users/groups and not the “Everyone” group, you will need to add the“System” account with full rights on the Security tab. If you give the “Everyone” group full rights,then it is not necessary to add “System.”5. Grant each user/group Full Control and click OK. A minimum of Change and Read permissions arerequired. NTFS formatted servers will display a Security tab, in which case you must grant NTFSPermissions. You need to allow System with Full Control. The Security tab will not be available if thedrive is formatted using FAT32.6. Click OK to close the Advanced Sharing window.7. Click the Security tab.8. Add the desired users/groups. Typically, the default NTFS permission is all you will need. However,you can grant the users/groups Full Control access.9. Click OK to apply these settings.10. Click Close to close the MIP Share Properties window.Note: You must allow inheritable permissions.MIP Fund AccountingInstallation Guide16
Chapter 3: New User - Workstation InstallBefore starting the Workstation installation, you must have already completed the "MIP FundAccounting Server Install" (page 10) and "Granting Access to the MIP Share Directory" (page 15), ifthere is a network.This chapter describes the installation process for the MIP Fund Accounting Workstation. This installationprovides the program files needed to run the system. During the installation, you can choose whichshortcut and executable files to install for each system, such as Administration, Accounting, Payroll, orthe entire system. Please carefully read each panel of the wizard during installation.The necessary files related to this installation are copied to the MIP Share directory of the server duringthe MIP Fund Accounting Server installation. There is only one executable (SETUP.EXE) for theworkstation install.Note: The user logged on to the workstation machine must be a member of the Local Administratorsgroup.Ensuring Access to “All Users” FolderBefore you begin the workstation install and you are using Aatrix , you must ensure that the workstationhas access to the “All Users” directory. The following steps should be completed:1. Click Start Run.2. Enter the local drive letter: in the Open box.3. Click OK. The system displays an explore window.4. Open the Program Data folder.5. Ensure that the “All Users” and user name folders are listed. Also verify that each user that usesAatrix (for 1099s, W-2s, 990s, etc.) has “Full Control” rights (right-click onfolder Properties Security tab). MIP Fund Accounting cannot install successfully without thesefolders and rights. These steps should be completed for each workstation running on Windows 8.1, or10.MIP Fund AccountingInstallation Guide17
Chapter 3: New User - Workstation InstallData Files and Directory StructureWhen installing the MIP Fund Accounting Workstation, the system and program files are stored on eachcomputer. After the workstation installation, the following directory structure exists on the drive and in thedirectory that was specified during installation.MIP DirectoryThe MIP Fund Accounting Workstation installation creates a MIP directory on the local disk partition withthe most space. This directory contains the following folders:HELP contains all the files associated with the online help system.PROGS contains the executable (*.EXE) files required to run the system. Specific *.DLL files areincluded in the PROGS directory. Do NOT delete any of these files.MIP Fund Accounting Workstation InstallThis section describes the workstation install. There are two ways to access this install:If you selected the Install Abila MIP Workstation check box at the end of the Server Install, the systemautomatically launches the Welcome panel of the MIP Fund Accounting Workstation install.If you are installing the workstation only, go to the workstation machine and log on as a user with localadministrator rights. Navigate to the MIP Share directory (\\MIP Share) on the Server, open the Setupsub directory, and select Setup.exe.MIP Fund AccountingInstallation Guide18
MIP Fund Accounting Workstation Install1. The Abila MIP Fund Accounting Workstation install Welcome panel displays.2. Click Next. Review the End User License Agreement and select the “I accept the terms in the licenseagreement” option.3. Click Next. Accept the default MIP destination folder (recommended), or use the Change button tonavigate to a different location.MIP Fund AccountingInstallation Guide19
Chapter 3: New User - Workstation Install4. Click Next. The Custom Setup panel displays, which allows you to select the systems you would liketo install. By default, the system installs the start menu shortcuts and program files for all systems,even if they are not part of the license.To prevent a system fro
SQL Server (Express Download) 9 SQL Server Express (Can be downloaded by following a link) 9 MIP Fund Accounting Server Install 10 Granting Access to the MIP Share Directory 15 Chapter 3: New User - Workstation Install 17 . SQL Server 2014, SQL Server 2012, and Windows 10 Users: Be sure to start the SQL Server .