Transcription
Informatica Intelligent Cloud ServicesAccelerator for Snowflake User Guide Copyright Informatica LLC 2020. Informatica, the Informatica logo, and Informatica Intelligent Cloud Services aretrademarks or registered trademarks of Informatica LLC in the United States and many jurisdictions throughout the world.A current list of Informatica trademarks is available on the web at https://www.informatica.com/trademarks.html
ContentsIntroduction . 2Getting started . 3Step 1. Create an IICS organization . 3Step 2. Install the bundle. 7Step 3. Install the Secure Agent (runtime environment). 9Step 4. Configure connections . 9Configure a Snowflake connection . 9Configure a Salesforce connection. 10Configure a flat file connection . 11Using the IICS Accelerator for Snowflake. 12Loading Salesforce data to Snowflake . 12Loading a CSV file to Snowflake . 16Loading CSV files using a mass ingestion task. 19Using pushdown optimization in a mapping . 23Step 1. Create an ODBC DSN . 24Step 2. Create a connection . 24Step 3. Create a mapping. 25Step 4. Create and run a mapping task . 27Step 5. Monitor the pushdown job . 27Next steps. 27IntroductionThe IICS Accelerator for Snowflake guide will help you to navigate the Informatica IntelligentCloud ServicesSM (IICS) interface and to load data into Snowflake quickly.This guide contains two sections. The first section describes the initial steps for setting up yourorganization to use the Snowflake Accelerator. It explains the following: How to create an IICS organizationHow to install an add-on bundle (optional)How to install a Secure Agent to run your tasksHow to create connections to Snowflake and other data endpointsThe second section of this guide includes examples of commonly used features for loading datainto Snowflake. It explains how to perform the following tasks: Load Salesforce data to SnowflakeLoad a CSV file to SnowflakeLoad CSV files using mass ingestionUse the pushdown optimization option in a mapping2
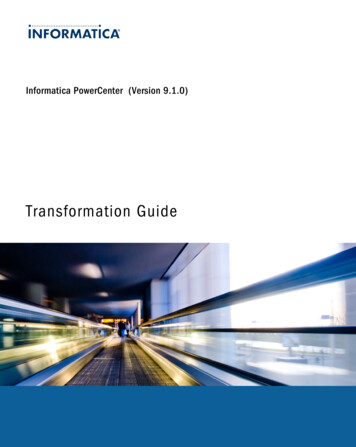
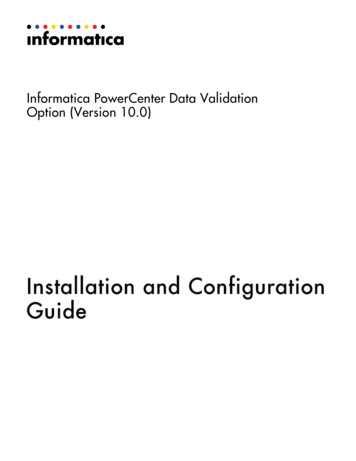
Getting startedTo begin, you need to perform the following steps:1. Create an IICS organization.Create an IICS organization from the Snowflake Partner Connect page.2. Optionally, install the add-on bundle.An add-on bundle is a set of mappings that is pre-built and published by an IICS user.The add-on bundles and templates are provided to help you load Salesforce Opportunityand Account data into Snowflake and to load a CSV file into Snowflake without writing asingle line of code.After you install the bundle, you can start using the mappings. The bundle containsmappings called “Salesforce Oppty Acct to Snowflake - Parameterized” and “CSV toSnowflake.”3. Install a Secure Agent to use as the runtime environment for your mappings and tasks.The Secure Agent enables IICS to access application, relational database, and filesources and targets in your on-premises network.4. Configure connections to Snowflake, Salesforce, and CSV files.These connections allow you to connect to your data sources and targets.Step 1. Create an IICS organizationComplete the following steps to create your IICS organization and create a Snowflakeconnection.1. Log in to Snowflake and click Partner Connect.2. Click the Informatica tile:3
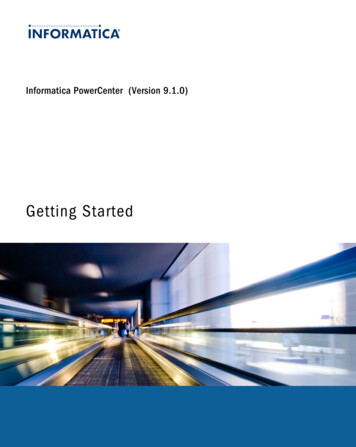
Objects that will be created in Snowflake are displayed. These objects will be used tocreate a Snowflake connection in IICS:3. Click Connect.4. When you see the message saying that your partner account has been created, clickActivate to register your IICS organization:4
5. Fill in the form and click Submit.If you have an existing IICS organization with the same email address as your username, uncheck “Use my email address as my username.”5
6. Click the appropriate region to log in to IICS. Your region is the Data Center selected inthe previous page.The Informatica Intelligent Cloud Services Accelerator for Snowflake Marketplace pagealso contains links to other materials on the Informatica Knowledge Base. Be sure tocheck them out!7. Log in using the IICS user name and password that you provided in the previous form:6
8. Set up the security question and click Log In:A Snowflake connection is automatically created for you.9. Test the connection by opening the Administrator service, clicking Connections, andselecting the connection. On the connection details page, click Test Connection:You should see the message, “The test for this connection was successful.”Step 2. Install the bundleNote: This is an optional step. The add-on bundle is automatically provisioned for you. To view it,open the Data Integration Service in IICS, click Explore, and open the Add-On Bundles project:7
If you don’t see the bundle, or you need to reinstall it, the Snowflake Partner Connect Bundle islisted in Add-On Bundles page in Administrator.To install the bundle:1. In IICS, open the Administrator service.2. Click Add-On Bundles from the menu and select the Available Bundles tab.3. Search for “Snowflake” and click the result.4. Click Copy Bundle Content To:5. Select the project or folder where you want to copy the mappings.8
Step 3. Install the Secure Agent (runtime environment)The Secure Agent is a small footprint application that enables secure communication across thefirewall between your organization and IICS. It enables IICS to get through the firewall to accessapplication, relational database, and file sources and targets in your on-premises network.In this step, you install the Secure Agent on a server in your on-premises network or in the cloudservice provider of your choice.1. In the Administrator service, click Runtime Environments.2. Click Download Secure Agent.3. Select the operating system platform where you will install the Secure Agent.4. Click Copy to copy the install token string.The install token is needed to associate the Secure Agent with your IICS organization.5. Click Download to start downloading the Secure Agent.6. Install the secure agent and supply the install token when requested.You should see the secure agent listed on the Runtime Environments page inAdministrator:Note: Your runtime environment should be listed with the status “Up and Running” beforeyou continue to the next step. If you see the status “Not all the services are running,” wait 510 minutes for the agent to start up completely and install updates.For more information about deploying a Secure Agent, see these instructions in the IICSAdministrator guide or check out this video.Step 4. Configure connectionsInformatica supports more than 300 connectors. A connector is a pre-built integration that allowsyou to connect to data sources and targets.In this step, you configure Snowflake, Salesforce, and flat file connections.Configure a Snowflake connectionNote: This is an optional step. A Snowflake connection was already created for you when youcreated your organization through Snowflake Partner Connect.If you want to configure another Snowflake connection, you can configure a Snowflakeconnection on the Connections page in the Administrator service.1. In Administrator, click Connections.2. Click New Connection in the top right corner of the screen.3. Enter a name and optional description for the connection.4. Select Snowflake Cloud Data Warehouse V2 as the connection type.5. Configure the following properties:9
Runtime Environment. Select the Secure Agent that you created. Username Password AccountWarehouse Roles6. To test the connection, click Test Connection.You should see the message, “The test for this connection was successful”:7. Click Save to save the connection.For more information about configuring a Snowflake Cloud Data Warehouse V2 connection, seethis topic in the IICS Connections guide.Configure a Salesforce connectionConfigure a Salesforce connection on the Connections page in the Administrator service.1. In Administrator, click Connections.2. Click New Connection in the top right corner of the screen.3. Enter a name and optional description for the connection.4. Select Salesforce as the connection type.5. Configure the following properties: Runtime Environment. Select the Secure Agent that you created. User Name Password10
Security Token Service URL6. To test the connection, click Test Connection.7. You should see the message, “The test for this connection was successful”:8. Click Save to save the connection.For more information about configuring a Salesforce connection, see this topic in the IICSConnections guide.Configure a flat file connectionConfigure a flat file connection on the Connections page in the Administrator service.1. In Administrator, click Connections.2. Click New Connection in the top right corner of the screen.3. Enter a name and optional description for the connection.4. Select Flat File as the connection type.5. Configure the following properties: Runtime Environment. Select the Secure Agent that you created. DirectoryDate Format Code Page6. To test the connection, click Test Connection.11
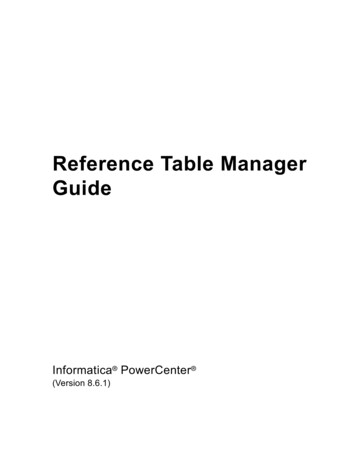
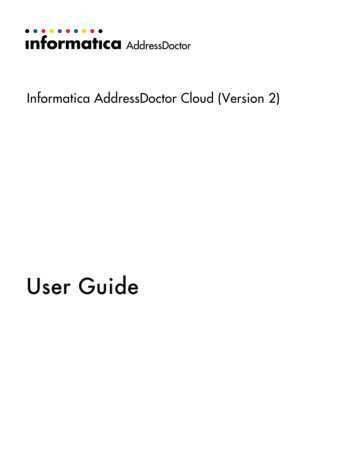
You should see the message, “The test for this connection was successful:”7. Click Save to save the connection.For more information about configuring a flat file connection, see this topic in the IICSConnections guide.Using the IICS Accelerator for SnowflakeThis section uses mappings and tasks included in the bundle that you installed to perform thefollowing tasks: Load Salesforce data to SnowflakeLoad a CSV file to Snowflake using a mappingLoad CSV files to Snowflake using a mass ingestion taskPerform ELT in Snowflake using pushdown optimizationLoading Salesforce data to SnowflakeThe Data Integration Mapping Designer allows you to define data integration flow in a visualdesigner interface. It starts from defining the data sources to read data from, applyingtransformations based on your requirements on that data set, and then writing the resulting dataset to the target system.Note: If you still have the Administrator service open, click Administrator next to the Informaticalogo in the top left corner of the screen. Then select Data Integration from the menu.The first mapping in the bundle is called “Salesforce Oppty Acct to Snowflake - Parameterized.”This mapping can:1. Read the Opportunity object from Salesforce.2. Filter records prior to 2018.3. Read the Account object from Salesforce.4. Join the Opportunity object with the Account object.5. Aggregate the Amount column in the Opportunity object and group by AccountId,ForecastCategory, and FiscalYear.6. Sort the records by AccountId, FiscalYear, FiscalQuarter, and ForecastCategory.7. Write the resulting records to the Snowflake table.12
The source and target connections in this mapping are parameterized using input parameters.This means that you have the option to choose the sources and the target Snowflake table at runtime.For more information about input parameters, see this topic in the Data Integration Mappingsguide.The following image shows the mapping in the Mapping Designer:Click each transformation and view the transformation details on the Properties panel.The following image shows the properties on the Source tab of the Opportunity source:13
To run the mapping, click Run in the top right corner of the canvas, and then do the following:1. Select your runtime environment and then click Next:2. In the Salesforce Account Connection and Salesforce Opportunity Connectionsource parameter fields, select the Salesforce connections you created and then clickNext:3. In the Snowflake Connection target parameter field, select the Snowflake connectionyou created:4. Click Create Target to create a new table.Alternatively, you can click Select to use an existing table.5. In the Create Target dialog box, enter the following information and then click OK:PropertyDescriptionObjectEnter the target table name. This table will be created when you run themapping.TableTypeEnter TABLE.PathEnter the database/schema.14
6. Click Run.7. Click My Jobs to open the job activity page:The target table is created in Snowflake:15
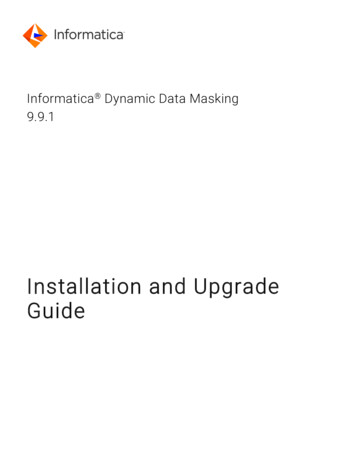
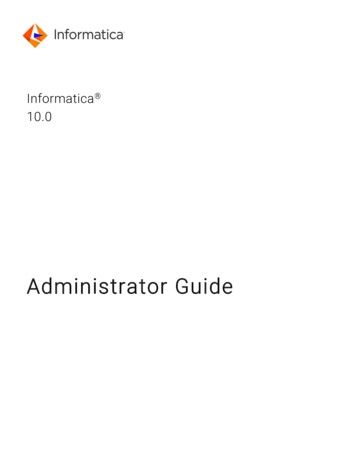
Loading a CSV file to SnowflakeIn this step, you load a CSV file from the flat file directory that you configured in the flat fileconnection and write it to a Snowflake table. Please download the CSV file and place it in the flatfile directory.The second mapping in the bundle is called “CSV to Snowflake.” This mapping does thefollowing: Reads the DimCustomer.csv file.Writes the records into Snowflake table.The target connection in this mapping is parameterized using input parameters. This means thatyou have the option to choose the Snowflake target table at run time.Click each transformation and view the transformation details on the Properties panel.The following image shows the properties on the Source tab of the CSV source:16
To run the mapping, click Run in the top right corner of the canvas, and then do the following:1. Select your runtime environment and then click Next:2. In the FlatFile Connection source parameter field, select the flat file connection youcreated and then click Next:3. In the Snowflake Connection target parameter field, select the Snowflake connectionyou created:4. Click Create Target to create a new table.Alternatively, you can click Select to use an existing table.17
5. In the Create Target dialog box, enter the following information and then click OK:PropertyDescriptionObjectEnter the target table name. This table will be created when you run themapping.TableTypeEnter TABLE.PathEnter the database/schema.6. Click Run.7. Click My Jobs to open the job activity page:18
The target table is created in Snowflake:For more information about creating mappings, see the Data Integration Mappings guide.Loading CSV files using a mass ingestion taskLoading many CSV files into Snowflake is easy to do using a mass ingestion task. A massingestion task can transfer a large number of files of any file type between on-premises and cloudrepositories and can track and monitor file transfers. This section describes the step-by-stepinstructions to create and run a mass ingestion task.Before you create the task, complete the following prerequisites: Place the CSV files into the directory in which your flat file connection is configured toread. You can download the sample CSV files from here. The sample files are extractsfrom the Salesforce Opportunity object.Create a table in Snowflake with the same columns that are in the CSV files. File massingestion requires a target table to be available. You can download an SQL script tocreate the table here.To create and run the mass ingestion task:1. In Data Integration, click New in the navigation menu on the left:19
2. In the New Asset dialog box, select Mass Ingestion Task:3. On the Definition page, enter the following information:PropertyDescriptionTask NameEnter a task name.LocationSelect the project and folder where you want to save this task.Runtime EnvironmentSelect the runtime environment to run the task.4. Click Next.5. On the Source page, enter the following information:PropertyDescriptionConnection TypeSelect Local Folder.Source DirectorySelect the directory where you placed the CSV files.20
PropertyDescriptionFile PickupSelect File Pattern, leave the default Wildcard, and enter Oppty *.6. Click Next.7. On the Target page, enter the following information:PropertyDescriptionConnection TypeSelect Snowflake Cloud Data Warehouse V2.ConnectionSelect the Snowflake connection from the list.WarehouseEnter your warehouse name.DatabaseEnter the database name where you created the opportunity table.SchemaEnter the schema name.Target Table NameEnter OPPORTUNITIES.RoleEnter a role name that has access to the target table.21
8. Click Next.9. On the Schedule page, select Do not run this task on a schedule:10. Click Save to save the task.11. Click Run.12. Open the My Jobs page to check the job status:22
The target table is populated in Snowflake:For more information about mass ingestion tasks, see “Mass ingestion tasks” in the DataIntegration Tasks guide.Using pushdown optimization in a mappingThis section gives an example of a pushdown optimization scenario in which you develop amapping in Data Integration and configure it to run entirely on Snowflake.The steps involved are:1.2.3.4.5.Create an ODBC DSN.Create one or more ODBC connections in IICS.Create a mapping.Create a mapping task and run it.Validate the pushdown implementation.23
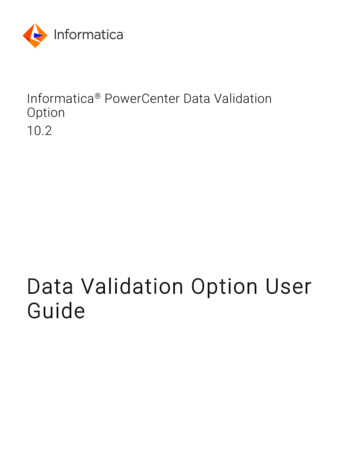
Step 1. Create an ODBC DSNOn the machine where you downloaded and installed the Secure Agent, create an ODBC DSNentry using a 64-bit ODBC client. Use the SnowflakeDSI driver that you download from theSnowflake website:Be sure to specify the attributes Database, Schema, Warehouse, and Role in addition to theother credentials, as shown above.Step 2. Create a connection1. In Administrator, click Connections.2. Click New connection in the top right corner of the screen.3. Create an ODBC connection using the following values:PropertyDescriptionConnection NameName of the connection.The connection will appear in mappings and tasks with this name.DescriptionOptional description for the connection.TypeSelect OBDC.Runtime EnvironmentRuntime environment you have configured with the IICSorganization.UsernameYour Snowflake account user name.PasswordPassword for your Snowflake account.Data Source NameName of the ODBC data source that you created.24
PropertyDescriptionSchemaName of the schema in your Snowflake account that contains yourtables. If you use more than one schema, you can create aconnection for each schema.Code PageSelect the code page that you want to use.OBDC SubtypeSelect Snowflake.Driver Manager for LinuxSelect unixODBC 2.3.0 (the default value).4. To test the connection, click Test Connection.You should see the message, “The test for this connection was successful.”5. Click Save to save the connection.Step 3. Create a mapping1. Click Administrator next to the Informatica logo in the top left corner of the screen, andthen select Data Integration from the menu.2. Click New in the navigation menu on the left.3. In the New Asset dialog box, select Mapping.4. In the Mapping Designer, create a mapping with the following tionSourceThe Snowflake objectthat you read data from.Browse and select the object.FilterFilter the rows that youdon’t want to process orload.Configure the filter condition.AggregatorGroup by rows andapply aggregatefunctions such as SUM.Configure the Group By fields and use theAggregate tab to apply aggregate functionsfor the rest of the fields using the FieldExpression dialog.An example is shown below.TargetThe Snowflake objectthat you want to writedata to.Browse and select the object or create anew target object based on your fieldprojection.Configure the write action (insert, upsertetc.).If you use an existing Snowflake object,configure the field mapping on the FieldMapping tab.25
Aggregator transformation configuration – Group By tab:Aggregator transformation configuration – Aggregate tab:Target transformation – Target tab:5. In the top right corner of the Mapping Designer, clickto validate the mapping.If the mapping has validation errors, check the Data Integration online help for moreinformation.The most common validation errors are: No source or target object selectedTransformations not linkedIn the Aggregator transformation, no fields are created, or no fields are specifiedfor grouping No fields are mapped for an existing target6. Click Save to save the mapping.26
Step 4. Create and run a mapping task1. In the top right corner of the Mapping Designer, open the Actions menu and select NewMapping Task.2. On the Definition page of the New Mapping Task wizard, enter a name for the mappingtask and select the runtime environment you created.3. Click Next.4. On the Schedule page, enable pushdown optimization:a. Scroll down to the Advanced Session Properties and click Add.b. In the Session Property Name, select Pushdown Optimization in the PerformanceSettings.c. In the Session Property Value, select Full.d. Keep the Enable cross-schema Pushdown Optimization option selected,regardless of whether your source and target objects are in the same schema anddatabase.5. Click Finish to save and create the task.6. Click Run to run the task.7. Click My Jobs to open the job activity page.It might take a few seconds for the new job to show up on the My Jobs page. Clickrefresh if you don’t see it after a few seconds.Step 5. Monitor the pushdown jobWhen the job completes and shows the status as “Success,” you can go to the SnowflakeConsole and check the command history. Refer to the Frequently Asked Questions or the forum ifthe task fails and you need more information about the errors.When the task shows either Success or Warning, the Snowflake command history should showa command that contains an INSERT INTO the target object followed by a SELECT from thesource and a GROUP BY applied to the group by field.An example appears below:This completes the tryout of the pushdown optimization feature to implement an ELT pattern onSnowflake. Refer to the Snowflake Connector Guide to find the transformations and functions thatsupport pushdown and any limitations that apply.Next stepsCongratulations on completing the tasks in this guide!There is much more that you can do with IICS. Please check out the Cloud Data Integrationdocumentation on Informatica Network to find out more.27
Administrator guide or check out this video. Step 4. Configure connections Informatica supports more than 300 connectors. A connector is a pre-built integration that allows you to connect to data sources and targets. In this step, you configure Snowflake, Salesforce, and flat file connections. Configure a Snowflake connection Note: