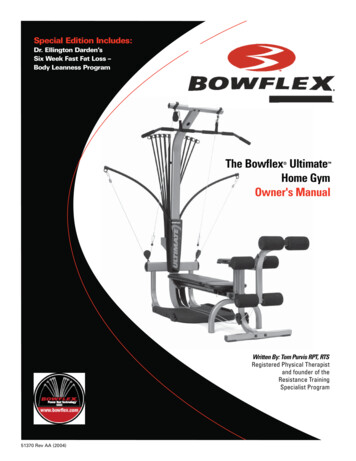
Transcription
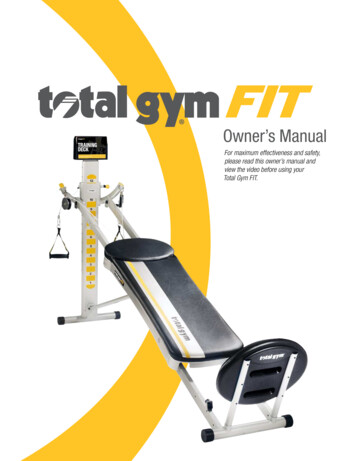
FITOwner’s ManualFor maximum effectiveness and safety,please read this owner’s manual andview the video before using yourTotal Gym FIT.
TOTAL GYM FIT OWNER’S MANUALTable of ContentsEQUIPMENT WARNING/CAUTION LABELS & SAFETY INSTRUCTIONS . 3PRODUCT SPECIFICATIONS . 4SET UP .5-6OPTIONAL ACCESSORIES .7-9Hitch Pin Locations . 7Wing Attachment . 7Press Up Bars . 8Dip Bars . 8Weight Bar . 8Leg Pull . 8AbCrunch . 9Pilates Kit . 9STARTING OUT . 10INSPECTION AND MAINTENANCE .11-12LIMITED LIFETIME WARRANTY . 12 TOTAL GYM STARTER PROGRAM .13-14WORKOUT PROGRESS CHART . 15 TOTAL GYM PARTS LIST & OVERVIEW . 16To order optional accessories, please go to TotalGymCatalog.com
TOTAL GYM FIT OWNER’S MANUALCongratulations on purchasing your new Total Gym With this product in your home, you have everything you need to start your own workout program, to tone and strengthen the importantmuscle groups of your upper and lower body. This is vital for all of us, regardless of age, sex, or fitness level, and regardless of whetheryour primary goal is body sculpting, weight loss, health maintenance, or more energy for daily activities.Strength training not only tones and conditions the muscles we use every day to stand, walk, lift, and turn; it can actually transform ourbody composition. By reducing body fat and increasing the proportion of lean muscle in our bodies, strength training can effectively turn upour metabolic thermostat, so that we burn calories all the time, no matter what we’re doing.It’s easy - all you have to do is spend 15 to 20 minutes a day, 3 to 4 days per week on your Total Gym to start realizing the benefits. Be sure to read through this Owner’s Manual carefully. It is the authoritative source of information about your Total Gym . CUSTOMER SERVICE QUESTIONSIf you have questions about your Total Gym , please call Customer Service at 1.800.501.4621, Monday through Friday, 8:30 am to5:00 pm, EST. ORDERING REPLACEMENT PARTSWhen ordering parts, please contact our Parts Department, toll free at 1.800.501.4621, Monday through Friday, 8:30 am to 5:00 pm, EST.IMPORTANT: You must have your serial number and this manual ready when calling for parts.Serial #:PLEASE ALSO PROVIDE THE FOLLOWING INFORMATION:1. Name, Mailing Address and Telephone Number2. Date of Purchase3. Where Product was Purchased4. Model Number5. Part Order Number and DescriptionTo order optional accessories, please go to TotalGymCatalog.com 2
TOTAL GYM FIT OWNER’S MANUAL EQUIPMENT WARNINGS / CAUTION LABELS & SAFETY INSTRUCTIONSEquipment Warning / Caution LabelsSee page 4 for placement of the following warning/caution labels on your unit.Safety InstructionsBefore beginning this or any exercise program, consult a physician or health professional, who can assist you in planning aprogram appropriate for your age and physical condition. This is especially important if you are over age 35 or have pre-existing healthproblems.Do not overexert yourself. Stop exercising immediately and consult your doctor if you experience pain or tightness in your chest, irregularheart beat, shortness of breath, or if you feel faint, nauseous, or dizzy.This product is designed for home use only. It is not intended for commercial or institutional use. Use only as instructed.Do not stand on the product.The Total Gym is not intended for use by children. Keep this and all fitness equipment out of the reach of children. Keep fingers, loose clothing, and hair away from moving parts.Inspect your exerciser before each use to ensure proper operation. Do not use this equipment unless all moving parts, includingcables and pulleys are working properly.The exerciser should only be used on a mat or carpeted surface to prevent unexpected movement of the unit.Use only the accessory items recommended by the manufacturer.To avoid serious injury, care should be taken at all times when getting on and off this or any exercise equipment.3 To order optional accessories, please go to TotalGymCatalog.com
TOTAL GYM FIT OWNER’S MANUAL PRODUCT SPECIFICATIONSProduct SpecificationsStraight SafetyHitch Pin(For use in holelocated in HeightAdjustment SlideMechanism)SAFETY HITCH C PIN 4 STRAIGHT SAFETYHITCH PINS (SHORT) 1 connected with a lanyard to height adjustment slidemechanism. Use in safety hole during exercise. 3 in Literature Pack (replacements to use as needed).Vertical ColumnWING ATTACHMENTTotal GymTraining Deck(optional)Yellow Height AdjustmentQuick Release Pin KnobWARNINGLABEL 1CAUTIONLABEL 1Requires 2 short hitch pinsBlack Spring Loaded Pin KnobWARNINGLABEL 2Pulley AssemblyHeight AdjustmentSlide MechanismWARNINGLABEL 4CableSquat StandGlideboardInner RailWARNINGLABEL 2HandleSquat StandReceptaclesOuter RailSafety Hitch C PinCenter Support RailBack CrossbarWARNINGLABEL 5RollersHole for optional Weight BarCAUTIONLABEL 2Front CrossbarLENGTHHEIGHTFolded . 50.5”In Use . 93”Folded . 8.5”In Use . 44.5”Width . 18.5”Weight . 66 lbs.Maximum User Weight . 450 lbs.Optional Accessories Available for PurchaseLEG PULL ACCESSORYPRESS UP BARSPulley/D-Ring AssemblyLeg Pulley Bracketfor use with leg pulleyaccessory onlyRopeO-ringFoot Harness (2)ClipWeight Bar accessory also available.DIP BARSRequires2 shorthitch pinsWARNINGLABEL 31 Long Hitch Pinfor use with leg pulleybracket onlyPILATES ACCESSORY KIT*CAUTIONLABEL 3ABCRUNCHRequires 2 short hitch pinsTOTAL GYM CYCLO TRAINERPilates Toe BarFootHarness (2)*Kit also includesPilates exercise video.CAUTIONLABEL 424-inch leg pulleyrope extensionTo order optional accessories, please go to TotalGymCatalog.com 4
TOTAL GYM FIT OWNER’S MANUAL SET UPOOREDFUL TSet up your Total Gym in 5 easy steps.NOFULLY ASSEMBLED!NO TOOLS REQUIRED!STEP 3.ASSEMBLYDLESet UpLS REQUIBending knees, lift gym up fromopposite end of squat stand. Makesure that it rests solidly on the squatstand. Remove the accessories fromunder the bench.! WARNINGSTEP 4.KEEP HAIR, FINGERS, LOOSE CLOTHING, CHILDREN AND PETSAWAY FROM HINGES AND OTHER MOVING PARTS TO AVOIDSERIOUS INJURY. ALSO, BE SURE TO HAVE THE YELLOW HEIGHTADJUSTMENT PIN AND SAFETY HITCH PIN LOCKED IN PLACEBEFORE GETTING ON YOUR TOTAL GYM TO AVOID SEVERE INJURY.STEP 1.Lay shipping box flat and open carton top.Extend Total Gym out in the following manner: 4A. Make sure the handles are out to the sides before you beginto unfold your unit. Keep hands and fingers away from pulley.Place one hand on the edge of the frame. With your otherhand, pull the black Spring Loaded Pin Knob located at the rightrail. Continue to hold pin out while taking hold of the VerticalColumn and pulling up. Once in the full upright position, releasethe black Spring Loaded Pin. You should hear it lock into place.BackCrossbarVertical ColumnSTEP 2.Remove corner tape from the carton bottom (as indicated by theX’s). Remove all packaging materials, including cardboard inserts,from your Total Gym . Remove the squat stand (optional) from underthe gym (as shown to the right) and install on opposite end intoreceptacles. 4B. Continue to carefully lower therails slowly, unfolding the unit untilit is flat on the floor with the VerticalColumn in full upright position.Be sure to support the frame inthe center to avoid having theproduct drop suddenly onto thefloor or pinch fingers.IMPORTANT: Be sure the black Spring Loaded Pin is lockedinto place before using your unit. You will know the pin is lockedinto place when you can see the end through the inside of therail bracket.5 To order optional accessories, please go to TotalGymCatalog.com
TOTAL GYM FIT OWNER’S MANUAL SET UPSTEP 5.Position one foot on top of Back Crossbar to keep the product fromlifting off the floor. With one hand on either the right or left rail andthe other hand holding the yellow Height Adjustment Quick ReleasePin Knob out, slide the rails along the Vertical Column to desiredposition and release pin. Pin will pop into place – you will hear asnap. Yellow height adjustment quick release pin knob should beflush against black nut and no pin should be visible.5A. With one hand on a side rail, grasp the height adjustment knobon the height adjustment slide mechanism and raise to one ofthe lower levels.! WARNINGATTEMPTING TO EXERCISE WITH THE YELLOW HEIGHTADJUSTMENT PIN IN THIS BOTTOM HOLE POSITION WILL CAUSETHE VERTICAL COLUMN TO COLLAPSE FORWARD AND COULDRESULT IN SERIOUS INJURY.FAILURE TO SECURELY LOCK THE HEIGHT ADJUSTMENT PIN ANDSAFETY HITCH PIN INTO PLACE MAY RESULT IN SERIOUS INJURYOR EVEN DEATH.SET UP IS COMPLETE!Begin using Total Gym at a low incline. As your fitness levelincreases, raise the incline to increase the intensity of your workoutand improve your muscle strength. Height Adjustment QuickRelease Knob (Yellow)Put Straight Safety HitchPin Back Into HoleIf you have questions about your Total Gym , please callCustomer Service at 1.888.811.9740. Be sure to check out the instructionalvideo entitled full of valuable tips to getthe most out of your new Total Gym . 5B. Insert the Straight SafetyStraight SafetyHitch Pin connected toHitch PinConnected with athe lanyard through thelanyard to heightadjustment columnsafety hole on the sideof the height adjustmentInsert Safety Hitchslide mechanism until itC Pin into side holeis through the Verticallocated directly belowHeight AdjustmentColumn. NOTE: InsertAssembly on theSafety Hitch C Pin intoVertical Columnside hole located directlybelow Height AdjustmentAssembly on the Vertical Column. Never sit or exercise onTotal Gym without the yellow Height Adjustment QuickRelease Pin Knob, Straight Safety Hitch Pin and SafetyHitch C Pin securely locked into place.5C. Insert the Training Deck holder into the two holes located on thetop of the support column.Total Gym TrainingDeck and HolderTo order optional accessories, please go to TotalGymCatalog.com 6
TOTAL GYM FIT OWNER’S MANUAL OPTIONAL ACCESSORIESOptional AccessoriesFollow the instructions below on how to attach the optional accessories to your Total Gym . ALL HITCH PIN LOCATIONS One (1) short Straight Safety Pin is connected by a lanyard to the height adjustment slide mechanism on the support column. Three (3) short Straight Safety Pins are held within the Literature Pack (replacements to use as needed). Safety Hitch C Pin is packed in accessory box.! WARNINGFAILURE TO SECURELY LOCK THE SAFETY HITCH PIN INTO PLACE MAY RESULT IN SERIOUSINJURY OR EVEN DEATH.WING ATTACHMENT (OPTIONAL)Two thick Foam Pads are provided with the Wing Attachment. Theymust be attached to the Attachments before exercising. To do this:1. Simply wet each crossbar with soapy water.2. Then attach Foam Pads on the Crossbars as shown. Let drybefore beginning to exercise with the Wing Attachment.3. Insert the 2 Short Hitch Pinsthrough the holes on theWing Attachment Bracketsand the hole on the Rails, asshown.4. You are now ready toperform Pull Up and Chin Upexercises to work the arms,lats and back.2 Short Hitch PinsLeg Pull, Crunches and Sit Ups1. Locate the holes at the top of the Right and Left Rails.CrossbarsWING ATTACHMENT EXERCISESBelow are instructions on how to position the Wing Attachment inaccordance with the exercises you wish to do. NOTE: Hitch Pins areincluded in the Literature Pack.The Right and Left Wing Attachmentcan be placed on opposite rails depending on the exercise. Alwayskeep the Foam Pads to the outside of the Rails.Pull Ups and Chin Ups1. Locate the holes at the top of the Right and Left Rails.2. With the Wing Attachment angled toward the Glideboard, lineup the Brackets on the Attachments with the desired positionholes on the Rails.7 To order optional accessories, please go to TotalGymCatalog.com2. With the Wing Attachment angled away from the Glideboard,line up the Brackets on the Attachments with the desiredposition holes on the Rails.3. Insert the 2 Short Hitch Pinsthrough the holes on theWing Attachment Bracketsand the hole on the Rails, asshown.4. You are now ready to performLeg Pulls, Crunches and SitUp exercises to work theabdominals, waist and legs.2 Short Hitch Pins
TOTAL GYM FIT OWNER’S MANUAL OPTIONAL ACCESSORIESPRESS UP BARS (OPTIONAL)WEIGHT BAR (OPTIONAL)Weight BarPress Up Bars2 short hitch pinsPress Up BarsSlide through herePress Up Bar hole1. Attach each press up bar to the frame with the short hitch pinsincluded with your Total Gym .Note: Hitch pins are included with the press up bars.Simply line up each bar with the holes at the bottom ofthe frame. 2. Slide one short hitch pin through the hole of one of the pressup bars and through frame. Repeat Steps 1 and 2 for attachingthe other press up bar. Make sure to securely attach eachpress up bar to each side of the frame before using.See Total Gym: Start It Up!, section “Optional Accessories” fortips on how to utilize the press up bars. Remove the press upbars when you are not exercising with them.DIP BARS (OPTIONAL)Dip Bars2 short hitch pinsDip BarsDip Bar holeHitch Pin1. Attach each dip bar to the frame with the short hitch pinsincluded with your Total Gym .Note: Hitch pins are included with the dip bars. Simplyline up each bar with the holes in the upper portion of thebottom frame. 2. Slide one short hitch pin through the hole of one of the dip barsand through frame. Repeat Steps 1 and 2 for attaching theother dip bar. Make sure to securely attach each dip bar toeach side of the frame before using.1. Slide weight bar through the hole near the bottom of the TotalGym glideboard rails.2. Add free weights equally and evenly to both sides of the weightbar when stacking weights. Weight clips must be installedon each side to prevent the weights from slipping off the bar.Weights and clips not included.LEG PULL (OPTIONAL)Pulley/D-Ring AssemblyLeg Pulley Bracketfor use with leg pulleyaccessory onlyRopeO-ringFoot Harness (2)Clip1 Long Hitch Pinfor use with leg pulleybracket onlyLeg Pull Bracket1. Connect the Leg Pull Bracket tothe top of the Vertical Column byaligning Bracket with the hole atthe top of the column; be surebracket is right side up with hooksfacing upward. Insert Long HitchPin through the top holes to secureBracket onto the Vertical Column.RopeD-ring / pulleycombination2. Detach the Pulley from the hook on the underside of theglideboard; attach “O-ring” (that is connected to the rope) tothe hook on the underside of the glideboard.3. Place D-Ring on Pulley first. Then connect the D-Ring to theBracket. NOTE: If rope appears to be twisted, take D-Ringoff and turn Pulley around.4. Attach the Foot Harness to one ofyour feet by placing your foot in theHarness so the sewn-in ring is onthe bottom of your foot. Pull tightlyon the strap at the Harness Buckleso the Foot Harness is secure.O-ringO-ringStirrupTo order optional accessories, please go to TotalGymCatalog.com 8
TOTAL GYM FIT OWNER’S MANUAL OPTIONAL ACCESSORIES5. Position yourself on the glideboardClipcorrectly for the specific exerciseyou want to perform. While sittingO-ringdown on the glideboard, bring 1knee up, connect the Clip on the endof the rope toan “O-Ring” on theFoot Harness attached to your foot. Depending on the exerciseyou are performing, connect the Clip to the proper “O-Ring.”Be sure to always stabilize the glideboard when clipping on oroff the Harness. Also, use caution when getting on or off theglideboard. You are now ready to exercise using the Leg PulleyAccessoryPILATES KIT (OPTIONAL)Pilates Toe BarFootHarness (2)24-inch legpulley ropeextensionPulley/D-RingAssembly*Kit also includesPilates exercise video.To begin your Pilates Exercise Program carefully follow theassembly instructions below.1. Insert Pilates Toe Bar into squat stand receptaclesNOTE: Remove Leg Pull Bracket when you are notexercising with it. To remove the Leg Pull Bracket,completely pull the Long Hitch Pin out of the top holeson the Vertical Column. To disconnect the Foot Harness,unclip the rope from the “O-Ring” on the Harness. Be sureto stabilize glideboard when disconnecting Foot Harness.ABCRUNCH (OPTIONAL)2. Assemble Pilates 24-inch leg pulley rope extensionA. Detach the pulley mechanismfrom the hook on theunderside of the glideboard.B.Next, connect the D-ring/pulley combination of your legpull accessory to the leg pullbracket on the vertical column.ASSEMBLY1. Match AbCrunch Handle labeled to theElbow Pad labeled .See page 8 on how toattach Leg Pull Bracket totop of vertical column.2. Insert Handle into Elbow Pad bracket andattach by inserting short hitch pin.3. Repeat for left side.INSTALLATION – HOW TO INSTALL THE ABCRUNCH1. Locate the holes at the top of theright and left rails on the supportcolumn end of the unit.D. Connect the clip on the endof the leg pulley rope to theO-ring on one of the footharnesses.2. Install the AbCrunch arm labeled onto the right side rail with thehandle facing the support column.3. Insert the short hitch pin through theholes on the attachment bracket andthrough the hole on the right rail asindicated by arrows in image.C. Attach the foot harnesses toyour feet by placing your footin the harness so the sewn-inring is on the bottom of yourfoot. Pull tightly on the belt sothe harness is secure.Bracket4. Repeat for left AbCrunch arm.You are now ready to perform all of the AbCrunch exercisesshown in the AbCrunch Workout DVD.E. Connect one end of the Pilates24-inch rope to the O-ring onthe leg pulley rope.F. Next, connect the other endof the Pilates 24-inch rope tothe O-ring on the other footharness.You are now ready to begin your Pilates exercise program.9 To order optional accessories, please go to TotalGymCatalog.com
TOTAL GYM FIT OWNER’S MANUAL STARTING OUT1. Important Things to Remember When Using Total GymStarting Out Always have control of the glideboard before getting on andoff the exerciser. Keep your feet on the floor when getting on and off theexerciser. Only remove them from the floor for the duration ofthe exercise. If you are using the handles, hold onto them as you get onand off the glideboard.2. Exercising with the Handles OnlyGrasp the handles which are attached to the cable and slide theglideboard to a position in which you can comfortably sit or laydown on when performing the desired exercise. Be sure to keepyour feet on the floor until you are in the correct position for thespecific exercise. Then, if the exercise calls for your feet to beoff the floor, place your feet as specified in the instructions.3. Exercising with the Squat Stand OnlySlide the glideboard to a position in which you can comfortablysit or lay down on when performing the desired exercise. Keepyour feet on the ground until you are in the correct position andfeel comfortable. Then, place your feet in the proper positionand begin to exercise.Wear athletic shoes and comfortable light clothing when exercisingon your Total Gym . Do not exercise barefoot. Check your exerciserbefore use to ensure that all the parts are in place and workingproperly (see page 11 for details of the inspection process). Adult supervision is required whenever a child is on or nearthis exerciser.When starting your exercise program, begin with the basicexercises in the Training Deck included with your Total Gym tofamiliarize yourself with the movements. Use the lowest inclinelevel to start with—you can work up to a higher incline level in theweeks and months to come. For the specific Total Gym exercises and programs, follow theexercises in the Total Gym Training Deck included with yourTotal Gym . Begin using the product at a low incline. As your fitness levelprogresses, increase the incline to increase the intensity andimprove your muscle strength. Don’t be in a hurry to exercise at ahigh intensity level; start out easily and build gradually. Total Gymis as easy as 1-2-3 to use, so read on. To order optional accessories, please go to TotalGymCatalog.com 10
TOTAL GYM FIT OWNER’S MANUAL INSPECTION AND MAINTENANCEInspection and MaintenanceINSPECT YOUR TOTAL GYM PRIOR TO EACH USEBefore using your Total Gym for your workout session, be sure tomake the following inspection: Make sure the equipment is fully opened and sitting on a solidlevel surface with plenty of clearance on all sides.4. Keeping one hand on the frame, use your other hand to pull theyellow Height Adjustment Quick Release Knob Pin out and lowerthe frame until it rests on the Back Crossbar. When you let goof the yellow height Adjustment Quick Release Knob Pin, youshould hear it snap back into place.Height AdjustmentQuick Release Pin Knob Check that the pulley is attached securely to the hook on thefront underside of the glideboard, as well as the uprights on thesupport column.Frame Make sure that the eyebolts are securely fastened to eachupright on the support column. Check that the cables are traveling correctly in the groove ofeach pulley. Make sure the cable is securely fastened to each hand grip. Check the cable for signs of wear and tear.5. Pull out the black Spring Loaded Pin Knob located at the rightrail. Continue to hold pin out while taking hold of the VerticalColumn and lowering it forward towards the center rail & glideboard. Once completely forward, release the Pin. You shouldhear it snap back into place. Check that the squat stand is installed correctly in the squatstand receptacles.Vertical Column Make sure the glideboard is gliding smoothly along the frame.Spring-loaded Pin(black knob) Make sure all the safety hitch pins and height adjustment pinare securely in place and locked into position.ROUTINE MAINTENANCECenter Rail Wipe down your Total Gym after each use with a clean, damp(not wet) cloth. Do not leave towels or workout clothing laying orhanging on the equipment. Periodically check the following parts for signs of fraying orother wear: the cable, the pulleys, the wheels, the glideboard,the squat stand and the frame. If a part needs replacement, donot use the equipment until it is repaired or replaced.6. With caution, to avoid pinched fingers or hands, lift up at thecenter of the frame and fold the exerciser together.When it is completely folded, the exerciser should be at a 90degree angle with the floor. The exerciser will rest on the squatstand for support. Periodically remove the glideboard to clean rails and glideboardwheels. See “To Remove the Glideboard” (on page 12) fordetails.TO STORE YOUR TOTAL GYM Weight Bar HoleFollow these easy steps to store your Total Gym properly: Squat Stand1. First, remove all accessories and attachments.2. Remove Safety Hitch C Pin and Straight Safety Pin from VerticalColumn.3. Be sure the Cable Pulley is attached to the underside of theglideboard for folding.11 To order optional accessories, please go to TotalGymCatalog.com7. You can store the exerciser in a closet or against the wall. Tostore it under a bed, simply lower the exerciser to the floor,remove the squat stand, and roll under the bed.
TOTAL GYM FIT OWNER’S MANUAL INSPECTION AND MAINTENANCE & WARRANTY! CAUTIONUSE CAUTION WHEN FOLDING THEEXERCISER—SERIOUS INJURYCOULD RESULT FROM PINCHEDFINGERS OR HANDS.Limited Lifetime WarrantyTotal Gym Fitness, LLC warrants that under normal residential use,Total Gym is free from defects in material or workmanship. Theduration of coverage of this warranty varies depending on the partof equipment that is defective (see chart below). This warrantyis effective from the date of original purchase. This warranty isvalid only for the original owner of this exerciser and is nottransferable. TO REMOVE THE GLIDEBOARDYou can also remove the glideboard if you need to fit the exerciserunder a narrow space (between 6” and 8”).1. Disconnect the pulley from the hook on the underside of theglideboard.Note: to reattach the pulley cable for use, see instructionsTO RE-ATTACH PULLEY CABLE below.2. Next, facing the glideboard, lift up the glideboard and slide itoff the frame of the exerciser. When the bench is completely offthe exerciser, set it aside.Squat Stand3. Next, lower the exerciser to the floor, remove the squat stand,and roll the exerciser under the desired area.! CAUTIONTHE GLIDEBOARD WEIGHS APPROXIMATELY 18.25 LBS. USECAUTION WHEN LIFTING IT OFF OF THE EXERCISER. LIFTINGINCORRECTLY MAY RESULT IN USER INJURY.TO RE-ATTACH PULLEY CABLEGrab pulley and slide up glideboard along rails about 1 foot. Reachunderneath the glideboard and attach pulley to hook. Be sure tokeep hands out of the way of rails and slowly let the glideboard rollback down the rails until it rests at the bottom.PARTFrameWARRANTYLifetimeCOVERAGEReplace frame that is structurally defectivewith a new frame or replace the entire unit.All other parts6 monthsRepair or replace defective part or product.(includes wheels,pulleys, cables)The Total Gym Fitness, LLC obligation under this warranty islimited to replacing the defective part(s); or, at its option, repairingor replacing (or refund in its sole discretion) the product. Forservice on this equipment, call 1-800-501-4621. Improper orincorrectly performed repairs voids this warranty.This warranty does not cover product damage attributable tomisuse, abuse, neglect, accidents, unauthorized alterations orrepairs, failure to follow manufacturer’s directions for use, impropermaintenance, vandalism, usage for commercial or rental purposes,or “ordinary wear and tear”. This warranty does not cover anyseparately sold items, parts, or accessories.Except for other written warranties issued by Total Gym Fitness, LLCapplicable to new Total Gym Fitness, LLC product or parts, no otherexpress warranty is given or authorized by Total Gym Fitness, LLC.Any implied warranty of merchantability or fitness for a particularpurpose is limited to the duration of this warranty. No agent orretailer of Total Gym Fitness, LLC has authority to modify thiswarranty in any respect.Total Gym Fitness, LLC may not be held liable for indirect orconsequential damages arising out of use or performance of thisproduct. These include—but are not necessarily limited to—loss of use of the product; loss of time, enjoyment, or revenue;inconvenience; installation or removal costs; or other incidental orconsequential damages.Some states do not allow limitations on how long an impliedwarranty lasts, or the exclusion or limitation of incidental orconsequential damages, so the above limitation may not apply toyou. This warranty gives you specific legal rights; you may also haveother rights which vary from state to state.For service, call our Customer Service Department at:1-800-501-4621To order optional accessories, please go to TotalGymCatalog.com 12
TOTAL GYM FIT OWNER’S MANUAL STARTER PROGRAMTotal Gym Starter Program The following workout, for menand women of all fitness levels,will get you acquainted with yournew Total Gym. You can viewthis workout in its entirety as awork-along program in your TotalGym: Start It Up! Video. Followthis guide as you work-along oruse it as a reference when youcan’t watch the workout.This starter program has been designed as a circuit trainingprogram to maximize cardio and strength training benefits. Start offwith 15 repetitions of each exercise, moving from one to the otherwith little or no rest in between. If you find that 15 reps are too easy,increase the incline level on your Total Gym. If you are strugglingwith 10-12 reps, then decrease your incline level.See Total Gym: Start It Up! video for the work-along version ofthis program.4. LEG CURLS (SEATED OR LYING)5. CROSS CABLE ROW6. BICEP CURL1. SQUATS7. OUTER HIP & THIGH2. SINGLE LEG SQUATS3. PULL UPS13 To order optional accessories, please
Never sit or exercise on Total Gym without the yellow Height Adjustment Quick Release Pin Knob, Straight Safety Hitch Pin and Safety Hitch C Pin securely locked into place. 5C. Insert the Training Deck holder into the two holes located on the top of the support column.