Transcription
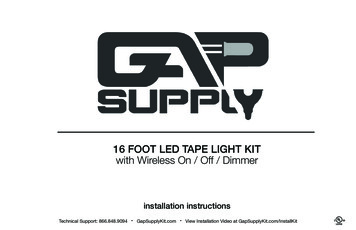
16 FOOT LED TAPE LIGHT KITwith Wireless On / Off / Dimmerinstallation instructionsTechnical Support: 866.848.9094 GapSupplyKit.com View Installation Video at GapSupplyKit.com/InstallKit
Kit Includes16 foot roll Vivid SeriesLED tape light in3000K Soft WhiteL-VMW600-16-3025 foot rollconnection wireT-22G-CW-2560 watt 12V DCpower supplyT-60W-12V-PILED tape light to wireconnectors (6 pieces)plus adhesion padsfor installationWireless On / Off / DimmerT-Q-4Z-WC-RF-WTWireless ReceiverT-Q-WR963M AdhesionPromoter WipeL-APW-4298L-8MM-EZ6PKExpansion PacksExpansion PacksDescriptionAdd a ZoneDo you have enough tape light but need to add a Zone to an Area of your project? Thisexpansion pack includes connectors and a 96 watt receiver to add a Zone using yourexisting tape light.L-Q-EP1ZAdd an Areaor a ZoneL-Q-EP1Z1A2L-Q-EP1Z(1) T-Q-WR96 – Receiver (96 watts maximum 12V DC)(1) L-8MM-EZ6PK – Tape Light to wire connectors (6 pieces)Do you have enough tape light but need to add an Area or a Zone to your project? Thisexpansion pack includes a power supply, connectors, and 96W receiver to add a Zone oran Area using your existing tape light.(1) T-Q-WR96 – Receiver (96 watts maximum 12V DC)(1) L-8MM-EZ6PK – Tape Light to wire connectors (6 pieces)(1) T-60W-12V-PI – 60 watt 12V DC power supplyTechnical Support: 866.848.9094 GapSupplyKit.com View Installation Video at GapSupplyKit.com/InstallKitL-Q-EP1Z1A
Overview of Basic Kit Hookup DiagramEXAMPLE – Basic Kit Hookup Diagram120V PowerHouse line voltage120V OutletHidden electricaloutletHome LinePower SupplyConverts 120V to 12V120 volts inPower Supply12 volts outVoltage120 VoltsConnectionWire12V20 gauge2 conductor wirein cabinet ratedLED ReceiverQuattroControllerOutlet (NotSwitched)All 120V LineVoltage installsshould be done bya qualifiedelectricianOutlet commonlyused: Microwave,Refrigerator, RangeHood, & DishwasherSupplied by otherPlug-In Power SupplyWireless DimmerReceiversTape LightConnectorJoins wire to Tape Light12V Tape LightWith 3M adhesive-backed tapeSplice up to 3 wire setsin each connectorTape Light to Tape LightORClass 220 gauge2 conductor wireUL Listed forin wall useLine VoltageWiringSupplied by other12V 1 ZoneControl8MM-EZConnector8MM-EZ screw-downTape Light connectorMultiple receivers can bepaired to a singlecontrollerLED Tape Light197" roll (16.4 feet) Cut every 1"AdhesionClean surface with 3M Adhesive Promoter Wipesbefore adheringTape LightTechnical Support: 866.848.9094 GapSupplyKit.com View Installation Video at GapSupplyKit.com/InstallKit3
LED Tape Light KitInstallation InstructionsTools NeededProduct Legend–WireStrippersFlat HeadScrewdriver #1 PhillipsScrewdriverFemale BarrelConnectorT-FBC#2 PhillipsScrewdriverEZ ConnectorL-8MM-EZFactoryinstalledMale PlugFactory installedFemale PlugNOTE DO NOT connect low-voltage LED tape light to high-voltage power.Do not over tighten any screws.Maintain polarity on all connections, Red to ( ) and Black to (-).Maximum 32.8 feet of Tape Light can be connected together.For shorter lengths of Tape Light, cut with scissors at cut marks where a black line runs through 2 solder points– CUT AT DESIGNATED CUT LINES ONLYPre-Installation Testing1. Completely unroll the LED Tape Light from the reel.2. Plug-in Power Supply – insert the MalePlug on the Power Supply into the FemaleConnector on the end of the LED Tape Light.43. Turn on 120V AC power to the Power Supply.All LEDs should illuminate.4. Unplug Power Supply – after verifying LEDillumination, disconnect LED Tape Light fromPower Supply.Technical Support: 866.848.9094 GapSupplyKit.com View Installation Video at GapSupplyKit.com/InstallKit
LED Tape Light KitInstallation InstructionsInstallationHave a power outlet for Plug-in Power Supply or use existing outlet behind the microwave, refrigerator, dishwasher, or under the sink.If using our in-line low voltage switches, sensors, or Wireless Control systems, see instructions packaged with the components.Step 1. Connect Power Supply to Receiver1. Insert the Male Plug on the Power Supply intothe Female Plug on the Receiver.Step 2. Connect Receiver to Tape Lights using Direct or Remote ConnectionDirect Connection1. Insert the Male Plug on the Receiver into theFemale Plug on the end of the LED Tape Light.Technical Support: 866.848.9094 GapSupplyKit.com View Installation Video at GapSupplyKit.com/InstallKit5
LED Tape LightReceiver to Tape Light Installation InstructionsRemote Connection or for field-cut sections of Tape LightSelect between the following options for connecting Receiver to Tape LightOption 1: Using 8MM-EZ Connector1. Use #2 Phillips to loosen screw and removecover from Receiver.2. Use a flat blade screwdriver to loosenterminals for the Male Plug and remove.3. Insert one end of stripped wires intoReceiver LED terminals, Red wire to ( ) and Blackwire to (-) terminals. Tighten screws.4. Use #1 Phillips to loosen the 4 terminal screwson 8MM-EZ Connector. Peel 1/2" of the adhesiveprotector from back of LED tape light, insert intoconnector, evenly tighten screws. Insert wiresfrom Receiver into terminals, Red wire to ( ) sideof tape, Black wire to (-) side of tape; tightenscrews.6Technical Support: 866.848.9094 GapSupplyKit.com View Installation Video at GapSupplyKit.com/InstallKit
LED Tape LightReceiver to Tape Light Installation InstructionsOption 2: Using Female Barrel Connector & 8MM-EZ Connector1. Cut a length of connection wire to run fromReceiver to Tape Light location.Strip 1/4" insulation from both ends of wire, twisteach wire, and fold stripped wires in half on bothends.2. Insert Male Plug on Receiver into FemaleBarrel Connector. Use Flat blade screwdriverto loosen screws on Female Barrel Connector.Insert wires, Red wire to ( ), Black wire to (-),and tighten screws.3.Use #1 Phillips to loosen the 4terminal screws on 8MM-EZ Connector. Peel1/2" of the adhesive protector from back ofLED tape light, insert into connector, evenlytighten screws. Insert wires from Receiver intoterminals, Red wire to ( ) side of tape, Blackwire to (-) side of tape; tighten screws.Technical Support: 866.848.9094 GapSupplyKit.com View Installation Video at GapSupplyKit.com/InstallKit7
Mounting Tape Light and PairingMounting Tape Light; pairing tape light to receiver and controllerStep 3. Mount Tape LightNOTEFor fuller countertop light coverage, install the Tape Light 1-1/2” from the back of the cabinet face frame or from the light rail at the front of the cabinets.Direct mounting to surface1. Make sure mounting surface is clean,dry, oil-free, and dust-free. Using the 3M Adhesion Promoter Wipes will ensure an extratight bond to surface.82. Peel the adhesive backing from the TapeLight and mount directly to cleaned surface. Useadhesive pads for securing the connectors tosurface.Technical Support: 866.848.9094 GapSupplyKit.com View Installation Video at GapSupplyKit.com/InstallKit
Step 5. Pair Receiver to Wireless ControllerPairing Instructions1. Remove Controller from back plate, slidebattery compartment open, remove battery, anddiscard clear plastic tab. Reinsert battery, replacecover.2. Clear the receiver by pressing and holding theLearning button until the lights blink twice3. Quickly press and release theLearning button and, within 5 seconds, pressand release one of the 4-Zone buttons on theController. When lights blink once, Controller andReceiver are paired.4. Use the Controller to turn lights on and off andto dim.Technical Support: 866.848.9094 GapSupplyKit.com View Installation Video at GapSupplyKit.com/InstallKit9
10Technical Support: 866.848.9094 GapSupplyKit.com View Installation Video at GapSupplyKit.com/InstallKit
KIT CON 16 FT DE CINTA DE LUZ LEDcon regulador de luz inalàmbricoinstrucciones de instalaciónTechnical Support: 866.848.9094 GapSupplyKit.com View Installation Video at GapSupplyKit.com/InstallKit
Kit IncluyeRollo de 16 pies deVivid Series LED cintade luz en 3000KBlanco SauveL-VMW600-16-30Rollo de 25 pies decable de conexiònT-22G-CW-25Fuente dealimentaciòn de60 vatios 12V DCT-60W-12V-PICinta de luz LED paraconectar los conectores yalmohadillas de adhesiònpara la instalaciònRegulador de luz inalàmbricode encendido y apagadoT-Q-4Z-WC-RF-WTReceptor inalàmbricoT-Q-WR963M Toallita deadherenciaL-APW-4298L-8MM-EZ6PKPaquetes de expansiònPaquetes de expansiòn DescripciònAgregar una zonaL-Q-EP1Z12¿Tiene suficiente luz de cinta pero necesita agregar una Zona a un àrea de su Proyecto?Este paquete de expansion incluye conectores y un receptor de 96 vatios para agregar unaZona con su luz de cinta existente.(1) T-Q-WR96 – Receptor inalàmbrico(1) L-8MM-EZ6PK – Cinta de luz LED para conectar los conectoresAgregar un àreao una zonaL-Q-EP1Z1AL-Q-EP1Z¿Tiene suficiente luz de cinta pero necesita agregar un àrea o Zona a su proyecto? Estepaquete de expansion incluye una fuente de alimentaciòn, conectores y un receptor de 96vatios para agregar una Zona o un àrea usando su luz de cinta existente.(1) T-Q-WR96 – Receptor inalàmbrico(1) L-8MM-EZ6PK – Cinta de luz LED para conectar los conectores(1) T-60W-12V-PI – Fuente de alimentaciòn de 60 vatios 12V DCSoporte Tècnico: 866.848.9094 GapSupplyKit.com Ver el video de instalaciòn en GapSupplyKit.com/InstallKitL-Q-EP1Z1A
Diagramae de conexiòn del kit bàsicoEXAMPLE – Basic Kit Hookup Diagram120V de energìaVoltaje de lìnea de la casaToma decorrientede 120VFuente dealimentaciòn(se convierte a 120V a 12V)12V Controlde 1 zonatomacorriente ocultoHome Line120 volts inPower Supply12 volts outVoltage120 VoltsLED ReceiverQuattroControllerCable deconexiòn12VCable de caliber20 de 2 conductoresen gabineteclasificado oToma de corriente(no cambiado)Todas lasinstalaciones devoltaje de lìnea de120V deben serrealizadas por unelectricistacalificadoSalida comùnmenteutilizada: microondas,refrigerador,campana extractoray lavaplatos(suministrado por otro)(suministrado por otro)Fuente dealimentaciònenchufableAtenuador inalàmbricoReceptoresLuz de cinta de 12Vcon cinta adhesiva 3M Empalme hasta 3 grouposde cables en cada conectorLuz de cinta a luz de cintaORClase 2 20calibre 2 conductorde alambre Listadopor UL para usoen paredCableado devoltaje de lìneaConector deluz de cinta(une el cable a la luz de cinta)8MM-EZConnectorConector de luz decinta atornillada de8MM-EZmùltiples receptorespueden ser emparejadosa un solo controlador197” rollo (16.4 pies)de Luz de Cinta LED Cortar cada 1”AdhesiònLimpie la superficie contoallitas de adhesive 3M antes de aherir la cintaadhesive.Soporte Tècnico: 866.848.9094 GapSupplyKit.com Ver el video de instalaciòn en GapSupplyKit.com/InstallKit13
Kit de luz de cinta LEDinstrucciones de instalaciónHerramientas necesarias–Leyenda del Producto Conector hembrade BarrilT-FBCPelacables Destornillador de #1 Destornillador #2 Destornilladorcabeza planaPhillipsPhillipsEZ ConectorL-8MM-EZEnchufe machoinstalado enfàbricoEnchufe hembrainstalado defàbricaNota No conecte la luz de cinta LED de bajo voltaje a la alimentaciòn de alto voltaje.No apriete demasiado los tornillos.Mantener la polaridad en todas las conexiones, Rojo a ( ) y Negro a (-).Màximo 32.8 pies de cinta de luz se pueden conectar juntos.Para tramos màs cortos de cinta, corte con Tijeras en las marcas de corte donde una lìnea negra atraviesa 2 puntos de soldadura– CORTE SOLO EN LAS LÌNEAS DE CORTE DESIGNADASPruebas de preinstalaciòn1. Desenrolle completamente la cinta de luz LED del carrete.2. Enchufe la fuente de alimentaciòn inserte el enchufe macho en la fuente dealimentaciòn en el conector hembra en elextremo de la luz de cinta LED.143. Encienda la fuente de alimentaciòn de120V AC. Todos los LEDs deberìan iluminarse.4. Desconecte la fuente de alimentaciòn –despuès de verificar la iluminaciòn del LED,desconecte la luz de la cinta LED de la fuente dealimentaciòn.Soporte Tècnico: 866.848.9094 GapSupplyKit.com Ver el video de instalaciòn en GapSupplyKit.com/InstallKit
Kit de luz de cinta LEDinstrucciones de instalaciónInstalaciònTenga un tomacorriente para la fuente de alimentaciòn enchufable o use el tomacorriente existente detràs del microondas, refrigerador,lavaplatos o debajo del fregadero. Si utiliza nuestros interruptores, sensores o sistemas de control inalàmbrico de bajo voltaje en lìnea,consulte las instrucciones incluidas con los components.Paso 1. Conecte la fuente de alimentaciòn al receptor1. Inserte el enchufe macho en la fuente dealimentaciòn en el enchufe hembra del receptor.Paso 2. Conecte el receptor a las luces de cinta usando una conexiòn directa o remotaConexiòn directa1. Inserte el enchufe macho en el receptor enel enchufe hembra en el extremo de la luz decinta LEDSoporte Tècnico: 866.848.9094 GapSupplyKit.com Ver el video de instalaciòn en GapSupplyKit.com/InstallKit15
Kit de luz de cinta LEDInstrucciones de instalaciòn de luz de receptor a cintaConecciòn remota o por campo-cortar secciones de cinta de luzSeleccione entre las siguientes opciones para conectar el receptor a la cinta de luzOpciòn 1: Usando el EZ Conector de 8MM1. Use Phillips #2 para aflojar el tornillo y quitarla cubierta del receptor.2. Use un destornillador de punta plana paraaflojar los terminals del enchufe macho y retire.3. Inserte un extremo de los cables pelados enlos terminals LED del receptor,el cable rojo a( )y el cable negro a los terminals (-). Apretar lostornillos.4. Use Phillips #1 para aflojar los 4 tornillos determinal en el EZ Conector de 8MM. Despegue½” del protector adhesive de la parte posteriorde la luz de cinta LED. Insèrtelo en el conectory apriete los tornillos uniformemente. Inserte loscables del receptor en los terminals, el cable rojoal lado ( ) de la cinta, el cable negro al lado (-) dela cinta. Apriete los tornillos.16Soporte Tècnico: 866.848.9094 GapSupplyKit.com Ver el video de instalaciòn en GapSupplyKit.com/InstallKit
Kit de luz de cinta LEDInstrucciones de instalaciòn de luz de receptor a cintaOpciòn 2: Usando el conector hembra de barril y el EZ conector 8MM1. Corte un tramo de cable de conexiòn para quese extienda desde el receptor hasta la ubicaciònde la luz de la cinta. Pele el aislamiento de 1/4”de los extremos del cable, retuerza cada cable ydoble los cables pelados por la mitad en ambosextremos.2. Inserte el enchufe macho en el receptor en elconector del barril hembra. Use un destornilladorde punta plana para aflojar los tornillos en elconector del barril hembra. Inserte los cables.Cable rojo a ( ). Cable negro a(-) y apriete lostornillos.3. Utilice #1 Phillips para aflojar los 4 tornillosde los terminals en el EZ conector 8MM.Despegue ½” del protector adhesive de laparte posterior de la luz de cinta LED. Inserteen el conector y apriete los tornillos de manerauniforme. Inserte los cables del receptor enlos terminales. Cable rojo al lado ( ) de lacinta. Cable negro al lado (-) de la cinta,apriete los tornillos.Soporte Tècnico: 866.848.9094 GapSupplyKit.com Ver el video de instalaciòn en GapSupplyKit.com/InstallKit17
Mounting Tape Light and PairingLuz de cinta de montaje; empareje la luz de cinta con el receptor y el controladorPaso 3. Monte la luz de la cintaNOTAPara una cobertura de luz de mostrador màs complete, instale la cinta de luz 1-1/2” desde la parte posteriordel marco frontal del gabinete o desde el riel de luz en la parte frontal de los gabinetes.Montaje directo a superficie1. Asegùrese de que la superficie de montajeestè limpia, seca y libre de aceite. El uso de3M Toallita de adherencia asegurarà una unionmàs firme a la superficie.182. Retire el soporte adhesive de la cinta de luz ymòntelo directamente sobre la superficie limpia.Use almohadillas adhesivas para asegurar losconectores a la superficie.Soporte Tècnico: 866.848.9094 GapSupplyKit.com Ver el video de instalaciòn en GapSupplyKit.com/InstallKit
Instrucciones de emparajamientoPaso 5. Empareja el receptor al controlador inalàmbrico1. Retire el controlador de la placa posterior,el compartimiento lateral de la baterìa abierto,retire la baterìa y deseche la pestaña de plàsticotransparente. Vuelva a colocar la masa, vuelva acolocar la cubierta.2. Para borrar el receptor, mantenga presionado el botòn de aprendizaje hasta que las lucesparpadeen dos veces.3. Presione y suelte ràpidamente el botòn deaprendizaje y dentro de 5 segundos presioney suelte uno de los botones de 4 zonas en elcontrolador y el receptor estàn emparejados.4. Use el controlador para encender y apagar lasluces y para atenuar.Soporte Tècnico: 866.848.9094 GapSupplyKit.com Ver el video de instalaciòn en GapSupplyKit.com/InstallKit19
20Soporte Tècnico: 866.848.9094 GapSupplyKit.com Ver el video de instalaciòn en GapSupplyKit.com/InstallKit
16 FOOT LED TAPE LIGHT KIT with Wireless On / Off / Dimmer installation instructions. 2 T 8668489094 . . Kit Includes 60 watt 12V DC power supply T-60W-12V-PI Wireless On / Off / Dimmer T-Q-4Z-WC-RF-WT Wireless Receiver T-Q-WR96 25 foot roll connection wire T-22G-CW-25 LED tape light to wire
