Transcription
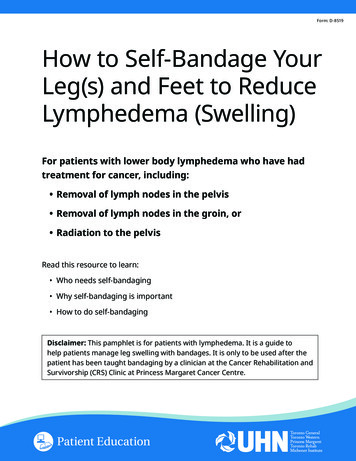
Form: D-8519How to Self-Bandage YourLeg(s) and Feet to ReduceLymphedema (Swelling)For patients with lower body lymphedema who have hadtreatment for cancer, including: Removal of lymph nodes in the pelvis Removal of lymph nodes in the groin, or Radiation to the pelvisRead this resource to learn: Who needs self-bandaging Why self-bandaging is important How to do self-bandagingDisclaimer: This pamphlet is for patients with lymphedema. It is a guide tohelp patients manage leg swelling with bandages. It is only to be used after thepatient has been taught bandaging by a clinician at the Cancer Rehabilitation andSurvivorship (CRS) Clinic at Princess Margaret Cancer Centre.
Do not self-bandage if you have an infection inyour abdomen, leg(s) or feet.Signs of an infection may include: Swelling in these areas and redness of the skin (this rednesscan quickly spread) Pain in your leg(s) or feet Tenderness and/or warmth in your leg(s) or feet Fever, chills or feeling unwellIf you have an infection or think you have an infection, go to: Your Family Doctor Walk-in Clinic Urgent Care ClinicIf no Walk-in clinic is open, go to the closest hospital EmergencyDepartment.2
What is the lymphatic system?Your lymphatic system removes extra fluid and wastefrom your body. It plays an important role in how yourimmune system works. Your lymphatic system is madeup of lymph nodes that are linked by lymph vessels.Your lymph nodes are bean-shaped organs that arefound all over your body. Large groups or chains oflymph nodes can be found in your neck, under yourarms and in your groin (see picture to the right).Having surgery to remove lymph nodes, or radiationtreatment to areas in your body where you havelymph nodes, can prevent fluid from flowing properly.This can cause swelling called lymphedema.The Lymphatic SystemCircles show where clusters (groups) of lymphnodes are in your body. It is normal for lymphnodes to be removed during cancer treatment.How does self-bandaging help with lymphedema?If you had surgery and/or radiation treatment for cancer, the areas that mayhave swelling include your feet and leg(s). Wrapping your body with bandages(compression), helps move the lymph fluid in the direction of the heart.The goal of bandaging is to: Help reduce your swelling Help prevent the swelling from getting worseThe short stretch bandages that you should use are designed for patientswith lymphedema. Ask the CRS Clinic staff for a list of places where you canbuy these bandages.3
When should you wear the bandages? To be most useful, bandages should be worn during the day and whenyou exercise. It is common for the bandages to slip down with movement. Thebandages can also slip if your leg becomes less swollen as you wearthem. You may need to wrap the bandages again if this happens. You may also bandage at night, once you are comfortable wearing them.What should you do before you start? Clean your skin with soap and water and pat it dry. Make sure to drybetween your toes. Check your skin for any breaks (cuts) or redness. If needed: Clean the cut and apply a bandage. Do not wrap with compressionbandages until the skin has healed If there is redness, follow the instructions above. It may be aninfection. Do not wrap with compression bandages until theinfection has gone. Apply moisturizer (lotion) to your skin. This will help you to avoiditchiness, irritation and skin breakdown. Apply a skin lotion to your leg and foot. Rub it into your skin very well. Pull on the tubular cotton sock (stockinette). It will prevent the lotionon your skin from being rubbed off by the bandage. Make sure you are in a comfortable position while bandaging to avoid anyback discomfort.Please follow instructions given by the clinic staff at the CRS Clinic.4
Have all your supplies ready before you beginLegpaddingFoot and anklepaddingToe gauzeShort stretchbandagesTapeStockinetteFoam foranklesBandaging supplies may include:1. Stockinette (tubular cotton) to protect the leg and foot2. Padding (soft white artiflex/castor padding or foam) to help with pressureof the bandages3. Gauze (white, 4cm and/or 6xcm) bandage for your toes4. Short stretch bandages for your feet and legs (beige, 8 cm, 10 cm and/or 12 cm)5. Kidney-shaped foam for swelling behind your anklesBandaging supplies may differ based on your specific needs. You will only begiven the supplies you need. Ask a doctor, clinician or therapist at the CRS Clinicfor the pamphlet called “How to Care for Your Bandages”.5
Step 1. Bandaging the toes Put the stockinette (tubular cotton)on your leg. Pull it back to bandage your toes. Begin with the 4 cm toe gauze andwrap it once around the base of allyour toes. Wrap the big toe first. Start from the bottom of the toe nail andwrap around the toe two to three timestowards the base of the toe. Do not stretch gauze as you bandagethe toes. Wrap the gauze around the base ofall the toes again. Wrap the 2nd toe (the one next toyour big toe) the same way as the big toe. Continue wrapping each toe the same way. The 4th and 5th toe can be wrapped togetheror you can leave the 5th toe unwrapped.6
Option: Toe Wrap with Adhesive (sticky, glue-based) GauzeYou can use adhesive (sticky or glue-based) gauze to bandage your toesseparately. Wrap around each toe without pulling the gauze. You can leave the 5th toe unwrapped if you choose.When you finish bandaging your toes, check your blood flow by doing thefollowing test: Press on the big toenail. It should lose somecolour or turn pale. The colour will return after a few seconds whenyou release the toe. If this does not happen you may have bandagedtoo tightly. You will need to remove the bandageand wrap it more loosely.The toe bandages should feel comfortable. You should have no painor discomfort.7
Step 2. Foam for anklesIf the skin around your anklebones is thick and spongy, you may have beengiven two pieces of foam (kidney-shaped) to help with the swelling. Place the foam behind the anklebones. Wrap the 6 cm larger gauze around the foamso that it does not slip. Pull the stockinette back over the ankle and foot.8
Step 3. Applying padding to the foot and leg With the 10cm padding: Wrap around yourfoot beginning at the base of the toes. Wrap around the foot again moving closerto the ankle. Cover the whole foot. Overlap the padding by half with each wrap. Continue with this padding up the legin the same way. Make sure the back of the knee is wellpadded and protected. You may havebeen given an extra piece of paddingfor this area. Continue the padding to just under the groin(about two finger widths below groin). Try to smooth out the wrinkles in thepadding as best as you can.Do not use tape as it may tear the padding.9
Step 4. Bandaging the foot and ankleBandage #1 Try to keep your foot at a 90-degree anglewhen you wrap the foot. Begin with the 8 cm bandage (beige).Wrap around the foot at the base ofthe toes without pulling. This willsecure the bandage. Now wrap two to three more times,pulling the bandage across the topand across the bottom of the foot. Give a gentle pull on the bandageat each half turn to keep even pressure. Continue with the same bandageacross the top of the foot towardthe back of the ankle.10
Wrap the bandage around the back ofthe ankle and across the top of the foot. Always give a gentle pull on the bandageat each half turn to keep even pressure. Bring the bandage around to the bottomof the foot. Then across the top of the footagain, moving the bandage closer to theheel. This pattern of wrapping is calleda “figure 8”. Always give a gentle pull on the bandageat each half turn to keep even pressure. Repeat this figure 8 pattern aroundthe foot and ankle until the arch ofthe foot is covered. The number oftimes you repeat the figure 8 patternwill depend on how much swellingyou have in your foot. Continue with the remaining bandagearound your ankle and up your lower leg. Overlap the bandage by half with each wrap. Always give a gentle pull on the bandageat each half turn to keep even pressure. Tape the end of the bandage to preventit from loosening.11
Step 5. Bandaging the legBandage #2 Take a 10 cm bandage: Wrap aroundjust above the ankle without pulling.This will secure the bandage. Wrap again and gently pull across thefront and then the back of the leg. Overlap the bandage by half with each wrap. Always give a gentle pull on the bandageat each half turn to keep even pressure. Continue with the same bandage. Bendthe knee slightly if possible. Wrap the bandage over the knee. Thenwrap below the knee and finally abovethe knee in a figure 8 pattern. Continue wrapping the upper leg andtape the end of the bandage to preventit from loosening. Always give a gentle pull on the bandageat each half turn to keep even pressure.12
Bandage #3 Take another 10 cm bandage. Feelyour ankle and lower leg and startthe bandage where it feels soft. Wrap in the opposite directionto the previous bandage. Wrap around the lower leg withoutpulling. This will secure the bandage. Wrap again and gently pull across thefront and then the back of the leg.Overlap the bandage by half with each wrap. Do the figure 8 wrap over the knee(as described before). This will help withknee movement. Always give a gentle pull on the bandageat each half turn to keep even pressure. Place your weight on the leg that youare bandaging, if possible. Continue wrapping to the top of theleg and tape the end of the bandageto prevent it from loosening.13
Option: Added Bandage You may have been told to add another bandage. If so, wrap the added bandage in the same way starting below the knee. Continue bandaging toward the upper leg and tape the end of thebandage to prevent it from loosening.When you finish bandaging your leg, check yourblood flow by doing the following test: Press on your big toenail. It should lose somecolour or turn pale. The colour will return after a few seconds whenyou release the toe.If this does not happen you may have bandaged too tightly.You will need to remove the bandage and wrap it more loosely.The leg wrap should feel comfortable. You should have no pain ordiscomfort.What should you avoid? Do not strain your shoulders, neck, arm or hand. Do not wrap the bandage in a way that causes you pain. Do not continue self-bandaging if it is causing you pain. If paincontinues, follow-up with your doctor or heath care team. Do not do self-bandaging if you have an infection in that area.14
Contact informationIf you have questions about self-bandaging, please contact the CancerRehabilitation and Survivorship Clinic at 416 946 4501, extension 2363,and ask to speak with one of the clinic staff members.Notes or commentsThe development of patient education resources is supported by the Princess Margaret CancerFoundation. Visit www.uhnpatienteducation.ca for more health information.Contact us to provide feedback or request this brochure in a different format, such as large printor electronic formats: pfep@uhn.ca 2019 University Health Network. All rights reserved. Use this material for your information only. It does not replace advice from yourdoctor or other health care professional. Do not use this information for diagnosis or treatment. Ask your health care provider for adviceabout a specific medical condition. You may print 1 copy of this brochure for non-commercial and personal use only.Form: D-8519 Authors: Stephanie Phan, Sylvia Crowhurst, Pam Hammond, revisions by Lydia Beck Revised: 06/2019
5 Have all your supplies ready before you begin Bandaging supplies may include: 1. Stockinette (tubular cotton) to protect the leg and foot 2. Padding (soft white artiflex/castor padding or foam) to help with pressure