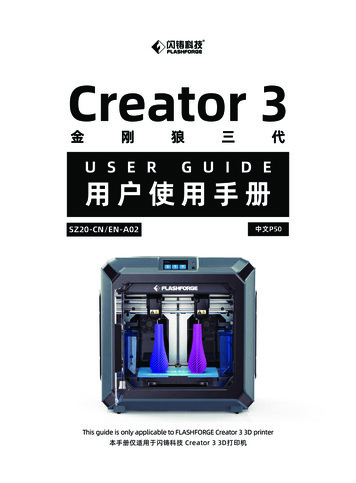
Transcription
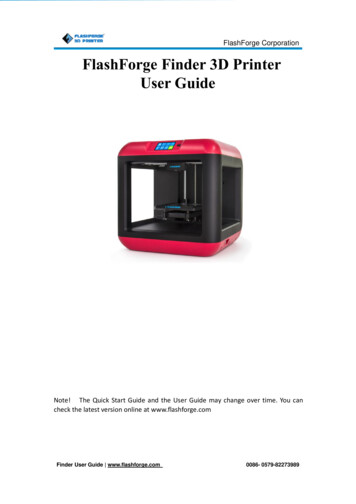
FlashForge CorporationFlashForge Finder 3D PrinterUser GuideNote! The Quick Start Guide and the User Guide may change over time. You cancheck the latest version online at www.flashforge.comFinder User Guide www.flashforge.com0086- 0579-82273989
ContentContent. 2Preface.3Introduction. 4Notice. 5Chapter 1: 3D Printing Technology.8Chapter 2: About Finder.102.1 About Your Finder.10Chapter 3: Unpacking.23Chapter 4: Hardware Assembly.274.1 Filament Installation. 274.2 Printer Start-up.284.3 Loading Filament. 284.4 Unloading Filament. 30Chapter 5: Build Plate Leveling. 32Chapter 6: About Software.346.1 Software Installation. 346.2 Exploring FlashPrint. 35Chapter 7: Basic Printing. 587.1 Generate a Gcode.587.2 Print Methods.61Chapter 8 Supports and Service. 71Finder User Guide www.flashforge.com2400-699-1063
PrefaceNote: Each device must be tested before leaving factory. If there are some residues in extruderor some tiny scratches on the build tape, it is normal and won’t affect the printing quality.On the completion of this User Guide, thanks all FlashForge engineers and theFlashForge 3D printer users for their unremitting efforts and sincere assistance.The FlashForge Finder User Guide is designed for the Finder users to start theirprinting journey with FlashForge Finder. Even if you are familiar with earlierFlashForge machines or 3D printing technology, we still recommend that please readthis guide, as there is lots of important information about the Finder for you to get abetter 3D experience.For a better and more successful printing experience, you can refer to the followingmaterials:(1) Quick Start GuideUsers will find the Quick Start Guide together with the printer accessories. The QuickStart Guide will help you start your print journey as soon as possible.(2) Official FlashForge Website:The official FlashForge website contains the up-to-date information concerningFlashForge software, firmware, device maintenance and so on. Users are also able toget the contact information from there.Finder User Guide www.flashforge.com3400-699-1063
IntroductionNotes:·Please read FlashForge Finder 3D Printer User Guide carefully before use.·The User Guide is written based on Windows 7 OS.·The version of the FlashPrint is latest.The FlashForge Finder 3D Printer User Guide contains the information needed foryou to set up and use this device.This User Guide including the following parts: Preface, Introduction and After-saleservice.The Preface section includes resource acquisition channel, the overall framework ofthe manual, and the problems that should be paid attention to while printing.The introduction section contains the overview of 3D printing technology, equipmentintroduction, unpacking and installation of equipment, software installation and use.After-sale section contains users how to get the support and help.Finder User Guide www.flashforge.com4400-699-1063
NoticeSafety Notice! Notices: Read all the instructions in the manual and familiarize yourself with theFlashForge Finder User Guide before setting-up and using. Failure to comply with thewarning and instructions may result in individual injury, fire, equipment damage orproperty damage.PLEASE STRICTLY FOLLOW ALL THE SAFETY WARNINGS AND NOTICEBELOW ALL THE TIME.· Work Environment Safety① Keep your work place tidy.② Do not operate Finder in the presence of flammable liquids, gases or dust.③ Keep Finder out of children and untrained people’s reach.· Electrical Safety① Always use the Finder with a properly grounded outlet. Do not refit Finder plug.② Do not use Finder in damp or wet locations. Do not expose Finder to burning sun.③ In case of device damage, please use the power supply provided by FlashForge.④ Avoid using the device during an thunderstorm.⑤ In case of uncertain accident, please unplug the device if you do not use it for long.·Personal Safety① Do not touch the nozzle and build plate during printing.② Do not touch the nozzle after finishing printing.③ Dress properly. Do not wear loose clothing or jewelry. Keep your hair, clothing andFinder User Guide www.flashforge.com5400-699-1063
gloves away from moving parts.④ Do not operate the device while you are tired or under the influence of drugs,alcohol or medication.· Cautions① Do not leave the device unattended for long.② Do not make any modifications to the device.③ To lower the build plate before loading/unloading filament. (The distance betweenthe nozzle and build plate should be kept for at least 50mm)④ Operate the device in a well-ventilated environment.⑤ Never use the device for illegal activities.⑥ Never use the device to make any food storage vessels.⑦ Never use the device to make any electrical appliance.⑧ Never put the model into your mouth.⑨ Do not remove the models with force.· Environment RequirementsTemperature: RT 15-30 Moisture: 20%-70%· Place RequirementsThe device must be placed in a dry and ventilated environment. The distances of theleft, right and back side space should be at least 20cm, and the distance of the frontside space should be at least 35cm.· Filament RequirementsDo not abuse the filament. Please make sure you use the FlashForge filament or theFinder User Guide www.flashforge.com6400-699-1063
filament from the brands accepted by FlashForge.· Filament StorageAll polymers degrade with time. Do not unpack filament until necessary. Filamentshould be stored at clean and dry conditions.Legal NoticeAll the information in this document is subject to any amendment or change withoutthe official authorization from FlashForge.FLASHFORGE CORPORATION MAKES NO WARRANTY OF ANY KIND WITHREGARD TO THIS DOCUMENT, INCLUDING, BUT NOT LIMITED TO, THEIMPLIED WARRATIES OF MERCHANTABILITY AND FITNESS FOR APARTICULAR PURPOSE.FCC NoticeThis device complies with part 15 of the FCC Rules. Operation is subject to thefollowing two conditions: (1) This device may not cause harmful interference, and (2)this device must accept any interference received, including interference that maycause undesired operation.FlashForge shall not be liable for errors contained herein for incidental consequentialdamages in connection with furnishing, performance or use of this materialThis document contains proprietary information protected by copyright.Copyright 2018 FlashForge Corp. All Rights ReservedFinder User Guide www.flashforge.com7400-699-1063
Chapter 1: 3D Printing Technology3D printing refers to transforming three-dimensional models into physical objects thatyou can hold and touch. It is also called additive manufacturing because the 3D modelis created by “adding” layers upon layers of material until the object is fully formed.Fused Filament Fabrication(FFF) is the most common method of 3D printing. It is alsothe method that the Finder uses. It works by melting plastic material called filamentonto a print surface in high temperature. The filament solidifies after it cools down,which happens instantaneously after it is extruded from the nozzle. 3D objects areformed with the filament laying down multiple layers.1.1 Process3D printing involves three steps:1.) Make or download a 3D model2.) Slice and export the 3D model3.) Build the 3D model1.1.1 Make a 3D Model:Currently, there are three ways to making a 3D model.·Designing From Scratch You can use free CAD (computer-aided design) softwaresuch as 3DTADA, AutoCAD, SolidWorks, Pro-E, and our own software Happy 3D todesign your own 3D model.·3D Scanners An alternative method to making a 3D model is to scan an object. 3Dscanners work by digitizing a physical object, collecting its geometric data, and savingit to a file on your PC. There are also apps that can turn a mobile device into a 3DFinder User Guide www.flashforge.com8400-699-1063
scanner.·From the Cloud The most popular way of obtaining a 3D model is to download itfrom websites that allow users to upload 3D models that they designed.E.g. : www. thingiverse.com1.1.2 Slice and Export the 3D Model:Slice software is the software that prepares 3D models for printing and turns them intoinstructions for the 3D printers. FlashPrint is the slicing software used for theFlashForge Finder.Using FlashPrint, you can turn stl. files into g. or gx. files for printing. Then the filescan be transferred to your Finder via USB cable, USB stick or WiFi.Finder support Simplify3D software, software not developed by FlashForge may needregister or charge extra fee, please choose to use (or not) according to your needs.1.1.3 Build the 3D Model:Once the output file has been transferred to your Finder, it will start to turn the 3Dmodel into a physical object by laying down layers of filament.Finder User Guide www.flashforge.com9400-699-1063
Chapter 2: About Finder2.1 About Your Finder2.1.1 ViewsFinder User Guide www.flashforge.com10400-699-1063
2.1.2 TermsBuild PlateThe surface on which the Finder builds an object.Build TapeThe blue tape that covers Finder’s build plate so thatthe object can stick to the build plate well.The three dimensional amount of space that an objectBuild Volumewill use once it is completed. The largest build volumeof Finder is 140*140*140mm.Knobs under the build platform that are used forLeveling Knobsadjusting the distance between the nozzle and buildplate.ExtruderNozzleCooling FanFilament IntakeFilament Guide TubeFilament CartridgeSolid Glue StickUnclogging Pin ToolStamping WrenchThe device that draws the filament from the spool,melts it and pushes it through a nozzle into the buildplate.Also called “print head”, which located at the bottomof the extruder where heated filament is squeezed out.To cool the outer assembly of the extruder and gearmotor.An opening located at the top of the extruder.A black plastic piece that guides the filament from thefilament box to the filament intake.A specific box for placing FlashForge filament.A solid adhesive used for making the model stick to thebuild plate firmly.A tool that used for cleaning and unclogging theextruder.A tool that used for seizing the nozzle’s metal cube.Finder User Guide www.flashforge.com11400-699-1063
2.1.3 ReferenceNameFinderNumber of Extruder1Print TechnologyFused Filament Fabrication(FFF)Screen Size3.5’’ color IPS Touch ScreenBuild Volume140 140 140mmLayer Resolution0.05 - 0.4mmBuild Accuracy 0.2mmPositioning AccuracyZ axis 0.0025mm; XY axis 0.011mmFilament Diameter1.75mm( 0.1)Nozzle Diameter0.4mmBuild Speed30-150 mm/sSoftwareFlashPrint、Support Simplify3DSupport FormatsInput: .gx/.gOSWin xp/Vista/7/8/10、Mac OS、LinuxDevice Size420*420*420mmNet Weight9KgAC InputInput: DC24V 2.71A 65WConnectivityFinder User Guide www.flashforge.comUSB cable, USB stick, Wi-Fi,FlashForge Cloud, Polar Cloud12400-699-1063
2.1.4.1 Interface MenusBuildRead the print file from The local memory card The USB stick The Polar Cloud printing BackChoose Batch files1. Tap and hold to select the file2. Select the file you want to delete3. The selected file has a tag (on theright)4. Tap the delete icon at the top right todelete all the selected filesSelect the target print file among the list Build: To begin printing Copy: To copy the files to the localmemory card from the USB stick (Thebutton is not available while printing fromlocal memory card ) Delete: To delete the print file BackFinder User Guide www.flashforge.com13400-699-1063
Print interface Abort: To abort the print job. Pause/Resume: To suspend or resume theprint job. Tools:To check status or modify settingsduring printing: build time, Z axis, filamentused, printing speed, light status, changefilament, finish-shutdown. Extruder temperature: Can be changedduring printing.To set extruder temperature during printing:After extruder temperature has reachedtarget temperature, temperature figure willbe underlined in print interface,Tap the temperature figure to adjust;Tap [Yes] to save the setting while tap [No]to cancel the setting.Tools in print interface Printing speed: To change printing speedduring printing by tapping the underlinedspeed figure. Light bulb: To turn on/off the light. Filament: To change filament duringprinting. (Note: You need to suspend theprinting operation first) Finish-Shutdown: To start auto shutdownafter print job finished. Cancel: To end the tool orders and returnto the print interface.To set the printing speed during printingTap the speed figure to adjust;Tap [Yes] to save the setting while tap [No]to cancel the setting.Finder User Guide www.flashforge.com14400-699-1063
2.1.4.2 Preheat MenusPreheatTap the [Preheat] to enter the preheatinterface. Tap the [Start] to heat up to thesetting temperature.The default temperature is 220 .Tap the temperature display bar to set thetemperature.To set the preheat temperature.Tap [Yes] to save the setting ,[No] to cancel the setting.The picture displays the preheat interface. Itshows the real-time temperature and thetarget temperature. Tap the [Abort] buttonto abort the preheat job. Tap [Back] to backto the previous interface but not abort thepreheat job.Finder User Guide www.flashforge.com15400-699-1063
2.1.4.3 Tool MenusToolsTap [Tools] to enter tool options. Filament: To load/unload the filament. Level: To adjust the build plate. Home: To make the X, Y and Z axes backto the zero point. Manual: To manually adjust the positionsof X, Y and Z axes. Setting: To implement relevant functionsetups. Status: The check the real-time status ofthe printer. About: Information about the printer. BackManual adjustment Y : The extruder moves to the zero point,that is, the back of the machine Y-: The extruder moves to the directionopposite to the Y . X : The extruder moves to the zeropoints, that is, to the right direction X-: The extruder moves to the directionopposite to the X . Z : The build plate elevates. Z-: The build plate descends. BackFinder User Guide www.flashforge.com16400-699-1063
Tap [Setting] to enter the setting interface Language: To set the display language WiFi: To turn on/off the WiFi. Wlan hotspot: To turn on/off the Wlanhotspot. Polar Cloud Connection:To turn on/off the Polar Cloud Connection. FlashForge Cloud Connection:To turn on/off the FlashForge CloudConnection. Extruder Calibration: To adjust the initialdistance between the extruder and the buildplate. Startup Sound: To turn on/off the StartupSound. Power Saving Mode: To turn on/off thepower saving mode. Light Bar Control: To turn on/off the lightbar control. Factory Reset:Return to factory setting. Update: To update the firmware version. BackWiFi: Turn on WiFi: Turn on the WiFi, releasethe WiFi hotspot and set the WiFi oncomputer. BackFinder User Guide www.flashforge.com17400-699-1063
WLan hotspot OFF/On: To turn on/off the Wlan hotspot. Setup Wlan hotspot: to set the SSID andpassword. SSID: The name of hotspot. Password: The password of hotspot. Save: To save the setting. BackPolar Cloud Connection: Cloud Connection: To turn on/off the polarcloud connection. Setup Cloud Connection: To set cloudconnection ID and PIN which have alreadybeen registered on:https://polar3d.com ID: The email address of your Cloudaccount. PIN: The PIN code of your Cloud account. Save: To save the setting. Back(Note: To use polar cloud printing function,you need to connect the printer to internetwith Wi-Fi )Finder User Guide www.flashforge.com18400-699-1063
Extruder CalibrationAdjust Z-axis to the right position and tap[OK] : The build plate elevates. -: The build plate descends. OK: To save the setting and back to settingmenus. BackThe proper distance may be one ordinarypaper’s thickness.Note: Please do this operation aftercontacting with our after-sale engineer.Turn on/off [FlashForge Cloud]: Tap to turn on/off the FlashForge CloudConnection.Turn on/off [Startup Sound]: Tap to turn on/off the sound when restartthe printer.Power Saving Mode OnThe power saving mode status is turned on.If there is no operation within half an hour,the printer will automatically shut down.(Power saving mode will not work in theprocess of printing)Power Saving Mode OffThe power saving mode status is turned off.Automatically shut down will not work.Finder User Guide www.flashforge.com19400-699-1063
Turn on/off [Light Bar Control]:Tap to turn on/off the light bar when restartthe printer. Factory Reset:Return to factory setting. Update: To update the firmware version. BackStatus:It displays the real-time status of theextruder temperature and filament.About:(First page)It displays the basic information about thedevice.About:(Second page)It displays the basic information about thedevice.Finder User Guide www.flashforge.com20400-699-1063
LicenseIt displays the basic information about thelicense.Finder User Guide www.flashforge.com21400-699-1063
2.2 AccessoriesFilament*1Quick Start GuideSolid GumAfter-sale CardPower CableScrewdriverUSB CableAllen Wrench(M2.0/2.5)Stamping WrenchPower AdapterFilament Guide TubeUnclogging Pin ToolGreasePTFE TubeFinder User Guide www.flashforge.com22400-699-1063
Chapter 3:UnpackingThis chapter will present you the whole unpacking procedure of Finder 3D printer.(Note: Make sure you read the whole unpacking guide)Place the packaging box on a clean work surface.3‐1(3-1) Open the box, grasp the external packing and then lift your Finder out of thebox.3‐2(3-2) Remove the external packing and the plastic bag.Finder User Guide www.flashforge.com23400-699-1063
3‐3(3-3) Remove the top insert.3‐4(3-4) You will see Quick Start Guide,After-sales Service Card ,power cable,Filament Guide Tube and tool bag.3‐5Finder User Guide www.flashforge.com24400-699-1063
(3-5)Discard the blue tape that holds the flat cable in place. Be careful with the flatcable.3‐6(3-6) Cut off four ribbons that used for fixing the guide rod. Then slide the extruder tomake sure the extruder is in good condition.3‐7(3-7) Remove the middle insert. A spool of filament is packed inside.Finder User Guide www.flashforge.com25400-699-1063
3-8(3-8) Lift the build plate up and take out the power adapter, USB cable and solid gum.3‐9(3-9) Remove the two buckles that hold the Z-axis guide rodsCongratulations! You have unpacked your Finder. Next, let’s move on to hardwareassembly of Finder.Finder User Guide www.flashforge.com26400-699-1063
Chapter 4: Hardware AssemblyYour Finder has been installed before leaving factory, you can start up the Finder forprinting after mounting the filament spool and completing leveling.4.1 Filament Installation4-1(4-1) The filament cartridge is at the rear of Finder. Lift the cartridge out of the Finder.4-2Finder User Guide www.flashforge.com27400-699-1063
(4-2) Take out the filament and thread it through the filament detecting equipment.(Note: The filament should feeds from the bottom of the spool towards the top)After installing the filament, put the cartridge back to the printer.4.2 Printer Start-up(4-3) Insert the power supply into the power input on the back of the Finder and plugthe power cable into an electrical outlet. Then turn on the power switch.4‐4(4-4) Press the touch screen button to start the device.4.3 Loading FilamentFor stable filament loading and proper device protection, you need to install thefilament guide tube properly.(4-5) Take out the filament guide tube, thread the filament from the filamentcartridge through the tube.Finder User Guide www.flashforge.com28400-699-1063
4-5(4-6) Insert the filament from the filament guide tube into the filament intake.4‐6Next, we will load the FlashForge filament. (Note: Please lower the build plate toincrease the distance between the nozzle and build plate to 50mm at least foravoiding nozzle jam.)4‐7(4-7) Tap [Tools].图 4-64-8Finder User Guide www.flashforge.com29400-699-1063
(4-8) Tap [Filament]--[Load]4-9(4-9)After the extruder’s temperature reaches 220 , the printer will sound a beep toprompt you to load the filament into the extruder.4-10( 4-10 ) Press the spring presser,and then insert the filament into the extruder at anupright angle. Then the filament will be drawn through the extruder. Do not tap[Cancel] until the filament load the extruder steadily.4.4 Unloading FilamentFinder User Guide www.flashforge.com30400-699-1063
4-11(4-11) Tap [Tools]-[Filament]-[Unload] and the extruder starts heating up.4-124-12(4-12) After the extruder reaches 220 , the printer will sound a beep to prompt you tounload the filament from the extruder. Press the spring presser, press down thefilament for about three seconds and gently pull the filament out.Note: Do not pull out the filament with force as it will damage the gears. If themelted filament has cooled down in the extruder, please repeat the steps above.Finder User Guide www.flashforge.com31400-699-1063
Chapter 5: Build Plate LevelingFinder creatively adopts three-point intelligent leveling system, which will give clearand comprehensive feedback to users. There are three spring-loaded knobs under thebuild platform. The distance between the plate and nozzle increases while tighteningthe knobs. On the contrary, the distance reduces.5‐1(5-1) Tap [Tools] - [Level] on your Finder touch screen. Please wait while the extruderand platform finish initial movements. After that, operate according to the guide on thetouch screen.5-2Finder User Guide www.flashforge.com32400-699-1063
(5-2) After tapping [Yes], the extruder starts to move towards the first point and theplate moves up and down to verify the distance between nozzle and plate.5-3(5-3) When it shows that the distance is too big, please unscrew corresponding nutunder platform clockwise until hearing a steady beep and the [Verify] button appears.5-4(5-4) If the distance is appropriate, tap [OK] to second point leveling. If still not,please follow the prompts to adjust again till you see [OK] button.5-5(5-5) Repeat steps 2 through 4 above to complete second and third points leveling andthen Tap [Finish] to exit.Finder User Guide www.flashforge.com33400-699-1063
Chapter 6: About SoftwareThis chapter talks about the basic function of FlashPrint. For more information aboutadvanced function, you can browse our website www.FlashForge.com.6.1 Software Installation6.1.1 Software AcquisitionMethod 1: To get the installation package from the USB stick in the toolkit.Method 2: Open the link below to download the installation ownloads---FlashPrint---choose the software version---download6.1.2 Software Installation and Start-up1. Decompress the zipped file or start the installation program, and then install thesoftware according to the direction.2. Start the software with the start menu shortcut or by clicking the software icon.(See6-1)6‐1Finder User Guide www.flashforge.com34400-699-1063
6.2 Exploring FlashPrint6. 2.1 Machine Type SelectionNote! After starting FlashPrint, you need to select the target machine type first.When you start FlashPrint, a dialog box will pop up. Just select FlashForge Finder inthe machine type list and click [OK]. You can also change the machine type viaclicking [Print]--[Machine type]. See graphic 6-2:6‐26.2.2 Software Introduction6‐3Finder User Guide www.flashforge.com35400-699-1063
Load files.Enter the support edit mode.Print it directly with your Finder or export to your USB Stick.View FlashPrint home screen from one of six viewing angles.Move model around on XY-plane; shift click to move along Z axis.Turn and rotate your model.Scale the size of your object.Cut model into several parts.6.2.3 LoadingYou can load a model file or Gcode file into your FlashPrint by the following sixmethods:Method 1: Click the [Load]on the main interface. Then select the object file.Method 2: Select the file for loading and drag the file to the main interface of thesoftware.Method 3: Click [File]--[Load File]. Then select the object file for loading.Method 4: Click [File]--[Examples] to load the example filesMethod 5: Click [File]--[Recent Files] to load the files opened recently.Method 6: Select and drag the target file to the icon of FlashPrint.Note:3D models can be stored as .STL, .OBJ, or .FPP file and support editing byFinder User Guide www.flashforge.com36400-699-1063
FlashPrint.Generating RilievoLoading a png, jpg, jpeg, bmp picture file into the FlashPrint. And the followingdialogue box(6-3) will pop up. The setting box includes settings for shape, mode,maximum thickness, base thickness, bottom thickness,width, height, top diameter andbottom diameter.Shape: including plane, tube, canister and lamp.Mode: including “darker is higher” and “lighter is higher”.Maximum thickness: Z value of the modelBase thickness: The minimum raft thickness and the default value is 0.5mmWidth: X value of the modelDepth: Y value of the modelBottom thickness: For tube, canister and lamp to set up bottom thicknessTop diameter: For tube, canister lamp and seal to set up the top diameterBottom diameter: For tube, canister, lamp and seal to set up the bottom diameter6‐4Finder User Guide www.flashforge.com37400-699-1063
Plane(6-5)Tube(6-6)Cansiter(6-7)Finder User Guide www.flashforge.com38400-699-1063
Lamp(6-8)Seal(6-9)6.2.4 Views①Changing viewsChange model views by moving, rotating, scaling. DragClick the [View] iconand then you can move the object by the following threemethods:Method 1: Hold down the left mouse button and drag.Finder User Guide www.flashforge.com39400-699-1063
Method 2: Hold down the mouse wheel and scroll up and down.Method 3: Hold down the Shift key, hold down the right mouse button and drag. RotateClick the [View] iconand then you can rotate the object by the following twomethods:Method 1. Hold down the right mouse button and drag.Method 2. Hold down the Shift key, hold down the left mouse button and drag. ScaleRotate the mouse wheel to enlarge or shrink the build plate.②Set ViewAllows users to view the object on the build plate. Six views are under the view menu,that is, home view, bottom view, top view, front view, back view, left view and rightview.Method 1: Click the the [View] button, there are six views in the drop- down listMethod 2: Click the the [Look] iconon the left, click it again and a submenuwill appear with six views for selecting.③Reset ViewAllow users to reset views by the following two methods:Method 1: Click the [View] menu and select [Home View]Method 2: Click the [View] button on the left, click it again and you will see theviewing options, you can click [Reset].④Show Model OutlineClick [View]--[Show Model Outline], it will highlight the yellow border of the objectFinder User Guide www.flashforge.com40400-699-1063
⑤Show Steep OverhangClick [View]--[Show Steep Overhang]. When the intersection angle between themodel surface and horizontal line is within the overhang threshold value, the surfacehas steep overhang and it becomes red in the software. Overhang threshold valuecould be set as needed. The default value is 45 degree.6.2.5 MoveSelect the object and move the object by the following two methods:Method 1: Click the [Move] icon on the left, hold down the left mouse button anddrag to adjust the location of the model in XY direction. Hold down the Shift key,hold down the left mouse button and drag to adjust the location of the model in Zdirection. The distance and the direction of the movement shall be displayed.Method 2: Click the [Move] button on the left and then enter the distance value. Click[Reset] to reset distance values.Note: Users shall click [Center] and [On Platform] after the location adjustment toensure the model(s) be within the build area and on the build platform. If a specifiedposition is needed, only to click [On Platform].6.2.6 RotateSelect the target object and rotate the object by the following two methods:Method 1: Click the [Rotate] icon on the left and three mutually perpendicular ringsappear around the object Click one ring and rotat
Using FlashPrint, you can turn stl. files into g. or gx. files for printing. Then the files can be transferred to your Finder via USB cable, USB stick or WiFi. Finder support Simplify3D software, software not developed by FlashForge may need register or charge extra fee, please choose to use (or not) according to your needs. 1.1.3 Build the 3D .