Transcription
Center for Faculty Development and SupportGoogle Docs Tutorial
Table of ContentsOverview . 3Learning Objectives. 3Access Google Drive . 3Introduction . 4Create a Google Document. 4Upload an Existing Document . 6Sharing Google Documents . 7Organize your Google Docs. 10My Drive . 10Shared with Me . 12Search for a Document or Folder. 12Template Gallery . 12Access a Template. 13Submit a Template . 14Remove a Template . 16Introduction of Google Form . 16Create a New Form . 16Edit a Form . 18Send a Form . 19Resources . 20Access Help . 20Important URLs . 20Center for Faculty Development and Support revised in January, 2014Page 2 of 20
OverviewThis documentation is written for San Jose State University (SJSU) campus Google Drive users.The goal is to provide an overview of Google Drive. We will explore and discuss why GoogleDrive is created, when it may be best used and how to create your own Google documents.Step-by-step instructions will be demonstrated first, followed by hands-on practices anddiscussions in an instructor-led workshop.Google Drive is one of the applications (apps) of Google Suite, which includes Gmail, Calendar,Sites and other applications. You need your SJSUOne account to access Google Drive. If you arenot sure whether you have an SJSUOne account, visit SJSU directory at http://directory.sjsu.eduto verify your email address. If you are not listed in the directory, contact Human Resources athttp://www.sjsu.edu/hr/. If you are listed, but your address is not, you may be a new hire andthe account will be created for you shortly.Learning ObjectivesAfter completing this training you should be able to:1.2.3.4.5.6.7.8.Log in with your SJSUOne account to access your Google Drive.Understand and explain what Google Drive is and when to use it.Create a Google document and upload an existing document.Share your documents with others with the appropriate access permission.Organize your documents in Google Drive.Know where to find, when to use, or how to submit a template.Understand the design of Google form and create, edit, and send a Google form.Know where and how to find help.Access Google Drive Enter http://docs.sjsu.edu in the URL box of any browser to launch your Google Driveaccount. The SSO (Single Sign-on) login page will appear. Enter your SJSU ID and password to log into your SJSU Google Drive account. If you are a new user, click the “SJSUOne account” link underneath SSO LOGIN, followthe instruction to activate your account. If you have lost your password or your password has expired, click the “SJSUOneaccount” link underneath SSO LOGIN, follow instruction and take the appropriateaction.Center for Faculty Development and Support revised in January, 2014Page 3 of 20
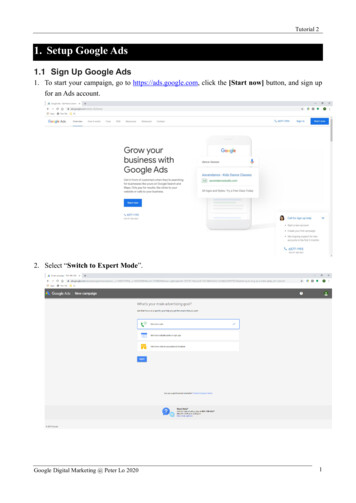
You can also log into your SJSU Gmail or Calendar account, click Apps Drive at the topGoogle apps black bar to launch your SJSU Google Drive window as follows.EXERCISE #1: Log into your SJSU Google Drive account.IntroductionGoogle Drive is a server-based solution designed for online access and collaboration. It allowsyou to create, store and access Google Docs, Sheets, Slides, forms, and drawings in GoogleDrive online. These apps come with simple formatting features and can be viewed as a lightweight version of Microsoft Word, PowerPoint, Excel, or a drawing application but in a GoogleDocs file format.The traditional method of sharing is to attach a document to an email and send it to others oryour collaborators. Google has introduced a different way, that is, to store all documents in afixed central workspace or location – the Google server, and attach the email address to thecorresponding document. You will be able to access your documents any time anywhere in thecloud via the Internet. If you make any changes to the file on the web, on your computer oryour mobile device, the changes will be updated and synced wherever your Google Drive isinstalled.Google Drive not only allows you to download the Google documents onto your local computerbut upload and store your existing Microsoft Word, PowerPoint, Excel spreadsheet or PDFdocuments from your local computer to Google Drive online. These documents may be savedeither as is or in Google Docs format. Google Drive serves as a good file backup system. It isuserID and password protected that only you have the access to the documents.In addition, Google form is a very useful tool for you to create professional looking surveyquestions, collect and store survey data in a spreadsheet format. It can also be used to planevents, give students quizzes, collect feedback, etc. All Google documents can be used for yourpersonal needs as well as for group collaboration needs.Create a Google DocumentBelow are step-by-step instructions to create a new Google document.Center for Faculty Development and Support revised in January, 2014Page 4 of 20
1. Click the Create button in the upper left corner under the SJSU logo. Select Documentfrom the drop down list to open your Google document window as below.2. Click the body of the document text area and when the cursor is blinking, enter textsuch as, “This is my first Google document at San Jose State University.” Explore thebasic formatting features on the rich text formatting area or on the menu bar. Forexample, try formatting your text in size 18 points, bold, italic, and center aligned.Hyperlink the words “San Jose State University” as a practice.3. Your Google document will be automatically saved and named “Untitled document.” Tosave the document in a different name, click the Untitled document link at the upperleft corner and Rename Document window will open. Or, select Rename from the Filemenu to rename your Google document to “My first Google document”.4. To comment on a document, click the Comments button at the upper right corner thenclick the Comment icon. Enter your comments in the Add a Comment box.5. To save this document as a Word document, click the File menu, select Download as then Word from the pop-up list. A separate new Word document will be downloadedand opened in Microsoft Word on your desktop.Center for Faculty Development and Support revised in January, 2014Page 5 of 20
6. Click My Drive – Google Drive tab on the top to view your Google document list. Yournewly created document in Google Docs format should be listed under My Drive.To create a slide presentation document in Google Docs format, follow step 1 above and clickthe Create button but select Presentation from the drop down list. Start creating your slidepresentation document where the cursor is blinking.To create a spreadsheet document, repeat step 1 above but select Spreadsheet from the dropdown list. Start creating your spreadsheet document as you would in a Microsoft Excelapplication. Repeat the same process for Google form or drawing documents. Due to theunique design of Google form documents, it will be discussed later in more details.EXERCISE #2: Create a Google document using the instructions above.Upload an Existing Document1. Click the Upload icon next to the Create button at the upper left corner. Select Files and a new Open window will appear.Center for Faculty Development and Support revised in January, 2014Page 6 of 20
2. Browse to locate the document you want to upload, double-click on your desirabledocument and an Upload settings window will appear.3. If you want to convert your existing document to the Google Docs format, check theappropriate box. If not, make sure the box is not checked. Click Start upload on thelower left corner to start the upload.4. Once the upload is complete, your document will appear on the Document list with anUpload complete window overlapping on top of your Document list. Click the “x” at theupper right corner to close the Upload complete window.EXERCISE #3: Upload an existing document from your desktop.Sharing Google DocumentsWhen you create a Google document or upload an existing document, this document staysprivate to you only on the server. You decide the visibility of the documents, that is, whetheryou want to keep the documents private or share them with others. You are in control of thepermission access of the documents, namely, whether others can edit, comment, or view only.Sharing Google documents allows you to collaborate with others to edit or view comments inreal time or at any time. Another advantage is to avoid email attachments. You can share yourdocuments with as many or as few people as you want. See instructions below.Share with Specific People1. a) Click the check box next to the document you want to share from the Documents list.More icons become available at the top. Click either the Share icon or the More icon toselect Share from the drop down list under More.Center for Faculty Development and Support revised in January, 2014Page 7 of 20
b) Or, double-click to open your Google document. Click the Share button at the upperright corner.2. A Sharing settings window will open as below. To share your document with specificpeople, add their email addresses in the Invite people box at the bottom.3. Determine what access permission you want to assign to your guests, such as, Can edit,Can comment, Can view, and select your desirable option. If you want include amessage when you notify people via email, click the Add message blue text link to openthe message box to enter your message. If you want to send a copy to yourself, checkthe box next to Send a copy to myself.4. Click Share & save button when done and a new window will open. A list of your guestswill appear in the Who has access area with the appropriate access permission you haveassigned.Center for Faculty Development and Support revised in January, 2014Page 8 of 20
5. If you want to remove a person from your sharing list, click the “x” at the right end ofthe list.Share with othersYou can also make your document public by sharing it with others at SJSU, anyone with the link,or public on the web. Follow instructions below to determine the visibility of your document.6. In the Sharing Settings window, Click the Change blue link to the right of Privatesetting and another Share Settings box will open. Determine how you want to assignthe visibility of your document by checking the appropriate radio button. If you needmore details to help you make the decision, click the Learn more about visibility bluetext hyperlink at the lower right corner.7. If you check any of the non-private radio buttons such as, People at SJSU with the link,additional Access option will appear at the bottom. Determine further the accesspermission you assign to Anyone within SJSU by selecting Can view, Can comment, orCan edit. Click the Save button when done.Center for Faculty Development and Support revised in January, 2014Page 9 of 20
8. The URL of your document will appear next in the Link to share box at the top. You canshare this link with others.EXERCISE #4: Share your Google document with others by adding two neighbors as yourguests. Assign your desirable access permission for your guests. Send a copy to yourself so thatyou can view and explore what your guests may receive.Organize your Google DocumentsGoogle Drive provides you five gigabyte of storage space for free. Any documents in GoogleDoc format or documents others have shared with you do not use the storage space. As youare creating documents, your document list becomes longer and you may want to startplanning how to organize them as early as possible.My DriveFolders or documents under My Drive are created by you. To the left of My Drive, you will finda right arrow. You can click this right arrow to expand or collapse the folder list under My Drive.You can organize your documents by assigning or creating a new folder label, changing thecolor of the folder, or removing it to the trash. You have full control of any documents orfolders under My Drive. Below are instructions on how to create, modify, or remove a folder.1. To create a folder, click the Create button at the upper left corner under the SJSU logoand select Folder from the drop-down list.Center for Faculty Development and Support revised in January, 2014Page 10 of 20
2. A New folder window will open. Enter a name such as, Test, in this New Folder box.Click Create button when done.3. Your newly created Test folder will appear under My Drive on the left pane and alsounder the My Drive TITLE column in the center.4. Go to your documents list under the My Drive TITLE column.a. Drag any document from the list and drop it into the Test folder. This documentwill be moved into the Test folder.b. Or, select a document then click either the Organize or the More icon at the top.A separate Move to window will open. Select the appropriate folder, move yourdocument there by clicking the Move button.Center for Faculty Development and Support revised in January, 2014Page 11 of 20
5. You can rename the folder by selecting Rename , change the color of your folder byselecting Change color, or download the document by selecting Download 6. To remove a folder or a document, 1) right click on the folder or document and selectRemove from the pop-up list. Or, 2) check the box next to your folder or documentthen click the Trash icon at the top to remove it to the trash.Shared with MeBeneath My Drive, you will find Shared with me. Click it you will find a list of documents and orfolders other people have shared with you. You can open, view, download, move to My Drive,or remove them. You may or may not be able to share it with others, depending on whetheryou are given the edit privilege.Search for a Document or FolderTo search a document, go to the Search Docs box next to the magnifying glass icon at the top ofyour home Documents list and enter a few characters of your search criteria and start yoursearch.EXERCISE #5: Create a new folder and place a document in this new folder.Template GalleryThere are many additional apps which may be useful to you and you can add or connect themto your Google Drive. For instance, Template Gallery is a good example. This app containsCenter for Faculty Development and Support revised in January, 2014Page 12 of 20
many sample Google document, presentation, or spreadsheet templates. There are fourseparate types of template galleries: Public, SJSU, Templates I’ve used, and My Templates.Prior to creating your own document, spreadsheet, presentation, form, or drawing in GoogleDocs format, explore the Public Templates or SJSU Templates. You may find various samplememo, cover letter, presentation design, grade book, cards and certificates, etc. that may beready to use or you can modify it to meet your needs. Repurposing the existing free templatewill save you time and give you more ideas. You can also submit your file as a template andshare it with others.Access a TemplateTo access Google Template Gallery:1. Click the Create button and the Connect more apps link at the bottom. A new Connectapps to Drive window will open. Enter template in the search box. Skip this step ifTemplate Gallery is already on the drop down list under Create.2. A new Connect apps to Drive window will open with the Drive Template Gallery shown ontop of the list. Click the Connect button to add this app to your Google Drive and close thewindow by click the X at the upper right corner. The From template should appear on thedrop down list after you click the Create button.3. Select this From Templates from the drop down list. A new Template Gallery window willopen as below.Center for Faculty Development and Support revised in January, 2014Page 13 of 20
4. Click the SJSU Templates tab and its content will be displayed. Click the link in blue text onthe left to browse or preview the various templates at SJSU. Once you find the one that bestmeets your needs, click Use this template and that template window will open, ready foryour use.5. Click the Public Templates tab, you may find more template selections of business forms,labels, cards and certificates, meeting notes, surveys, etc. Preview and click Use thistemplate to use your selected template.6. You may also select Make a copy from the File menu within a Google document and usethat copy as your template.Submit a Template1. a) On your home Google Documents list, select the document you want to submit as atemplate and click the More icon at the top.b) Or, click the Submit a Template link at the top right corner of the main TemplateGallery page.Center for Faculty Development and Support revised in January, 2014Page 14 of 20
2. A separate Submit a template window will open. Browse to locate your document byclicking the Choose from your Google Docs link at the top. Enter text or instructions inthe Enter a description box. Select an appropriate category for your template by clickingthe down arrow of Select a category and Select another category boxes.3. Click Submit template at the bottom left and your template will be displayed underboth My Template tab and SJSU Template tab. It usually takes a while for your templateto appear.Note: Only documents and forms in Google Docs format can be submitted. You must enterdescriptions and select one category for the template you want to submit.Center for Faculty Development and Support revised in January, 2014Page 15 of 20
Remove a Template1. Go to either the SJSU Template or My Template tab to locate your template. Click theRemove From Gallery link below the Use this template button to remove yourtemplate.EXERCISE #6: Browse and find a template you want to use, copy and open that template as apractice.Introduction of Google FormGoogle form is a powerful feature of Google documents. It can be used to generateforms/survey questions, give students quizzes, plan events, aggregate data or feedback for yourbusiness, school, or personal needs. You can create a professional looking form with short text,paragraph text, multiple choices, check boxes, choose from a list, scale, or grid format and sendit to your recipients. Your recipients will see a user-friendly form format in the front end. Theirresponses will be collected and stored in a spreadsheet format in the back end. Seeinstructions below.Create a New Form1. Click the Create button and select Form. An untitled form with various available themewindow will open. Enter a name such as “Practice Form” in the Untitled Form box at thetop. Select the preferred theme for your form. Or, you can click the OK button to usethe Default theme.Center for Faculty Development and Support revised in January, 2014Page 16 of 20
2. Your Untitled form window will open as below. In the Form Settings area, determinethe following three settings for your form.a. The default is to Require SJSU login to view this form box. If you suspect any ofyour respondents does not use an SJSU email address, leave this box unchecked.b. If you want to keep the form anonymous, leave the box next to Automaticallycollect respondent’s SJSU username unchecked.c. If you wish to indicate form completion progress for your users, check the boxnext to Show progress bar at the bottom of form pages.3. In the Form Description box, enter descriptions such as the purpose or instructions foryour form.4. In the box next to Question Title, enter text for your question and any Help Text thatmay clarify or further explain your question if appropriate. Help Text is optional.5. For the Question Type, click the down arrow to select the appropriate type of questionfor your form or survey. Your options are: Text, Paragraph text, Multiple Choice,Checkboxes, Choose from a list, Scale, and Grid. You may also include Date and Timefield if you want your users to enter the date and time when completing the form. Afteryou make a selection, you will be presented with different form formats correspondingto your choice of question type. Browse through the various question type format toexplore your options. Or, follow the steps to complete your question.Center for Faculty Development and Support revised in January, 2014Page 17 of 20
6. If you want to make your question a required question, make sure you check the boxnext to Required question. Click Done when you finish.7. To add another question, click the down arrow of the Add Item button at the top. Selectthe appropriate question type and repeat the above steps 4 to 6 to create the nextquestion for your form. Repeat this process to create all your questions.Edit a FormThere are two different ways you can edit a form. They are:1. a) For each Google form question, click the Pencil icon at the upper right corner of eachquestion to edit your form. Or, click the Duplicate icon, which is next to the pencil iconto duplicate the question if the two adjacent questions are of similar type but withdifferent wordings.b) In the Google responses spreadsheet, click the Form menu and select Edit form fromthe drop down list. The Google form window will open with your questions. You mayedit or modify your question.Center for Faculty Development and Support revised in January, 2014Page 18 of 20
2. To remove a question item, click the Trash icon.3. If you want your responders to be able to edit their responses after submission, checkthe box next to Allow responders to edit responses after submitting underConfirmation page.Send a FormAfter you finish creating and editing the form, there are three different ways to send the formto your recipients:1. a) In the Confirmation Page of your Google form, click Send form button. See above.b) At the upper right corner of your form underneath your email address, click Sendform. See below.c) Or, in a form responses spreadsheet, go to the Form menu and select Send form fromthe drop down list.2. A Send form window will open. Enter the email addresses of your recipients or yourcontact groups in the box below Send form via email: . If you wish to share this formwith your collaborators and allow them edit permission, click Add Collaborators andadd their email addresses.Center for Faculty Development and Support revised in January, 2014Page 19 of 20
3. Click Done when you are ready to send the form.EXERCISE #7: Create a simple form and email it to your instructor and neighbors.ResourcesAccess HelpWhenever you have any questions, click the down arrow next to the gearicon at theupper right corner beneath your email address and select Help from the drop down list. TheGoogle Drive Help window will open as below right.Enter text for the subject you need help in the Search box at the top. Browse and search foryour answer.Important URLs Center for Faculty Development Communication chnology Google Drive Helphttps://support.google.com/drive/?hl enCenter for Faculty Development and Support revised in January, 2014Page 20 of 20
but upload and store your existing Microsoft Word, PowerPoint, Excel spreadsheet or PDF documents from your local computer to Google Drive online. These documents may be saved either as is or in Google Docs format. Google Drive serves as a good file backup system . It is userID and password
