Transcription
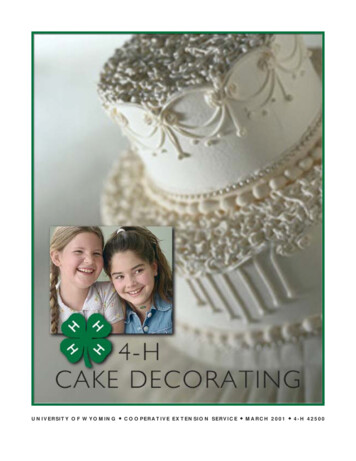
UNIVERSITY OF WYOMING!COOPERATIVE EXTENSION SERVICE!MARCH 2001!4-H 42500
Prepared by:Ronda Whitman, Albany County 4-H LeaderAcknowledgements:Appreciation is extended to Wilton Enterprises, Inc., whose publications have served asreference in the preparation of this 4-H manual, and for samples of techniques illustrated.Graphic Designer: Tana Stith, College of Agriculture, Office of Communications and TechnologyIssued in furtherance of Cooperative Extension work, acts of May 8 and June 30, 1914, in cooperation with the U.S. Department of Agriculture. Glen Whipple, Director, Cooperative Extension Service,University of Wyoming, Laramie, Wyoming 82071.Persons seeking admission, employment, or access to programs of the University of Wyoming shallbe considered without regard to race, color, religion, sex, national origin, disability, age, politicalbelief, veteran status, sexual orientation, and marital or familial status. Persons with disabilitieswho require alternative means for communication or program information (Braille, large print,audiotape, etc.) should contact their local UW CES Office. To file a complaint, write the UW Employment Practices/Affirmative Action Office, University of Wyoming, P.O. Box 3434, Laramie,Wyoming 82071-3434.
PROJECT INFORMATIONIntroductionWhen you bake and decorate a cake for a specialoccasion, the smiling faces around the table willbe your greatest reward.After a few lessons and a lot of practice you willbe able to decorate beautiful cakes for birthdayparties, anniversaries, and other special days.You can practice on practice boards, waxedpaper, or freezer paper (waxed side up) taped tocardboard—or even a cake pan turned upsidedown. Once you decorate the practice surface,scrape the icing off and use it over again.Cake decorating recordsKeeping records or descriptions of your decoratedcakes is important. Either take a picture or drawa simple diagram of each cake you decorate, thengive a short explanation of what you did andwhat you learned, even if you had problems.Also, keep a record of expenses and compare theamount to what it would have cost to buy adecorated cake.Cake decorating levelsThe 4-H Cake Decorating Project offers fourlevels. These levels are:each year. Refer to the table of contents to findinformation for each project level.Place this manual in a loose-leaf binder. You maywant to keep your cake decorating records in thesame binder and add other information as youprogress.Basic supplies1. Straight-sided cake pan or pans, preferably 8inches round, 3 inches tall.2. Metal spatula with a rounded end (8 inchesor 11 inches, depending on your hand size).3. Decorating bags, three types are available. Featherweight or plastic bag with orwithout coupler. (The coupler allows thedecorator to change tips on the samebag.) Beginners should start with three10-inch Featherweight bags. Clear plastic disposable bags, usuallyavailable in packages of 12 or 24. Parchment or plastic-coated freezer paper.4. Decorating tips (see your particular level forspecific tips needed).5. Three types of food colorings Paste color Liquid coloring Powdered coloringLevel 1: Beginning cake decorating—let’s begin.Level 2: Intermediate cake decorating—flatsurface flowers, roses, and layer cakes.Level 3: Advanced cake decorating—stackedcakes, side decorations, lily nail flowers, andmore flowers.Level 4: Master cake decorating—design yourown.This cake decorating manual contains goals,skills, and techniques for the project’s four levels.Study these goals and establish your own goalsPROJECT INFORMATION1
6. Box for storing all supplies together. Mark allsupplies with your initials for easy identification, and store tips separately as they can beeasily dented or bent. Tips can be markedwith an engraver or fingernail polish.7. Folder to hold your manual, cake records,and other paperwork.8. Flat plate or cake board for displaying decorated cake.9. Revolving cake stand or turntable (optional).4-H cake decoratingThe Wyoming 4-H Cake Decorating project isdivided into four skill levels:LEVEL 1: The Beginning DecoratorMembers will learn to bake and frost single-layercakes and learn simple decorating procedures.Skills, techniques, and goalsThe skills and techniques learned in this projectare listed in the chart found on pages 3 to 8.They are divided by subject with the skill levellisted down the left side of the chart. Your 4-Hleader and parents can help you identify theskills you want to learn according to the level inwhich you are enrolled. Then, as the yearprogresses, you can check to see what you havelearned and what you still have to do. Refer topages 3 through 8 in this manual to see what willbe learned in each level.You might like to try a technique above your skilllevel, and you may have to repeat some methods.However, you should master the minimumnumber of required items in each decoratinglevel before moving on to the next level. Stay in alevel for more than one year if you have notmastered the required skills.LEVEL 2: The Intermediate DecoratorMembers will learn how to bake two-layer cakesand make flat surface flowers, simple flower nailflowers, roses, a variety of borders, and specialeffects like Cornelli lace, lattice work, basketweave, and others.LEVEL 3: The Advanced DecoratorMembers will learn to bake stacked and tieredcakes, master all flat surface flowers, and learn tomake flowers using the lily nail.LEVEL 4: The Master DecoratorMembers will design their own projects using theskills learned from previous levels.2PROJECT INFORMATION
MASTEREDAverage skill developedAbove average skilldevelopedNeeds improvementSKILLS AND TECHNIQUESWrite year accomplished in small box.TriedLEVELWant to learnD e c o r a t i n g sk i l l s a n d te c h n i q u e sNotes or commentsTHE CAKEMaster all the items in your level before advancing to the next level.1, 2 Bake and prepare level cake1Prepare single-layer cake (minimum 5)1, 2 Prepare cut-up cake1, 2 Prepare a cake in a shaped specialty pan2Prepare one- and two-layer cakes (minimum of 5)2,3 Cut cakes for serving using different methods3Prepare a level, stacked cake3Prepare a level, tiered cakeFROSTING THE CAKEMaster all the items in your level before advancing to the next level.1, 2 Achieve proper consistency of icing for frosting the cake1, 2 Frost a smooth cake for decorating2Prepare a "filled" cakeICINGSMaster all the items in your level before advancing to the next level.Achieve the proper consistency for making the following:BUTTERCREAM ICING1Decorations of stars, flowers, leaves1, 2 Borders1, 2 Writing2Flowers2Combination borders2Figure piping2, 3 Side decorations3Drop string workROYAL ICING2, 3 Flowers2, 3 Figure pipingPROJECT INFORMATION3
4Want to learnTriedNeeds improvementAverage skill developedAbove average skilldevelopedPROJECT INFORMATIONMASTERED
PROJECT INFORMATIONWant to learnTriedNeeds improvementAverage skill developedAbove average skilldevelopedMASTERED5
6Want to learnTriedNeeds improvementAverage skill developedAbove average skilldevelopedPROJECT INFORMATIONMASTERED
PROJECT INFORMATIONWant to learnTriedNeeds improvementAverage skill developedAbove average skilldevelopedMASTERED7
8Want to learnTriedNeeds improvementAverage skill developedAbove average skilldevelopedPROJECT INFORMATIONMASTERED
Level 1: Beginning cake decoratingLET’SSupplies BEGIN 1. Basic supplies listed for all units (Projectinformation, page 1).2. Decorating tips—Four types are suggested;however, you may select any that give thedesired results.Two drop flower tips (one large and onesmall) - 224 or 107 and 131 or 1933. Practice surface4. Optional: Special molds—sugar, candy, and gelatin Shaped cake pans One plain round or writing tip - 3 or 4Goals One leaf tip - 67 or 3521. Develop basic skills in cake decorating. Three star tips - 16, 18, 22, or 25, 27, and31 or 352. Combine color, design, and flavors in apleasing way.PROJECT INFORMATION9
ExhibitDecorated cake using a minimum of four different skills and techniques learned in this unit:cake frosted smoothly, proper icing consistencyfor decorations, borders, drop flowers, writing,and leaves.Additional exhibits1. Decorated cake using either the stencil oroutline technique (one technique) with threeadditional skills or techniques (for a total offour skills and techniques) learned in this unit.2. Cut-up cake (one technique) using a minimum of three additional skills or techniques(for a total of four skills and techniques)learned in this unit.3. Cake or exhibit using solid sugar molds (onetechnique) and three additional skills ortechniques learned in this unit (for a total offour skills and techniques).104. Cake baked in shaped cake pan (one technique) and three additional skills or techniques (for a total of four skills and techniques) learned in this unit.5. Educational display showing techniqueslearned (posters, record books, etc.)Judging standards1. Each exhibit should show a minimum of fourdifferent skills or techniques learned in this level.2. Cakes should have uniform shape and thickness and be level (except cut-up cakes andcakes baked in special shaped pans).3. Cake forms (Styrofoam ) are better forexhibits than actual cakes.(Note: State Fair exhibits are required to becake forms.)4. Cakes should be placed on disposable cakeboards which may be covered with plastic orpaper doilies.PROJECT INFORMATION
5. Cakes should be frosted neatly; however,extremely smooth frosting is not necessary.Record books6. Design of decorations should be suitable forthe size and shape of the cake. A decoratedcake should show good use of color and apleasing combination of decorations.1. A record book should be neat and contain thefollowing: beginning and ending inventory,goals, one individual cake record for eachcake decorated during the project, leadershipactivities, and a project story.2. A record book should show that the memberhas decorated a minimum of five cakesduring the project year.3. Pictures or simple diagrams and explanationsmay be used. Other cakes decorated whiletaking this unit may be included.Level 2: Intermediate cake decoratingFLAT SURFACEFLOWERS, ROSES,ANDLAYERCAKESSupplies1. Basic supplies listed for all units (page 1).2. Decorating tips—four types are suggested.You may already have some of these tipsfrom Unit 1. Plain round or writing tips - 2, 4, 7 Leaf tips - 69, 75, 352 Star tips - 16, 18, 20, 22 or 25, 27, and 31,or 35 Petal tips - 104, 150PROJECT INFORMATION Flat flower nail - 7 Basket weave tip - 47 or 483. Sugar molds for hollow sugar molding. Forexample, Easter egg, ball, or bell.4. Color Flow icing mix.5. Artificial cake form (may be used for exhibit)can be purchased from a craft store or madefrom Styrofoam .Goals1. Develop intermediate skills in cake decorating.2. Develop intermediate skills in combiningcolor, design, and flavors in a pleasing way.11
12PROJECT INFORMATION
ExhibitDecorated cake using a minimum of five Level 2techniques: cake frosted smoothly, proper icingconsistency for decorations, flowers, borders,combination borders, or special effects.5. Decorations should show a variety of techniques (borders, side decorations, specialeffects, etc.). They should be evenly spacedand show even pressure.Additional exhibits6. Design should be suitable for the size andshape of the cake. It should demonstrategood use of color and a pleasing combinationof decorations.1. Any other decorated cake using at least fiveskills and techniques learned in this unit.Record books2. Cut-up cake (one technique) and at least fouradditional skills and techniques learned inthis unit.3. Any other decorated item using at least fiveskills and techniques learned in this unit.4. Decorated cake or other exhibit using figurepiping techniques (one technique) and fouradditional skills and techniques learned inthis unit.5. Educational display showing techniqueslearned (posters, record books, etc.).1. Record books should be neat and completewith the following information: beginningand ending inventory, goals, one individualcake record for each cake decorated duringthe project, leadership activities, and aproject story.2. Record books should show that a minimumof five cakes have been decorated. Eitherpictures or simple diagrams and explanationsmay be used on the page provided. Othercakes decorated while taking the unit may beincluded.Judging standards1. Exhibits in this unit should contain a minimum of five Level 2 skills and techniques.2. Artificial cake forms (Styrofoam ) are betterfor exhibits than actual cakes. State Fairexhibits require cake forms.3. Cakes should be placed on disposable cakeboards which may be covered with paper orplastic doilies.4. Frosting should make a good base for decorations. Colored frosting should be wellblended and free of discolorations.PROJECT INFORMATION13
Level 3: Advanced cake decoratingMORE FLOWERS,STACKED ANDTIEREDCAKESSupplies6. Pillars, or columns, to fit separator plates.Most plates take 4 pillars.7. Dowel rods 1/8-inch diameter.8. Tips: Plain round or writing tips - 1, 2, 3, 5, 7,and 91. Basic supplies listed for all units (page 5). Star tips - 14, 16, 18, 20, 54, 199, and 512. Wedding cake pans in various sizes. The 3inch deep pans eliminate the need for layering cakes. Petal tips - 102, 103, 104, 150, and 59 Variety tips - 88 and 127 Set of lily nails3. Two different sized pans for stacked cakes,for example, 8-inch and 10-inch.4. Three different sized pans for a stacked andtiered wedding cake: 6-inch, 8-inch, and 12-inch.5. Two separator plates for each layer. Platesshould be 2 inches larger than the tier that willbe placed on the plate, but both plates mustbe the same size. For example, an 8-inch cakewill need two 10-inch separator plates.149. Artificial cake forms (may be used for exhibit). State Fair entries must be on artificialcake forms.Goals1. Develop advanced skill in cake decorating2. Combine color, design, and flavors in apleasing wayPROJECT INFORMATION
ExhibitJudging standardsDecorated stacked and/or tiered cake using aminimum of four Level 3 skills and techniques.1. Exhibited cakes should have a minimum offour Level 3 skills and techniques.Additional exhibits2. Cakes or artificial cake forms may be used(primary exhibit must be a tiered cake or astacked and tiered cake).1. Cut-up cake using at least four skills andtechniques learned in Level 3.2. Any other decorated cake using at least fourskills and techniques learned Level 3.3. Any other decorated item using at least fourskills and techniques learned in this unit.4. Educational display showing skills andtechniques learned in this unit.3. Additional exhibits are not required to betiered cakes.4. Cakes should be placed on disposable, suitable cake plates.5. Design and decorations should be suitable forthe size and shape of the cake and shouldshow good use of color and pleasing decoration combinations.5. Record book.PROJECT INFORMATION15
6. Optional decorations: Lambeth method,marzipan, gum paste, rolled or cookedfondant, pulled sugar flowers, Australian netnail decorations, molded chocolate, andcombinations or variations.7. Special occasion ornaments may be used.2. Record books should show that the memberhas decorated at least one tiered cake. Pictures or simple diagrams and simple explanations may be used. All cakes decorated whiletaking this unit may be included in the recordbook.8. Techniques learned in previous units mayalso be used.Record books1. Record books should be neat and completewith the following information: beginningand ending inventory, goals, leadership, oneindividual cake record for each cake decorated during the project, and project story.Level 4: Master cake decoratingDESIGNSupplies YOUR OWNDetermine the supplies you will need to accomplish your goals.GoalInvestigate areas of personal interest in cakedecorating.ObjectivePlan, develop, complete, and evaluate an advanced cake decorating project. Include goals,objectives, activities, and an evaluation of youractivities.2. Decorate a cake or cakes using your owndesigns.3. Experiment with scratch recipes and mixesfor both cakes and icing. Document.4. Interview local home decorators about markets, pricing, and advertising, etc.5. Contact (or start) a local cake decorator clubin your area.6. Visit a professional decorator for ideas.7. Teach a lower-level cake decorating project.8. Expand cake decorating skills to decoratingfood. Use ideas in professional books andmagazines and create your own.9. Visit a food or restaurant show.ActivitiesExhibit1. Design various original patterns using thetechniques learned in Levels 1 through 3.1. A brief, written description of your projectincluding your goals, plans, accomplishments, and evaluation of results. You might16PROJECT INFORMATION
use pictures or records to provide evidence ofyour accomplishments.2. Decorated cake using more than five techniques (original design).Project plan1. Goals and skills to be learned.2. Resources that can be used, where information or help can be located, how to determine what has been accomplished.LeadershipLeadership responsibilities should develop andincrease throughout your 4-H experiences. Youwill expand your skills further as you select areaswhere you feel less confident or less capable.What kind of skills would help you the most?Activities Plan and organize an activity. Teach or show others how to use a skill.Evaluation Assist a leader with a project lesson.1. What was accomplished and learned. Plan leadership activities and follow throughwith them.2. How well goals were met.3. The results of your project (may include adecorated cake if that applied to your goals.)CitizenshipGood citizens use their knowledge and skills tomake better lives for themselves, their families,and their communities. Complete one or moreactivities to help others.Record booksThe record book for Level 4 should include Page1 of the Cake Decorating Record, a beginning andending inventory, the project story, the projectplan and evaluation, and leadership and citizenship activities.Activities Make a decorated cake for a neighbor. Make a decorated cake or food item for anursing home or day care center. Make a decorated cake for a local function orfundraiser. Share a skill. Help a 4-H leader or Extension educator at acounty event or at fair. Look around and find some other way toshow your concern for others and help insome way.PROJECT INFORMATION17
18PROJECT INFORMATION
T H EBaking the cakeStart with a good recipe or a good quality cakemix. Be sure to adjust the recipe for Wyoming’shigh altitude unless you are already using a highaltitude recipe.1. Use the correct pan size. Cakes baked in apan that is too large will become flat and dry.Baking a cake in a pan that is too smallresults in a peaked cake or the batter runsover the pan. (The peak can be cut off, butyou may end up with an uneven top.) Use astraight-sided pan. There are many goodbaking finishes to choose from, includingnon-stick, anodized aluminum, and insulated. Just be sure to select a durable panthat won’t warp, rust, or chip during repeated use. Shiny pans distribute heat moreevenly and give cakes a golden color. If youuse a glass pan, reduce the oven temperatureby 25 degrees.2. Generously grease the inside of the cake panor pans with solid vegetable shortening. Usea pastry brush or paper towel to spread theshortening evenly on the bottom and sides,making sure all inside surfaces are covered.Then, shake flour in the pan to coat the sidesand bottom. (The flour helps the cake batterclimb the pan side and raise properly.) If youprefer, grease the bottom of the pan and lineit with cut parchment paper. There is no needto flour the parchment. Be sure to remove thepaper before the cake completely cools, so itwon’t stick to the cake.Another simple and effective method toprepare the pan is to use an aerosol spraythat has the grease and flour in the samepreparation. Follow label directions.3. To help your cake remain level, fold a strip ofterry cloth so it is the same height as the panTHE CAKEC A K Esides. Wet the terry cloth then wrap it aroundthe outside of the pan and pin it togetherwith straight or safety pins. Pour equalamounts of batter into the pans and bake.The terry cloth adds humidity to the oven,which helps keep the cake level. It also keepsthe outer portion of the batter from bakingmore rapidly than the center.Note: You can purchase specifically designedoven-safe bands to wrap around pans beforebaking.4. Bake the cake in the center of the ovenaccording to temperature and time directionson the recipe or mix. To see if the cake isdone, lightly touch a finger to the cake’scenter. If it is done, it will spring back. Or,stick a toothpick in the center, and if it comesout clean the cake is done. If the cake is notdone, bake it for a few more minutes. Thecake should pull away from the edges of thepan.Cooling the cake1. Take the cake from the oven and place it onthe cooling rack. If the cake is not level,saturate a light-weight cotton tea towel (notterry cloth) with water, wring it dry, andpress the cake’s top gently to form an eventop. Remove the towel immediately.Cool the cake for 10 to 15 minutes on acooling rack. (Larger cakes, 14 inches indiameter, may need to cool 15 to 20 minutes.)2. Gently loosen the sides of the cake by running a metal spatula or table knife around theedges. Place the cooling rack on the cake’stop and, while holding the rack and the pan,turn both over. If the cake does not releasefrom the pan, return it to a warm oven (250 )19
for approximately 5 minutes and repeat theprocedure. Cool completely at least one houron a cooling rack. (If cooled on a plate orboard, it will steam and make the bottomsurface soggy.) Larger cakes will break if notturned right side up to cool.Leveling the cake1. If you did not level your cake with the damptowel, you can level it by trimming off theraised portions using a serrated knife or cakeleveler. Let the cake cool for at least 1 hour(or chill in the refrigerator). Use a serratedknife or cake leveling tool to trim off excesscake. You may need to ask for help from anadult.2. Brush off loose crumbs. Freezing the cakewill make it easier to handle.Now you are ready to ice the cake. Thebottom of the cake will be more level andeasier to frost. For a single layer cake, place the top ofthe cake down on the cake board andfrost the bottom. For a two-layer cake, place one layer rightside up on the cake board. Put frosting onthe first layer. Place the second layerupside down on the first so you arefrosting the bottom of the top layer. When layering large cakes or tortes, use acake board as a large spatula and shimmythe top layer off the board onto the top ofthe bottom cake layer.Leveling20Planning the designBefore planning the cake’s design, look in magazines and cake decorating books. A visit to yourlocal bakery might provide you with severalinteresting ideas.Designs should be:1. Suitable for the cake’s shape: Round or wedge-shaped design on around cake. Straight or triangular design on a squareor rectangular cake.2. In proportion to the size of the cake: Large designs or groups of small designsare best on a large cake. Small designs are best on a small cake.3. Seen well from the viewing area: Some cakes are planned to be viewedfrom one side only; others are the sameon all sides. Bring out design details by using colorsthat go well together:!In general, lighter colors are best forbackgrounds and deeper, brighter,colors are best for decorations.!If colors are too dark or too pale, thedetails of the design may be lost.Balancing the design1. You must mark the cake when you select adesign that is repeated or placed at equallyspaced intervals (such as scallop or lattice).Decide whether you want to divide the cakeinto four, six, eight, or more sections. Place asmall dot of the background icing at each “x”to serve as a guide. Draw a design line with atoothpick and check for accuracy beforegoing over it with icing.THE CAKE
Assembling a tiered cake1. Check to make sure the assembled cake willfit through any door.2. Try this quick and easy way to divide a cakeinto equally spaced sections: Take a 2-inch wide length of paper (calculator tape works well) and place it aroundthe outside of your cake pan. Cut it to theexact length. Remove and fold the tape in half andcontinue folding it in half until you haveas many sections as you need. Unfold andplace the tape around the top edge of thecake and attach it with a toothpick orlarge pin. Mark the cake at each fold.Your cake is now marked for your design.3. When doing latticework on the cake top, usevarious sized pans or bowls as a guide.(Round pans, margarine tubs, and plasticstorage containers work well for this.) Pressthe desired size of container lightly on thetop of the cake. Then, place or pipe straightor decorative lines in a contrasting color offrosting.THE CAKE2. The base for your cake must be sturdyenough to support the weight of the assembled cake. How heavy is your cake? Thefollowing cakes were made with BettyCrocker Super Moist yellow cake mix. Theywere filled, frosted, and decorated withbuttercream icing. The weights and heightsare for two-layer round cakes.3. Level and ice all tiers first. Each tier of yourcake must be on a cake circle or board cut tofit. Smear a few strokes of icing on the boardsto secure the cake. Fill and ice the layersbefore assembly.4. Place the bottom tier on a sturdy base plateor cake board cut 4 inches larger than thetier’s diameter. Imprint an outline in thecenter of this tier using a cake pan or cakeboard circle 2 inches smaller in diameter thanthe tier to be placed above it. Press the cakeboard gently in the center of the lower tier;remove the circle. Push a ¼-inch dowel rodinto the cake within the circular outline atthe cake’s lowest point. Push the rod all theway into the cake so it touches the base.Mark the dowel rod at the frosting line.Gently pull the dowel out of the cake. Usepruning sheers to cut the dowel rod. Markand cut six more dowels the same length as21
the first. Push all seven rods into the cakebase within the circular outline and evenwith the top of the cake. The dowels shouldnot stick out above the cake. Do not reposition the dowels after placing them in thecake. Generally, the larger and more numerous the upper tiers, the more dowels will beneeded. Very large cakes need ½-inch dowelsin the base tier.5. If you plan to position a small cake on top ofa novelty cake, ice the small cake on a cakeboard cut to fit. Dowel rods also may benecessary to support the small cake. Note: Iceall cakes on cut-to-fit boards when makingany tiered cake.6. Sprinkle coconut lightly on the top of thebottom tier within the imprinted circle. Thiswill keep the next tier from sticking to thefrosting and pulling it off when the cake iscut and served.9. Plastic pegs are needed in the separatorplates to prevent slipping. Insert the plasticpegs into the cake to determine if the pegsare too long and will need to be cut off. Markthe peg at the cake’s lowest point. Use pruning shears to cut all the pegs the same length.Attach the pillars to the top of the separatorplate. Then, insert the pegs into the base ofthe separator plate. With the pillars on top,determine the proper alignment and push theseparator plate pegs into the tier top. Thecake plate must rest level on top of the cake.If there is space between the cake separatorplate and the supporting tier, the cake will beunstable and not travel well.10. Place the top plate of the set on top of thepillars. Position the top cake tier on the7. Sharpen the end of another dowel rod with akitchen knife or pencil sharpener and push itthrough both layers of the cake to the cardboard circle base. Hit the end of the rodsharply with a tack hammer to drive the rodthrough the cardboard to the bottom caketier. Clip the rod even with the top of thesecond tier using pruning shears. This servesto secure the tiers, keeping them in place fortransporting.8. When using separator plates and pillars, skipa cake size for each separator set used. Forexample, you can use a 14-inch base cakewith a 12-inch layer directly on top of the 14inch layer (with the cardboard circle anddowel rods for support under the 12-inchlayer). Place the 10-inch separator plates andpillars on top of the 12-inch layer. Skip the10-inch cake and use an 8-inch cake on top ofthe 10-inch separator plate. A 6-inch cake ona cut-to-fit cardboard circle can be placeddirectly on top of the 8-inch cake. A sharpened dowel rod through both the 6-inch and8-inch cakes will offer more stability.22THE CAKE
separator plate. Remove this top tier and anytiers separated by plates when transportingthe cake.11. Separator plates should always be 2 incheslarger than the size of your cake pan to allowroom for borders and to give the cake abalanced appearance. Therefore, if you areplanning to use an 8-inch cake on the separator plate, a 10-inch plate set should be used.Always purchase two of the same size separator plates because they are used in sets. Eachset of plates should have four plastic pegswith it for support.Storing the cake1. Sunlight will alter colors and cause the icingto soften. Store your cake in a covered cakebox out of direct sunlight. Find a box thatwill fit your cake without squashing the topdecorations. You can purchase special cakeboxes from a craft or cake supply store, orask your grocery store bakery for a box.2. Humidity can soften royal and buttercreamicing. When the humidity gets high, prepareyour royal icing using only pure cane confectioners’ sugar (not beet sugar or dextrose),and add 1 teaspoon more of meringue powder to the recipe. Buttercream icing can bestabilized with 1 to 2 tablespoons of meringue powder.3. Cakes iced with buttercream icing can bestored at room temperature, refrigerated fortwo to three days, or frozen. Bright colorsmight weep when thawed.4. Cakes with thoroug
8. Flat plate or cake board for displaying deco-rated cake. 9. Revolving cake stand or turntable (optional). 4-H cake decorating The Wyoming 4-H Cake Decorating project is divided into four skill levels: LEVEL 1: The Beginning Decorator Members will learn to bake and frost s