Transcription
National 4-H s GuideBeginnerGrades 2-5
Dear Educator,Embryology: Hatching Classroom Projects designed to provide you with backgroundinformation and exciting experiential activities dealing with life science for use in yourclassroom. Each activity is designed to be grade-level appropriate and has been correlatedto U.S. National Science Education Standards.Children have a natural sense of curiosity about living things in the world around them.Building on this curiosity, students can develop an understanding of biology through directexperience with living things, their life cycles and their habitats. This curriculum was developedwith your students in mind. Many believe students learn best by interacting with the world—by listening, observing, experimenting and applying their knowledge to real-world situations.Each activity within this curriculum follows these steps in the experiential learning model.An additional goal of this curriculum is to help students develop life skills. Life skills help anindividual live a productive and satisfying life. Within this curriculum your students will havethe opportunity to develop life skills related to science processes, managing, thinking, working,relating and living a healthy lifestyle.We hope that Embryology: Hatching Classroom Projects is an enjoyable experience for bothyou and your students as well as a beneficial unit in your life science curriculum. Here are afew quotes from kids who worked with our pilot:The best part of learning aboutchickens and embryos was.“Watching the eggs hatch and getting to play with the littlechicks.”“Seeing the cute little chicks after they hadhatched.”“Seeing how the embryos develop insidethe shells. I also liked watching thechicks get their first white feathers andsee them grow.”“It was fun the whole time.”“The best part was seeing how thechick hatched. It was cool how itpecked its way around the shell.”“The best thing was when theyhatched. It was really exciting.I also liked learning abouthatching eggs. I learned somuch that I didn't know before.”AcknowledgementsDesign Team: Phillip J. Clauer, Design TeamChairperson, Extension Poultry Specialist, Virginia Tech;Donna Bailey, 4-H Extension Agent, Maryland; Caitlin Boon,Poultry Science Student; Debbie Curry, Vice PresidentPrograms and Education, Discovery Place, Inc., Nature Museum;Gary Davis, Extension Poultry Specialist, NC State University;Mickey Hall, Extension Poultry Specialist, Clemson; Ed Maxa,Extension 4-H Specialist, NC Cooperative Extension Service.Writing: Mark JostEditing: Kate McCarthyPhotography: Mark Sumner, Virginia TechDesign and Production: Northern Design Group, MNOther assistance from:Tom ZurcherJim AdamsPam Segall–Roberts
HatchingClassroomProjectsTable of ContentsIntroductionEmbryology and the National Science Standards 2Experiential learning model 3Life skill development 4Science skills 4Activity matrix 5Getting organizedPlanning and scheduling 6Background for a successful project 7The reproductive system and fertilization 10Daily embryonic development 12The activitiesEggsploring the egg 14Pick a chick 16Warming up with eggs 18Building an eggs-ray viewer 20Playing peek-a-boo with embryos 22Building a home ’tweet home 24Counting the chicks 26Caring and handling 28Eggsploring careers 30ReferencesGlossary 32Student assessment rubric 34Reproducible student activity sheets 36Embryology record sheet 42Resources 44Insert: A Closer Look embryology poster1
IntroductionEmbryology and theNational Science StandardsA classroom unit in embryology will help you meet thefollowing National Science Standards:Abilities necessary to conductscientific inquiryAsk questions about objects, organismsand events in the environment.Life cycles of organismsAnimals have life cycles including birth,maturation, reproduction and death.Animals closely resemble their parents.Plan and conduct a simple investigation.Use simple equipment and toolsto gather data.Organisms and their environmentsUse data to construct a reasonableexplanation.All animals depend on plants. Someanimals eat plants for food. Other animalseat animals that eat the plants.Communicate investigations andexplanations.The characteristics of organismsOrganisms have basic needs. Organismscan survive only in environments in whichtheir needs can be met.Each animal has different structures thatserve different functions in growth, survivaland reproduction.The behavior of individual organismsis influenced by internal cues and byexternal cues.An organism’s patterns of behavior arerelated to the nature of that organism’senvironment, including the kinds andnumbers of other organisms present,the availability of food, resources andthe physical characteristics of theenvironment.Abilities of technological designIdentify a simple problem.Propose a solution.Implement proposed solutions.Evaluate a product or design.Communicate a problem, design andsolution.2
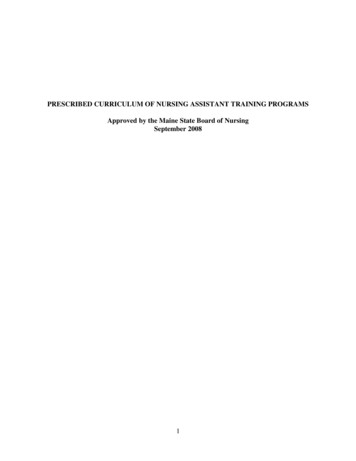
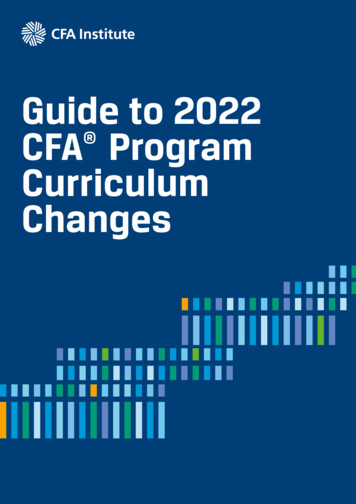
Experiential learning modelExperiential learning means having students do hands-onactivities, reflect on the meaning and apply what theylearned. This process helps ensure that the students learnactively and make knowledge a part of their world. It alsohelps students answer questions such as “Why should Ilearn this?” and “Now that I know this, what do I do next?”1.Experiencethe activity;perform,do it2.5.Applywhat was learnedto a similar ordifferent situation;practiceSharethe LearningModel4.Generalizeto connect theexperience toreal-worldexamples3.Processthe experience;discuss, analyze,reflectPfeiffer and Jones’ ModelPfeiffer, J.W., & Jones, J.E., “Reference Guide to Handbooks andAnnuals” 1983 John Wiley & Sons, Inc. Reprinted with permissionof John Wiley & Sons, Inc.Providing an experience alone does not create“experiential learning.” The activity comes first. Thelearning comes from the thoughts and ideas createdas a result of the experience. This is a “learn by doing”or experiential process. Addressing each step inthe process assures a purposeful plan to obtain aspecific goal.ExperienceThe model begins with experience,action. This immediately focuses theattention on the learner rather thanthe teacher. This requires active cooperation from the learner, coupledwith guidance from the teacher tohelp maintain the learner’s curiosity.Teaching becomes a cooperativeenterprise.ShareSharing is simply asking the group orindividuals, What did you do? Whathappened? What did it feel like to do(whatever)? This step should generatelots of information to lead to theprocess step.ProcessThe questions and discussion nowbecome more focused on what wasmost important about the experience.Common themes that emerge from thesharing session are explored further.Often the key teaching points relatedto the subject matter are discussed.GeneralizeIn this step the experience is related toa real-world example. This step helpsthe student to answer the questions,Why should I learn this? What did theexperience mean to me personally? Tomy everyday life? Subject matter andlife skill development can be discussedin this step. For example, if you hopethat the activity helps students developteamwork skills, then questions aboutteamwork would be appropriate.ApplyThis step helps the student answer thequestion, Now that I know this, what doI do next? Can students express whatthey learned? Can they use what theylearned? Can the student actuallyapply the learning to a new situation?3
Life skilldevelopmentScienceskillA skill is a learned ability to do something well. Lifeskills are abilities we can learn that will help us to besuccessful in living a productive and satisfying life.The following is a list of skills that students willdevelop through experiencing the activities withinthis curriculum. Also included is a set of criteria thatcan act as indicators to determine if the life skill isbeing developed.These skills represent the scientific thinkingand process skills that are essential to scientificinquiry. An inquiry based science classroom usesand encourages the use of these skillsin science activities.Planning and organizing – A method for doingsomething that has been thought out aheadof time; how the parts can be put together.Indicator:Student can develop a part of a plan.Keeping records – Recording selected usefulinformation, usually focused for a specific purpose.Indicator:Student is able to categorize information andselect useful information.Teamwork – Work done by two or more people,each doing parts of the whole task. Teamworkinvolves communicating effectively, identifying andagreeing on a common task, dividing a task byidentifying contributions by each person, acceptingresponsibility for one’s part of the task, workingtogether to complete the task and sharingaccomplishment.Observing – Generating reasonable questions aboutthe world based on observation.Examples:Seeing, hearing, tasting, smelling and feeling.Comparing and measuring – Using simplemeasurement tools to provide consistencyin an investigation.Examples:Sensory observations, weight, quantity, quality,temperature and capacity.Relating – Developing solutions to unfamiliarproblems through reasoning, observationand experimentation.Examples:Asking questions, making a hypothesis,understanding relationships, designing andconducting simple investigations, identifying thecontrol and variables in an investigation.Indicator:Understands roles as essential and enjoysworking together with others of similarinterests/abilities.Poultry incubation4
The ActivitiesEmbryology SkillLife SkillScience SkillEggsploring the eggIdentifyingparts of eggsLearning to learnObservingSelecting chicken breedsby characteristicsCommunication anddecision makingCategorizingIncubation offertile eggsPlanning and organizingObservingPreparing a candlerRelating to others,cooperationComparing andmeasuringObservation ofembryosRecord keepingObserving,communicating, relatingPreparing a brooderPlanning andorganizingComparing andmeasuringConnecting embryologyand mathRecord keepingComparing andmeasuringHandling chickssafelyRelating to othersObserving andcommunicatingExploring careers inthe poultry industryDevelopingteamworkNonePage 14Pick a chickPage 16Warming up with eggsPage 18Building aneggs-ray viewerPage 20Playing peek-a-boowith embryosPage 22Building a home‘tweet homePage 24Counting the chicksPage 26Caring and handlingPage 28Eggsploring careersPage 305
Getting OrganizedPlanning and schedulingchecklistPlanning is crucial to the success of an embryology project.Use this section as a checklist to help you plan the project activities.As you complete each part check it off so you know what has been finished.Other important details to assist you with this project follow this checklist.One to six months before youplan to start the project Plan the exact dates during which you wishto do this project.Starting the project Dates of the embryology project:to . Before you order eggs, decide what you will dowith the chicks that hatch. Contact a farmer, zooor other animal caretakers who are equipped toproperly care for the chicks.The chicks will be placed with. To insure egg availability, order the eggs at leastone to three months in advance of the day youplan to set them.Secure an incubator at least a month before thestart of the project and be sure it worksproperly.Read the lesson plan and secure any materialsyou will need at least a month before the projectbegins. 6Set up the incubator in a safe area and startrunning it 48 hours before eggs are to arrive.Prepare the students a few days before theproject begins. Help them understand theprinciples of incubation and embryology.Discuss what the class wishes to accomplishand what role they will play in reaching thegoals of the project. This includes preparingcalendars and other project resources.If your class plans to incubate eggs, preparethe eggs for incubation.Turn the eggs three times daily.Keep water pans full at all times. Always addwater that is warm to the touch.Keep daily records of all activities involving theeggs (i.e., turning, temperature, water added,candling, and other activities). These recordsare extremely helpful for trouble-shootingcauses of poor hatches.Candle the eggs every three days to checkprogress.Stop turning eggs three days (after 18 daysfor chicken eggs) prior to expected hatch.Prepare brooder box at least two days priorto expected hatch.Remove the chicks from the incubator and placethem in a warm brooder within two to six hoursafter they hatch.Remove and discard all remaining unhatchedeggs 60 hours after the first chick hatches,then disconnect incubator power.Clean and disinfect the incubator as soon asthe power is disconnected.Let the incubator dry. Then store it in a safe,cool and dry place.
Background for a successful projectImportant procedures to considerAbout the eggsA.A.Obtaining fertile hatching eggs. Locating fertileeggs may present a problem, especially in an urbanarea. Most eggs sold in grocery storesare not fertile and cannot be used for incubation.Fertile eggs can usually be obtained fromhatcheries or poultry breeding farms. Largehospitals may also be able to provide them.Contact your local Extension office for suggestions.1. For a basic observation and hatching project,12 eggs per incubator are adequate. If youare planning to do an experiment or activities,additional eggs may be required.2. When you obtain fertile eggs from a sourcethat does not routinely hatch its own eggs, youmay want to test the eggs in an incubator toensure that good fertility and hatchability canbe obtained before you use the eggs as partof the class project. The presence of a malewith a laying hen does not guarantee fertility orhatchability. You are also strongly encouragedto use chicken or coturnix quail eggs to hatchin the classroom. Duck, goose, pheasant andother species of fowl can be more difficult tohatch in classroom incubators. Duck andgoose eggs often rot and may explode in theincubator.3. When you have located a source of fertileeggs, pick them up yourself, if possible,rather than have them shipped or mailed.It is difficult for hatcheries, the postal serviceand transportation companies to properlyhandle small orders of eggs.B.Caring for eggs prior to incubation. Timing,temperature and position are critical to safe storage.1. The eggs should be collected within four hoursafter they are laid.2. If it is necessary to store fertile eggs beforesetting, store small end down at a temperaturebetween 50 and 65 F and at 70 percenthumidity.3. Never store eggs more than 10 days after theeggs are laid. Hatchability drops quickly if theyare stored for more than 10 days.4. Transport fertile eggs in a protective carton, smallend down. Do not leave eggs in the sun or a hotcar. In winter, don’t let the eggs get below 35 F.5. It is always best to set the fertile eggs in aheated incubator within 24 hours of obtainingthem.B.C.Plan the exact dates for your project. Many teachersuse this material as a supplement to a specificcurriculum like biology, human sexuality, humandevelopment or other related topics. It is extremelyimportant that you understand that this is acontinuous project for at least a 25-day period.Plan the project around holidays and testing periods.It is usually best to plan to set your eggs on a Tuesday.This allows you to prepare on Monday and insuresthat the chicks will not hatch on a weekend.To prevent bacterial contamination, make sure that allstudents and teachers wash their hands afterhandling the eggs, raw egg products, incubated eggs,chicks and litter.Before you order eggs, plan what you will do withthe chicks that hatch. Contact a farmer, zoo or otheranimal caretakers who are equipped to care for thechicks properly. NEVER allow chicks to go homewith students from your class. It is your responsibilityto make sure that the chicks get a good home.7
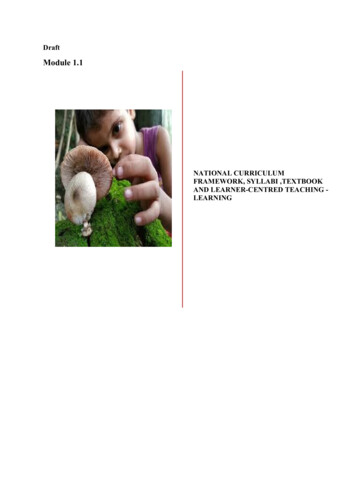
About the incubator and incubationC.Preparing the eggs for incubating. Fertile eggsfrom a commercial hatchery are usually alreadypresorted. However, it is usually wise to check youreggs before setting them.1. Candle eggs prior to setting to check for crackedeggs, thin-shelled eggs and double-yolked eggs.Do not incubate these eggs since they usuallydo not hatch.2. Do not wash the eggs unless necessary. Theeggs have a natural protective coating that isremoved by washing. Only wash eggs that arevisibly dirty. Then wipe the egg clean with a wetcloth warmer (at least 10 degrees warmer) thanthe temperature on the eggs. Do not set eggsthat are excessively dirty.3. Bring fresh eggs to be placed in the incubatorto room temperature two hours prior to setting.4. Mark the eggs with “X” and “O” on oppositesides to aid in daily turning. Also, number theeggs on the top of the large end to aid inidentification and record keeping during theproject. When marking eggs always use a pencilor wax crayon. Do not use permanent or toxicink pens or markers.5. Eggs that are warmed to room temperatureshould be immediately placed in the incubator.X0A.B.C.D.E.Setting eggs thatare marked withX’s and O’s.Do not setcracked eggs.8Secure an incubator and make sure it is in goodworking order. You may choose a new or usedincubator.1. If buying a new incubator, order at least onemonth prior to the start of the project. Forced airincubators (with a fan to circulate the air) arebest. Once the new incubator arrives, assembleif necessary and follow instructions for operation.2. Used incubators should be checked one monthprior to the start of the project. Make sure yourequipment is clean and working correctly. Thiswill allow you time to order parts or a newincubator if necessary.Turn the incubator on a couple of weeks before theproject starts and run it for 48 hours to insure thateverything is working properly. Once you know itis in proper working order, unplug and set in a safearea until a few days before the start of the project.Inform the administration and maintenance staff thatyou are doing this project and ask them to tell youif the electricity needs to be shut off for any reason.Proper incubator placement in the classroom helpsavoid problems.1. Set up the incubator in a room that stays above65 F.2. Make sure the electrical outlet that you are usingwill be “on” 24 hours a day. Some schools turnoff entire sections of the school at night and onweekends.3. Place the incubator on a sturdy level surface.4. Place the incubator at least six inches awayfrom the edge of the surface to avoid accidentalbumps.5. Avoid high traffic areas, hot sunny windows,heating and cooling vents, drafty windows anddoors.Turn incubator on 36 to 48 hours prior to setting theeggs.1. Adjust the incubator so it holds the desiredtemperature. Follow manufacturer guidelinesfor adjusting the temperature. In still-air units(without fans) adjust the temperature to 101 F.In forced-air units (with fans), adjust thetemperature to 100 F. Always adjust thethermostat so the heat source goes off whenthe temperature reaches the desired temperatureand comes on when the temperature drops belowthe desired temperature.2. Use at least two thermometers to insure youare getting an accurate temperature reading.3. Check the temperature often. Impropertemperature can result in a poor hatch andweak chicks.
During incubationBrooding the chicksA.A.B.C.D.E.F.G.H.I.J.Turn the eggs three times daily. Stop turning eggsthree days (after 18 days for chicken eggs) priorto expected hatch. Remember to wash hands.Keep water pans full at all times. Always add waterthat is warm to the touch. It is best to add the waterwhen you open the incubator to turn the eggs.Keep daily records of all activities involving the eggs(i.e., turning, temperature, water added, candling,and other activities). These records are extremelyhelpful for trouble-shooting causes of poor hatches.Candle the eggs every three days to check progress.Stop turning eggs three days (after 18 days forchicken eggs) prior to expected hatch.Never help the chicks from the shell.Remove the chicks from the incubator and placethem in a warm brooder within two to six hoursafter they hatch. If your incubator has good levelsof humidity the chicks may not dry in the incubator.They will dry once moved to the brooder.Remove and discard all remaining unhatched eggs60 hours after the first chick hatches, then disconnectincubator power.Clean and disinfect the incubator as soon as thepower is disconnected. Once the dirt has dried to thesurface, it becomes difficult to remove.Let the incubator dry. Then store it in a safe, cool anddry place.B.C.D.E.F.Make sure the brooder box is working 2 to 4 daysprior to hatch.Brooders should maintain a temperature of 92 to 95 F(taken at one inch above the floor level, the heightof the chick’s back) during the first week. If youkeep the chick beyond the first week, decrease thetemperature 5 F per week until room temperatureis reached.The brooder should have textured, absorbent litteron the floor. If the floor is slippery, the chicks candamage their legs. Pine or cedar shaving or texturedpaper towel work best in the classroom.Feed 18 to 22 percent protein chicken starter food.This completely balanced ration can be obtained fromany feed and garden store. The feed can be placedin jar lids, egg cartons, small tuna-sized cans or acommercial chick feeder.Water should be available at all times. Use wateringequipment that will not allow the chick to get into thewater and drown. Commercially made water fountainsfor use with a quart jar work best. If you need to usea watering device that is not proven, it is recommendedthat you place clean marbles or gravel in the waterso the chicks can drink between them but not get intothe water and drown.Clean the waterer and brooder daily. This will preventodors and keep the brooder dry. Dampness providesfavorable conditions for the development of moldsand bacteria.Turn eggthree timesdaily untilthe 18th day.The end result:A newly hatched chick.9
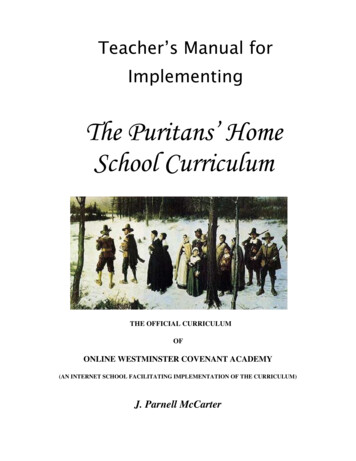
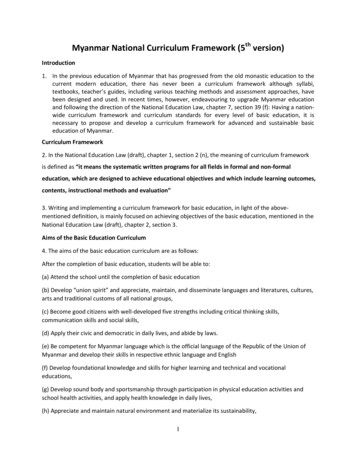
The reproductive systemand fertilizationThe roosterThe henThe male fowl has two testes along its back. These neverdescend into an external scrotum, as do those of otherfarm animals. A testis consists of a large number of veryslender, convoluted ducts. The linings of these ductsgive off sperm. The ducts eventually lead to the ductusdeferens, a tube that conducts the sperm to a smallpapilla. Together, the two papilla serve as an intermittentorgan. They are on the rear wall of the cloaca.The reproductive system of the female chickenis in two parts: the ovary and oviduct. Unlike most femaleanimals, which have two functioning ovaries, the chickenusually has only one. The right ovary stops developingwhen the female chick hatches, but the left one continuesto mature.The rooster responds to light in the same way as the hen.Increasing day length causes the pituitary to releasehormones. These, in turn, cause enlargement of thetestes, androgen secretion and semen production, whichstimulates mating behavior.Figure 7 – OvaryFigure 8 – Oviduct10The ovary is a cluster of sacs attached to the hen’s backabout midway between the neck and the tail. It is fullyformed when the chick hatches and contains severalthousand tiny ova—each ovum within its own follicle. Asthe female reaches maturity, these ova develop a few ata time into yolks. (Figure 7)The oviduct is a tube-like organ lying along the backbonebetween the ovary and the tail. In a mature hen, it is about25 to 27 inches long. The yolk is completely formed in theovary. When a yolk is fully developed, its follicle ruptures atthe stigma line, releasing it from the ovary. It then entersthe infundibulum, the entrance of the oviduct(Figure 8).The other parts of the egg are added to the yolk as itpasses through the oviduct. The chalazae, albumen, shellmembranes and shell then form around the yolk to makethe complete egg, which is then laid. This complete cycleusually takes from 23 to 32 hours. About 20 minutes afterthe egg is laid, another yolk is released and the processrepeats itself. Development takes place as follows:Partsof oviductLengthof partTimethereFunctionof partInfundibulum2 in.15 min.Picks up yolk, egg fertilizedMagnum13 in.3 hr.40–50% of white laid down,thick albumenIsthmus4 in.11/4 hr.10% albumen shellmembrane laid down,shape of egg determinedUterus4.2 in.20 3/4 hr.40% of albumen, shellformed, pigment ofcuticle laid downVagina andcloaca4 in.—Egg passes throughas it is laid
How eggs are fertilizedEach gender, the rooster and the hen, contributessomething to the egg. The rooster provides sperm;the hen provides an ovum. When a rooster mates witha hen, it deposits sperm in the end of the oviduct. Thesesperm, containing male germ cells, travel the length ofthe oviduct and are stored in the infundibulum. On thesurface of every egg yolk there can be seen a tiny,whitish spot called the blastodisc. This contains a singlefemale cell. If sperm is present when a yolk enters theinfundibulum, a single sperm penetrates the blastodisc,fertilizing it and causing it to become a blastoderm.Technically, the blastoderm is the true egg. Shortly afterfertilization, the blastoderm begins to divide into two,four, eight and more cells. The first stages of embryonicdevelopment have begun and continue until the eggis laid. Development then subsides until the egg isincubated. The joining of sperm and ovum is calledfertilization. After fertilization, the egg can develop andbecome a chick.The rooster must be present for an egg to be fertilized.Supermarket eggs are from hens that are raised withouta rooster. Roosters are not necessary at farms whereeggs are produced for people to consume. Eggs forincubation are grown at special farms called breederfarms where roosters are with the hens.Development during incubationAs soon as the egg is heated and begins incubation,the cluster of cells in the blastoderm begins to multiplyby successive divisions. The first cells formed are alike.Then, as the division of cells progresses, somedifferences begin to appear.These differences become more and more pronounced.Gradually the various cells acquire specific characteristicsof structure and cell grouping or layer. These cellgroupings are called the ectoderm, mesoderm andendoderm. These three layers of cells constitute thematerials out of which the various organs and systemsof the body develop.From the ectoderm, the skin, feathers, beak, claws,nervous system, lens and retina of the eye, linings of themouth and vent develop. The mesoderm develops intothe bone, muscle, blood, reproductive and excretoryorgans. The endoderm produces the linings of thedigestive tract and the secretory and respiratory organs.Development from a single cell to a pipping chick is acontinuous, orderly process. It involves many changesfrom apparently simple to new, complex structures.From the structures arise all the organs and tissuesof the living chick.Physiological processeswithin the eggMany physiological processes take place duringthe transformation of the embryo from egg to chick.These processes are respiration, excretion, nutritionand protection.For the embryo to develop without being connectedto the hen’s body, nature has provided membranesoutside the embryo’s body to enable the embryo to useall parts of the egg for growth and development. These“extra-embryonic” membranes are the yolk sac, amnion,chorion and allantois.The yolk sac is a layer of tissue growing over thesurface of the yolk. Its walls are lined with a specialtissue that digests and absorbs the yolk material toprovide food for the embryo. As embryonic developmentcontinues, the yolk sac is engulfed within the embryoand completely reabsorbed at hatching. At this time,enough nutritive material remains to feed the chick forup to three days.The amnion is a transparent sac filled with colorlessfluid that serves as a protective cushion during embryonicdevelopment. This amniotic fluid also permits thedeveloping embryo to exercise. Specialized musclesdeveloped in the amnion gently agitate the amnioticfluid. The movement keeps the growing parts free fromone another, preventing adhesions and malformations.The chorion contains the amnion and yolk sac. Initially,the chorion has no apparent function, but later theallantois fuses with it to form the choric-allantoicmembrane. This enables the capillaries of the allantoisto touch the shell membrane, allowing calciumreabsorption from the shell.The allantois membrane has many functions. It: serves as an embryonic respiratory organ receives the excretions of the embryonic kidneys absorbs albumen, which serves as nutriment (protein)for the embryo absorbs calcium from the shell for the structuralneeds of the embryo.The allantois differs from the amnion and chorion in thatit arises within the body of the embryo. In fact, its closestportion remains within the embryo throughout thedevelopment.11
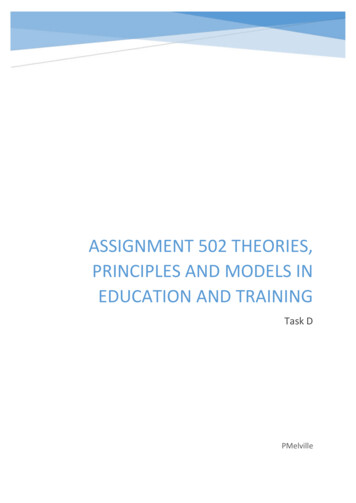
Day 2Daily embryonicdevelopment24 hours — Embryo begins to turn on left side.24 hours — Blood vessels appear in the yolk sac.24 hours — Major developments visible under microscope.25 hours — Beginning of formation of veins and heart.Before egg laying Fertilization. Division and growth of living cells. Segregation of cells into groups with special functions.30 hours — Second, third and fourth vesicles of brainclearly defined, as is the
chickens and embryos was. “Watching the eggs hatch and getting to play with the little chicks.” “Seeing the cute little chicks after they had hatched.” “Seeing how the embryos develop inside the shells. I also liked watching the chicks get their first white